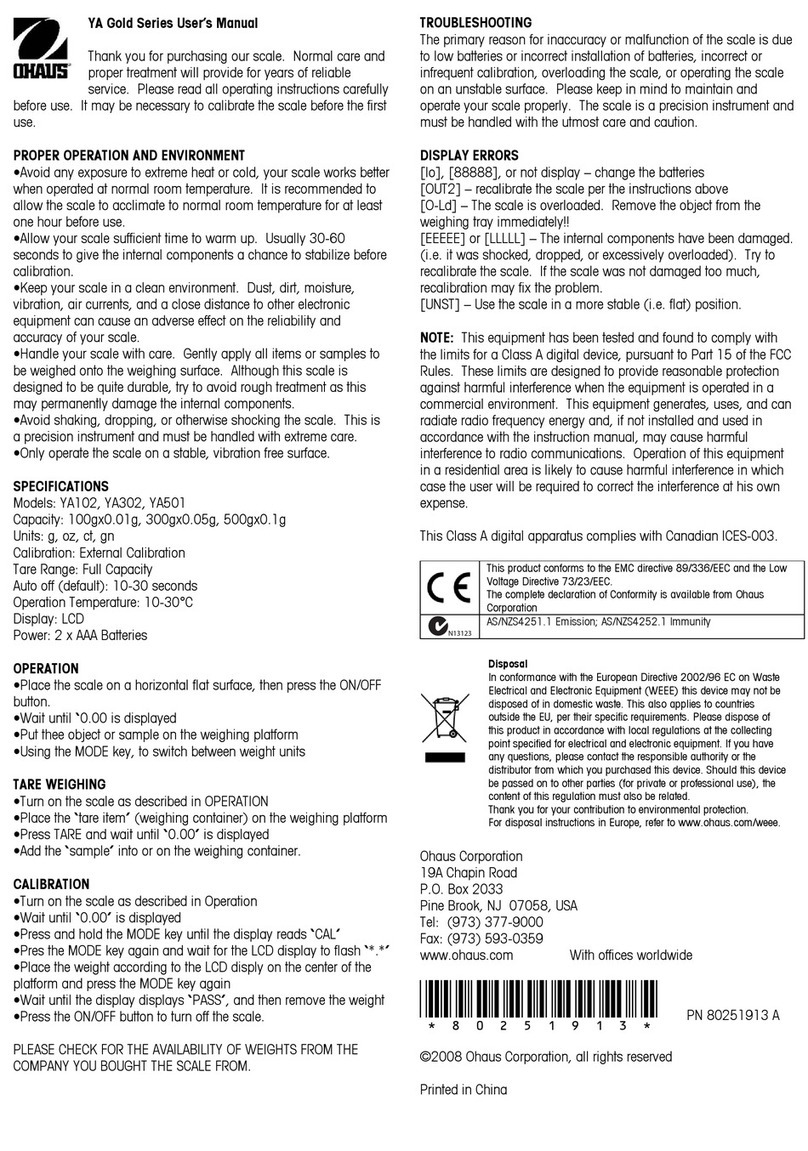
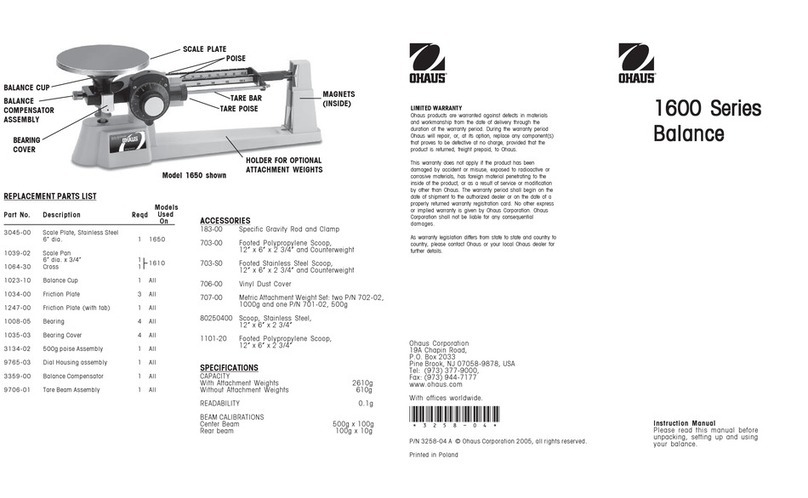
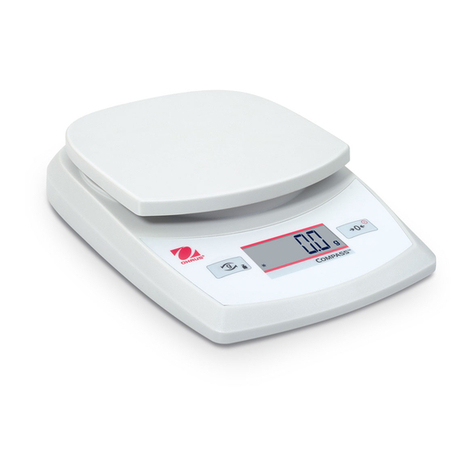
OHAUS RS Series User manual

xxxxxx(06/06)1.0
RS Series
Operator Manual
GB

Dimensions
INTRODUCTION
This publication is provided solely as a guide for individuals who have purchased the OHAUS RS
Series scale product.
OHAUS CORPORATION RESERVES THE RIGHT TO MAKE REFINEMENTS OR
CHANGES WITHOUT NOTICE.
Ohaus Corporation 2006
No part of this manual may be reproduced or transmitted in any form or by any means,
electronic or mechanical, including photocopying and recording, for any purpose without the
expressed written permission of Ohaus Corporation.
GB

RS Series Operator Manual
Precautions
WARNING
ONLY PERMIT QUALIFIED PERSONNEL TO SERVICE
THIS EQUIPMENT. EXERCISE CARE WHEN MAKING
CHECKS, TESTS AND ADJUSTMENTS THAT MUST BE
MADE WITH POWER ON. FAILING TO OBSERVE
THESE PRECAUTIONS CAN RESULT IN BODILY
HARM.
WARNING
FOR CONTINUED PROTECTION AGAINST SHOCK
HAZARD CONNECT TO PROPERLY GROUNDED
OUTLET ONLY. DO NOT REMOVE THE GROUND
PRONG.
WARNING
DISCONNECT ALL POWER TO THIS UNIT BEFORE
REMOVING THE FUSE OR SERVICING. FAILURE TO DO
SO MAY RESULT IN BODILY INJURY OR PROPERTY
DAMAGE.
CAUTION
BEFORE CONNECTING/DISCONNECTING ANY INTERNAL ELECTRONIC
COMPONENTS OR INTERCONNECTING WIRING BETWEEN ELECTRONIC
EQUIPMENT ALWAYS REMOVE POWER AND WAIT AT LEAST THIRTY (30)
SECONDS BEFORE ANY CONNECTIONS OR DISCONNECTIONS ARE MADE.
FAILURE TO OBSERVE THESE PRECAUTIONS COULD RESULT IN DAMAGE TO
OR DESTRUCTION OF THE EQUIPMENT OR BODILY HARM.
CAUTION
OBSERVE PRECAUTIONS FOR HANDLING ELECTROSTATIC SENSITIVE
DEVICES.
READ this manual
BEFORE operating or
servicing this equipment.
FOLLOW these
instructions carefully.
SAVE this manual for
future reference.
DO NOT allow untrained
personnel to operate,
clean, inspect, maintain,
service, or tamper with
this equipment.
ALWAYS DISCONNECT
this equipment from the
power source before
cleaning or performing
maintenance.
CALL OHAUS for parts,
information, and service.

RS Series Operator Manual
GEO-Value
The GEO-Value of verified balances explains for which location of use the balance has been verified.
This GEO-Value is shown on the balance total price display shortly after the balance is turned on.
Further details are shown in the “GEO-Value table“ below.
GEO-Value table
Country Geo-Width Geo-Value (default)
Austria 46°22‘ – 49°01‘ 18
Belgium 49°30‘ – 51°30‘ 20
Bulgaria 41°41‘ – 44°13‘ 16
Croatia 42°24‘ – 46°32‘ 18
Czechia 48°34‘ – 51°03‘ 20
Denmark 54°34‘ – 57°45‘ 23
France 41°20‘ – 51°00‘ 19
Finland 59°48‘ – 70°05‘ 25
Germany 47°00‘ – 55°00‘ 20
Greece 34°48‘ – 41°45‘ 15
Hungary 45°45‘ – 48°35‘ 19
Ireland 51°05 – 55°05‘ 22
Iceland 63°17‘ – 67°09‘ 26
Italy 35°47‘ - 47°05‘ 17
Latvia 55°30 – 58°04‘ 23
Luxembourg 49°27‘ – 50°11‘ 20
Liechtenstein 47°03‘ – 47°14‘ 18
Lithuania 53°54‘ – 56°24‘ 22
Netherland 50°46‘ – 53°32‘ 20
Norway 57°57‘ - 71°11‘ 24
Poland 49°00‘ – 54°30‘ 21
Portugal 36°58‘ – 42°10‘ 15
Romania 43°37‘ – 48°15‘ 18
Sweden 55°20‘ – 69°04‘ 24
Switzerland 45°49‘ – 47°49‘ 18
Slovakia 47°44‘ – 49°46‘ 19
Slovenia 45°26‘ – 46°35‘ 18
Spain 36°00‘ – 43°47‘ 15
Turkey 35°51‘ – 42°06‘ 16
United Kingdom 49°00‘ – 62°00‘ 21
GB

RS Series Operator Manual
5
Contents
1Introduction................................................................................................................................... 1
1.1 Overview................................................................................................................................... 1
1.2 Specification.............................................................................................................................. 1
1.3 Maintenance ............................................................................................................................. 1
2Installation .................................................................................................................................... 2
2.1 Precautions ............................................................................................................................... 2
2.2 Contents of Packaging ................................................................................................................ 2
2.3 Interface.................................................................................................................................... 2
2.4 Installation of Scale .................................................................................................................... 2
2.5 Installation of Paper Roll ............................................................................................................. 3
2.6 Installation of Tower ................................................................................................................... 4
2.7 Installation of the Battery ............................................................................................................. 4
2.8 Power up and Turn off the Scale................................................................................................... 4
2.9 Option ...................................................................................................................................... 5
3Operation Interface ......................................................................................................................... 6
3.1 Display ..................................................................................................................................... 6
3.2 Cursor ...................................................................................................................................... 6
3.3 Keyboard .................................................................................................................................. 6
3.4 Key Function in Weighing Mode...................................................................................................7
3.4.1 20 Function Keys .............................................................................................................................7
3.4.2 30 Preset Keys .................................................................................................................................7
4Operation...................................................................................................................................... 8
4.1 Zero ......................................................................................................................................... 8
4.2 Tare ......................................................................................................................................... 8
4.2.1 Pushbutton Tare ...............................................................................................................................8
4.2.2 Input Preset Tare Manually.................................................................................................................8
4.2.3 Tare Display.....................................................................................................................................8
4.3 Item Management Levels............................................................................................................. 9
4.4 Vendor Log in and Log out .......................................................................................................... 9
4.5 Recall PLU (item information) or Input Unit Price and Compute Price ................................................ 9
4.6 Operation in Ticket Printing Mode...............................................................................................10
4.6.1 Print Ticket.....................................................................................................................................10
4.6.2 Multi-payment Way ........................................................................................................................11
4.6.3 Multi-vendor Operation....................................................................................................................13
4.6.4 Print Copy of the Ticket....................................................................................................................13
4.6.5 Save Ticket ....................................................................................................................................13
4.6.6 Ticket Format .................................................................................................................................13
4.6.7 Suspend Transactions .....................................................................................................................13
4.6.8 Void Transaction.............................................................................................................................14
4.6.9 Cancel All Transactions ...................................................................................................................14
4.6.10 ST.................................................................................................................................................14
4.6.11 Discount Operation .........................................................................................................................15
4.6.12 Rebate ..........................................................................................................................................15

RS Series Operator Manual
4.7 Operation in Label Printing Mode ............................................................................................... 16
4.7.1 Acess to Label Printing Mode ...........................................................................................................16
4.7.2 Print Label .....................................................................................................................................16
4.7.3 Label Format..................................................................................................................................16
4.8 Prepack .................................................................................................................................. 17
4.8.1 Access to Prepack Mode..................................................................................................................17
4.8.2 Prepack in Ticket Printing Mode .......................................................................................................17
4.8.3 Prepack in Label Printing Mode........................................................................................................17
4.9 Large Sale............................................................................................................................... 18
4.10 100g Function...................................................................................................................... 18
4.11 Show Data and Time............................................................................................................. 18
4.12 Backlight ............................................................................................................................. 18
5Setup ......................................................................................................................................... 19
5.1 Key Function in Setup Mode ......................................................................................................19
5.2 Quick Key (on-the-fly function) .................................................................................................. 19
5.2.1 Quick Key Location.........................................................................................................................19
5.2.2 Function of the Quick Key................................................................................................................19
5.3 Acess to Setup Mode................................................................................................................. 20
5.3.1 Access to Some Item .......................................................................................................................20
5.3.2 Exit Setup Mode .............................................................................................................................21
5.4 Setting Group........................................................................................................................... 21
5.4.1 Data Entry (Group 1)......................................................................................................................21
5.4.2 Ticket/Label Setting (Group 2)..........................................................................................................33
5.4.3 Data Deletion (Group 3)..................................................................................................................34
5.4.4 Operation Setting (Group 4).............................................................................................................36
5.4.5 Report (Group 6)............................................................................................................................38
5.4.6 Communication (Group 7) ..............................................................................................................41
5.4.7 Password Management (Group 8)....................................................................................................41
6Warning ..................................................................................................................................... 44
7Appendix A:................................................................................................................................. 45
8Appendix B: ................................................................................................................................ 51

RS Series Operator Manual
1
1Introduction
1.1 Overview
The RS Series, with integrated printer, has the family appearance of Tiger series scales.
The target customers for RS Series are:
•Small store business (i.e. Fruit & Vegetables, cooked meat, cheese, etc.)
•Bakery
All our equipment is assembled, tested and packed with great care. If you find something that does not meet your
expectations, please contact OHAUS immediately.
The RS Series scale is a high precision weighing instrument, which has to be approved and stamped by Weights and
Measures. This scale is stamped in our production plant or by your local Weights & Measures office. Please check the
stamping stickers on the scale before use.
Please read this instruction manual carefully.
If properly used and maintained, this scale will provide years of accurate weighing. Please handle it as you would any
piece of fine electronic equipment.
1.2 Specification
Capacity: 6kg or 15kg
Division: 2g or 5g
Weight display: 6 digits
Unit price display: 6 digits
Total price: 7 digits
Tare: 4 digits
Operating temperature: -10oC~+40 oC
Storage temperature: -25oC~+50 oC
Power supply: 100~240V universal AC power
Battery (option): 12V/5Ah lead-acid rechargeable battery
Interface: 1 port for cash drawer,
2 RS-232 for PC or scanner,
1 USB (option)
1 Ethernet (option)
PLU quantity: 1000
Group quantity: 20
Specifications are subject to change without notice.
1.3 Maintenance
Clean the scale regularly with a towel, making sure that no water
comes into the housing. The platter can be removed and washed
down, with normal household cleaning fluid.
Metrological instructions
Important note
on legal-for-trade scales in EEC
countries
Factory verified scales carry this
identification on the label applied on the
package.
Scales identified by the green "M" label
applied on the identification plate, can be
operated immediately.
Scales calibrated in two stages carry the
opposite identification on the label
applied on the package
These scales have already been verified in the first
step (declaration of conformity according to EN
45501-8.2) and should receive the second step
at their working place.
This second step must be performed by the
certified OHAUS after-sales service.
Please contact your local OHAUS agency.
Retail scales, used for legal trade, must be
submitted for calibration and verification.
Do respect the current metrological directives in
your country.
M
M
M

RS Series Oprator Manual
2
2Installation
2.1 Precautions
Before you install your RS Series scale, identify the best location for the equipment. The proper environment enhances the
operation and longevity of the scale. Keep in mind the following factors, which might have a negative influence on the
scale's operation:
)Vibration diminishes the scale’s ability to measure accurately. Excessive vibration from equipment such as conveyors
can cause inaccurate and non-repeatable readings.
)Be sure the scale is leveled properly.
)Air currents can also diminish a scale’s performance. Avoid placing the scale in front of or directly under air vents.
)Other than items being weighed, keep the scale free from objects rubbing or pressing against the platter.
2.2 Contents of Packaging
Package contents for all RS Series units include:
☞RS Series scale ☞Stainless steel platter ☞Power cord ☞Operation manual☞One ticket roll
2.3 Interface
The communication interface is located on the front of
scale bottom. There are 5 ports as follows:
)COM1 (male DB9 RS-232): to connect with
scanner
)COM2 (male DB9 RS-232): to connect with PC
)Cash Drawer* (RJ11): to connect with cash drawer
)Ethernet port (RJ45): network (option)
)USB: to connect with PC or scanner (option)
* The requirement on the cash drawer is as follows:
Under rating voltage Electrified time under Max.
voltage(ms)
Rating
Voltage(VDC)
Loop DC resistor(Ω)
T=20℃Max. electrified time(ms) Current(mA) max Continue rate
12 12 200 1000 200 10%
2.4 Installation of Scale
1. Open the box, carefully remove the packing material, and take all items out of the carton.
2. *Install the tower, if it is a tower version.
3. *Install the ticket or label roll.
4. *Install the battery, if it has a battery.
5. Remove the shipping protection screw (3kg only) as illustrated in the left picture,
and then put the platter on the top of the scale.
6. To connect a cash drawer to RS Series, plug the cable of the cash drawer into the
socket on the scale.
7. Set the scale base on a sturdy, level surface. Level the scale by turning the
adjustable feet on the bottom of the unit. Adjust the feet until the level bubble is in
the center of the circle.
Bubble indicator:
Correct Wrong
8. Connect the power cord to the scale base and AC power socket.
* The following 3 sections will describe how to install.
COM11 COM2 Cash Drawer Ethernet USB

RS Series Operator Manual
3
2.5 Installation of Paper Roll
The requirements of the tickets and labels are as follows:
The thickness of ticket or label plus liner should be less than 0.12mm.
Notice: If paper is not long enough to print the whole ticket, install a new paper roll and print the whole ticket again.
The procedures to install a ticket roll are as follows:
1)To open the printer door, push the switch of the printer door backward to the customer side
with thumb. This switch is located on the bottom of the scale.
2)Open the door wider.
3)Take the paper roll out (if needed). Put the new roll on the metal column.
4)Pull out some paper and position it between the two metal brackets on
black roll bar.
5)Close printer door and tear off excess paper.
6)Press key [Mode], then [X] to test paper.
The procedures to install label are as follows:
1)Push the switch of the printer door backward to the customer side with thumb, the door
will open.
2)Open the door wider.
3)Take the paper roll out (if needed). Put the new roll on the metal column.
4)Peel off the first two labels.
5)To limit the movement of the label, adjust the bar located at the top of the plastic guide, so
the label fits snugly in place.
6)Take liner and insert through the plastic guide
located behind the tear bar on the side of scale.
7)Pull liner trough and ensure
the bottom edge of the liner is
located directly above the
metal bracket on the bottom
of the black roll bar.
8)Close printer door.
9)Press [MODE] and [X] to test the label for scale to get some relevant data.
Notice:To avoid damage to the printer, don’t slam the printer door.
A
B
C
Label Dimensions
A : 57mm
B : =<68mm
C: >=12mm
D: 50mm
E: 2mm
F: 20~60mm
G: 46mm
H: 2mm
A
F
D
E
G
Ticket
A: 57mm
B: <=68mm
C: >=12
H
Switch of
printer door

RS Series Operator Manual
4
Installation of Tower
Please refer to the following pictures to install tower
2.6 Installation of the Battery
RS Series has a charge function and uses 12V/5Ah rechargeable lead-acid batteries. It is an option and is not in the scale
when shipped.
To remove the battery from the battery holder:
1)Remove the platter.
2)To take the cover up away, push the fixing button of the battery cover to the right and
forward.
3)Remove the harness from the two electronic poles.
4)Hold the middle of the battery in one hand. With the other hand, hold
the pole connector of the battery to take the
battery out of the holder.
☞To install the battery:
1)Remove the platter.
2)Put the battery in the holder, and make sure that
the harness is outside,
3)Connect the harness with the electric poles of the battery
Notice: Red harness should connect to the positive pole (red or +), and black harness should connect to the negative pole (black
or -), If not installed properly, the battery may be damaged.
Notice of lead rechargeable battery
The battery (12V/5Ah rechargeable lead-acid battery) service life will be affected by the charge and discharge
conditions. When used properly, it can withstand 300 cycles;
The new battery can provided about 30 hours work after fully charge. A fully charged battery normally lasts 12 hours.
The charge time will be shorter if the battery is not discharge fully. It is recommended to charge the battery every day.
Do not short the positive pole (+) and negative pole (-) when replacing the battery.
Charge the battery at least every 3 months to keep it in good condition.
The work hours of the battery are shorter than normal if the battery is not used for a long time (i.e. more than 2
months). At this time, please cycle battery at least 3 times by charging it and using it until fully discharged to make the
battery recover to normal condition.
The battery is not warranted due to the fact that its service time is greatly influenced by individual.
The number of work hours will decrease as the battery ages. This is normal for rechargeable batteries.
Don’t let the battery touch chemical solvent, oil, water, etc. Don’t let it near fire. Don’t open the battery, or it may cause
explosion or damage to the battery.
2.7 Power up and Turn off the Scale
Plug the cord into a properly grounded AC power outlet and press the switch in the middle of the left bottom of the scale.
The scale will go through a series of self-tests and then will proceed to normal operating mode. The power-up sequence is
as follows:

RS Series Operator Manual
5
Display
sequence Description Display
on 1st line
Display
on 2nd line
Display
On 3rd line
Display
on the bottom line Lit cursor
Step1 All segments are lit on the display. 888.888 888.888 8888.888 888888888888 All cursors
Step2
From top to bottom, it displays the part number of the
software, version number, country code and GEO
value
179403 1.0 EU 20
Step3 Ready to weigh 0.000 0.00 0.00 V1 ticket
Press the power switch to turn off the scale.
Note: Before switching on the RS Series scale, please ensure that there is nothing on the platter.
2.8 Option
)12V/5Ah rechargeable lead-acid battery
)Tower column

RS Series Oprator Manual
6
3Operation Interface
3.1 Display
3.2 Cursor
Cursor Instruction of lit cursor Cursor Instruction of lit cursor
Æ0ÅThe weight is gross 0 NET The weight is net weight
Prepack Scale is in prepack status LS Scale is in large sale status
ST Scale is in ST mode PLU The data on the right is PLU #
X Scale is in by count mode Fix The unit price, tare or PLU will not disappear when items
are removed or accumulated into total
100g The weight unit of the price is 100g The current power is AC
Lit: The power is battery
Flash and lit : Charging
Flash and no : Low battery,
needed to charge or change battery
3 lit blocks: the scale is master, and connects with at least
one slaver
2 lit blocks: the scale is a slave, and connects with master.
Off: scale is standalone or does not connect to other scales
3.3 Keyboard
Wei
g
ht dis
p
la
y
Unit Price dis
p
la
y
Total
p
rice dis
p
la
y
Tare dis
p
la
y
or instruction

RS Series Operator Manual
7
3.4 Key Function in Weighing Mode
3.4.1 20 Function Keys
☞Main function
Press the key to complement its main function
Key Key name Function
[Disc] Discount key Input the discount percentage or discount price
[-] Rebate key Input the rebate to total price
[PLU] PLU key Recall PLU or input unit price manually
[X] By count key Access to by count mode
[ÆTÅ] Tare key Tare the scale
[*] Print key Show total or print ticket and open cash drawer
[V1],[V2],[V3],[V4] Vendor key Subtotal transactions
[C] Clear key Clear input
[Void] Void key To cancel transaction
[0]~[9] Number key To input digits
[Mode/½] Mode/Shift key To get into/out of setting mode or complete the shift function of some keys
[↑] or [↓] Select the wanted transaction in void mode
☞Shift function (on the top right corner of key)
Press and hold [Mode/½] key, then press the following key to complete function written on its top right corner.
Key Shift function Function
[Disc] C Time key Access to or exit date/time showing mode
[-] LS Large item key Access to large weight input mode
[C] Æ0ÅZero key Zero scale
[PLU] ST Refund key Access to or exit refund (ST) mode
[X 100g 100g key Toggle between 100g unit price unit and kg unit price unit
[ÆTÅ] || Suspend key Suspend or take out of transactions
[*] Cash drawer key Open cash drawer
[V1] Calculator key Access to or exit calculator mode
☞Key function in calculator mode (on the bottom left corner of key)
Key Function on the bottom left corner Example: 3x5+5.67=20.67
[ÆTÅ] [+]: plus key
[X] [-]: minus key
[PLU] [x]: multiply key
[-] [/]: divide key
[*] [=]: equal key
[V1] [.]: point key
[C] Clear key to clear input
Key operation
[3][x]
[5]
[+]
[5][.][6][7]
[=]
Display shows as follows
3
5
15
5.67
20.67000
3.4.2 30 Preset Keys
☞Press the key or double click the key to recall PLU.
☞3 keys, [R]、[X] and [] can be set as vendor keys, [V4], [V3] and [V2]. In this case, they have the same functions
as [V1], but they can not be used to recall PLU.

RS Series Oprator Manual
8
4Operation
4.1 Zero
There are two ways to re-zero the scale:
☞Power-up zero
The scale will automatically capture zero when it is turned on. The power-up zero capture range is +/-10% of the scale
capacity. When the scale is turned on with a weight on the platter, which is more than +/-10% of the capacity, the scale
will not capture zero and the weight display will show "-----". After removing the weight, the scale will capture "zero".
☞Pushbutton zero
Press and hold key [Mode], then press [>0<] to re-zero the scale within the range of +/-2% of the scale capacity. To use
this function, the scale must be in the gross weighing mode (NET cursor must be off) and in a no motion condition. When
the weight on the platter is more than +/-2% of the scale capacity, scale can not be re-zeroed.
4.2 Tare
Tare is a subtract tare. When tare exists, the most the scale can weigh is its full capacity minus tare.
Tare can not be cleared unless the net weight is equal to gross weight. Tare function is enabled only when the displayed
weight value is positive.
4.2.1 Pushbutton Tare
Procedure Description Key
operation
Display
on 1st line
Display
on 2nd line
Display
On 3rd line
Display
on the bottom line
Lit
cursor
Step4 Put the container (20g) on the platter 0.020 0.00 0.00 V1 ticket
Step5 Tare and show tare 0.020kg [ÆTÅ] 0.000 0.00 0.00 t 0.020kg NET
Step6 Remove the container from the platter -0.020 0.00 0.00 t 0.020kg NET
Step7 Clear tare and get back the gross weighing mode [ÆTÅ] 0.000 0.00 0.00 V1 ticket
4.2.2 Input Preset Tare Manually
Procedure Description Key
operation
Display
on 1st line
Display
on 2nd line
Display
on 3rd line
Display
on the bottom line
Lit
cursor
Step1 Gross weight should be zero 0.000 0.00 0.00 V1 ticket
Step2 Please input the tare value [ÆTÅ] 0.000 0.00 0.00 tare 0.000
Step3 Input the tare value 1.000kg [1][0][0][0] 0.000 0.00 0.00 tare 1.000
Step4 Get tare [ÆTÅ] -1.000 0.00 0.00 Pt 1.000kg NET
Step5 Clear tare and get back the gross weighing mode [ÆTÅ] 0.000 0.00 0.00 V1 Ticket
The tare value is a multiple of the increment.. If the tare value entered is not a multiple of the increment, then the value will be
rounded (up or down) to the closest multiple.
e.g. If the increment is .005lb and the tare value entered is .007lb, then the scale will use a tare value of .005.
4.2.3 Tare Display
Tare will be shown on the bottom line. ”T” means pushbutton tare, ”PT” means preset tare including the tare in PLU
If tare exists, when key [V1] is pressed, the bottom line will show subtotal for about 1~2 minutes, then show tare.
Procedure Description Key
operation
Display
on 1st line
Display
on 2nd line
Display
on 3rd line
Display
on the bottom line
Lit
cursor
Step1 Put the container (20g) on the platter 0.020 0.00 0.00 V1 ticket
Step2 Tare is 20g [ÆTÅ] 0.000 0.00 0.00 t 0.020kg NET
Step3 Recall PLU1 without tare [1] 0.000 9.80 0.00 PLU 1 t 0.020kg NET
Step4 Put the item on the platter 0.500 9.80 4.90 PLU 1 t 0.020kg NET
Step5 Show subtotal 4.90$ on the bottom line [V1] 0.5 00 0.00 0.00
V
1 P1 A 4.90 NET
Step6 Show vendor # and tare 0.020kg 1~2 seconds later 0.5 00 0.00 0.00 V1 t 0.020 NET
Step7 Remove the container from the platter -0.020 0.00 0.00 V1 t 0.020 NET
Step8 Clear tare and show the subtotal 4.90$ [ÆTÅ] 0.000 0.00 0.00 V1 P1 A 4.90

RS Series Operator Manual
9
4.3 Item Management Levels
There are 1000 PLUs and 20 groups.
4.4 Vendor Log in and Log out
When vendor’s password exists, transactions can be accumulated only after this vendor logs in.The procedures to log in and
log out are as follows:
Log in: e.g. vendor 1 logs in
Procedure Description Key
operation
Display
on 1st line
Display
on 2nd line
Display
on 3rd line
Display
on the bottom line
Lit
cursor
Step1 Weighing mode 0.000 0.00 0.00 ticket
Step2 Please input password of vendor 1 [V1] for 5 seconds PW
Step3 Input the password [1][2][3] PW ***
Step4 One beep means vendor 1has logged in [*] V1 log in
Step5 Weighing mode, V1 means V1 has
logged in
About 1 second
later
0.000 0.00 0.00 V1 ticket
If 4 vendors have logged in, the display is as follows:
------- V1234 means 4 vendors have logged in 0.000 0.00 0.00 V1234 ticket
Log out: i.e. vendor 1 logs out
Procedure Description Key
operation
Display
on 1st line
Display
on 2nd line
Display
on 3rd line
Display
on the bottom line
Lit
cursor
Step1 V1 has logged in 0.000 0.00 0.00
V
1234 ticket
Step2 “V1 log out” shows about 2 seconds [V1] for 5 seconds V1 log out
Step3 No V1 means V1 has logged out About 1 second later 0.000 0.00 0.00 V234 ticket
When scale is turned off, all vendors will automatically be logged out.
4.5 Recall PLU (item information) or Input Unit Price and Compute Price
There are 3 ways to recall PLU or input unit price.
☞When automatically recalling PLU is enabled (Default status when you get scale)
1)Press PLU # to recall PLU. E.g.: Recall PLU 21. Its tare is 0.020kg, unit price is 2.00$/kg and etc.
Procedure Description Key operation Display
on 1st line
Display on 2nd
line
Display on
3rd line
Display
on the bottom line
Lit
cursor
Step1 Weighing mode 0.000 0.00 0.00 V1 ticket
Step2 Recall PLU 21 [2][1] -0.020 2.00 -0.04 PLU 21
pt0.020kg
NET
Step3 Calculate total price Put on items 1.000 2.00 2.00 PLU 21
pt0.020kg
NET
2)Input the unit price manually
To by weight type item, e.g. input a unit price 2.00$/kg。
Procedure Description Key operation Display on
1
st line
Display on 2nd
line
Display on
3rd line
Display
on the bottom line
Lit
cursor
Step1 Weighing mode 0.000 0.00 0.00 V1 ticket
Step2 Input unit price [PLU][2][0][0] 0.000 2.00 0.oo
Step3 Calculate total price Put on items 1.000 2.00 2.00
To by count type item, e.g. input a unit price 2.00$/PCS
Procedure Description Key
operation
Display
on 1st line
Display
on 2nd line
Display
on 3rd line
Display
on the bottom line
Lit
cursor
Step1 Weighing mode 0.000 0.00 0.00 V1 ticket
Group 20
PLU1 PLUPLU1 ------
Group 1
PLU1 PLUPLU1 ------
Scale
------

RS Series Operator Manual
10
Step2 Input the price value: 2.00$ [PLU][2][0][0] 0.000 2.00 0.oo
Step3 Initiate the by count mode and get price [x] Cn 1 2.00 2.00 x
Step4 Calculate the total price of 3 items [3] Cn 3 2.00 6.00 x
☞When PLU is recalled by PLU key (which can be set in setting 403: by PLU key)
1)Press PLU # and then key [PLU] to recall PLU. e.g. 21, its unit price is 2.00$/kg, preset tare is 0.020kg and etc.
Procedure Description Key
operation
Display
on 1st line
Display
on 2nd line
Display
On 3rd line
Display
on the bottom line
Lit
cursor
Step1 Weighing mode 0.000 0.00 0.00 V1 ticket
Step2 Recall PLU 21 [2][1][PLU] -0.020 2.00 -0.o4 PLU 21
PT0.020kg
NET
Step3 Calculate total price Put on items 1.000 2.00 2.00 PLU 21
PT0.020kg
NET
2)Input the unit price manually.
To by weight type item, e.g. input a unit price 2.00$/kg。
Procedure Description Key
operation
Display
on 1st line
Display
on 2nd line
Display
on 3rd line
Display
on the bottom line
Lit
cursor
Step1 Weighing mode 0.000 0.00 0.00 V1 ticket
Step2 Input the unit price 2.00$/kg [2][0][0] 0.000 2.00 0.oo
Step3 Calculate total price Put on items 1.000 2.00 2.00
To by count type item, e.g. input a unit price: 2.00$/1PCS.
Procedure Description Key
operation
Display
on 1st line
Display
on 2nd line
Display
on 3rd line
Display
on the bottom line
Lit
cursor
Step1 Weighing mode 0.000 0.00 0.00 V1 ticket
Step2 Input the price value: 2.00$ [2][0][0] 0.000 2.00 0.00
Step3 Initiate the by count mode and get price [x] Cn 1 2.00 x
Step4 Calculate the total price of 3 items [3] Cn 3 2.00 6.00 x
☞Recall information with scanner
e.g. recall the information of one bag of wash powder, its PLU # is 8, and item # (13 digits)is printed on the bag
Procedure Description Key
operation
Display
On 1st line
Display
on 2nd line
Display
on 3rd line
Display
on the bottom line
Lit
cursor
S
Weighing mode 0.000 0.00 0.00 V1 ticket
Step2 Scan bar code and get its information -0.020 2.00 0.oo PLU 21 pt
0.020kg
NET
Step3 Calculate total price Put on items 1.000 2.00 2.00 PLU 21
PT0.020kg
net
In weighing mode, if the scanner can not scan the bar code on the bag, you may input the item number manually to recall
the item information by pressing key [PLU], item number, and then [PLU] key.
Procedure Description Key
Operation
Display
on 1st line
Display
on 2nd line
Display
on 3rd line
Display
on the bottom line
Lit
cursor
Step1
W
eighing mode 0.000 0.00 0.00
V
1 ticket
Step2
T
o recall item information through item #. [PLU][1][2][3][4][5][6]
[PLU]
Cn 1 2.00 2.oo PLU 21
Step3 Calculate the total price of 3 items [x][3] Cn 3 2.00 6.00 PLU 21 x
Step4
4.6 Operation in Ticket Printing Mode
4.6.1 Print Ticket
For Example: One customer buys 2 items, PLU1 (0.5kg) and PLU6 (2 PCS), the procedure to print ticket is as follows:
Procedure Description Key
operation
Display
on 1st line
Display
on 2nd line
Display
on 3rd line
Display
on the bottom line
Lit
cursor
Step1 Ready for weighing 0.000 0.00 0.00 V1 ticket
Step2 Recall PLU1 [1] 0.000 9.80 0.00 PLU 1
Step3 Put the item 1 on the platter 0.500 9.80 4.90 PLU 1
Step4 Accumulate this transaction into subtotal of V1.
V1 means vendor 1, P1 means 1 transaction, [V1] 0.5 00 0.00 0.00
V1 P1 A
4.90

RS Series Operator Manual
11
A4.90 means the amount subtotal is 4.90$
Step5 Remove item1 away from the platter and recall
PLU3 [3] Cn 1 3.36 3.36
PLU 3
Step6 [x][2] CN 2 3.36 6.72
PLU 3
Step7 Subtotal, now has 2 transactions, amount is
11.62 [V1] 0.000 0.00 0.00
V1 P2 A
11.62
Step8 Show total amount [*] V1 Total 11.62 Pay 11.62
Step9 Input the cash paid by customer [1][2][0][0] V1 Total 11.62 Pay 12.00
Step10 Show change and print ticket [*] V1 Total 11.62 Change 0.38
In setting item 222, the change function can be disabled. In this case in step 8, after [*] is pressed, the ticket will be printed
directly.
Notice
zIf total amount is more than 7 digits, character V on the right will disappear and the total amount will be shown as
“nnnnnnn”
zWhen ticket printing is not finished, but the paper is used up, please install a new paper roll, then press [*] to print the
ticket again.
In total amount display mode, the following operation will return the scale back to weighing mode.
☞Input PLU number
☞Press tare
☞Press key [C]
The format sample of the ticket is listed below:
4.6.2 Multi-payment Way
Enable multi-payment way first as follows:
Procedure Description Key
operation
Display
on 1st line
Display
on 2nd line
Display
on 3rd line
Display
On the bottom line
Lit
cursor
Step1 In weigh mode 0.000 0.00 0.00 V1 Ticket
Step2 Waiting to insert ID code [Mode] [2] Setup/shift
Step3 Insert manager’s id code [2] PW
Step4 Insert manager’s password [6][6][6][6][6][6]] PW ******
Step5 Access to setup mode, in group 1 [*] Gr 01 ------- Info input
Step6 Access to setting item 443 [4][4][3] S 443 ------- Multi-pay
Step7 Default is to only use cash for payment [*] S 443 0 Cash only
Step8 Select multi-payment way [ T ]→← S 443 1 Multi-pay
Step9 Confirm selection and go to next step [*] S 401 ------- Restore DEF
Step10 Return scale to weighing mode [Mode][Mode] 0.000 0.00 0.00 V1 Ticket
After multi-payment way takes effect, the following 3 keys will be automatically defined as payment key:
OHAUS
*************************
Vendor: Susan Ticket No.: 0001
2005-02-08 15:56 Scale No.:01
PLU TEXT
Kg(PCS)
$/kg(PCS)
$
eel
0.005 9.80 4.90
Apple
2 3.36 6.72
P 2 Total 11.62
Cash 12.00
Change 0.38
YOU ARE WELCOME

RS Series Operator Manual
12
[Y]: Voucher key
[Z]: Credit card key
[3]: Cheque key
At this time, including cash key [*], there are 4 keys for payment.
a) Use credit card for payment operation
Procedure Description Key
operation
Lit
cursor
Display
on 1st line
Display
on 2nd line
Display
on 3rd line
Display
On the bottom line
------ Have done 2 transactions ------[V1] 0.000 0.00 0.00 V1 P2 A
11.62
next
Print ticket directly no matter “change function” is
enabled or not, and show “2 credit card” to indicate
it is paid by credit card. Don’t open cash as well
[Z]
V1 Total 11.62 2 credit card
On the ticket credit card will be printed on the left of the paid amount as follows:
Creditcard 11.62
b) Use cheque for payment operation
Procedure Description Key
operation
Lit
cursor
Display
on 1st line
Display
on 2nd line
Display
on 3rd line
Display
On the bottom line
------ Have done 2 transactions ------[V1] 0.000 0.00 0.00 V1 P2 A
11.62
next
Print ticket directly no matter “change function” is
enabled or not, and show “3 cheque” to indicate it
is paid by credit card. Don’t open cash as well
[3]
V1 Total 11.62 3 cheque
On the ticket cheque will be printed on the left of the paid amount as follows:
Cheque 11.62
3) Use voucher for payment operation
Procedure Description Key
Operation
Lit
cursor
Display
on 1st line
Display
on 2nd line
Display
on 3rd line
Display
On the bottom line
------ Have done 2 transactions ------[V1] 0.000 0.00 0.00 V1 P2 A
11.62
next No matter “change function” is enabled or not, press
voucher key to get into total display mode
[Y] V1 Total 11.62 V pay 11.62
next Input voucher value 12.00€[1][2][0][0] V1 Total 11.62 V pay 12.00
next * Press cash key to give cash change and print ticket [*] V1 Total 11.62 C cHG 0.38
On the ticket voucher will be printed on the left of the paid amount as follows:
Voucher 12.00
Cashchange 0.38
* If press voucher key [Y] at this time, the change will be voucher also, the display will be as follows:
next * Press voucher key to give voucher change [Y] V1 Total 11.62 V cHG 0.38
On the ticket printed content will be as follows:
Voucher 12.00
Voucher change 0.38
If input amount of voucher is less than total, the operation procedure is as follows:
Procedure Description Key
Operation
Lit
cursor
Display
on 1st line
Display
on 2nd line
Display
on 3rd line
Display
On the bottom line
------ Have done 2 transactions ------[V1] 0.000 0.00 0.00 V1 P2 A
11.62
next Input voucher value 10.00€[Y][1][0][0][0] V1 Total 11.62 V pay 10.00
next * Press cash key [*] to pay the remained by cash [*] V1 Remain 1.62 C pay 1.62
next Input cash value 2.00€[2][0][0] V1 Remain 1.62 C pay 2.00
next Press cash key to give cash change and print ticket [2][0][0] V1 Total 11.62 C cHG 0.38
* Other payment key can be used at this time.
One example of the printed content is as follows:
Voucher 10.00
Cash 2.00
CashChange 0.38

RS Series Operator Manual
13
Or:
Voucher 10.00
Credit card: 1.62
4.6.3 Multi-vendor Operation
Vendor quantity (up to 4) can be set in setting item 409. If one vendor operates the scale, and one vendor wants to recall
his own total when another vendor’s total is displayed on the bottom line, the procedure is as follows:
☞When only bottom line has content, the other lines are blank.
Procedure Description Key
operation
Display
on 1st line
Display
on 2nd line
Display
on 3rd line
Display
on the bottom line
Lit
cursor
------ Only on bottom line shows V1’s total
V
1 P2 a 11.62
Step1 Press [V2] to recall V2’s total [V2] V2 P1 A 5.62
Step2 Show V2’s total amount and print his ticket [*] V2 Total 11.62
☞When unit price is not zero
Procedure Description Key
operation
Display
on 1st line
Display
on 2nd line
Display
on 3rd line
Display
on the bottom line
Lit
cursor
------ Vendor 1’s total is shown on the bottom line 0.400 16.80 6.72 V1 P2 A
11.62
Step1 Clear unit price or PLU [C] 0.400 0.00 0.00 V1 P2 A
11.62
Step2 Press [V2] to recall V2’s total [V2]
V
2 P1 A 5.62
Step3 Show V2’s total amount and print his ticket [*] V2 Total 11.62
4.6.4 Print Copy of the Ticket
In setting item 206, printing a copy of ticket can be set to be enabled. In this case, after printing the ticket, press [*] again,
a copy of the ticket will be printed, and characters “COPY” will be shown on that ticket.
4.6.5 Save Ticket
In order to save a ticket, in setting item 203, you may select to accumulate transactions and not print the ticket.. This setting
item has 3 parameters as follows:
0: print ticket: print ticket
1: No ticket: don’t print ticket
2: Ticket: you may select whether to print or not
When parameter 2 is selected, after [*] is pressed, the procedure will be as follows:
Procedure Description Key
operation
Display
on 1st line
Display
on 2nd line
Display
on 3rd line
Display
on the bottom line
Lit
Cursor
------ Show V2’s subtotal V2 Total 11.62
Step1 Default is to print ticket [*] V1 Total 11.62 PrN T ticket
Step2 Select not to print ticket [ÆTÅ] V1 Total 11.62 No Ticket
Step3 Don’t print ticket [*] 0.000 0.00 0.00 V1ticket
4.6.6 Ticket Format
The default is to print discount price as follows:
If you want to use the below format, you may find it in setting item 229 by selecting parameter 0 (DISC UP/TP).
4.6.7 Suspend Transactions
One vendor can suspend transactions one time. The procedure to suspend or recall suspended transactions is as follows:
Ling Discount -10%
1.000 2.50 2.50
2.25
Ling Discount -10%
1.000 2.50 2.50
2.25 2.25

RS Series Operator Manual
14
Procedure Description Key
Operation
Display
on 1st line
Display
on 2nd line
Display
on 3rd line
Display
on the bottom line
Lit
cursor
------ Accumulate one transaction to subtotal [V1] 0.500 0.00 0.00 V1 P2 A
11.62
Step1 Remove items. Initiate suspend function [MODE]+[ ] 0.000 0.00 0.00 Suspend
Step2 Suspend the transaction of V1. Two
continuous beeps will indicate suspend
finished
[V1] 0.000 0.00 0.00 Suspend V1
Step3 V1 may begins treating another customer [1] 0.000 9.80 0.00 PLU 1
Step4 ----- V1 p3 A 8.50
Step5 Print the ticket [*] V1 Total 8.50
Step6 Recall the suspended transactions [MODE]+[ ] 0.000 0.00 0.00 Suspend
Step7 Recall V1’s suspended transactions, then V1
can continuously treat that customer [V1] 0.000 0.00 0.00
V1 P2 A
11.62
Step8 Print the ticket [*] V1 Total 11.62
If one vendor has the suspended transactions and the current subtotal of this vendor is not zero, when you press
[MODE]+[ ], “no more susp” will be shown for 1 second to indicate that this operation will be invalid.
4.6.8 Void Transaction
Before ticket is printed, any transactions can be cancelled.
For example: One customer bought 2 items, PLU 1: 0.5kg, and PLU 3: 0.4kg. Before ticket was printed, he wanted to
cancel PLU 1. The procedure is as follows:
Procedure Description Key
operation
Display
on 1st line
Display
on 2nd line
Display
on 3rd line
Display
on the bottom line
Lit
cursor
Step1 Weighing mode 0.000 0.00 0.00 V1 ticket
Step2 Recall PLU1 [1] 0.000 9.80 0.00 PLU 1
Step3 Put item on the platter 0.500 9.80 4.90 PLU 1
------ Two transactions were finished ------ 0.500 0.00 0.00 V1 P2 A
11.62
next Default to cancel the last transaction, here is PLU 3 [VOID] 0.500 -9.80 -4.90 PLU 3
void
next Use [ ] or [ ] to select the transaction needed↑↓ []↑0.500 -9.80 -4.90
PLU 1
VOID
next Confirm to void PLU1 and go back to weighing
mode [*] 0.500 0.00 0.00
V1 P1 A
4.62
4.6.9 Cancel All Transactions
Before the ticket is printed, all transactions of one vendor can be cancelled. Notice, do not cancel the pending transaction of
this vendor.
E.g.: One customer bought 4 items, then decided not to purchase before the ticket was printed. The following procedure will
cancel the transaction:
Procedure Description Key
operation
Display
on 1st line
Display
on 2nd line
Display
on 3rd line
Display
on the bottom line
Lit
cursor
------ 4 transactions had been accumulated [V1] 0.000 0.00 0.00 V1 P4 A 44.90
Step1 Cancel the last transaction [Void] 0.400 -16.80 -6.72 PLU 3 void
Step2 Cancel all transactions, and print void ticket [V1] void all
Step3 1 second later scale goes back to weighing mode 0.00 0.00 0.00 V1 ticket
4.6.10 ST
After ticket is printed, items can be refunded.
One customer made a purchase and the printed ticket contains PLU2: 0.600kg, 8.90$/kg,total 5.34$, and etc. The
procedures to refund are as follows:
Procedure Description Key
Operation
Display
on 1st line
Display
on 2nd line
Display
on 3rd line
Display
on the bottom line
Lit
cursor
Step4
W
eighing mode 0.000 0.00 0.00 V1 ticket
Step5 Initiate ST function, ST will shown in the [MODE]+[ST] 0.000 0.00 0.00 V1 ticket st
Other manuals for RS Series
1
Table of contents
Other OHAUS Scale manuals

OHAUS
OHAUS SD35 User manual

OHAUS
OHAUS Scout pro User manual

OHAUS
OHAUS PAJ-N Series User manual

OHAUS
OHAUS Ranger RD User manual

OHAUS
OHAUS I-C52M100L User manual

OHAUS
OHAUS Valor 1000 User manual

OHAUS
OHAUS RI Series User manual

OHAUS
OHAUS Valor 3000 User manual

OHAUS
OHAUS Ranger R41MEB User manual

OHAUS
OHAUS VF Series User manual

OHAUS
OHAUS CS 2000 User manual

OHAUS
OHAUS DV114C User manual

OHAUS
OHAUS SD User manual

OHAUS
OHAUS Ranger 3000 Series User manual

OHAUS
OHAUS ES series User manual

OHAUS
OHAUS CS 2000 User manual

OHAUS
OHAUS Adventurer Pro AV212DM Configuration guide

OHAUS
OHAUS VE1500P User manual

OHAUS
OHAUS Scout SJX Series User manual

OHAUS
OHAUS Defender D30BR User manual