OHAUS Carat PAJ603 User manual

Carat / Gold Balances
Instruction Manual
Balanzas Carat / Gold
Manual de Instrucciones
Balances Carat / Gold
Guide de I’utilisateur
Carat / Gold -Waagen
Bedienungsanleitung
Bilancia Carat / Gold
Manuale d’instruzioni

EN-1 Carat / Gold
1. INTRODUCTION
1.1 Safety Precautions
Please follow these safety precautions:
• Verify that the AC Adapter input voltage matches the local AC power supply.
• Use the balance only in dry locations.
• Do not operate the balance in hostile environments.
• Do not drop loads on the platform.
• Do not place the balance upside down on the platform or platform mounting cone.
• Service should be performed only by authorized personnel.
1.2 Controls
Button:
Functions:
O/T - On
Short Press:
Turns balance on, sets display to zero
Off
Long Press:
Turns balance off
Yes
Short press (Menu):
Selects or accepts setting
Unit
Short Press:
Steps through active units and modes
Menu
Long Press:
Enters Menu
No
Short press (Menu):
Steps through available settings
Long press (Menu):
Exit menu or abort out of menu item
Print
Short Press:
Sends data
Cal
Long Press:
Initiates Span Calibration
2. INSTALLATION
2.1 Package Contents
Gold Models Carat Models
Instruction Manual Instruction Manual
Power Adapter Power Adapter
Balance Balance
Pan Pan
Pan Support Glass Doors and Panels
Wind-Ring Warranty Card
Warranty Card Carat pan
Calibration weight (non-InCal models)

Pioneer™EN-2
2.2 Install Components
Gold Models
1) Install Wind-Ring
2) Install Pan Support
3) Install Pan
Carat Models
1) Install Side Doors - Insert fully into Top Frame then down over retainer.
2) Install Front and Rear Panels - Insert bottom edge in groove then press until locked.
3) Install Top Door
4) Install Pan

EN-3 Carat / Gold
2.3 Level Balance
Level the balance on a firm, steady surface. Avoid locations with excessive air current, vibrations, heat sources or
rapid temperature changes.
2.4 Connect Power
2.5 Initial Calibration
Without InCal - Power on the balance by pressing 0/T. Press and hold Print/Cal until [CAL] is displayed.
The display flashes the calibration mass needed. To select the alternate calibration weight press No. Put the
calibration mass on the pan. The display flashes [BUSY], then [CLEAr Pan]. Remove the mass. When
calibration is complete, [DONE]is displayed.
InCal - Press and hold Print/Cal until [CAL] is displayed. The display flashes [BUSY], when calibration is
complete, [DONE]is displayed
Note: Calibrations should be performed after a warm up time of 60 minutes.
3. OPERATION
Count or specific units of measure must be activated in the MODE or UNIT menus if they are not initially available.
3.1 Weighing Mode
Repeatedly press Unit until the desired unit icon is displayed.
Press 0/T to zero the balance and then place objects to be weighed on the pan.
3.2 Count Mode - Use the Count mode to count parts of uniform weight.
To access Count Mode, press Unit until the display shows [Count].
Establish an Average Piece Weight (APW) - Each time a new type of part is to be counted, the nominal weight of
one piece (APW) must be established using a small quantity of pieces.
With [CLr.APwW] displayed, press No to use the previously saved APW, or press Yes to establish a new APW. The
display indicates the number of pieces to be used to establish the new APW. If a different sample size is preferred,
press No until the desired sample size is displayed (5, 10, 20, 50 or 100). Put the specified number of pieces on
the pan. Press Yes to accept new APW or No to abort.
Count - Place the quantity to be counted on the pan.
APW Optimization - Since the weight of each piece varies slightly, APW Optimization may be used to increase the
accuracy of the count. The balance automatically recalculates the Average Piece Weight when the number of parts
on the pan is less than three times the original sample size. The display shows [APwW.OPT] each time the APW is
For use with CSA Certified (or
equivalent approved) power
source, which must have a
limited circuit output.

Pioneer™EN-4
optimized.
3.3 Weigh Below Feature
Remove Weigh Below Cover
Attach wire or string to Hook
Suspend sample
4. SETTINGS
4.1 Menu Navigation
.CAL.
InCal*
SPAN
LINEAR**
.SETUP.
AZSM
FILTER
A.TARE
GRAD
GBL RST
END.SET
.MODE.
COUNT
APWOPT
END.MOD
.UNIT.
END.UNIT
GRAM
MILLIGRAM
KILOGRAM
OUNCE
NOT ALL
UNITS
SHOWN
.PRINT.
OUT STA
A. PRINT
CONTENT
LINE FO
END.PRT
.RS232.
BAUD
PARITY
HAND.SH
END.R232
.LOC.
CAL
SETUP
MODE
PRINT
RS232
END.LOCK
.END.
NO
YES
UNIT
POUND
CAL ADJ
* InCal models only
** Not available in InCal models
END.CAL
ENTER MENU -When the balance is on, press and hold Unit/Menu until [mMENU] appears. Release the button and
the Calibrate [.CAL.] menu will display.
MENU NAVIGATION - Select menus, menu items and settings through use of the Yes and No buttons. Solid arrows
point to the content displayed when Yes is pressed, Dashed lines when No is pressed.
CHANGE SETTINGS - To select the displayed Setting, press Yes. To move to the next Setting, press No.
EXIT MENU - When [.END.] is displayed, press Yes to exit the menu function, or press No to return to the Cal menu.
Note: Press and hold No at any time to exit quickly.

EN-5 Carat / Gold
4.2 Calibration Menu [.CAL.]
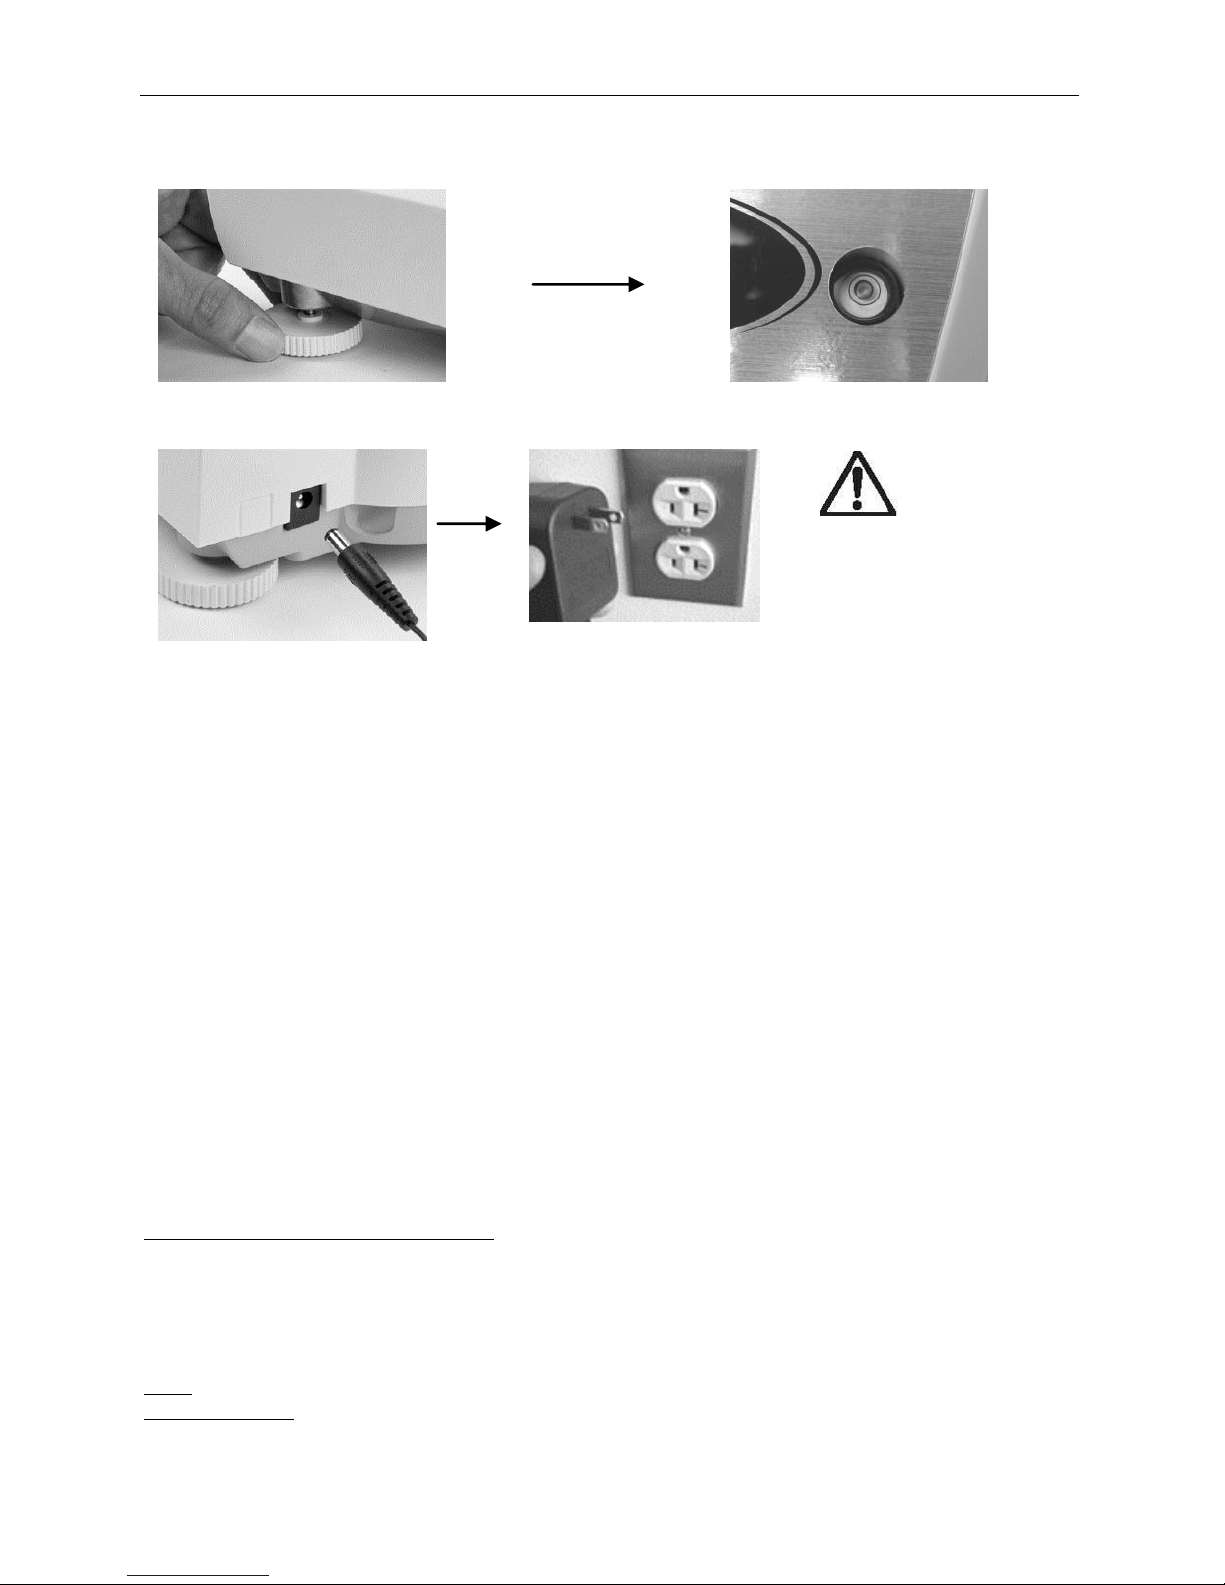
InCal or Span calibration should be performed daily and when the room temperature changes.
InCal [InCal] calibrates the balance using an internal mass.
Span Calibration [SpaN]uses two weight values: zero and a weight between 50% and 100% of the capacity of
the balance.
Linearity calibration [LIN] uses three weight values zero, 50% of capacity and full capacity. Generally this
calibration is not required unless testing shows that the linearity error exceeds the Linearity tolerance in the
Specification table. (Not available in InCal models)
Calibration Adjust [CAL Adj] allows adjustment to the result of the internal calibration by +/- 99 divisions. (InCal
models only)
4.3 Setup Menu [.setup.]
Automatic Zero-Setting [azsmM] - Environmental changes can cause the display to drift. The Automatic Zero-Setting
Mechanism (AZSM) is designed to keep the balance set at zero, despite these slight changes. (OFF, SET .5d, SET
1d, SET 2d, SET 5d)
Filter [filter] - Use the low setting (SET LO) when environmental disturbances are not present. Use the medium
setting (SET MED) for normal environments. Usethe high setting (SET HI) when vibrations or air currents are present.
Auto Tare [A-tare] - The initial item placed on the balance is assumed to be a container so it is zeroed out. The
next item is then weighed. When the pan is cleared the balance resets, waiting for a container. (SET OFF, SET ON)
Grad [Grad] –Select the readability displayed. Reducing the readability may be needed for approval. (SET 1d, SET
[1]d, SET 10d)
Global Reset [Gbl rst] - Resets all settings to factory default values. (RESET)
4.4 Mode Menu [.mMode.]
Count Mode [Count] - [SET ON, SET OFF]
Average Piece Weight (APW) Optimization [aPwW.OPT] - (SET ON, SET OFF)
4.5 Unit Menu [.Unit.]
The Unit menu is used to enable or disable a specific unit. (SET ON, SET OFF) The unit is indicated by a small character
next to Unit in the display (g = grams). The default setting is Grams and Carat on and all other units off.
T-Units - When unit [t] displays; press Yes to show the T-Unit settings; SET OFF, SET TT (Taiwan Tael), SET TH (Hong
Kong Tael), SET TS (Singapore Tael), SET TO (Tola) or SET TI (Tical).
M-Units - When unit [m] is displayed, press Yes to show the M-Unit settings; SET OFF, SET MO (Momme) or SET
ME (Mesghal).
4.6 Print Menu [.Print.]
Output Stable [Out.Stab] - Data will only be sent when the Stable indicator is on. This setting works with manual
button pressing or continuous and interval Auto Print. (SET ON, SET OFF)
Auto Print [A.Print] - Data will be continuously sent when [Continu] is set. Interval [Inter] sends data every
1 to 3600 seconds. When Stable [Stable] will send data when the balance detects a new stable reading. This
can be a weight value only [LOad] or it can also include a stable zero [L+zero]. [OFF] disables automatic printing.
Content [CONteNt] - The content in the data transmission can be modified. Each of the following settings can be
set on or off. Number Only [numMber] will only send the numeric result. Balance ID [Bal. ID] will add the Balance
serial number for traceability purposes. Reference [refer] will add reference information relevant to the current
mode. GLP [GLP] will send additional items to allow proper documentation of laboratory results.
Line Format [LinE Fo] - Single line format [single] will put all the data in one line separating each output with
a comma (,). Multi line format [mMulti] will put each data output on a new line. Multi +4 [mM-4LF] will add 4
line spaces between each output.

Pioneer™EN-6
4.7 RS232 Menu [.rs232.]
Baud [BAUD] - The RS232 baud rate can be set to 600, 1200, 2400, 4800, 9600 and 19200.
Parity [Parity] - Parity can be sent to 7 bits-even parity [7 eveN], 7bits-odd parity [7 odd], 7bits-no parity [7
No] or 8bit-no parity [8 No].
Handshake [Handsh] - Handshake can be set to off [set Off], X on –X off [on-off], or hardware [HardwWr].
4.8 Lock Menu [.LOC.]
When a Lock Menu item is set on the indicated menu cannot be changed.
[Loc Cal] - Calibration, [Loc SEt] - Setup, [Loc.mMod] - Mode, [Loc.Unit] - Unit,
[Loc Prt] - Print, [Loc 232] - RS232
4.9 Sealing Access to the Balance Settings
The Menu Lock switch prevents changes to the Lock Menu. The switch can be secured using paper seals, wire seals
or plastic ties.
Un-Locked
Locked with Plastic Tie
4.11 Approved “M” Models
Balances marked with an “M” have been calibrated and sealed at the factory for use as an EEC approved balance.
The Cal, Setup, Mode and Unit menus will be locked.
4.12 Local Approval
The InCal models can be approved by local weights and measures authorities. The calibration must be verified and
the Menu settings must be set appropriately before being locked using the Lock Menu. The Menu Lock switch on
the bottom of the balance can then be sealed in the locked position. The supplied capacity label is to be placed below
the display.
^^^^^^^^^^^^^^^^^^^^^
Multi Line Format with 4 line feeds
Line Feed-2
Line Feed-3
Line Feed-4
User ID: ………………..........
GLP (ON)
Bal ID: 123456789
Balance ID (ON)
Proj ID: ………………………
GLP (ON)
Time: ……:…….:…….
GLP (ON)
Date: …../….. /…..
GLP (ON)
120.01 g
Result
^^^^^^^^^^^^^^^^^^^^^

EN-7 Carat / Gold
5.0 MAINTENANCE
5.1 Troubleshooting
Symptom
Possible Cause
Remedy
Cannot turn on
No power to balance
Verify connections and voltage
Poor accuracy
Improper calibration
Unstable environment
Perform calibration
Move balance to suitable location
Cannot calibrate
Unstable environment
Incorrect calibration masses
Move the balance to suitable location
Use correct calibration masses
Cannot access mode
Mode not enabled
Enter menu and enable mode
Cannot access unit
Units not enabled
Enter menu and enable units
Err 5
Average Piece Weight too small
Add additional samples
Err 7.0
Time out
Err 8.1
Pan has load during power on
Remove weight from pan and re-zero
Err 8.2
Pan was removed prior to power on
Install pan and re-zero
Err 8.3
Weight on pan exceeds capacity
Remove weight from the pan
Err 8.4
Pan was removed during weighing
Re-install pan
Err 9.5
Factory calibration data corrupted
Contact the authorized dealer
Err 9.8
Factory calibration data corrupted
Perform calibration
Error 53
EEPROM Checksum error
Contact the authorized dealer
REF Err
Reference Weight is too small
Add additional samples
LOWrEF
Reference Weight is too low for accurate
parts counting or percent weighing
Add additionalsamples or continue to weigh
with less accurate results
5.2 Service Information
If the troubleshooting section does not resolve or describe your problem, contact your authorized Ohaus service
agent. Please visit our web site, www.ohaus.com to locate the Ohaus office nearest you.
5.3 Accessories
Security device, Lock and Cable 76288-01
Security device - Kensington® 470004-010
Auxiliary Display PAD7
Density Determination Kit 80850045 (0.1mg and 1mg models only)
Printer –42 character SF42
Ohaus Collect 80500746
Data collection Software SW12
Cable to SF42 80500571
Cable to IBM-9 pin 80500525

Pioneer™EN-8
6. TECHNICAL DATA
Ambient conditions - The technical data is valid under the following ambient conditions:
Ambient temperature: 10°C to 30°C
Relative humidity: 15 % to 80 % at 31°C non-condensing, decreasing linearly to 50% at 40°C
Height above sea level: Up to 2000 m
Operability is assured at ambient temperatures between 5°C and 40°C
Power - AC adapter, Balance power input 8-14.5 VAC, 50/60Hz 4VA or 8-20 VDC, 4W
Protection - Protected against dust and water, Pollution degree: 2, Installation category: Class II
6.1 Drawings
Gold
Carat

EN-9 Carat / Gold
6.2 Specifications
Carat Models
MODEL *
PAJ603
PAJ603C
PAJ1003
PAJ1003C
PAJ2003
PAJ2003C
Max (ct)
625
1050
2050
Min (ct)
0.1
0.2
d= (ct)
0.001
0.01
e= (ct)
0.01
0.01
0.01
0.01
0.1
0.1
Approval
X
Class I
X
Class 1
X
Class II
Repeatability
0.001(Std. Dev.)(ct)
0.005 (Std. Dev.)(ct)
Linearity (ct)
±0.002
±0.01
Tare Range
To capacity by subtraction
Stabilization
3 Seconds
Span cal mass
(g)
50 or 100
InCal or
50 or 100
100 or 200
InCal or
100 or 200
200 or 400
InCal or
200 or 400
Linearity cal
masses (g)
50, 100
X
100, 200
X
200, 400
X
Pan diameter
3.5in / 9cm
4.7in / 12cm
Net Weight
10.1lb / 4.6kg
Gold Models without InCal
MODEL
PAJ812
PAJ2102
PAJ3102
PAJ4102
PAJ2101
PAJ3101
PAJ4101
Max (g)
810
2100
3100
4100
2100
3100
4100
Min (g)
0.5
5
d= (g)
0.01
0.1
e= (g)
0.1
Repeatability
0.01(std. dev.)(g)
0.1(std. dev.)(g)
Linearity
±0.02g
±0.03g
±0.1g
Tare Range
To capacity by subtraction
Stabilization
3 Seconds
Span cal mass
(g)
500 or
800
1000 or
2000
2000 or
3000
2000 or
4000
1000 or
2000
2000 or
3000
2000 or
4000
Linearity cal
masses (g)
500, 800
1000,
2000
2000, 3000
2000,
4000
1000, 2000
2000,
3000
2000,
4000
Pan size
6.6 x 7.1 in / 16.8 x 18 cm (W x L)
Net Weight
10.0lb / 4.5kg

Pioneer™EN-10
Gold models with InCal (C and CM)
MODEL *
PAJ812C
PAJ2102C
PAJ3102C
PAJ4102C
PAJ2101C
PAJ3101C
PAJ4101C
Max (g)
810
2100
3100
4100
2100
3100
4100
Min (g)
0.5
5
d= (g)
0.01
0.1
e= (g)
0.1
Approval
Class 2
Repeatability
0.01(std. dev.)(g)
0.1(std. dev.)(g)
Linearity
±0.02g
±0.03g
±0.1g
Tare Range
To capacity by subtraction
Stabilization
3 Seconds
Span cal mass
(g)
500 or
800
1000 or
2000
2000 or
3000
2000 or
4000
1000 or
2000
2000 or
3000
2000 or
4000
Pan size
6.6 x 7.1 in / 16.8 x 18 cm (W x L)
Net Weight
10.0lb / 4.5kg
* Factory approved models will have an “M” added to the model number (ex. PAJ812CM).
6.3 Communication
6.3.1 Commands
The RS232 Interface allows a computer to control the balance as well as receiving data such as the displayed weight.
The balance will return “ES” for invalid commands.
Command
Function
IP
Immediate Print of displayed weight.
P
Print displayed weight (uses stable on/off menu setting).
CP
Continuous Print.
xP
Interval Print x = Print Interval (1-3600 sec)
T
Same as pressing Zero Key.
ON
Turns balance ON.
OFF
Turns balance OFF.
PSN
Show Serial Number.
PV
Version: Print product name, software revision and LFT ON (if LFT is set ON).
PU
Print current mode/unit
x#
Set PC ref wt (x) in grams
P#
Print PC ref wt
6.3.2 RS232 (DB9) Pin Connections
Pin 2: Balance transmit line (TxD)
Pin 3: Balance receive line (RxD)
Pin 5: Ground signal (GND)
Pin 7: Clear to send (hardware handshake) (CTS)
Pin 8: Request to send (hardware handshake) (RTS)
CTS
RTS
5
9
1
6
RxD
TxD
GND

EN-11 Carat / Gold
6.3 Compliance
Compliance to the following standards is indicated by the corresponding mark on the product
.
Mark
Standard
This product conforms to the EMC directive 2004/108/EC and the Low Voltage Directive
2006/95/EC. The complete declaration of Conformity is available from Ohaus Corporation
AS/NZS4251.1 Emission; AS/NZS4252.1 Immunity
CAN/CSA-C22.2 No. 1010.1-92; UL Std. No. 3101-1
Important notice for verified weighing instruments
Weighing Instruments verified at the place of manufacture bear one of the
preceding mark onthe packing label and the green „M‟ (metrology) sticker
on the descriptive plate. They may be put into service immediately.
Weighing Instruments to be verified in two stages have no green „M‟
(metrology) on the descriptive plate and bear one of the preceding
identification mark on the packing label. The second stage of the initial
verification must be carried out by the approved service organization of
the authorized representative within the EC or by the national weight &
measures (W+M) authorities
The first stage of the initial verification has been carried out at the manufacturers work. It comprises all
tests according to the adopted European standard EN 45501:1992, paragraph 8.2.2.
If national regulations limit the validity period of the verification, the user of the weighing instrument must
strictly observe the re-verification period and inform the respective W+M authorities.
ISO 9001 Registration
In 1994, Ohaus Corporation, USA, was awarded a certificate of registration to ISO 9001 by Bureau Veritus Quality
International (BVQI), confirming that the Ohaus quality management system is compliant with the ISO 9001
standard‟s requirements. On May 15, 2003, Ohaus Corporation, USA, was re-registered to the ISO 9001:2000
standard.
Disposal
In conformance with the European Directive 2002/96 EC on Waste Electrical and
Electronic Equipment (WEEE) this device may not be disposedof in domestic waste. This
also applies to countries outside the EU, per their specific requirements.
Please dispose of this product in accordance with local regulations at the collecting point
specified for electrical and electronic equipment.
If you have any questions, please contact the responsible authority or the distributor from
which you purchased this device.
Should this device be passed on to other parties (for private or professional use), the
content of this regulation must also be related.
Thank you for your contribution to environmental protection.

Pioneer™EN-12
LIMITED WARRANTY
Ohaus products are warranted against defects in materials and workmanship from the date of delivery through the
duration of the warranty period. During the warranty period Ohaus will repair, or, at its option, replace any
component(s) that proves to be defective at no charge, provided that the product is returned, freight prepaid, to
Ohaus.
This warranty does not apply if the product has been damaged by accident or misuse, exposed to radioactive or
corrosive materials, has foreign material penetrating to the inside of the product, or as a result of service or
modification by other than Ohaus. In lieu of a properly returned warranty registration card, the warranty period shall
begin on the date of shipment to the authorized dealer. No other express or implied warranty is given by Ohaus
Corporation. Ohaus Corporation shall not be liable for any consequential damages.
As warranty legislation differs from state to state and country to country, please contact Ohaus or your local Ohaus
dealer for further details.

ES-1 Pioneer™
1. INTRODUCCIÓN
1.1 Precauciones de seguridad
Siga estas precauciones de seguridad:
Verifique que el voltaje del adaptador de corriente alterna coincida con la alimentación eléctrica local.
Use la balanza sólo en lugares secos.
No opere la balanza en ambientes adversos.
No deje caer cargas sobre la plataforma de pesaje.
No coloque la balanza al revés sobre la plataforma o como de montaje para plataforma.
El servicio debe proporcionarse solamente por personal autorizado.
1.2 Controles
Botón:
Funciones:
O/T - On
Presión corta:
Enciende la balanza, pone la pantalla en cero
Off
Presión larga:
Apaga la balanza
Yes
Presión corta (Menu):
Selecciona o acepta la configuración
Unit
Presión corta:
Recorre las unidades y modos activos
Menu
Presión larga:
Ingresa al menú
No
Presión corta (Menu):
Recorre las configuraciones disponibles
Presión larga (Menu):
Sale del menúo cancela el elemento del menú
Print
Presión corta:
Envía datos
Cal
Presión larga:
Inicia la calibración de extensión
2. INSTALACIÓN
2.1 Contenido del paquete
Gold Carat
Manual de instrucciones Manual de instrucciones
Adaptador de corriente Adaptador de corriente
Balanza Balanza
Plato de pesaje Plato de pesaje
Soporte del plato de pesaje Puertas y paneles de vidrio
Anillo de viento Tarjeta de garantía
Tarjeta de garantía Plato para quilates
Peso de calibración (modelos de calibración externa)

Pioneer™ ES-2
2.2 Instalación de componentes
Gold
1) Instale Anillo de viento
2) Instale el soporte del plato de pesaje
3) Instale el plato de pesaje
Carat
1) Instale las puertas laterales - Inserte completamente en el marco superior y después abajo sobre el sujetador.
2) Instale los paneles anterior y posterior - Inserte el lado inferior en la ranura y presione hasta que se aseguren.
3) Instale la puerta superior
4) Instale el plato de pesaje

ES-3 Pioneer™
2.3 Nivelación de la balanza
Nivele la balanza sobre una superficie firme y estable. Evite lugares con exceso de corrientes de aire, vibraciones,
fuentes de calor y cambios rápidos de temperatura.
2.4 Alimentación eléctrica
2.5 Calibración inicial
Sin InCal - Encienda la báscula presionando 0/T. Presione y mantenga Print/Cal hasta que aparezca [CAL].
La pantalla destella el peso de calibración necesario. Para seleccionar un peso de calibración alterno,
presione No. Ponga el peso de calibración en el plato de pesaje. La pantalla destella [BUSY], y enseguida
[CLEAr Pan]. Retire el peso. Cuando termina la calibración, aparece [DONE].
InCal - Presione y mantenga Print/Cal hasta que aparezca [CAL]. La pantalla destella [BUSY]. Cuando
termina la calibración, aparece [DONE].
3. OPERACIÓN
Si Count (conteo) o las unidades específicas de medida no están disponibles en un principio, deben activarse en
los menús MODE o UNIT.
3.1 Modo de pesaje
Presione repetidamente Unit hasta que aparezca el icono deseado.
Presione 0/T para poner la balanza en cero y entonces coloque los objetos para pesar en el plato de pesaje.
3.2 Modo de conteo (Count) - Use el modo de conteo para contar piezas que tengan un peso uniforme.
Para entrar en el modo de conteo, presione Unit hasta que la pantalla muestre [Count].
Establecer un peso de pieza promedio (APW) - Cada vez que se vaya a contar un tipo nuevo de pieza, se debe
establecer el peso nominal de una pieza (APW) usando una cantidad pequeña de piezas.
Con [CLr.APwW] en la pantalla, presione No para usar el APW guardado anteriormente, o presione Yes para
establecer un nuevo APW. La pantalla indica el número de piezas que se van a usar para establecer el nuevo APW.
Si se prefiere un tamaño de muestra diferente, presione No hasta que aparezca el tamaño de muestra deseado (5,
10, 20, 50 ó100). Coloque el número de piezas especificadas sobre el plato de pesaje. Presione Yes para aceptar
el nuevo APW o No para cancelarlo.
Conteo - Coloque la cantidad que va a contar sobre el plato de pesaje.
Optimización del APW - Puesto que el peso de cada pieza varía ligeramente, la optimización del APW puede usarse
para aumentar la exactitud del conteo. La balanza recalcula automáticamente el peso de pieza promedio cuando
Debe usarse con una fuente de
energía certificada por la CSA (o
una aprobación equivalente), la
cual debe tener una salida limitada
de circuito.

Pioneer™ ES-4
el número de piezas sobre el plato es menor de tres veces el tamaño de la muestra original. La pantalla muestra
[APwW.OPT] cada vez que se optimiza el APW.
3.3 Función de pesaje por debajo
Retire la protección para pesaje
por debajo
Ate un alambre o cuerda en el
gancho
Suspenda la muestra
4. CONFIGURACIONES
4.1 Menúde navegación
.CAL.
InCal*
SPAN
LINEAR**
.SETUP.
AZSM
FILTER
A.TARE
GRAD
GBL RST
END.SET
.MODE.
COUNT
APWOPT
END.MOD
.UNIT.
END.UNIT
GRAM
MILLIGRAM
KILOGRAM
OUNCE
NOT ALL
UNITS
SHOWN
.PRINT.
OUT STA
A. PRINT
CONTENT
LINE FO
END.PRT
.RS232.
BAUD
PARITY
HAND.SH
END.R232
.LOC.
CAL
SETUP
MODE
PRINT
RS232
END.LOCK
.END.
NO
YES
UNIT
POUND
CAL ADJ
* InCal models only
** Not available in InCal models
END.CAL
INGRESO EN EL MENÚ- Cuando la balanza estéencendida, presione y mantenga Unit/Menu hasta que aparezca
[mMENU]. Suelte el botón y aparece el menúde calibración [.CAL.].
NAVEGACIÓN EN EL MENÚ- Seleccione menús, elementos de menúy configuraciones mediante el uso de los
botones Yes y No. Las flechas sólidas apuntan hacia el contenido mostrado cuando se presiona Yes, y las líneas
punteadas cuando se presiona No.
CAMBIO DE CONFIGURACIONES - Para seleccionar la configuración mostrada, presione Yes. Para ir a la siguiente
configuración, presione No.
SALIDA DEL MENÚ- Cuando aparezca [.END.], presione Yes para salir de la función de menú, o presione No para
regresar al menúde calibración. Nota: Presione y mantenga No en cualquier momento para salir rápidamente.
4.2 Menúde calibración [.CAL.]
La calibración InCal o de extensión debe realizarse diariamente y cuando cambia la temperatura ambiente.
InCal [InCal] calibra la balanza mediante un peso interno.
La calibración de extensión [SpaN]usa dos valores de peso: cero y un peso entre el 50 y 100% de la capacidad
de la balanza.
La calibración de linealidad [LIN] usa tres valores de peso, cero, 50% de la capacidad y la capacidad total.

ES-5 Pioneer™
Generalmente esta calibración no es requerida a menos que la prueba indique que el error de linealidad excede
la tolerancia de linealidad de la tabla de especificaciones. (No disponible en los modelos InCal)
4.3 Menúde configuración [.setup.]
Configuración de cero automático [azsmM] - Los cambios ambientales pueden hacer que la pantalla se desvíe.
El diseño del mecanismo de configuración de cero automático (AZSM) mantiene el ajuste de la balanza en cero
a pesar de esos pequeños cambios. (SET 0, SET .5d, SET 1d, SET 2d, SET 3d)
Filtro [filter] - Use la configuración baja (SET LOW) cuando no haya perturbaciones ambientales. Use la
configuración media (SET MED) para ambientes normales. Use la configuración alta (SET HI) cuando haya
vibraciones y corrientes de aire.
Tara automática [A-tare] - Se supone que el primer artículo que se coloca en la balanza es un recipiente, de
manera que se pone en cero. El siguiente artículo se pesa. Cuando el plato queda libre, la balanza se restablece
en espera de un recipiente. (SET OFF, SET ON)
Graduación [Grad] –Seleccione la capacidad de lectura mostrada. Puede ser necesario reducir la capacidad de
lectura para aprobación. (SET 1d, SET [1]d, SET 10d)
Restauración completa [Gbl rst] - Restablece todas las configuracionesa los valorespredeterminadosde fábrica.
(NO, YES)
4.4 Modo de menú[.mMode.]
Modo de conteo [Count] - [SET ON, SET OFF]
Optimización del peso de pieza promedio (APW) [aPwW.OPT] - (SET ON, SET OFF)
4.5 Menúde unidades [.Unit.]
El menúde unidades se utiliza para habilitar o inhabilitar una unidad de peso específica. (SET ON, SET OFF) La
unidad es indicada mediante un carácter pequeño junto a la unidad en la pantalla (g = gramos). La configuración
predeterminada es gramos y quilate con todas las demás unidades inhabilitadas.
Unidades T - Cuando aparezca la unidad [t]; presione Yes para mostrar las configuraciones de la unidad T; SET
OFF, SET TT (tael de Taiwán), SET TH (tael de Hong Kong), SET TS (tael de Singapur), SET TO (tola) o SET TI (tical).
Unidades M - Cuando aparezca la unidad [m], presione Yes para mostrar las configuraciones de la unidad M; SET
OFF, SET MO (momme) o SET ME (mesghal).
4.6 Menúde impresión [.Print.]
Salida estable [Out.Stab] - Los datos sólo se enviarán cuando el indicador de estable estéencendido. Esta
configuración funciona con la presión manual del botón o continua, e impresión automática a intervalos. (SET
ON, SET OFF)
Impresión automática [A.Print] - Los datos se enviarán continuamente cuando se haya seleccionado [Continu].
Intervalo [Inter] envía datos cada 1 a 3600 segundos. Cuando estáen estable [Stable], se enviarán datos
cuando la balanza detecte una nueva lectura estable. Esto puede ser sólo un valor de peso [LOad] o también
puede incluir un cero estable [L+zero]. [OFF] inhabilita la impresión automática.
Contenido [CONteNt] - El contenido en la transmisión de datos puede modificarse. Cada una de las siguientes
configuraciones puede activarse o desactivarse. Sólo número [numMber] sólo enviaráel resultado numérico.
Nombre de balanza [Bal. ID] agregaráel número de serie de la balanza con fines de rastreabilidad. Referencia
[refer] agregaráinformación de referencia correspondiente al modo actual. GLP [GLP] enviaráelementos
adicionales para permitir la documentación apropiada de resultados de laboratorio.
Formato de línea [LinE Fo] - Un formato de línea sencilla [single] colocarátodos los datos en una línea
separando cada salida con una coma (,). El formato multilínea [mMulti] colocarácada salida de datos en una
nueva línea. Multi +4 [mM-4LF] agregará4 espacios de línea entra cada salida.

Pioneer™ ES-6
4.7 Menúdel RS232 [.rs232.]
Baudios [BAUD] - La velocidad de baudios del RS232 puede establecerse en 600, 1200, 2400, 4800, 9600 y
19200.
Paridad [Parity] - La paridad puede enviarse a una paridad de 7 bits par [7 eveN], paridad de 7bits impar [7
odd], sin paridad de 7bits [7 No] o sin paridad de 8 bits [8 No].
Comunicación amiga [Handsh] - La comunicación amiga puede configurarse desactivada [Off], X activada –X
desactivada [on-off], o hardware [HardwWr].
4.8 Menúde bloqueo [.LOC.]
Cuando un elemento del menúde bloqueo estáconfigurado en el menúindicado no puede cambiarse. [Loc Cal]
- Calibración, [Loc SEt] - Configuración, [Loc.mMod] - Modo, [Loc.Unit] - Unidad, [Loc Prt] - Imprimir, [Loc
232] - RS232
4.9 Sellado del acceso a las configuraciones de la balanza
El interruptor de bloqueo del menúpreviene cambiosal menúdebloqueo. El interruptor puedeasegurarse con sellos
de papel, sellos de alambre o cintas de plástico.
Desbloqueado
Bloqueado con cinta de plástico
4.11 Modelos aprobados “M”
Las balanzas marcadas con una “M” han sido calibradas y selladas en la fábrica para usarse como balanzas
aprobadas por la EEC. Los menús Cal (calibración), Setup (configuración), Mode (modo) y Unit (unidad) están
bloqueados.
4.12 Aprobación local
Los modelos InCal pueden ser aprobados por las autoridades locales de pesos y medidas. La calibración debe
verificarsey las configuracionesdel menúdebenajustarsedebidamente antesde ser bloqueadas medianteel menú
de bloqueo. El botón del menúde bloqueo en la parte inferior de la balanza puede entonces sellarse en la posición
bloqueada. La etiqueta de capacidad provista se debe colocar por debajo de la pantalla.
^^^^^^^^^^^^^^^^^^^^^
Formato multilínea con 4 alimentaciones de línea
Alimentación de línea 2
Alimentación de línea 3
Alimentación de línea 4
User ID: ………………..........
Nombre de usuario: GLP (ON)
Bal ID: 123456789
Nombre de la balanza: ID de balanza (ON)
Proj ID: ………………………
Nombre de proyecto: GLP (ON)
Time: ……:…….:…….
Hora: GLP (ON)
Date: …../….. /…..
Fecha: GLP (ON)
120.01 g
Resultado
^^^^^^^^^^^^^^^^^^^^^

ES-7 Pioneer™
5.0 MANTENIMIENTO
5.1 Identificación y solución de problemas
Síntoma
Causa posible
Solución
No enciende
No hay energía hacia la balanza
Verifique las conexiones y el voltaje
Falta de precisión
Calibración incorrecta
Ambiente inestable
Calibre
Cambie la balanza a un lugar apropiado
No puede calibrarse
Ambiente inestable
Pesos de calibración incorrectos
Cambie la balanza a una ubicación apropiada
Use pesos de calibración correctos
No puede ingresar al
modo
Modo no habilitado
Ingrese al menúy habilite el modo
No puede ingresar en
la unidad de medida
Unidades no habilitadas
Ingrese al menúy habilite las unidades
Err 5
Peso promedio de piezas demasiado
pequeño
Agregar muestras adicionales
Err 7.0
Tiempo agotado
Err 8.1
El plato fue cargado durante el
encendido
Retire el peso que estásobre el plato y vuelva a poner
en cero.
Err 8.2
El plato fue retirado antes del
encendido
Instale el plato y vuelva a poner en cero
Err 8.3
El peso sobre el plato excede la
capacidad
Retire el peso que estásobre el plato
Err 8.4
El plato fue retirado durante el pesaje
Reinstale el plato
Err 9.5
Datos de calibración de fábrica
corrompidos
Comuníquese con el distribuidor autorizado
Err 9.8
Datos de calibración de fábrica
corrompidos
Calibre
Error 53
Error de suma de control EEPROM
Comuníquese con el distribuidor autorizado
REF Err
El peso de referencia es demasiado
pequeño
Agregar muestras adicionales
LOWrEF
El peso de referencia es demasiado
pequeño para el conteo de piezas
preciso o pesaje de porcentaje
Agregue muestras adicionales o continúe pesando
con resultados menos precisos
5.2 Información de servicio
Si la sección de identificación y solución de problemas no resuelve o describe su problema, comuníquese con su
agente autorizado de servicio de Ohaus. Visite nuestra página web www.ohaus.com para encontrar la oficina
Ohaus más cercana a usted.
5.3 Accesorios
Dispositivo de seguridad 76288-01
Dispositivo de seguridad - Kensington® 470004-010
Pantalla auxiliar PAD7
Paquete de determinación de densidades 80850045 (Sólo modelos de 0.1 mg y 1 mg)
Impresora –42 caracteres SF42
Ohaus Collect 80500746
Software de recopilación de datos SW12
Cable para SF42 80500571
Cable para IBM 9 patillas 80500525
This manual suits for next models
19
Table of contents
Languages:
Other OHAUS Scale manuals

OHAUS
OHAUS PS Series User manual

OHAUS
OHAUS SD35 User manual

OHAUS
OHAUS RC31P1502 User manual

OHAUS
OHAUS Scout pro Installation guide

OHAUS
OHAUS RS Series User manual

OHAUS
OHAUS Scout Pro Balance User manual

OHAUS
OHAUS PR Series User manual

OHAUS
OHAUS Valor 1000 User manual

OHAUS
OHAUS Valor 3000 User manual

OHAUS
OHAUS RC41M15-M User manual

OHAUS
OHAUS B10P User manual

OHAUS
OHAUS SP202 User manual

OHAUS
OHAUS CF1000R User manual

OHAUS
OHAUS CS Series User manual

OHAUS
OHAUS VF Series User manual

OHAUS
OHAUS SD75L User manual

OHAUS
OHAUS Scout pro User manual

OHAUS
OHAUS Compass CX Series User manual

OHAUS
OHAUS Ranger User manual

OHAUS
OHAUS Defender 2000 User manual