5
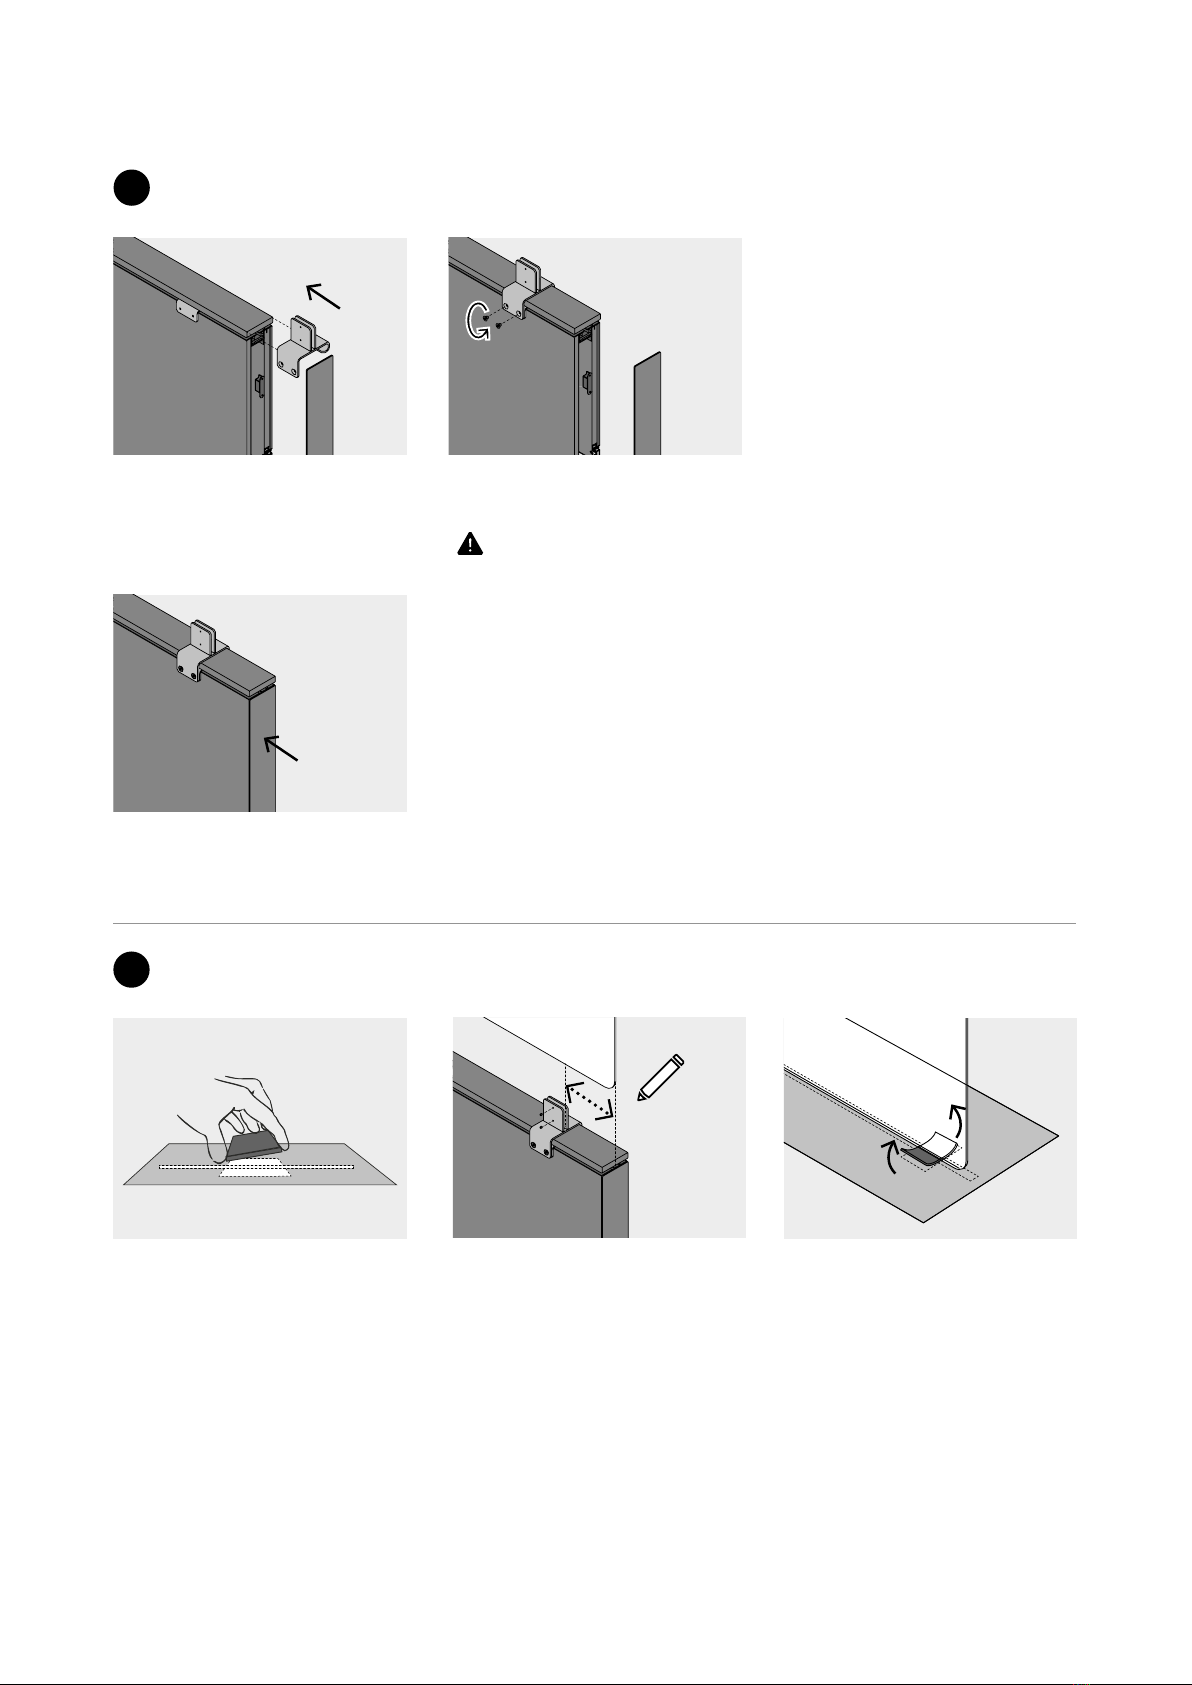
Die Folie vom Filz abziehen und
mit Klebeseite nach oben auf
der entsprechenden Schablone
positionieren. Remove the film
from the felt and place it on the
corresponding template with the
adhesive side facing up.
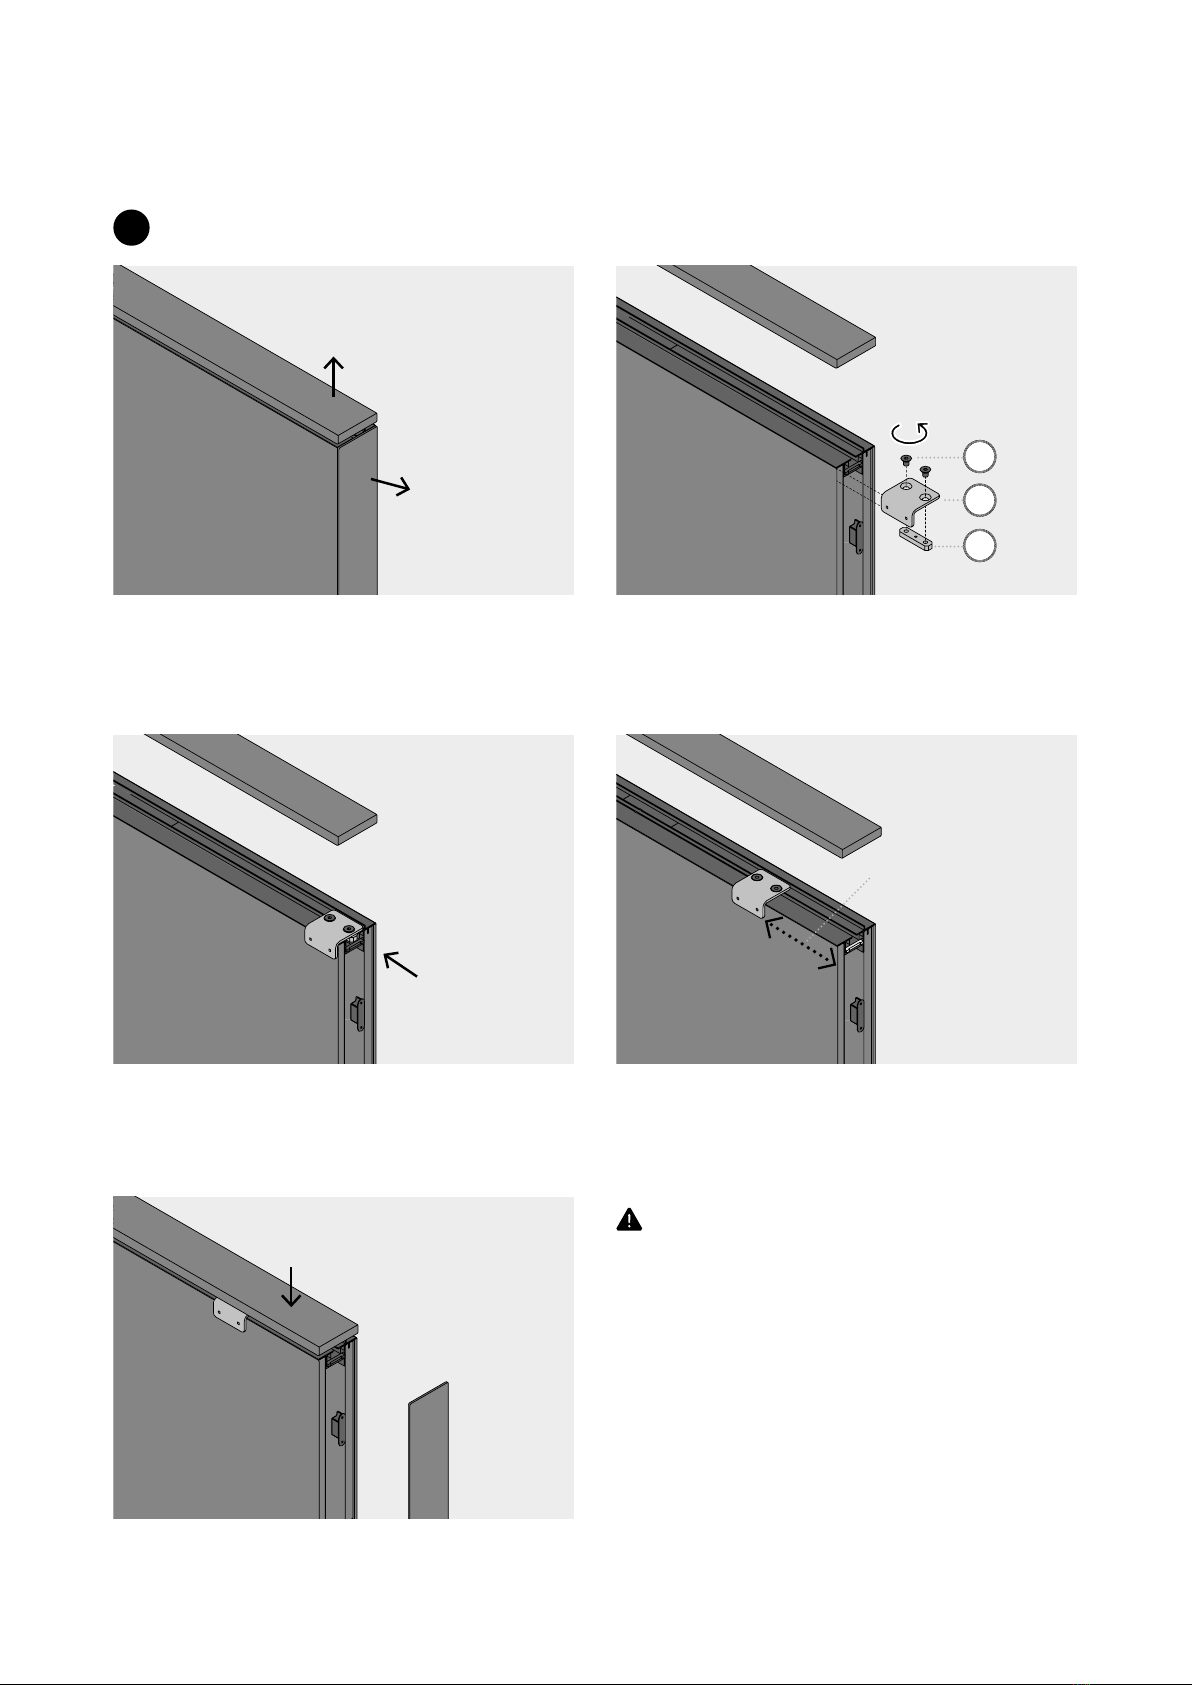
Die Glasklemme für die The-
ke auf die Abdeckung führen.
Guide the glass clamp for the
counter onto the cover.
Die Bohrungen der Glasklem-
men über den Gewindebohrun-
gen des Anbindungsbleches
positionieren und mit Senk-
schraube M6x8 verbinden.
Position the holes of the glass
clamps over the threaded holes of
the connecting plate and connect
with countersunk screw M6x8.
Seitenblende wieder anbringen.
Reattach side panel
Acrylglasscheibe mittig entlang
der Markierung positionieren
und auf das selbstklebende Filz
setzen. Position the acrylic glass
screen centrally along the mar-
king and place it on the self-adhe-
sive felt.
Screen annähernd bündig zur
Außenkante der Theke positio-
nieren. Abstand der Halterung
zur Außenkante bestimmen
und ggf. markieren. Position the
screen almost flush with the outer
edge of the counter. Determine
the distance between the bracket
and the outer edge and mark if
necessary.
C
Montage Filzstreifen Mounting felt strip
B
Montage Glasklemme Mounting glass clamp
Vorerst alle bereitstehenden Thekenhalter verbauen, ehe die Filz-
gleiter auf dem Screen angebracht werden. Ein nachträgliches
ablösen und neu aufkleben der Filzgleiter ist nicht möglich! Bei
Mehrfachanordnung von Screens, die Positionen der Screens
bzgl. der Eckverbinder und Thekenhalter vorab prüfen, indem sie
ohne Filzgleiter, aber mit Schutzfolie auf die Halter gesteckt wer-
den. First install all available counter holders before attaching the
felt gliders to the screen. It is not possible to remove and reattach
the felt gliders at a later date! In the case of multiple screen arrange-
ments, check the positions of the screens with regard to the corner
connectors and counter holders in advance by placing them on the
holders without felt gliders, but with protective film.