6
OKIOCAM T Plus Quick Start Guide
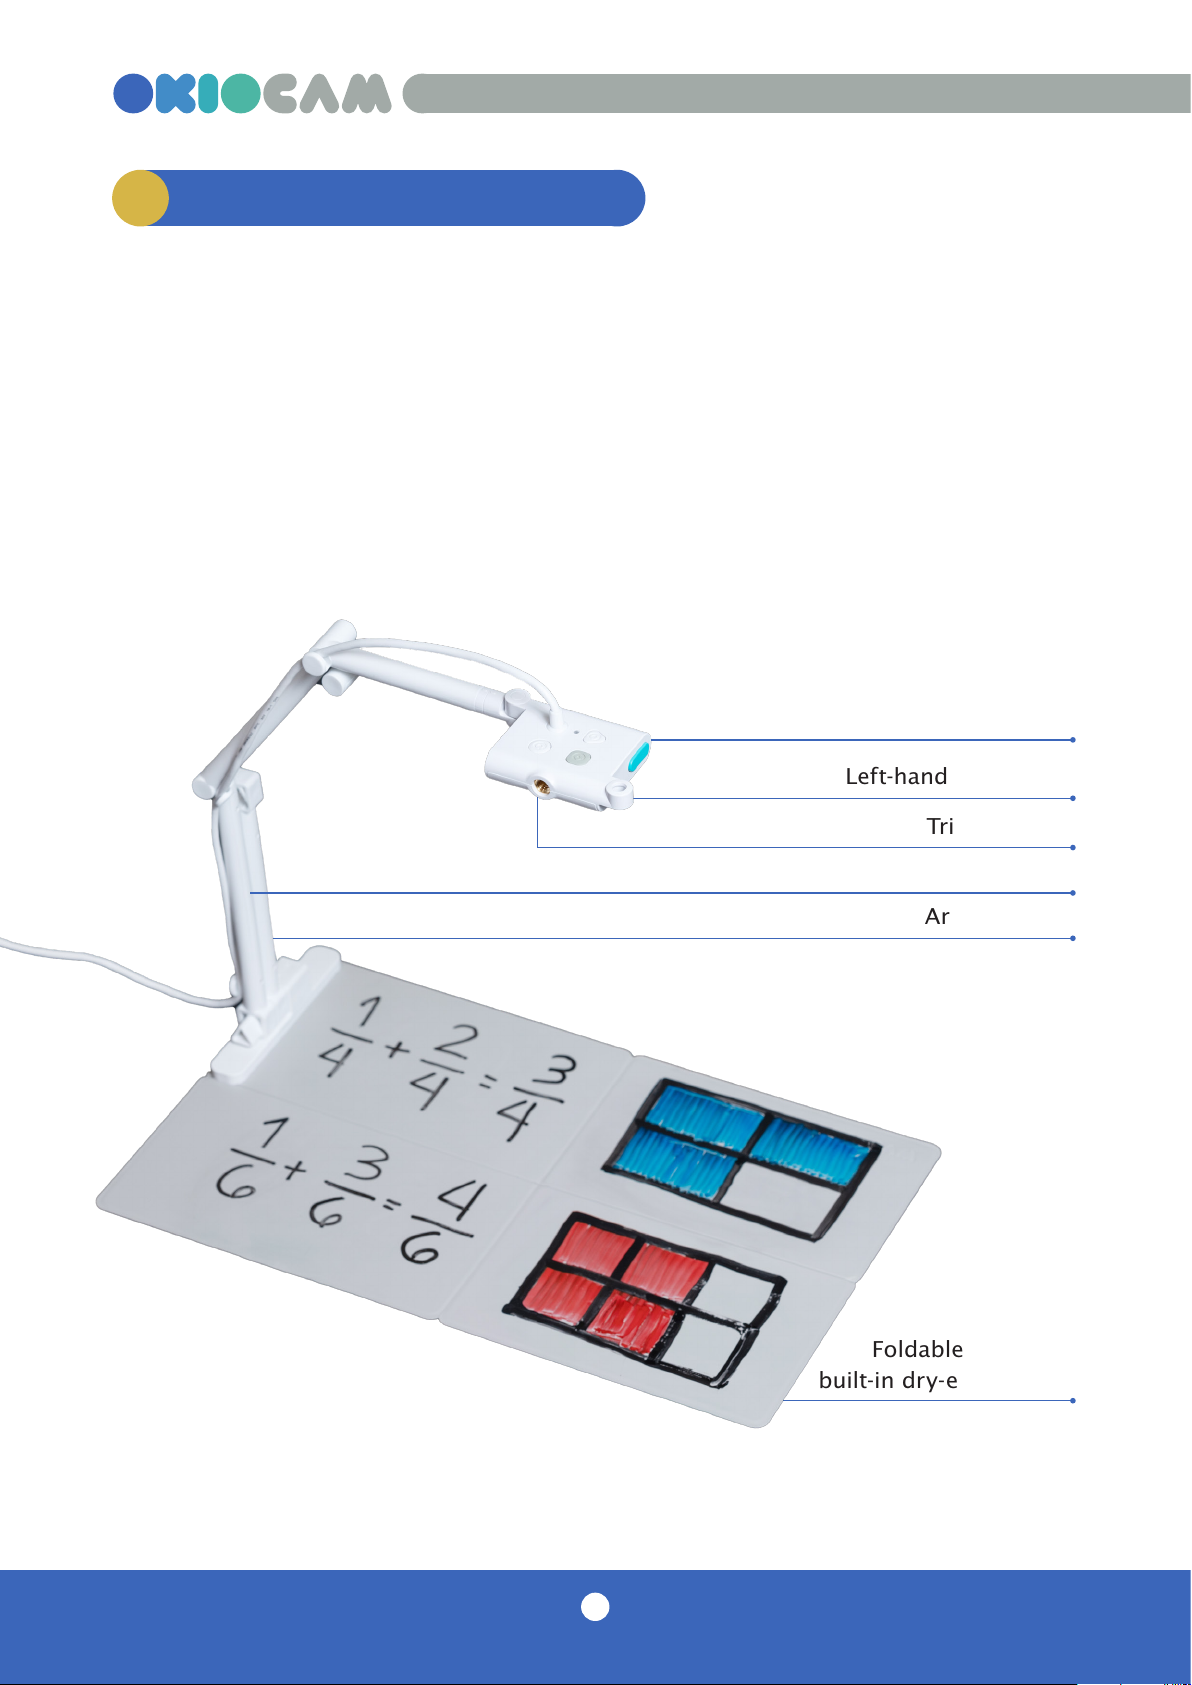
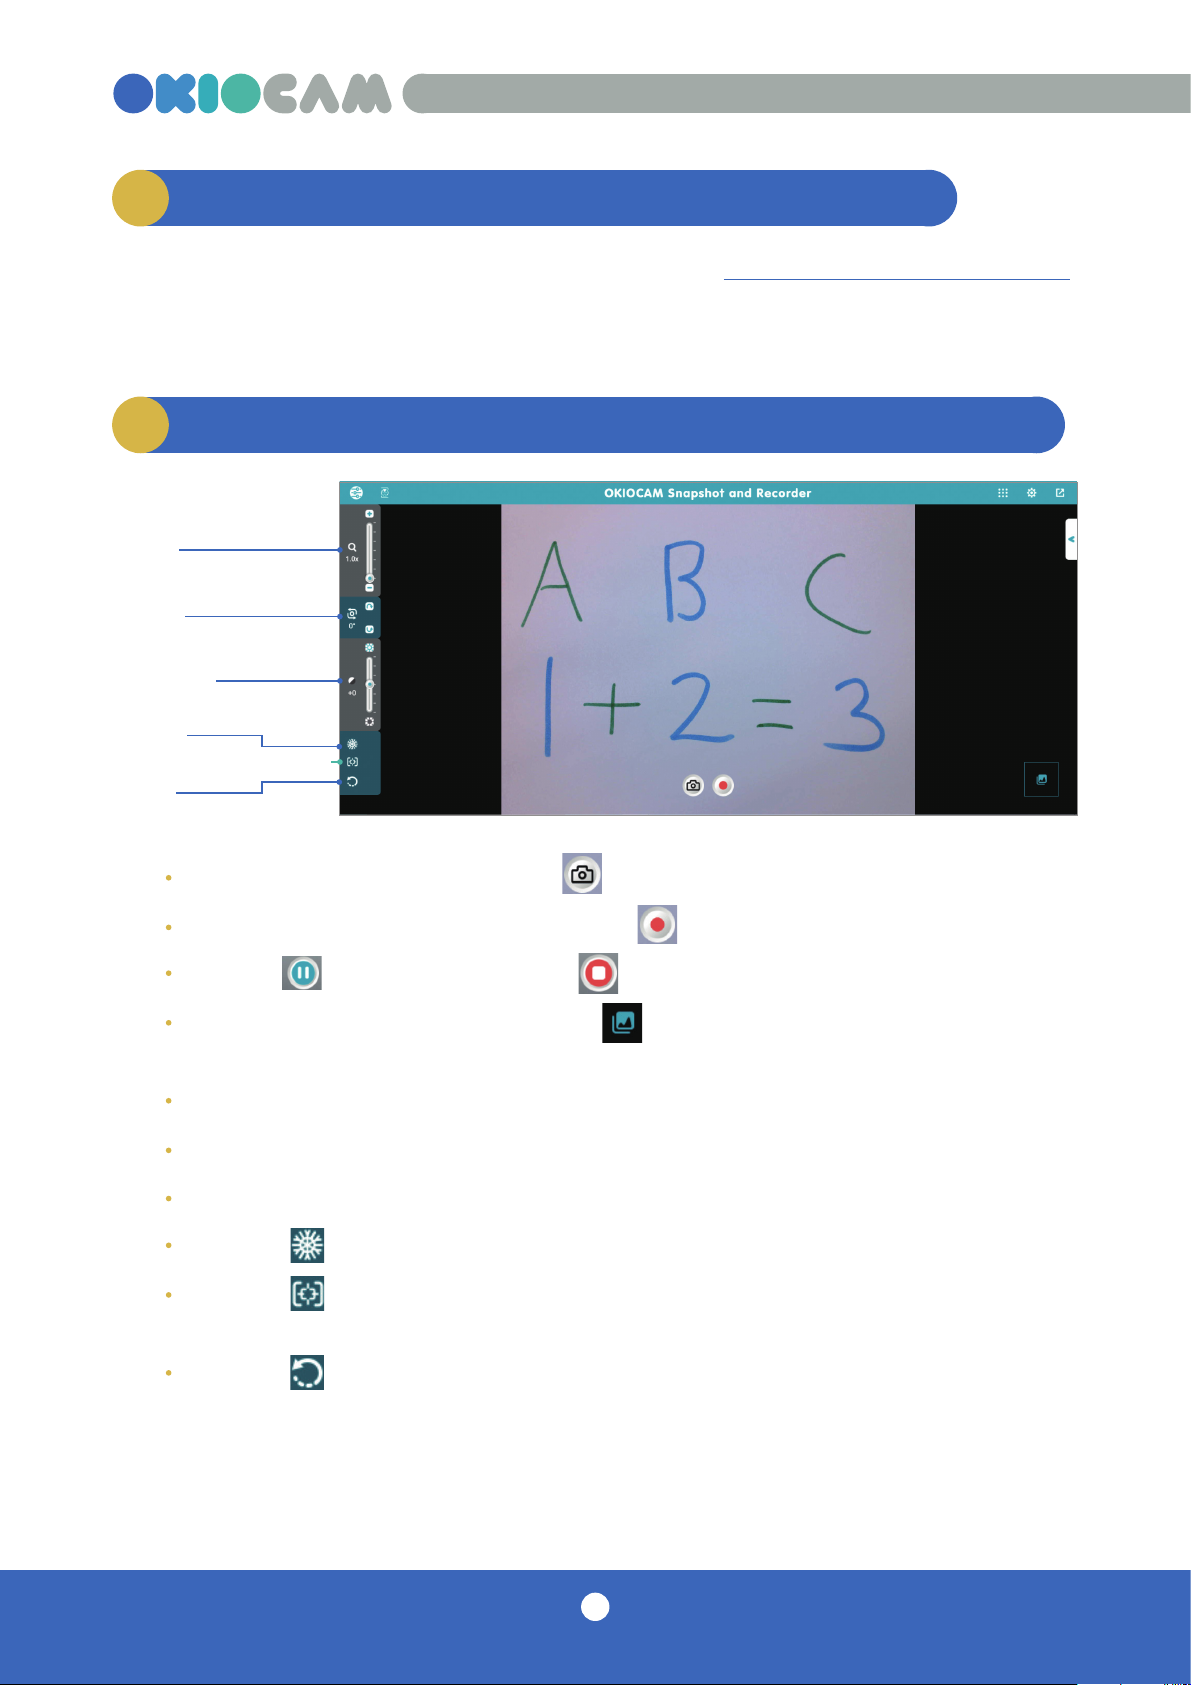
Button functionality is integrated in-
body. You do not need to install a
driver. The buttons work in all third-
party video conferencing and video
recording apps.
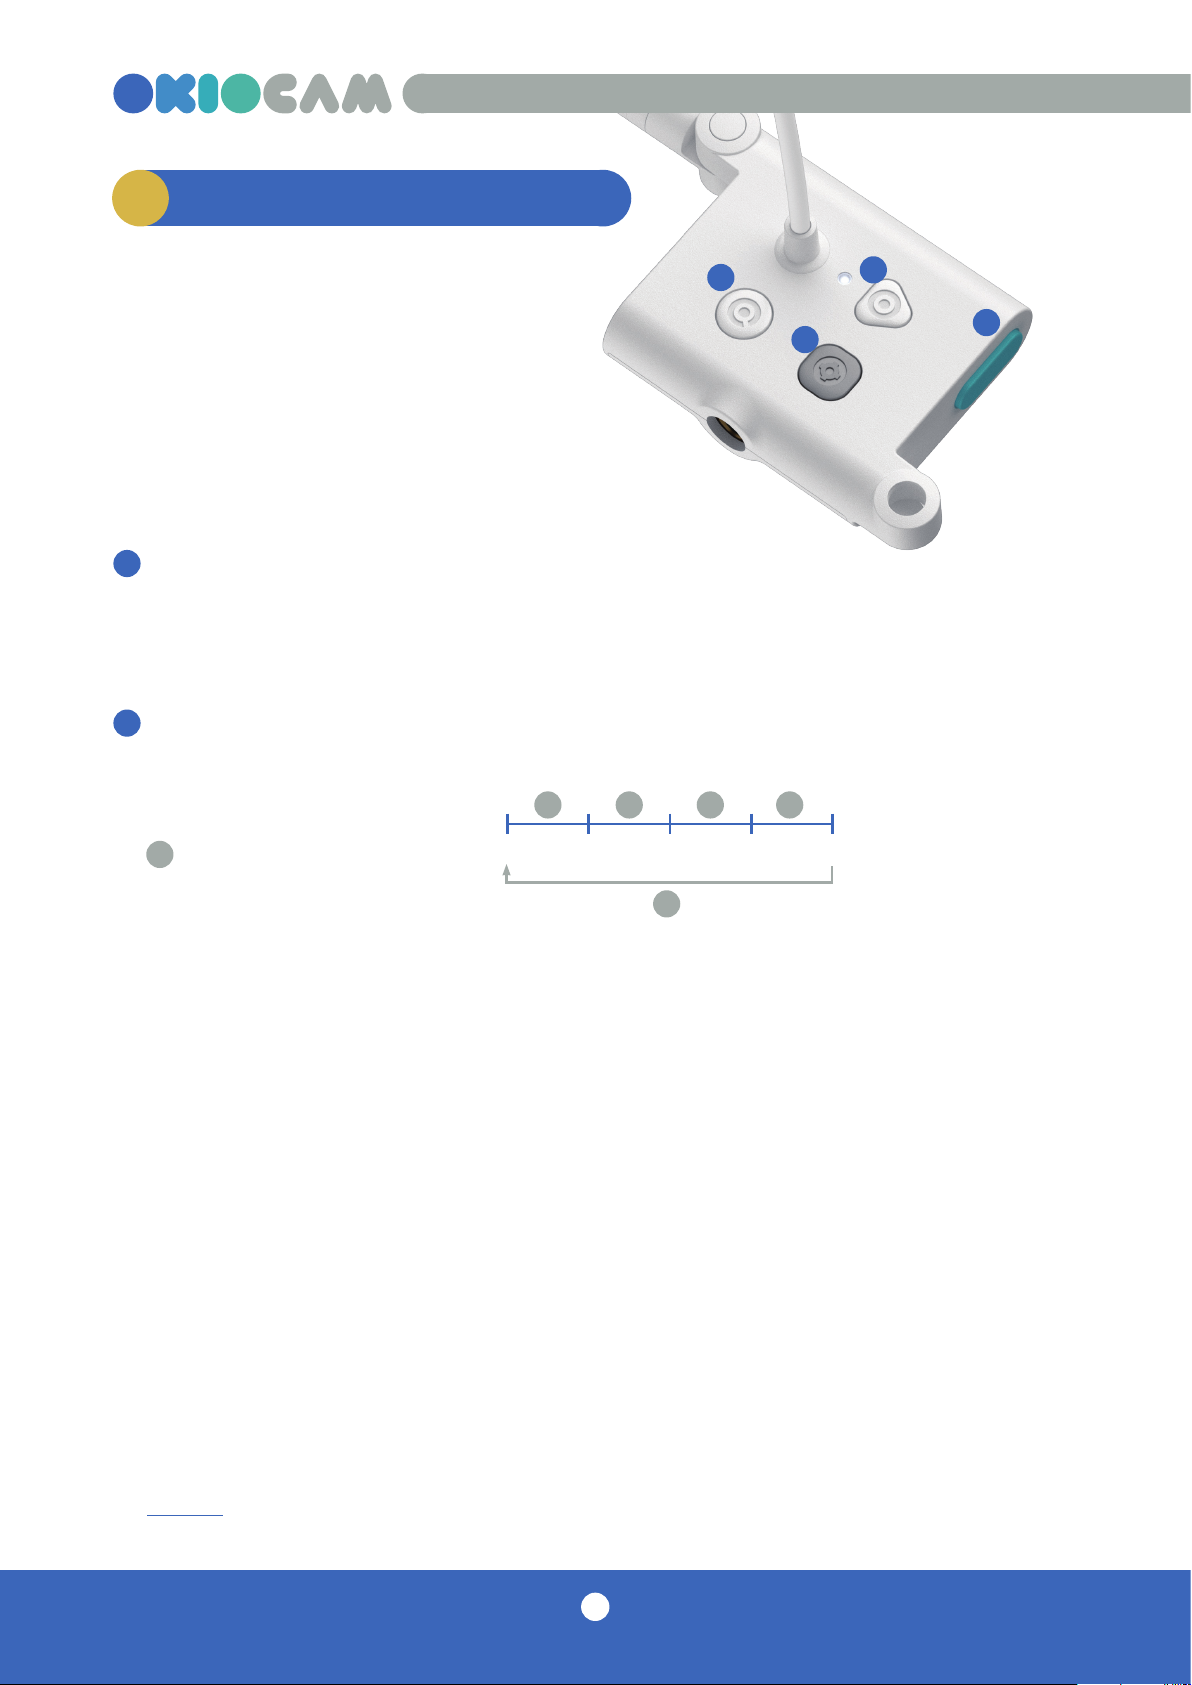
Auto adjust button
Adjusts the camera’s focus, exposure, and white balance automatically. Is the image
quality not quite clear enough? Press this to fix it in an instant!
1
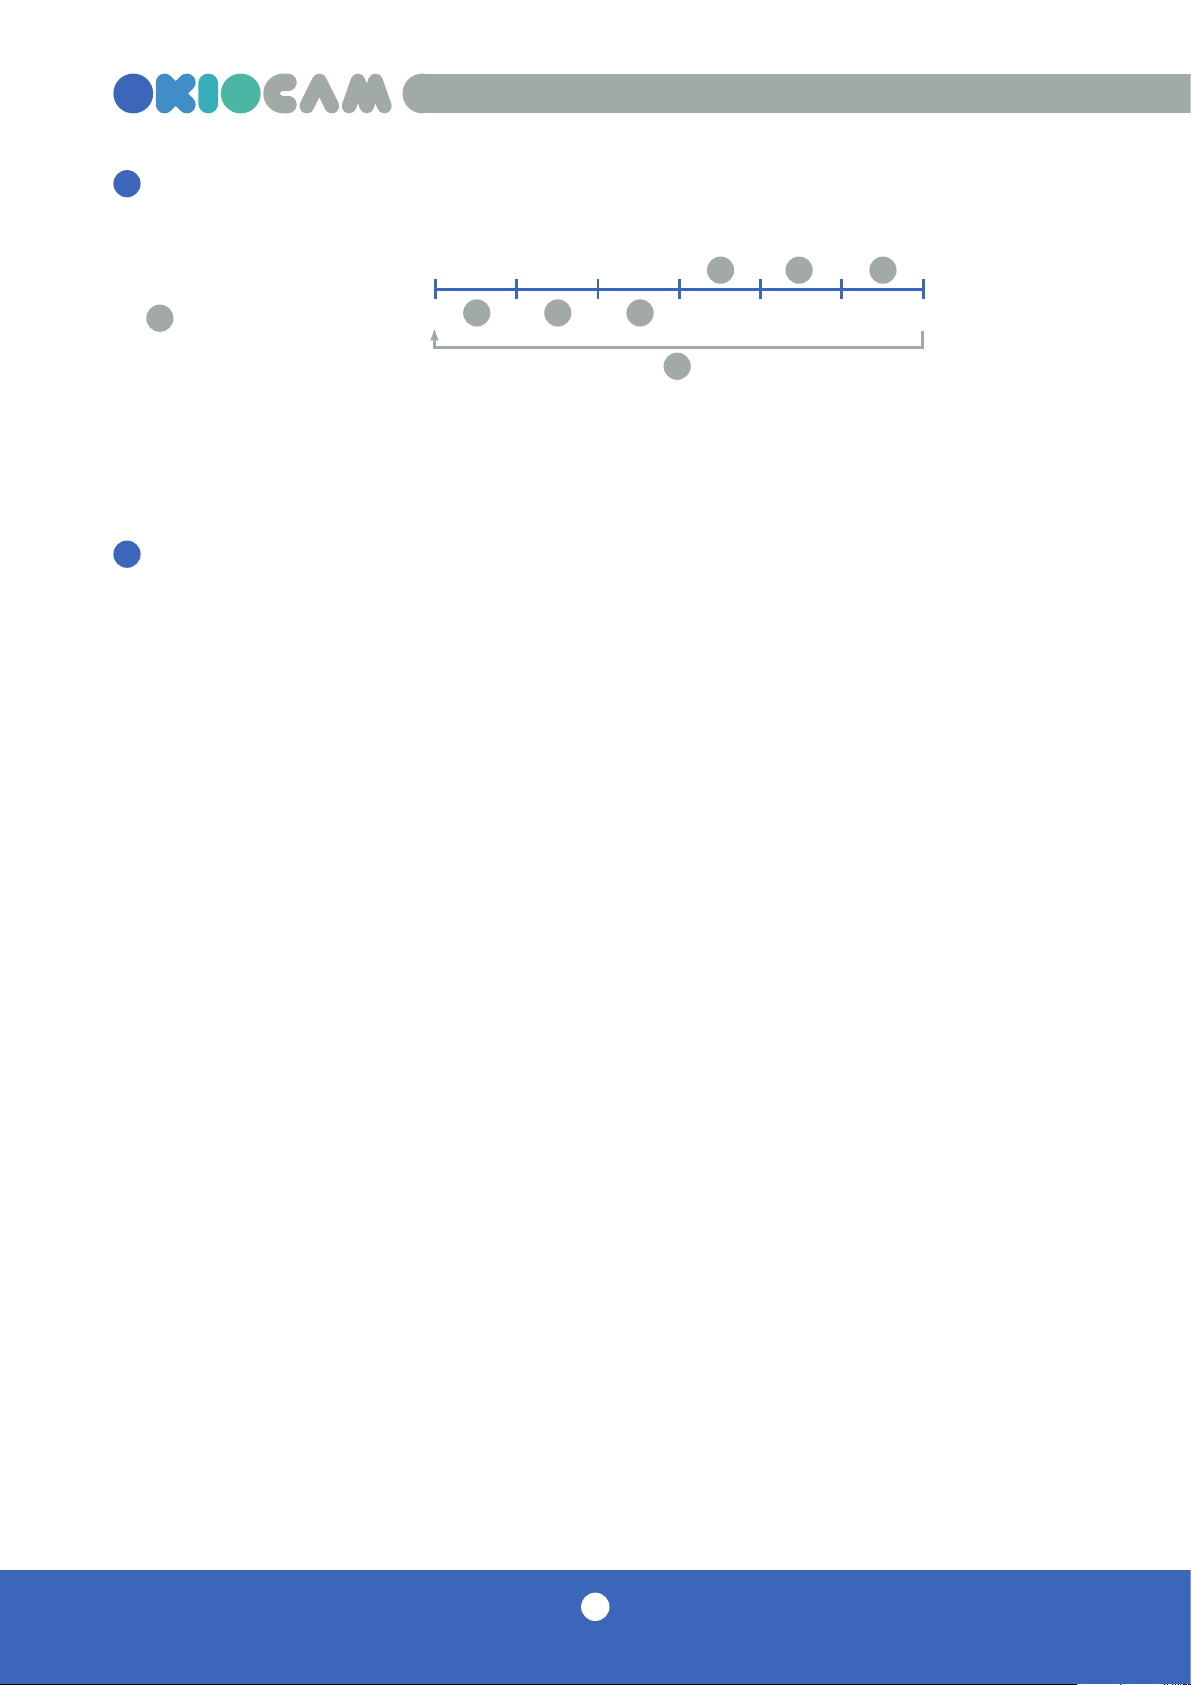
Zoom button
Cycles through 4 zoom levels.
About LSZ technology
OKIOCAM T Plus uses Lossless Sensor Zoom (LSZ) technology, which enables it to
zoom without stretching any pixels and degrading the image quality.
Lossless Sensor Zoom technology only supports resolutions up to 1920x1080.
When you press the zoom button on your OKIOCAM, it will crop its image from its
maximum resolution of 2592x1944, and resize it to fit the current resolution, with
no loss of quality.
The degree of zoom available will depend on the current resolution, with lower
resolutions offering higher degrees of zoom. For example, if you are using Google
Meet with your OKIOCAM’s resolution set to Standard definition (360p), the
maximum zoom level would magnify the image 3x (Lv4). If the resolution was set to
High definition (720p), the maximum magnification available would be 2x (Lv4).
For the full list of supported resolutions and their zoom levels, please refer to this
article.
2
1
23
4
No zoom Lv1 Lv2 Lv3 Lv4
1 2 34
5
number of presses
COKIOCAM T Plus buttons