manuals.online logo
Brands
  1. Home
  2. •
  3. Brands
  4. •
  5. olympia electronics
  6. •
  7. Smoke Alarm
  8. •
  9. olympia electronics BS- 655/A User manual

olympia electronics BS- 655/A User manual

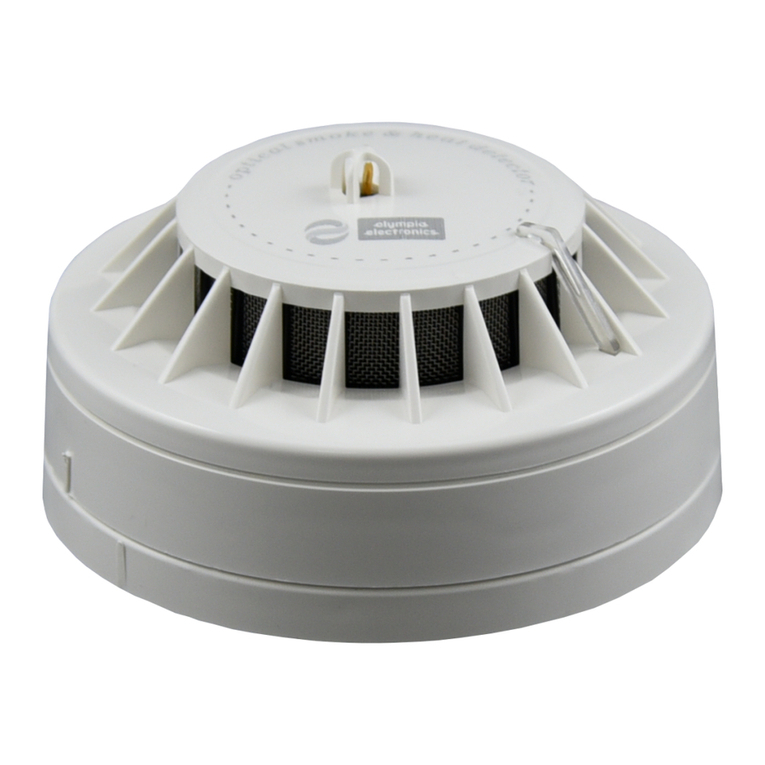
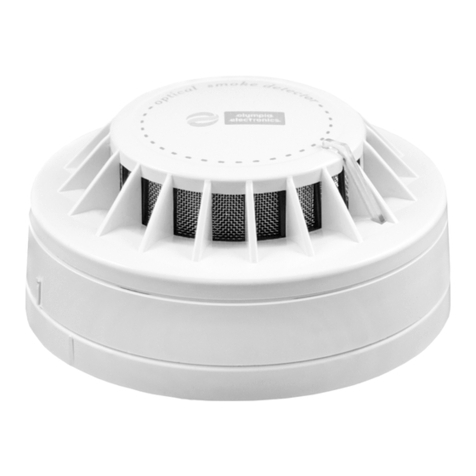
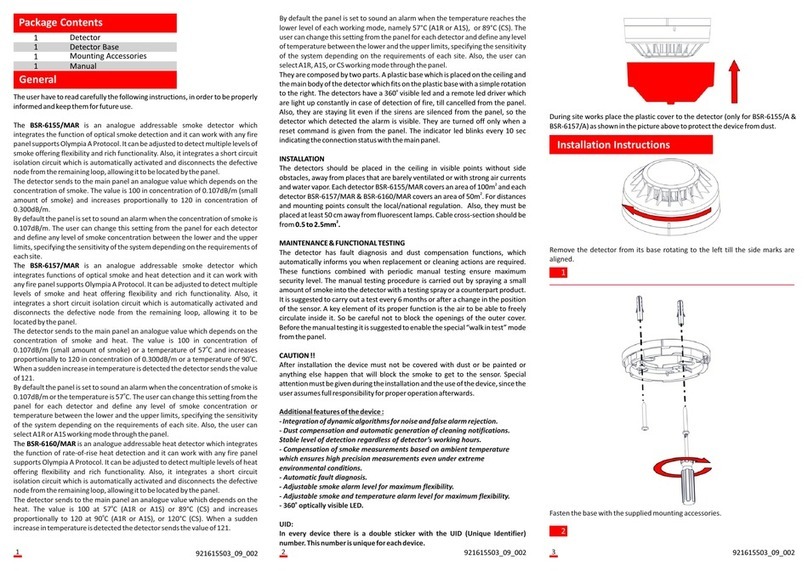
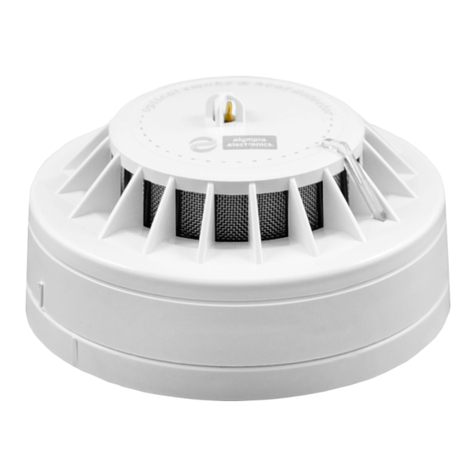
They are composed by two parts. A plastic base which is placed on the ceiling and the main
body of the detector which fits on the plastic base with a simple rotation to the right. The
o
detectors have a 360 visible led and a remote led driver which are light up constantly in case
of detection of fire, till cancelled from the panel. They are turned off only when a reset
command is given from the panel. The indicator led blinks every 6 sec indicating the normal
function.
The detector has fault diagnosis and dust compensation functions, which automatically
informs you through the onboard LED when replacement or cleaning actions are required.
The indication LED blinks every 7 seconds. In normal operation it blinks 1 time, if cleaning
action is required it blinks 2 times and if there is a failure it blinks 3 times. After cleaning
procedure it will take about 10 minutes for detector’s working indication to return to normal.
GENERAL
The user have to read carefully the following instructions, in order to be properly informed and
keep them for future use.
The BS-655/A is a conventional smoke detector which integrates function of optical smoke
detection. The detector transitions to alarm state when the concentration of smoke reaches
0.107dB/m.
INSTALLATION
The detectors should be placed in the ceiling in visible points without side obstacles, away
from places that are barely ventilated or with strong air currents and water vapor. Each
2
detector covers an area of 50 m while the distance between two detectors should not be
more than 15m. Also, they must be placed at least 50 cm away from fluorescent lamps. Cable
diameter should be from . to .0 5 2 5mm.
MAINTENANCE & FUNCTIONAL TESTING
90μΑ
17-30V DC
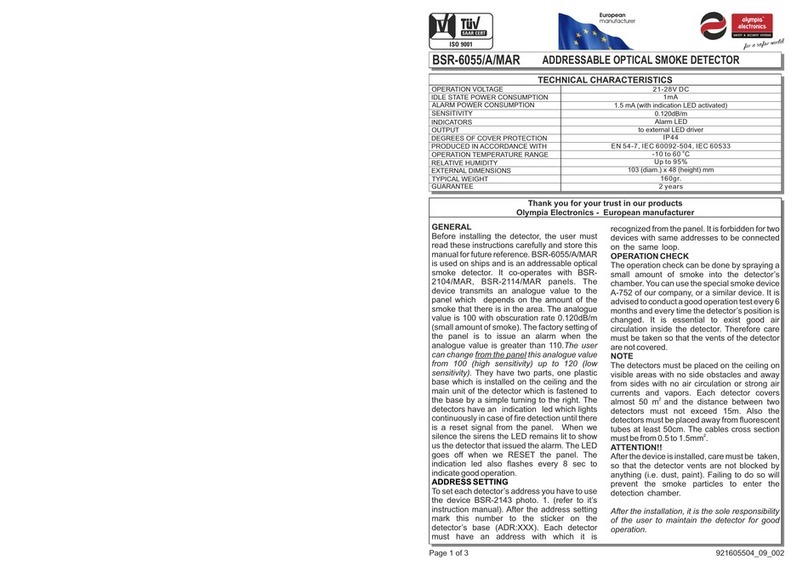
IP42
EN 54-7
12mA (with activated onboard LED)
0.107 dB/m
ABS/PC
158 gr.
103 (d) x 48 (h) mm
1mΑ for 2 sec
DEGREES OF COVER PROTECTION
PRODUCED IN ACCORDANCE WITH
OPERATING TEMPERATURE RANGE
RELATIVE HUMIDITY
CONSTRUCTION MATERIALS
EXTERNAL DIMENSIONS
TYPICAL WEIGHT
GUARANTEE
START UP POWER CONSUMPTION
OPERATION VOLTAGE
Thank you for your trust in our products
Olympia Electronics - European manufacturer
INDICATORS
OUTPUT
SMOKE CONCENTRATION SENSITIVITY
STANDBY CONSUMPTION
ALARM CONSUMPTION
TECHNICAL CHARACTERISTICS
Up to 95%
ο
-40 to 70 C
To panel / to external LED driver (BS-572)
Alarm LED
2 years
Page 1 from 4
BS- 655/A
Optical smoke detector
921655004_09_005
Warranty
Warranty
P.C. 60300 P.O. Box 06 Εginio Pierias Greece
www.olympia-electronics.gr
[email protected]
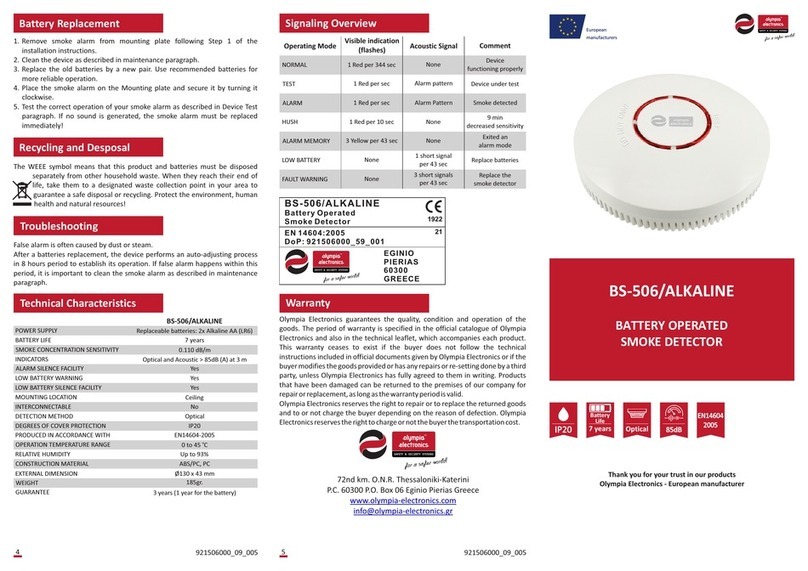
Olympia Electronics guarantees the quality, condition and operation of the goods. The period
of warranty is specified in the official catalogue of Olympia Electronics and also in the
technical leaflet, which accompanies each product. This warranty ceases to exist if the buyer
does not follow the technical instructions included in official documents given by Olympia
Electronics or if the buyer modifies the goods provided or has any repairs or re-setting done
by a third party, unless Olympia Electronics has fully agreed to them in writing. Products that
have been damaged can be returned to the premises of our company for repair or
replacement, as long as the warranty period is valid.
Olympia Electronics reserves the right to repair or to replace the returned goods and to or not
charge the buyer depending on the reason of defection. Olympia Electronics reserves the
right to charge or not the buyer the transportation cost.
HEAD OFFICE
72nd km. O.N.R. Thessaloniki-Katerini
Page 4 from 4 921655004_09_005
1293
21
EN 54-7:2018
DoP: 921655004_59_001
EGINIO
PIERIAS
60300
GREECE
BS-655/A
Optical smoke detector
21
1293
- 360
ooptically visible LED.
In every device there is a double sticker with the UID (Unique Identifier) number. This
number is unique for each device.
UID:
These functions combined with periodic manual testing ensure maximum security level. The
manual testing procedure is carried out by spraying a small amount of smoke into the detector
with an A-752 spray or a counterpart product. It is suggested to carry out a test every 6 months
or after a change in the position of the sensor. A key element of its proper function is the air to
be able to freely circulate inside it. So be careful not to block the openings of the outer cover.
Before the manual testing it is suggested to enable the special “walk in test” mode from the
panel.
CAUTION !!
After installation the device must not be covered with dust or be painted or anything else
happen that will block the smoke to get to the sensor. Special attention must be given during
the installation and the use of the device, since the user assumes full responsibility for proper
operation afterwards.
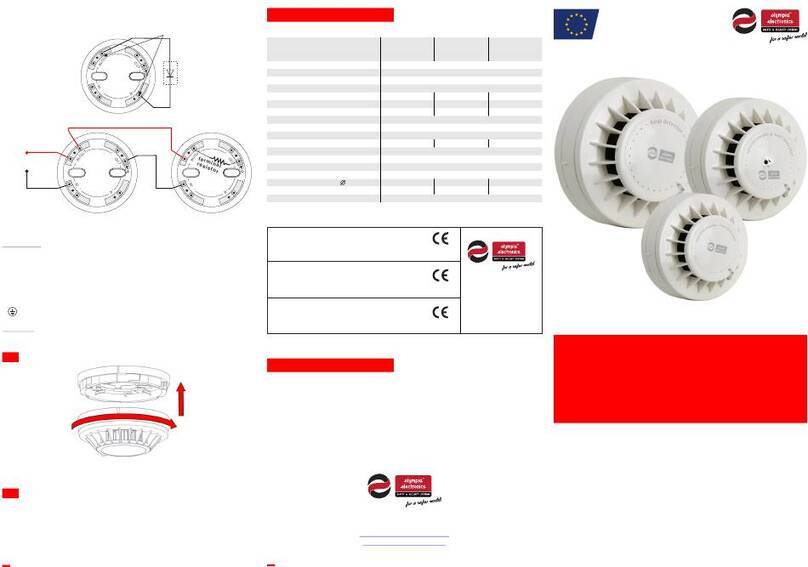
Also, during site works place the plastic cover to the detector as shown in the picture below to
protect the device from dust.
- Automatic fault diagnosis.
- Dust compensation and automatic indication when cleaning is required. Stable
level of detection regardless of detector’s working hours.
- Integration of dynamic algorithms for noise and false alarm rejection.
Additional features of the device :
- Compensation of smoke measurements based on ambient temperature which
ensures high precision measurements even under extreme environmental
conditions.
Page 2 from 4 921655004_09_005
5. : Connected to the cable’s shield (when shield is used).
2. - IN : It is connected to the zone of the panel or to the (- OUT) contact of the
previous detector.
4. - R : It is connected with BS-572.
1. + IN/OUT : It is connected to the zone of the panel or to the (+ IN/OUT)
contact of the previous detector.
CONNECTION
3. - OUT : It is connected to the next detector (- IN) or if it is the last one to the terminal
resistor.
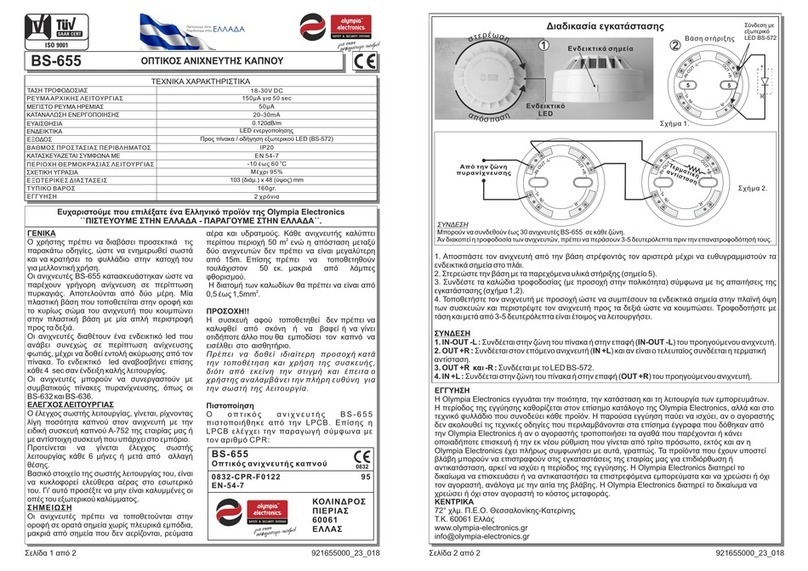
1. Remove the detector from its base rotating to the left till the side marks are aligned.
2. Fasten the base with the supplied mounting materials (point 5).
3. Connect the power cables (minding the correct polarity) according to the requirements of
the installation (Figure 1, 2).
4. Place the detector carefully so that the side marks are on the same position and rotate the
detector clockwise until it locks. Power the device and after 3-5 seconds it is ready for
operation.
Installation process
-R
U
T
/O
N
I
+
N
- I
T
U
- O
-R
U
T
/O
N
I
+
N
- I
T
U
- O
Connection
If the power of the detectors is turned off, wait for 3-5 seconds before you turn the power on
again.
Terminat ing
resistor
Figure 2
Fr om zone
of t he panel
Mounting base
Figure 1
2
Connection
with exterrnal
LED
Page 3 from 4
e
n
i
t
n
s
g
a
f
d
t
e
n
t
a
e
c
m
h
1
Indicating
LED
Side marks
55
R
+
-R
U
T
/O
N
I
+
N
- I
T
U
- O
921655004_09_005

Other olympia electronics Smoke Alarm manuals

olympia electronics BS- 657/A User manual

olympia electronics

olympia electronics BS- 657/A User manual

olympia electronics BSR-6057/A/MAR User manual

olympia electronics

olympia electronics BSR-6057/A/MAR User manual

olympia electronics BSR-6055/A Operator's manual

olympia electronics

olympia electronics BSR-6055/A Operator's manual

olympia electronics BS-506/LITHIUM User manual

olympia electronics

olympia electronics BS-506/LITHIUM User manual

olympia electronics BS-655 User manual

olympia electronics

olympia electronics BS-655 User manual

olympia electronics BSR-6157 User manual

olympia electronics

olympia electronics BSR-6157 User manual

olympia electronics BS-655/A User manual

olympia electronics

olympia electronics BS-655/A User manual

olympia electronics BSR-6155/MAR User manual

olympia electronics

olympia electronics BSR-6155/MAR User manual

olympia electronics BSR-6155 User manual

olympia electronics

olympia electronics BSR-6155 User manual

olympia electronics BS-655 User manual

olympia electronics

olympia electronics BS-655 User manual

olympia electronics BS-506/ALKALINE User manual

olympia electronics

olympia electronics BS-506/ALKALINE User manual

olympia electronics BSR-6055 User manual

olympia electronics

olympia electronics BSR-6055 User manual

olympia electronics BSR-6055/A/MAR User manual

olympia electronics

olympia electronics BSR-6055/A/MAR User manual

olympia electronics BS-657 User manual

olympia electronics

olympia electronics BS-657 User manual

olympia electronics BS-116 User manual

olympia electronics

olympia electronics BS-116 User manual

Popular Smoke Alarm manuals by other brands

BTR 60.300 Assembly, Installation and Commissioning Instructions

BTR

BTR 60.300 Assembly, Installation and Commissioning Instructions

ELRO FS1801 instruction manual

ELRO

ELRO FS1801 instruction manual

Smanos SMK-500 user manual

Smanos

Smanos SMK-500 user manual

Mircom MIX-2251AP Installation and maintenance instructions

Mircom

Mircom MIX-2251AP Installation and maintenance instructions

Quell Q9080 manual

Quell

Quell Q9080 manual

detectomat RCP 3500 quick start

detectomat

detectomat RCP 3500 quick start

First Alert 0827 user manual

First Alert

First Alert 0827 user manual

Honeywell FMST FXV(E) Series installation manual

Honeywell

Honeywell FMST FXV(E) Series installation manual

Edwards Signaling & Security Systems 517TB Series installation instructions

Edwards Signaling & Security Systems

Edwards Signaling & Security Systems 517TB Series installation instructions

Alecto SA-19/1 manual

Alecto

Alecto SA-19/1 manual

Tyco MR601TEx Product information

Tyco

Tyco MR601TEx Product information

Air Products & Controls SL-DA4R Series Installation and maintenance instructions

Air Products & Controls

Air Products & Controls SL-DA4R Series Installation and maintenance instructions

System Sensor BEAM1224A Installation and maintenance instructions

System Sensor

System Sensor BEAM1224A Installation and maintenance instructions

AV-GAD Freeko II installation instructions

AV-GAD

AV-GAD Freeko II installation instructions

secudo B 10 manual

secudo

secudo B 10 manual

Egardia SMOKE-9 installation guide

Egardia

Egardia SMOKE-9 installation guide

DSC Maxsys PC4612 installation instructions

DSC

DSC Maxsys PC4612 installation instructions

Visonic MCT-423 installation instructions

Visonic

Visonic MCT-423 installation instructions

manuals.online logo
manuals.online logoBrands
  • About & Mission
  • Contact us
  • Privacy Policy
  • Terms and Conditions

Copyright 2025 Manuals.Online. All Rights Reserved.