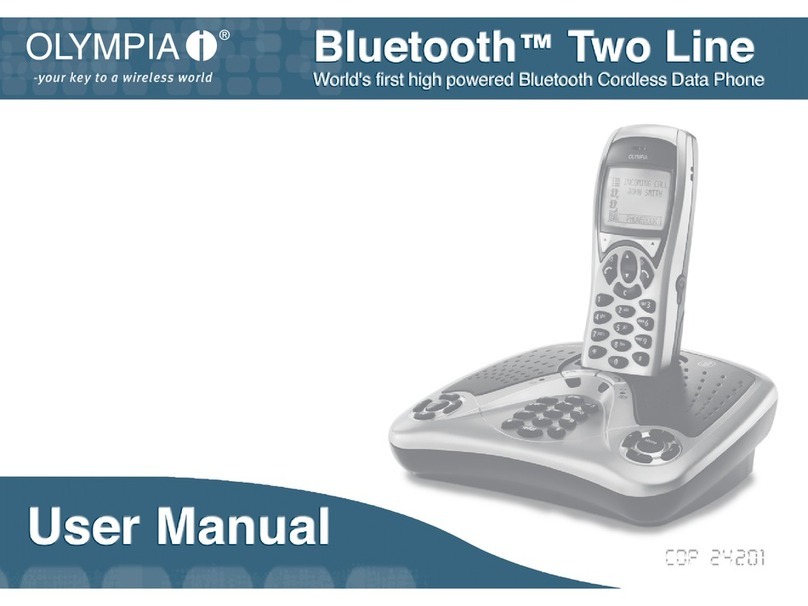
Olympia CDP 24201 User manual

USER
GUIDE

WelcomeYour purchase
Thank you for purchasing the Olympia Cordless Data Phone (CDP). As you will havealready realised, this
system is much more than just a cordless digital phone; it is a complete Bluetooth™ data network that
incorporates a telecommunications system consisting of a base station that can accommodate up to 7
handsets (one of which can be a Bluetooth™ headset).
OThis phone system's facilities are available and can be used when connected
to a single line.
Important safety instructions
ITHIS EQUIPMENT IS NOT DESIGNED FOR MAKING EMERGENCY TELEPHONE CALLS
WHEN THE MAINS POWER FAILS. ALTERNATIVE ARRANGEMENTS SHOULD BE
MADE FOR ACCESS TO EMERGENCY SERVICES.
Intended connection warning
This product is intended for connection to analogue public switched telephone networks and private
switchboards in the United Kingdom, the European Union and the United States of America.
Safety information
Only use the power supply included with the CDP. Using an unauthorised power supply will invalidate
your guarantee and may damage the telephone.
For the handset, use only approved Nickel Metal Hydride (NiMH) re-chargeable batteries. Never use
other batteries or conventional alkaline batteries. They could lead to a short circuit or destroy the battery
casing. Recommended batteries should havea power rating of at least 700mAh 1.2V.
Do not open the base station or handset (other than to change the batteries). This could expose you to
high voltages or other risks.
Radio signals transmitted between the handset & base may cause interference to hearing aids.
This product should not be used near emergency / intensive care medical equipment and should not be
used by people with pacemakers.
Never dispose of batteries in a fire. There is a serious risk of explosion and / or the release of highly toxic
chemicals.
Cleaning
Simply clean the handset and base with a damp (not wet) cloth, or an anti-static wipe. Never use
household polish, as this will damage the product. Never use a dry cloth as this may cause a static
shock.
Target performance specification
•Talk Time up to 7 Hours
•Standby time up to 7 Days
•Range Indoors up to 50 metres (depending on construction)
•Range outdoors up to 300 metres
USER
Page 2 www.olympia-life.com GUIDE
Welcome

FCC Information
FCC Part 68
This equipment complies with Part 68 of the FCC rules and the requirements adopted by the ACTA. On the exterior of
the cabinet of this equipment is a label that contains, among other information, a product identifier in the format
US:QSPTM00BCDP24 If requested, this number must be provided to the telephone company.
•ACTA Registration Number: US:QSPTM00BCDP24
•Ringer Equivalence Number (REN): 0
•RPC Code: QSP
•Service Order Code (SOC Code): 9.0F
•USOC Jack Type: RJ11
A FCC compliant telephone cord and modular plug is provided with this equipment. This equipment is designed to be
connected to the telephone network or premises wiring using a compatible modular jackthat is Part 68 compliant.
See Installation Instructions for details.
The REN is used to determine the quantity of devices that may be connected to the telephone line. Excessive RENs on
the telephone line may result in the devices not ringing in response to an incoming call. Typically, the sum of RENs
should not exceed five (5.0). To be certain of the number of devices that may be connected to a line (as determined
by the total RENs) contact the local telephone company.
If this equipment Olympia CDP 2.4 causes harm to the telephone network, the telephone company will notify you in
advance that temporary discontinuance of service may be required. But if advance notice isn't practical, the telephone
company will notify the customer as soon as possible. Also, you will be advised of your right to file a complaint with
the FCC if you believe it is necessary.
The telephone company may make changes to its facilities, equipment, operations or procedures that could affect the
operation of the equipment. If this happens the telephone company will provide advance notice so you can make the
necessary modifications to maintain uninterrupted service.
If trouble is experienced with this equipment Olympia CDP 2.4, for repair or warranty information, please contact Wave
Industries, 333 S.E. 2nd Avenue, Portland Oregon 97214 USA. If the equipment is causing harm to the telephone
network, the telephone company may request that you disconnect the equipment until the problem is resolved.
Connection to party line service is subject to state tariffs. (Contact the state public utility commission, public service
commission or corporation commission for information.)
FCC Part 15
This equipment complies with Part 15 of the Federal Communications Commission (FCC) rules for the
United States of America. Operation is subject to the following two conditions:
1. This device may not cause interference.
2. This device must accept any interference, including interference that may cause undesired operation
of the device.
IChanges or modifications to this unit not expressly approved by the party
responsible for compliance could void the users authority to operate this equipment.
This equipment has been tested and found to comply with part 15 of the FCC rules. These limits are designed to
provide reasonable protection against harmful interference in a residential installation. This equipment generates,
uses and can radiate radio frequency energy and, if not installed and used in accordance with the instructions, may
cause harmful interference to radio communications. However, there is no guarantee that interference will not occur in
a particular installation. If this equipment does cause harmful interference to radio or television reception, which can
be determined by turning the phone off and on, the user is encouraged to try and correct the interference by one or
more of the following measures:
1. Reorient or relocate the receiving antenna.
2. Increase the separation between the equipment & receiver.
3. Connect the equipment into an outlet or on a circuit different to that from which the receiver is
connected.
Consult the dealer or an experienced radio / TV technician for help.
USER
GUIDE www.olympia-life.com Page 3
ContentsWELCOME
Your purchase ························2
Important safety instructions ···············2
Intended connection warning ·············2
Safety information ··················2
Cleaning ·······················2
Target performance specification ·············2
FCC Information ·······················3
FCC Part 68 ·····················3
FCC Part 15 ·····················3
CONTENTS
START UP
Package contents·······················7
Charging the battery ·····················7
Positioning the system ····················8
Environmental ······················8
Siting ···························8
Connecting the system ····················8
Using the base station for calls ················9
Making Calls ·······················9
Receiving calls ······················9
Using the handset for calls ··················9
Making Calls ·······················9
Receiving calls ······················9
Missed calls ························9
OVERVIEW
Your system's facilities····················10
SYSTEM CONTROLS & INDICATORS
The phone ·························11
Phone display ······················11
Status icons ·····················12
Function icons····················12
Information area ··················12
The phone buttons ···················13
Keypad ·······················13
Line selection buttons ················13
Menu scroll button ·················13
Option buttons ···················13
Base station·························13
The base station buttons·················13
Keypad ·······················13
Line selection buttons ················14
Control buttons ···················14
Speed dial buttons ·················14
Message indicators ·················14
MAKING CALLS
Base station call methods ··················15
Keypad ·························15
Last number redial ···················15
Speed dial························15
Handset call methods ····················15
Keypad - line select first ·················15
Keypad - number first ··················16
Redial list ························16
Call log ·························16
Phonebook ·······················17
Dialling options menu····················17
USER
Page 4 www.olympia-life.com GUIDE
Contents

In-call menu ························18
Mute on/off ·······················18
Speaker on/off ·····················18
In-call volume ······················18
Recall ··························18
Boost mode ·······················19
Pulse/Tone ·······················19
Keypad lock·························19
Using a headset·······················20
Using two phone lines ···················20
Making a second call from the handset ·········20
Making a second call from the base ···········20
Making a second call from a different handset ······20
SETTINGS
Handset set-up ·······················21
Accessing the handset settings menu ··········21
Handset audio settings ·················21
Handset ring type ··················21
Handset ringer volume ···············22
Handset auto answer ················22
Tone (key click, out of range & battery warning) ···23
Handset name······················23
Registration menu ····················24
Language ························24
Backlight ························25
Reset ··························25
Base station set-up ·····················26
Accessing the base station settings menu ········26
Base station audio settings················26
Base station ring type ················26
Base station ringer volume ·············27
Base station auto answer ··············27
Key click·······················28
Base station name ····················28
Speed dial numbers ···················29
Storing ·······················29
Deleting·······················29
Set passkey ·······················29
Network ·························30
Pulse/Tone ·······················30
Reset base station ····················31
STORING & MANAGING NUMBERS
Storing speed dial numbers ·················32
Using the base station ··················32
Using the handset ····················32
Phonebooks·························32
Storing phone numbers ·················32
Editing stored phone numbers ··············33
Deleting a stored phone number ············33
Deleting all stored phone numbers ···········34
Copy a phonebook number ···············34
Redial list & call log ·····················35
Delete a number ····················35
Delete all numbers ···················35
Copy a number to a phonebook ·············36
TEXT HANDLING
Text entry ··························37
Contents
USER
GUIDE www.olympia-life.com Page 5

BATTERY CARE
Battery type ·························38
Battery status ························38
Battery warning ·······················38
Charging batteries ·····················38
Changing batteries ·····················38
NETWORK FEATURES
Supported network services ·················39
EXTRA HANDSETS
Overview ··························40
Registration ·······················40
TROUBLESHOOTING
Troubleshooting guide ···················41
ADVANCED SYSTEM USE
Olympia dataphone manager (ODM) ············43
Bluetooth™ facilities·····················43
Discoverable Mode ···················43
Pairing ·······················43
Bluetooth profiles ··················43
USER
Page 6 www.olympia-life.com GUIDE
Contents

Start upPackage contents
1. Handset & battery cover 6. Belt clip
2. Base station 7. 2 Line cords
3. 3 Clip-on covers (1 fitted, 2 spare) 8. USB cable
4. Batteries 9. Quick start guide
5. Power supply 10. User guide
11. Software on CD-ROM
Charging the battery
1. Connect the power supply to a
suitable mains socket and its
output lead to the rear of the
base station.
ODo NOT connect
any other lead at
this point.
2. Insert the batteries as indicated and slide the
battery cover into position.
3. Place the phone into the base station and leave it
for approximately 16 hours and the battery icon is
displayed as shown.
While your handset is charging, why not read
'Your system's Facilities' on page 10.
When the handset is fully charged, continue
with the set-up procedures.
Start up
USER
GUIDE www.olympia-life.com Page 7
9
10
11
8
7
1
3
4
2
6
5
-
+
-

Positioning the system
Environmental
Do not expose the CDP to direct sunlight.
The CDP may heat up when the batteries are being recharged. This is normal, however, we recommend
that you do not place the CDP on antique or veneered wood to avoid damage.
Do not stand your CDP on carpets or other surfaces that generate fibres, or place it in locations
preventing free flow of air over its surfaces.
Do not submerge any part of your CDP in water and do not use it in damp or humid conditions, such as
bathrooms.
Do not expose your CDP to fire, explosive or other hazardous conditions.
There is a slight chance that yourCDP could be damaged by an electrical storm. We recommend that you
unplug the power and telephone line cord during an electrical storm. Damage caused by lightning is not
covered by the warranty.
Siting
Situate your CDP close enough to the telephone and mains power sockets so that the cables will reach.
Make sure that your CDP is at least 1 metre away from other electrical products to avoid interference.
Connecting the system
IWhen setting up the base station, please ensure you use the telephone line
cords supplied with this unit, using any other telephone line cords could cause
a malfunction and invalidate the warranty.
When the handset has been fully charged and sited correctly in an appropriate environment, connect the
system as shown below:
USER
Page 8 www.olympia-life.com GUIDE
Start up
Mains Socket
NOTE
Do NOT connect the USB cable until you have completely installed the
relevant software from the accompanying CD-ROM.
Full installation details are contained later in this User Guide.
Line 2 Socket
Line 1 Socket
NOTE:
A single cable, combining
both Line 1 & Line 2, can be
connected into the Line 2
socket.
(USA only)

Using the base station for calls
OAll calls made and received using the base station are hands-free.
Making Calls
Select the required line and then use the keypad to enter the telephone number. The call will be
conducted using the base station's speakers (see also page 15).
Receiving calls
When a call is received, the base station will ring and the respective line selection indicator will flash red.
Press the flashing button and the call will be connected. The call will be conducted using the base
station's speakers.
Using the handset for calls
Making Calls
Use the keypad to enter the telephone number and then select the required line to make the call (see
also page 15).
Receiving calls
When a call is received, the handset will ring and the respective line selection button will flash red. Press
the flashing button and the call will be connected.
OWhen you receive a call, the caller's number will be displayed if you
subscribe the Caller ID Network facility.
Missed calls
If you fail to answer an incoming call or calls, the number of missed calls will be shown on your
handset's display and the last 20 missed call will bestored in your phone's call log (see page 35).
Start up
USER
GUIDE www.olympia-life.com Page 9
Line 2 select
button
Line 1 select
button
Ke
yp
ad
store
OLYMPIA
L1
L2
pqrs
7
*redial
0
4ghi
1
8
jkl
5
tuv
abc
2
wxyz
#
9
def
6
mno
3
--
r
e
c
a
l
l
+
mute 42
3
1
o
l
d
h
t
r
a
r
n
s
f
e
1
4
7
*
ghi
pqrs
6
mno
wxyz 9
#
C
2
5jkl
tuv
8
0
3
def
abc
Line 2 select
button
NOTE:
After a call is connected for
more than 10 seconds
(incoming or outgoing) an
active line selection button
will start to flash.
Line 1 select
button
Ke
yp
ad

OverviewYour system's facilities
3Bluetooth™ digital technology
3Base station and handsets handle 2 phone lines
3Handles up to 7 handsets (one of which can be a Bluetooth™ headset) - see page 40
3Calls can be made from the base station (hands free) - see page 15
3Handset/base station mute during call
3Paging - base station to handsets
3Intercom - handset to handset and handset to base station
3Base station has 100 phone number phonebook - see page 32
3Each handset has 40 phone number phonebook - see page 32
320 Number redial memory - see page 35
320 Number call log (incoming calls) - see page 35
3Caller line identification (CLI) linked to phonebook (see who's calling)
310 selectable ring tones for each line and handset - see page 21
3Call waiting/holding/conference/multi-party - see page 39
3Bluetooth link to PC for Internet use and data transmission
3PC based phonebook manager and synchronisation tool - see page 43
34 selectable languages (English, French, German and Spanish) - see page 24
USER
Page 10 www.olympia-life.com GUIDE
Overview
1
4
7
*
ghi
pqrs
6
mno
wxyz9
#
C
2
5jkl
tuv
8
0
3
def
abc
1
4
7
*
ghi
pqrs
6
mno
wxyz9
#
C
2
5jkl
tuv
8
0
3
def
abc
1
4
7
*
ghi
pqrs
6
mno
wxyz9
#
C
2
5jkl
tuv
8
0
3
def
abc
1
4
7
*
ghi
pqrs
6
mno
wxyz9
#
C
2
5jkl
tuv
8
0
3
def
abc
1
4
7
*
ghi
pqrs
6
mno
wxyz9
#
C
2
5jkl
tuv
8
0
3
def
abc
1
4
7
*
ghi
pqrs
6
mno
wxyz9
#
C
2
5jkl
tuv
8
0
3
def
abc
1
4
7
*
ghi
pqrs
6
mno
wxyz9
#
C
2
5jkl
tuv
8
0
3
def
abc
2 phone lines
PC or laptop
TM
Bluetooth enabled
PC or laptop
store
OLYMPIA
L2
L1
pqrs
7
*redial
0
4ghi
1
8
jkl
5
tuv
abc
2
wxyz
#
9
def
6
mno
3
--
r
e
c
a
l
l
+
a
g
e
p
mute 42
3
1
USB connection
Base station:
Hands-free calls
Control up to 7 handsets
Synchronise with PC or laptop based phonebook
USB connection TM
Bluetooth connection
TM
Or Bluetooth headset

System controls & indicatorsThe phone Phone display
Most of the time your phone's display has three separate areas that contain the following:
•Status icons
•Function Icons
•Information
OIn certain circumstances, e.g. when a list or an editing function is displayed,
the function icons will not be displayed.
System controls & indicators
USER
GUIDE www.olympia-life.com Page 11
Status
Icons
Information
Area
Function
Icons
1
4
7
*
ghi
pqrs
6
mno
wxyz 9
#
C
2
5jkl
tuv
8
0
3
def
abc
Line 2 select
button
Left Option
button
Line 1 selec
t
button
Right Option
button
Earpiece
Headset socket
(on side)
Microphone
Cancel
Menu scroll
rocker button
Display
Clip-on cover
Keypad

Status icons
One or more of the status icons will be displayed in the standby mode and will indicate the following:
Battery charger indicator. The number of bars is proportional to the chargelevel. Charge the
phone immediately if there areno bars. See page 38.
This icon is displayed when the keypad is locked. See page 19 .
This icon is displayed when the phone's ringer is turned off. See page 21.
This icon is displayed when the phone is muted during a call. See page 18.
This icon is displayed when a call is connected.
This icon is displayed when there is a network message waiting.
This icon is displayed when there is a USB connection to your phone.
This icon indicates the strength of the signal from the base station to your handset.
This icon indicates the boost facility is set to ON. See page 19.
Function icons
These icons identify the currently available function. The function title is also displayed next to the icon
as shown in the example of the phonebook function below:
The key is used to scroll through the functions and the key is pressed to select them. The
main functions are as follows:
•Phonebook
•Redial
•Call log
•Menu
The above main functions will often have further options available when they are selected.
Information area
This area displays information such as phone numbers, lists, menu options and the current function of
the option keys. The size of this area will adapt to suit the information being displayed.
USER
Page 12 www.olympia-life.com GUIDE
System controls & indicators

The phone buttons
Keypad
These keys enable you to enter telephone numbers and text when required. For text entry, see page 37.
When the keypad is referred to in 'How to' steps, they will be shown as
Line selection buttons
These buttons enable you to select either of the two lines connected to your system.
When the line 1 select button is referred to in 'How to' steps, it will be shown as
When the line 2 select button is referred to in 'How to' steps, it will be shown as
Menu scroll button
This rocker button is used to scroll up and down through the menu options shown on the display.
When the up menu scroll button is referred to in 'How to' steps, it will be shown as
Option buttons
The left and right option buttons can either both be OK keys (i.e. select the displayed menu option) or
perform the function displayed above the respective key.
When the left option button is referred to in 'How to' steps, it will be shown as
When the right option button is referred to in 'How to' steps, it will be shown as
Base station
The base station buttons
Keypad
These keys enable you to enter telephone numbers and redial the last number called.
When the keypad is referred to in 'How to' steps, they will be shown as
System controls & indicators
USER
GUIDE www.olympia-life.com Page 13
2
*#
0
8
5
7
4
3
6
9
1
ghi
pqrs
def
mno
wxyz
tuv
jkl
abc
store
OLYMPIA
pqrs
7
*redial
0
4ghi
1
8
jkl
5
tuv
abc
2
wxyz
#
9
def
6
mno
3
--
r
e
c
a
l
l
+
o
l
d
h
mute 42
3
1
Recall
button
Volume up
button
Mute
button Volume down
button
Hold/Transfer
button
Line 2 message
received indicato
r
Line 1 message
received indicator
Keypad
Redial button
Speed dial
buttons
Line 2 select
button
Line 2 select
button indicator
Line 1 select
button indicator
Line 1 select
button
L1
L2
t
r
a
r
n
s
f
e
2
*#
0
8
5
7
4
3
6
9
1
ghi
pqrs
def
mno
wxyz
tuv
jkl
abc
redial

Line selection buttons
This rocker button enables you to select either of the two lines connected to your system. When a line is
selected, the relevant end of the rocker button will glow red. If a handset is using one of the lines, it will
already be glowing red and cannot be selected by the base station.
When the line 1 select button is referred to in 'How to' steps, it will be shown as
When the line 2 select button is referred to in 'How to' steps, it will be shown as
Control buttons
The base station control buttons are clustered to the left of the keypad
These control buttons perform as follows:
The and buttons control the base station's speaker volume.
The button gives you access to some network services such as Call Waiting. See page 39 for
network services.
The button pages all handsets registered to the base station and within range (if a call is
active, it will be placed on hold). When a handset responds to the page, an intercom link is
automatically established and the Hold key pressed to transfer the call. The hold button is also used to
register handsets to the base station (see page 40 for details).
The button glows red when pressed and mutes the base station's microphone during a call. This
button can also be used to locate and communicate with another Bluetooth™ device (see page 43 for
details).
Speed dial buttons
The base station speed dial buttons are clustered to the right of the keypad
These buttons store and dial 4 pre-set speed dial numbers.
For more information about storing speed dial numbers, see page 32.
For more information about dialling speed dial numbers, see page 15.
Message indicators
The relevant indicator glows red when a network message has been received on the respective phone
line.
USER
Page 14 www.olympia-life.com GUIDE
System controls & indicators
h
o
l
d
c
a
l
e
l
r
mute +
-
-+
recall
hold
mute
3
1
store 24

Making callsBase station call methods
Keypad
1. Press or to select the required line
and key in the phone number to be called.
2. Make the call hands-free.
3. To end the call, press or as
appropriate.
Last number redial
1. Press the redial button.
2. Make the call hands-free.
3. To end the call, press or as
appropriate.
Speed dial
OTo store speed dial numbers, see page 32.
1. Press or to select the required line
and then press the relevant speed dial button.
2. Make the call hands-free.
3. To end the call, press or as
appropriate.
Handset call methods
OFor pre-call and in-call menus, see pages 18 and 18 respectively.
Keypad - line select first
1. Press or to select the required line and then
key in the phone number to be called. The connection
will be made.
2. To end the call, press or as appropriate.
OUsing this method, the phone number will not be added to the redial list and
no corrections can be made to the number.
Making calls
USER
GUIDE www.olympia-life.com Page 15
2
*#
0
8
5
7
4
3
6
9
1
ghi
pqrs
def
mno
wxyz
tuv
jkl
abc
redial
2
*#
0
8
5
7
4
3
6
9
1
ghi
pqrs
def
mno
wxyz
tuv
jkl
abc
redial
3
1
store 24
2
*#
0
8
5
7
4
3
6
9
1
ghi
pqrs
def
mno
wxyz
tuv
jkl
abc

Keypad - number first
1. Key in the phone number required.
2. Use if necessary to delete incorrect digits as
they are entered.
If a mistake is only noticed when number entry is
complete, use or to move the cursor to the
appropriate position right of the incorrect digit and
then delete and/or insert the correct character to
correct the mistake.
3. Press or to select the required line. The
connection will be made.
4. To end the call, press or as appropriate.
OUsing this method, the phone number will be added to the redial list and the
dialling options menu can be accessed, see page 17.
Redial list
1. From the standby screen press , the redial option
will be displayed.
2. Press to display the redial list then use
or to highlight the required phone number and
press .
3. The dial screen will be displayed. Press or to
dial the number on the respective line and the
connection will be made.
4. To end the call, press or as appropriate.
Call log
1. From the standby screen press , the call log
option will be displayed.
2. Press to display the call log list then use
or to highlight the required phone number and
press .
3. The dial screen will be displayed. Press or to
dial the number on the respective line and the
connection will be made.
4. To end the call, press or as appropriate.
USER
Page 16 www.olympia-life.com GUIDE
Making calls
2
*#
0
8
5
7
4
3
6
9
1
ghi
pqrs
def
mno
wxyz
tuv
jkl
abc

Phonebook
Each handset can access its own internal phonebook or the phonebook stored in the base station as follows:
1. From the standby screen press , the list option
will be displayed for the currently active phonebook
(handset or base). If the required phonebook is active,
proceed to step 2. If you wish to display the list option
for the alternative phonebook, press then .
2. To select a number from the phonebook list, press
and then either use or to highlight
the required name or press the keypad key that
corresponds to the first letter of the name in the
phonebook. Press and then proceed to step 3.
To select a number by using the search facility, press
so the search option is displayed and thenpress .
Use the keypad to enter the first character(s) of the name
to search for (see page 37 for text entry) and then press
. The first name in the list beginning with the
letters you searched for will be highlighted. Press
if the name is the one you searched for or use to
highlight the required name and then press .
3. The dial screen will be displayed. Press or to
dial the number on the respective line and the
connection will be made.
4. To end the call, press or as appropriate.
Dialling options menu
The number edit screen has a menu attached to it that offers the following options:
•Anonymous (the phone you are calling will not display your number)
•Pause (a pause is inserted into the number you are dialling)
These options can be accessed as follows:
1. Whenever you call a number from a list (phonebook, call
log, etc.), the dial screen will be displayed. To enter the
number edit screen from the dial screen, press .
When you key in a number from the standby screen
(without selecting a line first) the number edit screen
will be displayed.
2. To select the dialling options menu, press .
3. Press to select the required option if necessary
and then press . The phone number edit
screen will be re-displayed.
OTo remove the Anonymous code, select Anonymous again before making the
call. The Anonymous function only lasts for one call.
OIf a pause was selected, a P will be displayed in the phone number where the
pause will occur. This can be deleted by pressing .
Making calls
USER
GUIDE www.olympia-life.com Page 17

In-call menu
During a handset call, the following in-call menu options become available:
Mute on/off
During a call you can mute your phone so that you cannot be heard but you can still hear the other party.
1. When a call has been connected, the mute on option
is displayed. If it is not displayed, use or to
display it.
2. Press to mute your phone. The mute icon will
be shown at the top of your phone's display.
3. Press again to cancel the mute (only if the
mute option is still displayed).
Speaker on/off
To turn the speakerphone facility on or off, proceed as follows:
1. When a call has been connected, press to display
the speakerphone option.
2. Press to turn the speakerphone facility on and
again to turn it off.
In-call volume
To adjust the phone's volume during a call, proceed as follows:
1. When a call has been connected, press until the
volume option is displayed.
2. Press to display the volume adjustment
screen and use to turn the volume up or to
turn the volume down. The volume setting is
indicated by solid blocks.
OA * indicates the currently selected
option.
3. The volume setting screen will close after 5 seconds of
inactivity.
Recall
The recall option is used to access various network facilities as follows:
1. When a call has been connected, press until the
recall option is displayed.
2. Press to use the recall option (see page 39 for
network service details).
USER
Page 18 www.olympia-life.com GUIDE
Making calls

Boost mode
Your phone has a boost feature, designed to improve both the sound quality and operating range if you
are experiencing interference. The actual range will depend on your environment. You can turn boost
mode on or off during a call as follows:
1. When a call has been connected, press until the
boost option is displayed.
2. Press to increase the range. The signal
strength icon at the top of the display will change to
indicate signal boost is on.
Pulse/Tone
If your exchange requires your phone to use pulse dialling but during a call your need to enter tones
(e.g. for a call centre, etc.), you can switch to tone dialling temporarily as follows:
1. When a call has been connected, press until the
pulse/tone option is displayed.
2. Press to select the pulse/tone menu.
3. Use to change the option as required and press
to change the option or to abort .
OA * indicates the currently selected
option.
Keypad lock
To prevent accidental use of your handset, it has a keypad lock facility. To lock or unlock your handset's
keypad, proceed as follows:
1. Press then immediately after to lock
or unlock the keypad.
2. When a handset is locked, the lock icon will be shown
at the top of your handset's display.
ONo handset keys will work with the keypad lock on except those necessary for
emergency calls (e.g. 911, 999, 112, 110).
Making calls
USER
GUIDE www.olympia-life.com Page 19
B
C

Using a headset
You can connect a headset to your phone, enabling
hands-free operation. With a headset is connected, your
phone's internal earpiece and microphone are disabled.
To obtain maximum convenience from headset use, you can
set your handset to auto answer (see page 22 for setting
details).
The headset can be connected or removed during a call
without disruption.
IIt is not recommended to set auto answer
to On with the ring type set to Off for
either line.
OA cordless Bluetooth™ headset can be used instead of one of the system's
handsets. The cordless headset is linked directly to the base station.
Using two phone lines
Making a second call from the handset
With a call already in progress, you can make a second call, using the second phone line. Simply press
the unused line key & dial. You have full access to the phonebooks call logs & redial lists.
Making a second call from the base
With a call already in progress, you can make a second call, using the second phone line. Simply press
the unused line key & dial. You can also use the speed dial keys if required.
Making a second call from a different
handset
The handset will display that there is a line in use, simply use the other line as usual. You can even talk
to a second caller, using an Intercom, network inquiry, or call waiting.
USER
Page 20 www.olympia-life.com GUIDE
Making calls
1
4
7
*
ghi
pqrs
6
mno
wxyz 9
#
C
2
5jkl
tuv
8
0
3
def
abc Headset socket
(on side)
Table of contents
Other Olympia Cordless Telephone manuals

Olympia
Olympia OL6815 User manual

Olympia
Olympia COP 24201 User manual

Olympia
Olympia 6101 User manual

Olympia
Olympia 6111 User manual

Olympia
Olympia fun User manual

Olympia
Olympia Cool User manual

Olympia
Olympia OL3020 User manual

Olympia
Olympia OL2400 User manual

Olympia
Olympia 681X Series User manual

Olympia
Olympia CHILL Instruction sheet