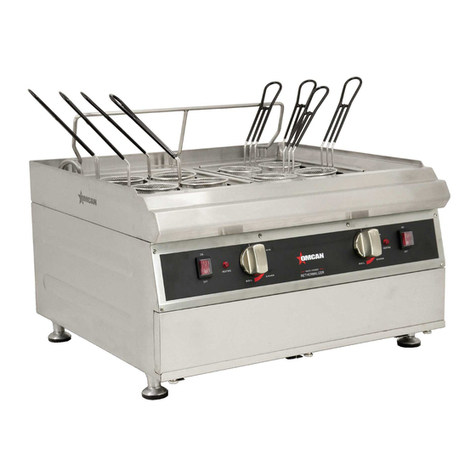
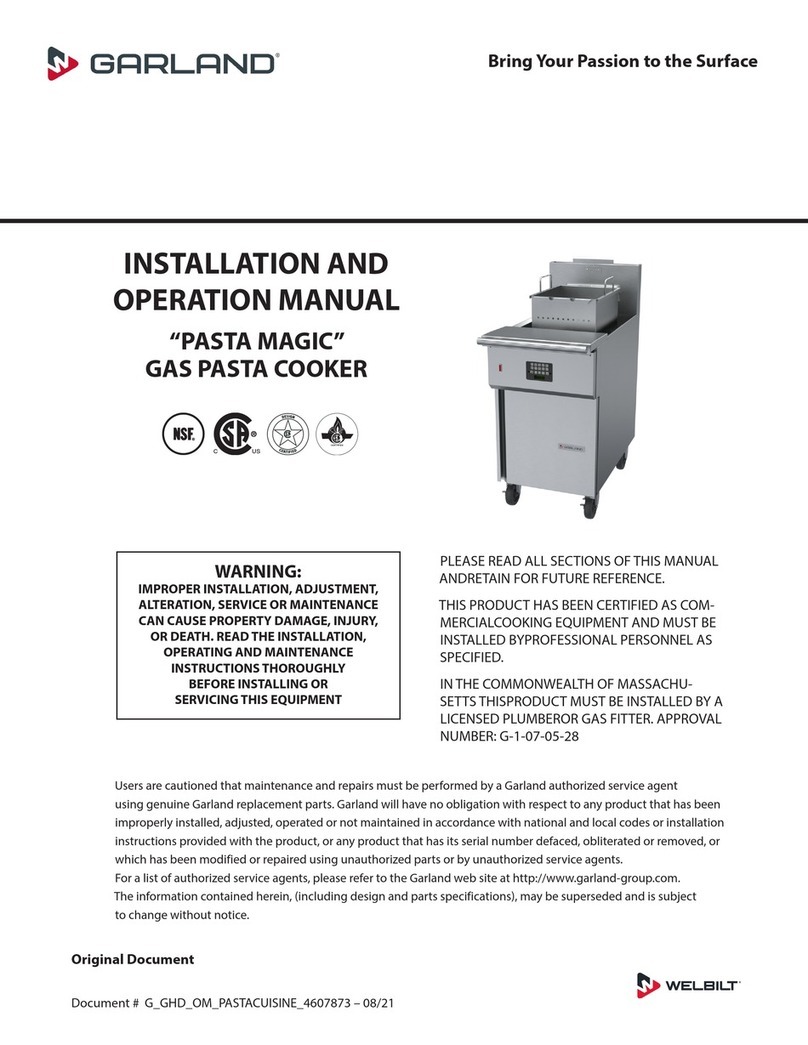
Omcan CE-CN-0011-NG User manual

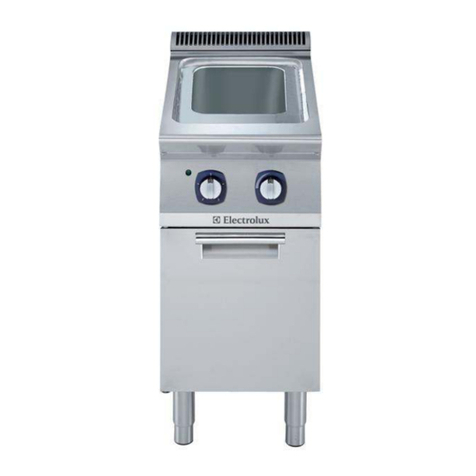
Pasta Cookers
Models CE-CN-0011-NG, 0022-NG
Items 47714, 48000
Instruction Manual
Revised - 02/01/2024
Toll Free: 1-800-465-0234
Fax: 905-607-0234
Email: [email protected]
www.omcan.com

2
Page
--------------------------------------------------------------------------- 3 - 4
--------------------------------------------------------------------------- 4 - 6
-------------------------------------------------------------------------- 6
--------------------------------------------------------------------------------------- 6 - 8
----------------------------------------------------------------------------------------- 8 - 9
--------------------------------------------------------------------------------------- 10
----------------------------------------------------------------------------- 11 - 12
---------------------------------------------------------------------------- 13 - 16
------------------------------------------------------------------------------------------- 17 - 18
---------------------------------------------------------------------------- 19
Table of Contents
Section
General Information
Safety and Warranty
Technical Specications
Installation
Operation
Maintenance
Troubleshooting
Parts Breakdown
Notes
Warranty Registration
Model CE-CN-0011-NG / Model CE-CN-0022-NG

3
General Information
Omcan Manufacturing and Distributing Company Inc., Food Machinery of America, Inc. dba Omcan
and Omcan Inc. are not responsible for any harm or injury caused due to any person’s improper or
negligent use of this equipment. The product shall only be operated by someone over the age of 18, of
sound mind, and not under the inuence of any drugs or alcohol, who has been trained in the correct
operation of this machine, and is wearing authorized, proper safety clothing. Any modication to the
machine voids any warranty, and may cause harm to individuals using the machine or in the vicinity of
the machine while in operation.
CHECK PACKAGE UPON ARRIVAL
Upon receipt of an Omcan shipment please inspect for external damage. If no damage is evident on the
external packaging, open carton to ensure all ordered items are within the box, and there is no concealed
damage to the machine. If the package has suered rough handling, bumps or damage (visible or concealed),
please note it on the bill of lading before accepting the delivery and contact Omcan within 24 hours, so we may
initiate a claim with the carrier. A detailed report on the extent of the damage caused to the machine must be
lled out within three days, from the delivery date shown in the shipping documents. Omcan has no recourse
for damaged products that were shipped collect or third party.
Before operating any equipment, always read and familiarize yourself with all operation and safety
instructions.
Omcan would like to thank you for purchasing this machine. It’s of the utmost importance to save
these instructions for future reference. Also save the original box and packaging for shipping the
equipment if servicing or returning of the machine is required.
---------------------------------------------------------------------------------------------------------------------------------------------------
Omcan Fabrication et distribution Companie Limité et Food Machinery d’Amerique, dba Omcan et
Omcan Inc. ne sont pas responsables de tout dommage ou blessure causé du fait que toute personne
ait utilisé cet équipement de façon irrégulière. Le produit ne doit être exploité que par quelqu’un de
plus de 18 ans, saine d’esprit, et pas sous l’inuence d’une drogue ou d’acohol, qui a été formé pour
utiliser cette machine correctement, et est vêtu de vêtements de sécurité approprié. Toute modication
de la machine annule toute garantie, et peut causer un préjudice à des personnes utilisant la machine
ou des personnes à proximité de la machine pendant son fonctionnement.
VÉRIFIEZ LE COLIS DÈS RÉCEPTION
Dès réception d’une expédition d’Omcan veuillez inspecter pour dommages externes. Si aucun dommage
n’est visible sur l’emballage externe, ouvrez le carton an de s’assurer que tous les éléments commandés
sont dans la boîte, et il n’y a aucun dommage dissimulé à la machine. Si le colis n’a subi aucune mauvaises
manipulations, de bosses ou de dommages (visible ou cachée), notez-le sur le bond de livraison avant
d’accepter la livraison et contactez Omcan dans les 24 heures qui suivent, pour que nous puissions engager
une réclamation auprès du transporteur. Un rapport détaillé sur l’étendue des dommages causés à la machine
doit être rempli dans un délai de trois jours, à compter de la date de livraison indiquée dans les documents
d’expédition. Omcan n’a aucun droit de recours pour les produits endommagés qui ont été expédiées ou cueilli
par un tiers transporteur.

4
General Information
Avant d’utiliser n’importe quel équipement, toujours lire et vous familiariser avec toutes les opérations
et les consignes de sécurité.
Omcan voudrais vous remercier d’avoir choisi cette machine. Il est primordial de conserver ces
instructions pour une référence ultérieure. Également conservez la boîte originale et l’emballage pour
l’expédition de l’équipement si l’entretien ou le retour de la machine est nécessaire.
---------------------------------------------------------------------------------------------------------------------------------------------------
Omcan Empresa De Fabricacion Y Distribucion Inc. Y Maquinaria De Alimentos De America, Inc. dba
Omcan y Omcan Inc. no son responsables de ningun daño o perjuicío causado por cualquier persona
inadecuada o el uso descuidado de este equipo. El producto solo podra ser operado por una persona
mayor de 18 años, en su sano juicio y no bajo alguna inuencia de droga o alcohol, y que este ha sido
entrenado en el correcto funcionamiento de esta máquina, y ésta usando ropa apropiada y autorizada.
Cualquier modicación a la máquina anúla la garantía y puede causar daños a las personas usando la
máquina mientras esta en el funcionamiento.
REVISE EL PAQUETE A SU LLEGADA
Tras la recepcion de un envio Omcan favor inspeccionar daños externos. Si no hay daños evidentes en el
empaque exterior, Habra el carton para asegurararse que todos los articulos solicitados ésten dentro de la
caja y no encuentre daños ocultos en la máquina. Si el paquete ha sufrido un manejo de poco cuidado, golpes
o daños (visible o oculto) por favor anote en la factura antes de aceptar la entrega y contacte Omcan dentro
de las 24 horas, de modo que podamos iniciar una reclamación con la compañia. Un informe detallado sobre
los daños causados a la máquina debe ser llenado en el plazo de tres días, desde la fecha de entrega que se
muestra en los documentos de envío. Omcan no tiene ningun recurso por productos dañados que se enviaron
a recoger por terceros.
Antes de utilizar cualquier equipo, siempre lea y familiarizarse con todas las instrucciones de
funcionamiento y seguridad.
Omcan le gustaría darle las gracias por la compra de esta máquina. Es de la mayor importancia para
salvar estas instrucciones para futuras consultas. Además, guarda la caja original y el embalaje para el
envío del equipo si servicio técnico o devolución de la máquina que se requiere.
Safety and Warranty
Note: post this manual in a prominent location for easy access. Please keep this manual for future
reference.
GENERAL INFORMATION
Before attempting to operate your unit, read the instructions in this manual thoroughly.

5
Safety and Warranty
WARNING: contain information about actions or conditions that may cause or result in a malfunction
of your system.
The gas noodle cooker is designed for boiling pasta, noodles, vegetable etc. This cooker uses a millivolt
temperature control circuit, which requires no external power. This model adopts an open-tank design with no
tubes, which makes cleaning the water tank quick and easy. The noodle cooker requires installation of legs or
optional casters at point of use. All noodle cookers are shipped with a package of standard accessories. Each
noodle cooker is adjusted, tested, and inspected at the factory before crating for shipment. Water tanks are
constructed of welded, heavy-gauge stainless steel. Heat is supplied by two stainless steel burners, which are
installed under the tank bottom. A drain is installed at the right hand of the water tank, with a front-controlled
manual ball valve. Each noodle cooker is equipped with a thermostat for precise temperature control. The
thermostat is located at the front part of the water tank for rapid response to changes in loads and to provide
the most accurate temperature measurement. A high temperature thermostat (hi-limit) shuts o gas to the
burner assembly if the controlling thermostat fails. This unit was carefully inspected and packed before leaving
the factory. The transportation company assumes full responsibility for safe delivery upon acceptance of the
equipment for transport.
What to do if your equipment arrives damaged:
1. File a claim for damages immediately, regardless of the extent of damages.
2. Inspect for and record all visible loss or damage, and ensure that this information is noted on the freight bill
or express receipt and is signed by the person making the delivery.
RESIDENTIAL USERS: vendor assumes no liability for parts or labor coverage for component failure
or other damages resulting from installation in non-commercial or residential applications. The right
is reserved to deny shipment for residential usage; if this occurs, you will be notied as soon as
possible.
1 YEAR PARTS AND LABOUR WARRANTY
Within the warranty period, contact Omcan Inc. at 1-800-465-0234 to schedule an Omcan authorized
service technician to repair the equipment locally.
Unauthorized maintenance will void the warranty. Warranty covers electrical and part failures, not
improper use.
Please see https://omcan.com/disclaimer for complete info.
WARNING:
The packaging components are classied as normal solid urban waste and can therefore be disposed of
without diculty.
In any case, for suitable recycling, we suggest disposing of the products separately (dierentiated
waste) according to the current norms.

6
Safety and Warranty
DO NOT DISCARD ANY PACKAGING MATERIALS IN THE ENVIRONMENT!
Technical Specications
Installation
Model CE-CN-0011-NG CE-CN-0022-NG
Capacity 41.6 L / 11 Gal 83.3 L / 22 Gal
Number of Baskets 6 12
Temperature Range 50 - 125°C / 122 - 257°F
Gas Type Natural Gas
Total BTU/h 70,000 140,000
Net Dimensions 35.4” x 15.7” x 46.8”
900 x 398 x 1189mm
35.4” x 31.4” x 46.9”
900 x 798 x 1190mm
Packaging Dimensions 19” x 38” x 36” / 483 x 965 x 914mm 38” x 43” x 39” / 965 x 1092 x 991mm
Net Weight 172 lbs. / 78 kgs. 363 lbs. / 164.7 kgs.
Packaging Weight 190 lbs. / 86.2 kgs. 402 lbs. / 182.3 kgs.
Item Number 47714 48000
PROPER INSTALLATION IN ACCORDANCE WITH THE INSTRUCTIONS THAT FOLLOW IS ESSENTIAL
FOR EFFICIENT, TROUBLE-FREE OPERATION OF YOUR NOODLE COOKER. ANY UNAUTHORIZED
ALTERATIONS MADE TO THIS EQUIPMENT WILL VOID THE WARRANTY.
Upon arrival, inspect the cooker carefully for visible or concealed damage.
CLEARANCE AND VENTILATION
The cooker(s) must be installed with a 6” (150mm) clearance at both sides and back when installed adjacent
to combustible construction; no clearance is required when installed adjacent to noncombustible construction.
A minimum of 24” (600 mm) clearance should be provided at the front of the cooker. One of the most important
considerations of ecient cooker operation is ventilation. Make sure the cooker is installed to eciently remove
combustion by-products, and the kitchen ventilation system does not produce drafts that interfere with proper
burner operation. The cooker ue opening must not be placed close to the intake of the exhaust fan, and the
cooker must never have its ue extended in a “chimney” fashion. An extended ue will change the combustion
characteristics of the cooker, causing longer recovery time. It also frequently causes delayed ignition. To
provide the air ow necessary for good combustion and burner operation, the areas surrounding the noodle

7
Installation
cooker front, sides, and rear must be kept clear and unobstructed. Cooker must be installed in an area with an
adequate air supply and adequate ventilation. Adequate distances must be maintained from the ue outlet of
the cooker to the lower edge of the ventilation lter bank.
NATIONAL CODE REQUIREMENTS
The type of gas for which the cooker is equipped is marked on the data plate attached to the inside of the
cooker door. Connect a cooker marked “NAT” only to natural gas, those marked “PRO” only to propane gas.
When installing this equipment in the UNITED STATES, the installation must conform to the latest edition of the
National Fuel Gas Code, ANSI Z223.1. In CANADA, installation must conform to the latest edition of Standard
CAN-/ GCA-B149.1 or .2, “Installation Codes for Gas Burning Appliances & Equipment”. In addition to the
applicable national code or standard, installation must also be in accordance with any local codes for the area
in which the equipment is installed. Installation shall be made with a gas connector that complies with national
and local codes. In the UNITED STATES, the applicable code is ANSI Z21.69 with Addenda, “Standard for
Connectors for Movable Gas Appliances”. Quick-Disconnect devices, if used, shall likewise comply with
national and local codes. In the UNITED STATES, the code is ANSI Z21.41, “Standard for Quick-Disconnect
Devices for Use with Gas Fuel”.
PRE-CONNECTION PREPARATIONS
After the cooker has been positioned under the cook station exhaust hood, ensure the following has been
accomplished:
1. Adequate means must be provided to limit the movement of cookers without depending upon the gas line
connections. If a exible gas hose is used, a restraining cable must be connected at all times when the
cooker is in use. The restraining cable and installation instructions are packed with the exible hose in the
accessories box that was shipped with your unit.
2. These cookers must be stabilized by installing restraining chains on Noodle cookers equipped with casters
or anchor straps on cookers equipped with legs. Follow the instructions shipped with the casters/legs to
properly install the chains or straps.
3. Level cooker equipped with legs by extending the adjustable portion of the leg out approximately 1”, and
then further adjust the legs, ensuring the cooker is level and at the proper height under the exhaust hood.
For cookers equipped with casters, the oor where the cooker is to be installed must be level.
4. Refer to the data plate on the inside of the cooker door to verify that the cooker is congured for the proper
type of gas before connecting the noodle cooker quick-disconnect device or piping from the gas supply line.
CONNECT TO THE GAS LINE
The size of the gas line used for installation is very important. If the line is too small, the gas pressure at the
burner manifold will be low. This may cause pilot outage, slow recovery and delayed ignition. The incoming
gas supply line should be a minimum of 1½” (38 mm) in diameter. All single cookers using natural gas require
a ¾”or 1/2” connection. For cookers using LP gas, one pipe size smaller may be used. If in doubt about the
correct pipe size, consult the local gas company. Before connecting new pipe to your unit, the pipe must be
thoroughly blown out to remove any foreign particles. If these foreign particles get into the burner and controls,
they will cause improper and sometimes dangerous operation.
1. Connect the quick-disconnect hose to the noodle cooker quick-disconnect tting at the rear of the cooker

8
Installation
Operation
and to the building gas line.
NOTE: some noodle cookers are congured for a rigid connection to the gas supply line. These
units are connected directly to the gas supply line. When using thread compound, use very small
amounts on male threads only. Use a pipe thread compound that is not aected by the chemical
action of LP gases (Loctite™ PST56765 Sealant is one such compound). DO NOT apply compound
to the rst two threads. This will ensure that the burner orices and control valve do not become
clogged.
2. Open the gas supply to the cooker and check all piping, ttings, and gas connections for leaks. A soap and
water solution should be used for this purpose.
NOTE: the cooker must be disconnected from the gas supply piping during any pressure testing of
the gas supply piping pressures equal to or greater than ½ psig (3.45kPa or 13.84 in. W.C.).
3. Close the cooker drain valve and ll the water tank with water or boil-out solution to the bottom WATER
LEVEL line at the rear of the water tank. Light the cooker and perform the boil-out procedures that are
described in the “start-up procedure” and “boiling out the water tank” topics.
4. It is suggested that the burner manifold pressure be checked at this time by the local gas company or
an authorized service agent. Refer to “check burner manifold pressure” in this manual for the proper
procedure.
WATER AND GAS CONNECTION
This model is specially designed to boil pasta and noodles. Water should be connected to this unit. The black
pipe is for gas connection. The middle pipe is for waste water drainage. Please make sure you have the right
connection. Wrong connection would damage the valve and cause gas leakage.
OPERATING THE GAS VALVE
The knob on the gas valve is placed in the PILOT or ON position by rotating it counter-clockwise. To return
the knob to the OFF position, the knob must be depressed slightly to disengage its stop tab, then rotated
clockwise.
LIGHTING THE PILOT AND BURNER
1. Open the door.
2. Turn the thermostat OFF (see gure below, view A). The thermostat is located behind the door.
3. Push the gas control valve knob and turn to OFF. Wait 5 minutes for unburned gas to vent.
4. Push and turn gas control valve knob to the “L” in PILOT (see gure below, view B).
5. While still holding the knob in, light the pilot with a lit ame. Continue to depress the knob until pilot remains
lit when knob is released. If the pilot does not remain lit, repeat step 3 through 5.
6. Depress and turn gas control knob to ON (See gure below, view C).
7. If gas supply is interrupted, repeat steps 2 through 6.

9
Operation
FILLING WITH WATER
Turn on faucet to ll the water tank with water. Do not exceed the max water-level.
THERMOSTAT OPERATION
Note: the boiling point of water might vary for dierent altitudes.
The thermostat is connected to a graduated knob located inside the cooker door. Rotating the knob clockwise
to the desired cooking temperature (set point) directly adjusts the thermostat to that temperature. The
thermostat controls the water tank temperature by regulating the gas supply to the burner via the gas valve.
The thermostat is in the full OFF position when the word OFF is at the top of the knob. A “click” will be heard
when the knob is rotated from the OFF position to a temperature, or when it is rotated back to the OFF
position.
DRAINING
1. Rotate the gas valve knob to the PILOT or OFF position.
2. Open the drain valve slowly.
3. Clean all food particles and residual water from the water tank before relling.
4. Close the drain valve and rell the water tank with clean water.

10
Maintenance
DAILY CHECKS AND SERVICES
INSPECT COOKER AND ACCESSORIES FOR DAMAGE
Look for loose wires, leaks, foreign material in water tank or inside cabinet, and any other indications that the
noodle cooker and accessories are not ready and safe for operation. Inspect the burner deectors to verify that
each is positioned directly above its orice, and that the ame ignites approximately 2½” (60mm) above the
orice. The ame should strike the center of the deector and be a rich blue color.
CLEAN COOKER CABINET INSIDE AND OUT
Clean inside the cooker cabinet with dry, clean cloth. Wipe all accessible metal surfaces and components to
remove accumulations dust. Clean the outside of the cooker cabinet with a clean, damp cloth soaked with dish
washing detergent, removing dust, and lint from the cooker cabinet.
QUARTERLY CHECKS AND SERVICES
DRAIN AND CLEAN WATER TANK
During normal usage of your cooker, a deposit of Water scale will gradually form on the inside of the tank. This
deposit must be periodically removed to maintain your cooker’s eciency. Follow the procedures for draining
the water tank, the follow the “boiling out the water tank” procedures.
CLEAN DETACHABLE PARTS AND ACCESSORIES
Wipe all detachable parts and accessories with a clean cloth dampened with a detergent solution. Rinse and
thoroughly dry each part.
SEMI-ANNUAL CHECKS AND SERVICE
CHECK BURNER MANIFOLD PRESSURE
1. Ensure that the gas valve knob is in the OFF position.
2. Remove the pressure tap plug from burner manifold.
3. Insert the tting for a manometer or pressure gauge into the pressure tap hole.
4. Place the gas valve in the PILOT position and light the pilot. When the pilot lights and continues to burn,
increase the setting on the thermostat knob until the burner lights. Compare the manometer or gauge
reading to the appropriate table below.
5. If the burner manifold pressure does not meet the specications in the tables in step 4, unscrew the slotted
cap from the top of the gas valve regulator (adjacent to the gas valve vent tube) and turn the adjusting
screw to obtain the correct pressure. Turn the screw clockwise to in-crease pressure, counter-clockwise to
decrease pressure.
6. After adjusting the manifold pressure to the correct value, reinstall the regulator cap and turn the gas valve
knob to the OFF position.
7. Remove the manometer or pressure gauge tting from the pressure tap hole and reinstall the pipe plug.
8. Place the gas valve in the PILOT position and check for gas leaks. If no leaks are found, re-light the pilot
and return the unit to operation.

11
Troubleshooting
OPERATOR TROUBLESHOOTING
The tables that follow provide operators with a list of possible malfunctions, the probable causes of the
malfunctions, and the corrective actions to take to correct the problem.
In some cases the operator may not be able to correct the problem, but will at least be able to accurately
diagnose the problem, and that will assist a qualied service technician in restoring the equipment to full
operation in the shortest possible time.
Problem Probable Cause Corrective Action
Burner does not light at all. Pilot is not lit. Light pilot.
Loose, dirty, or corroded terminals
on gas valve.
Clean and tighten terminals on gas
valve.
Loose, dirty, or corroded terminals
on thermostat.
Clean and tighten terminals on
thermostat.
Burner does not light all the way
around.
One or more burner orices
clogged.
Turn gas valve knob to OFF
position. Use thin wire to clear
obstruction from burner orices.
Blocked ue. Clear blockage from ue.
Burner experiences delayed
ignition.
Too little make-up air in kitchen. Adjust kitchen ventilation system to
increase make-up air.
Flame rolling out from under
noodle cooker.
Flue obstructed. Remove obstruction from ue.

12
Troubleshooting
Pilot repeatedly goes out. Clogged pilot orice. Use a small wire to clear
obstruction from pilot orice.
Pilot ame blowing away from
pilot generator (excessive draft in
kitchen).
Eliminate draft in kitchen.
Pilot generator not inserted fully
into pilot burner.
Reinsert pilot generator into pilot
burner until ame surrounds tip.
Corroded connection where pilot
generator connects to gas valve.
Clean pilot generator connection at
gas valve.
If all of the above causes have
been ruled out. The probable
causes are low pilot ame. Pilot
generator low millivolt output. High
resistance in hi-limit thermostat
contacts, or a defective pilot
magnet in the gas valve.
Call service.

13
Parts Breakdown
Model CE-CN-0011-NG 47714

14
Parts Breakdown
Model CE-CN-0011-NG 47714
Item No. Description Position Item No. Description Position Item No. Description Position
AP112 Tank Assembly for 47714 2 AP129 1/2 to 3/4 Street Elbow for 47714 24 AP142 Faucet Nut for 47714 46
AP113 Flue Cover for 47714 3 AP130 Gas Pipe for 47714 25 AP143 Faucet Support for 47714 47
AP114 Inner Flue for 47714 4 AJ605 Test Plug for 47714 26 AP144 Water Faucet Connecting Nut for 47714 48
AP115 Front Bullnose for 47714 5 AP131 Nozzle Elbow for 47714 27 AP145 O Ring for 47714 49
AP116 Door Assembly for 47714 6 AJ595 Oven Nozzle for 47714 28 AP146 Water Pipe Welding Assembly for 47714 50
AP117 Top Door Hinge for 47714 7 AP132 Gas Burner for 47714 29 AP147 Knob Insert Shaft for 47714 51
AP118 Bottom Door Hinge for 47714 8 AN722 NG Pilot for 47714 30 AP148 Water Knob + Knob Insert for 47714 52
AP119 Overow Box for 47714 9 AN721 Thermal Pile for 47714 31 AD733 Drain Valve for 47714 53
AP120 Heat Deector for 47714 10 AC316 Pilot Pipe for 47714 32 AP149 Water Outlet Pipe Connector + Drain
Pipe for 47714 54, 57
AP121 Drain Strainer Mesh for 47714 11 AO146 Clamp for 47714 33 AP150 Overow Pipe for 47714 55
AP122 Overow Strainer Mesh for 47714 12 AP133 Water Feeding Pipe for 47714 34 AP151 Pipe Clamp for 47714 56
AP123 Basket Support for 47714 13 AP134 Water Pipe Connector for 47714 35 AP152 Pipe Clamp for 47714 58
AP124 Front Strainer Plate for 47714 14 AO142 1/2 to 15 Street Elbow for 47714 36 AD722 Control Knob for 47714 59
AP125 Front Panel for 47714 15 AP135 Water Pipe Clamp for 47714 37 AP153 Bezel for 47714 60
AP126 Back Plate for 47714 16 AO143 Corrugated Pipe for 47714 38 AP154 Thermostat for 47714 61
AD718 Adjustable Leg for 47714 17 AP136 Water Pipe Assembly for 47714 39 AP155 High Limit for 47714 62
AK289 Intake Pipe Adapter for 47714 18 AP137 1/2 Street Elbow for 47714 40 AP156 Water Faucet Facial Panel for 47714 63
AP127 Gas Feeding Pipe for 47714 19 AP138 Faucet for 47714 41 AD716 Door Magnet for 47714 64
AP128 1/2 Male Thread Connector for 47714 20 AJ588 1/2-10 Pipe Connector for 47714 42 AD717 Door Column for 47714 65
AN718 Elbow for 47714 21 AP139 Flexi Pipe for 47714 43 AP157 Left Hand Basket for 47714 66
AN717 Combination Valve NG for 47714 22 AP140 Fitting Nut for 47714 44 AP158 Right Hand Basket for 47714 67
AN715 Union Connector for 47714 23 AP141 Brass Olive for 47714 45

15
Parts Breakdown
Model CE-CN-0022-NG 48000

16
Parts Breakdown
Model CE-CN-0022-NG 48000
Item No. Description Position Item No. Description Position Item No. Description Position
AP492 Tank Assembly for 48000 2 AN718 Elbow for 48000 25 AP141 Brass Olive for 48000 49
AP493 Flue Cover for 48000 3 AN717 Combination Valve NG for 48000 26.1 AP142 Faucet Nut for 48000 50
AP114 Inner Flue for 48000 4 AN715 Union Connector for 48000 27, 29 AP143 Faucet Support for 48000 51
AP494 Front Bullnose for 48000 5 AP129 1/2 to 3/4 Street Elbow for 48000 28 AP144 Water Faucet Connecting Nut for 48000 52
AP495 Left Door for 48000 6 AP130 Gas Pipe for 48000 30 AP145 O Ring for 48000 53
AP496 Right Door for 48000 7 AP131 Nozzle Elbow for 48000 31 AP146 Water Pipe Welding Assembly for 48000 54
AP117 Top Door Hinge for 48000 8 AJ595 Oven Nozzle for 48000 32 AP147 Knob Insert Shaft for 48000 55
AP118 Bottom Door Hinge for 48000 9 AP132 Gas Burner for 48000 33 AP148 Water Knob+Knob Insert for 48000 56
AP497 Top Door Hinge for 48000 10 AN722 NG Pilot for 48000 34.1 AD733 Drain Valve for 48000 57
AP498 Bottom Door Hinge for 48000 11 AN721 Thermal Pile for 48000 35 AP150 Overow Pipe for 48000 58
AP119 Overow Box for 48000 12 AC316 Pilot Pipe for 48000 36 AP151 Pipe Clamp for 48000 59
AP120 Heat Deector for 48000 13 AO146 Clamp for 48000 37 AP149 Water Outlet Pipe Connector+Drain Pipe
for 48000 60
AP121 Drain Strainer Mesh for 48000 14 AP133 Water Feeding Pipe for 48000 38 AP152 Pipe Clamp for 48000 61
AP122 Overow Strainer Mesh for 48000 15 AP134 Water Pipe Connector for 48000 39 AD722 Control Knob for 48000 62
AP499 Basket Support for 48000 16 AO142 1/2 to 15 Street Elbow for 48000 40 AP153 Bezel for 48000 63
AP124 Front Strainer Plate for 48000 17 AP135 Water Pipe Clamp for 48000 41 AN725 Thermostat for 48000 64
AP500 Front Panel for 48000 18 AO143 Corrugated Pipe for 48000 42 AP155 High Limit for 48000 65
AP501 Back Plate for 48000 19 AP136 Water Pipe Assembly for 48000 43 AP156 Water Faucet Facial Panel for 48000 66
AP502 Connector Strip for 48000 20 AP503 1/2 Street Elbow for 48000 44 AD716 Door Magnet for 48000 67
AD718 Adjustable Leg for 48000 21 AP138 Faucet for 48000 45 AD717 Door Column for 48000 68
AK289 Intake Pipe Adapter for 48000 22 AJ588 1/2-10 Pipe Connector for 48000 46 AP158 Right Hand Basket for 48000 69
AP127 Gas Feeding Pipe for 48000 23 AP139 Flexi Pipe for 48000 47 AP157 Left Hand Basket for 48000 70
AP128 1/2 Male Thread Connector for 48000 24 AP140 Fitting Nut for 48000 48

17
Notes
________________________________________________________________________________________
________________________________________________________________________________________
________________________________________________________________________________________
________________________________________________________________________________________
________________________________________________________________________________________
________________________________________________________________________________________
________________________________________________________________________________________
________________________________________________________________________________________
________________________________________________________________________________________
________________________________________________________________________________________
________________________________________________________________________________________
________________________________________________________________________________________
________________________________________________________________________________________
________________________________________________________________________________________
________________________________________________________________________________________
________________________________________________________________________________________
________________________________________________________________________________________
________________________________________________________________________________________
________________________________________________________________________________________
________________________________________________________________________________________
________________________________________________________________________________________
________________________________________________________________________________________
________________________________________________________________________________________
________________________________________________________________________________________

18
Notes
________________________________________________________________________________________
________________________________________________________________________________________
________________________________________________________________________________________
________________________________________________________________________________________
________________________________________________________________________________________
________________________________________________________________________________________
________________________________________________________________________________________
________________________________________________________________________________________
________________________________________________________________________________________
________________________________________________________________________________________
________________________________________________________________________________________
________________________________________________________________________________________
________________________________________________________________________________________
________________________________________________________________________________________
________________________________________________________________________________________
________________________________________________________________________________________
________________________________________________________________________________________
________________________________________________________________________________________
________________________________________________________________________________________
________________________________________________________________________________________
________________________________________________________________________________________
________________________________________________________________________________________
________________________________________________________________________________________
________________________________________________________________________________________

19
Warranty Registration
Gracias por comprar un producto Omcan usted. Para registrar su garantía para este producto, complete la información a continuación,
cortar la tarjeta en la perforación y luego enviarlo a la dirección indicada a continuación. También puede registrarse en línea en:
Merci d’avoir acheté un produit Omcan. Pour enregistrer votre garantie pour ce produit, complétez les informations ci-dessous, détachez la
carte au niveau de la perforation, puis l’envoyer à l’adresse spécié ci-dessous. Vous pouvez également vous inscrire en ligne en visitant:
Thank you for purchasing an Omcan product. To register your warranty for this product, complete the information below, tear o the card at
the perforation and then send to the address specied below. You can also register online by visiting:
OMCAN
PRODUCT WARRANTY REGISTRATION
3115 Pepper Mill Court,
Mississauga, Ontario
Canada, L5L 4X5
https://omcan.com/warranty-registration/
Purchaser’s Information
Name: Company Name:
Address:
Telephone:
City: Province or State: Postal or Zip: Email Address:
Country: Type of Company:
Restaurant Bakery Deli
Dealer from which Purchased: Butcher Supermarket Caterer
Dealer City: Dealer Province or State: Institution (specify):
Invoice: Other (specify):
Model Name: Model Number: Serial Number:
Machine Description:
Date of Purchase (MM/DD/YYYY): Date of Installation (MM/DD/YYYY):
Would you like to extend the warranty? Yes No
Por correo en Canadá
Pour postale au Canada
For mailing in Canada
Por correo en los EE.UU.
Pour diusion aux États-Unis
For mailing in the US
OMCAN
PRODUCT WARRANTY REGISTRATION
4450 Witmer Industrial Estates, Unit 4,
Niagara Falls, New York
USA, 14305
Thank you for choosing Omcan | Merci d’avoir choisi Omcan | Gracias por elegir Omcan

Since 1951 Omcan has grown to become a leading distributor of equipment and supplies to the North
American food service industry. Our success over these many years can be attributed to our commitment
to strengthen and develop new and existing relationships with our valued customers and manufacturers.
Today with partners in North America, Europe, Asia and South America, we continually work to improve
and grow the company. We strive to offer customers exceptional value through our qualied local sales
and service representatives who provide convenient access to over 6,500 globally sourced products.
Depuis 1951 Omcan a grandi pour devenir un des “leaders” de la distribution des équipements et
matériel pour l’industrie des services alimentaires en Amérique du Nord. Notre succès au cours de ces
nombreuses années peut être attribué à notre engagement à renforcer et à développer de nouvelles
et existantes relations avec nos clients et les fabricants de valeur. Aujourd’hui avec des partenaires en
Amérique du Nord, Europe, Asie et Amérique du Sud, nous travaillons continuellement à améliorer et
développer l’entreprise. Nous nous efforçons d’offrir à nos clients une valeur exceptionnelle grâce à
nos ventes locales qualiées et des représentants de service qui offrent un accès facile à plus de 6500
produits provenant du monde entier.
Desde 1951 Omcan ha crecido hasta convertirse en un líder en la distribución de equipos y suministros
de alimentos en América del Norte industria de servicios. Nuestro éxito en estos años se puede atribuir
a nuestro compromiso de fortalecer y desarrollar nuevas relaciones existentes con nuestros valiosos
clientes y fabricantes. Hoy con socios de América del Norte, Europa, Asia y América del Sur, que trabajan
continuamente para mejorar y crecer la empresa. Nos esforzamos por ofrecer a nuestros clientes valor
excepcional a través de nuestro local de ventas y representantes de los servicios que proporcionan un
fácil acceso a más de 6,500 productos con origen a nivel mundial.
This manual suits for next models
3
Table of contents
Other Omcan Pasta Maker manuals

Omcan
Omcan R220 User manual

Omcan
Omcan PM-IT-0012E User manual

Omcan
Omcan PM-CN-0150 User manual

Omcan
Omcan PM-IT-0004 User manual

Omcan
Omcan PM-IT-0080 User manual

Omcan
Omcan PM-IT-0008 User manual

Omcan
Omcan PM-CN-0179 User manual

Omcan
Omcan CE-CN-0004-P User manual

Omcan
Omcan PM-IT-0210-M User manual

Omcan
Omcan PM-IT-0002 User manual
Popular Pasta Maker manuals by other brands

Pasta Vision
Pasta Vision PV100 instruction manual

Unold
Unold 68801 Instructions for use

KitchenAid
KitchenAid KPEXTA Instructions and recipes

Axis
Axis AX-GPC-1 Installation, operating and maintenance instructions

KitchenAid
KitchenAid KSMPEXTA user manual

Lotus cooker
Lotus cooker CPM-6G Instructions for installation and use