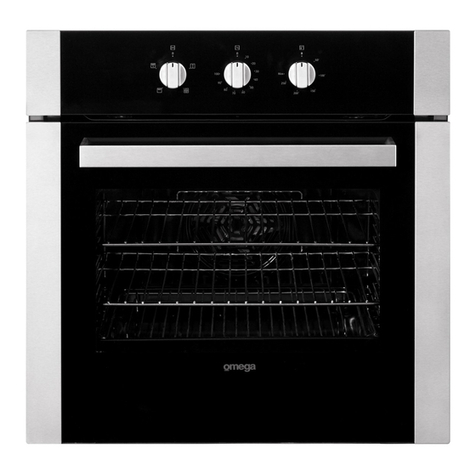
Omega OO654X User manual

OO654X
OPERATING AND INST
ALL
A
TION
INSTRUCTIONS OF
BUILT-IN OVEN

DEAR CUSTOMER,
We thank you and congratulate you on your choice.
This new carefully designed product, manufactured with the
highest quality materials, has been carefully tested to satisfy
all your cooking demands.
We would therefore request you to read and follow these
easy instructions, which will allow you to obtain excellent
results right from the start.

1
Contents
1- Presentation and size of product
2- Warnings
3- Preparation for installation and use
4- Using the oven
5- Cleaning and maintenance of your product
6- Service and Transport

2
PART
1:
PRESENT
A
TION AND SIZE OF PRODUCT
LIST OF COMPONENTS :
1- Control panel
2- Handle
3- Oven Door
4- Child Lock
5- Tray
8- Wire Grill
9- Racks
10- Oven Light
11- Turbo Heating Element(behind the plate)
12- Fan (behind the plate)
6- Lower Heating Element (behind the plate) 13- Air Outlet Shutters
7- Upper Heating Element (behind the plate)

P
AR
T 2
S
AFETY WARNINGS
READ THESE INSTRUCTIONS CAREFULLYAND COMPLETELY BEFORE USING YOUR
APPLIANCE, AND KEEP IT INA CONVENIENT PLACE FOR REFERENCE WHEN NECESSARY.
Safety W
arnings
- The appliance is not intended for use by persons (including children) with reduced physical,
sensory or mental capabilities, or lack of experience and knowledge, unless they have been
given supervised or instruction concerning use of the appliance by a responsible person for
their safely.
- WARNING: The appliance and its accessible parts become hot during use. Care should
be taken to avoid touching heating elements.
- WARNING: Danger of fire: do not store items on the cooking surfaces.
- WARNING: If the surface is cracked, switch off the appliance to avoid the possibility of
electric shock.
-WARNING: - Accessible parts will become hot when in use. To avoid burns and scalds, young
children should be kept away.
- The appliance is not intended to be operated by means of an external timer or
separate remote-control system.
- Young children should be supervised to ensure that they do not play with the appliance.
- If the electrical supply is restricted, means of all-pole disconnection must be accessible and
incorporated in the fixed wiring in accordance with the wiring rules.
-During use, the appliance becomes hot. Care should be taken to avoid touching heating
elements inside the oven.
- Do not use harsh abrasive cleaners or sharp metal scrapers to clean the oven door glass and
other surface since they can scratch the surface, which may result in shattering of the glass or
damage to the surface.

4
- Do not use steam cleaners for cleaning the appliance.
- WARNING: Ensure that the appliance is switched off before replacing the lamp to avoid
the possibility of electric shock.
- CAUTION: Accessible parts may be hot when the cooking or grilling is in use. Young
children should be kept away.
- Your appliance is produced in accordance with all applicable local and international
standards and regulations.
- Maintenance and repair work must be made only by authorized service technicians.
Installation and repair work that is carried out by unauthorized technicians may endanger
you. It is dangerous to alter or modify the specifications of the appliance in any way.
- Prior to installation, ensure that the local distribution conditions (nature of the gas and gas
pressure or electricity voltage and frequency) and the requirements of the appliance are
compatible. The requirements for this appliance are stated on the label.
- CAUTION: This appliance is designed only for cooking food and is intended for indoor
domestic household use only and should not be used for any other purpose or in any other
application, such as for non-domestic use or in a commercial environment or room heating.
- Do not try to lift or move the appliance by pulling the door handle.
- All possible security measures have been taken to ensure your safety. Since the glass
may break, you should be careful while cleaning to avoid scratching. Avoid hitting or
knocking on the glass with accessories.
- Ensure that the supply cord is not wedged during the installation. If the supply cord is
damaged, it must be replaced by the manufacturer, its service agent or similarly qualified
persons in order to prevent a hazard.
- While the oven door is open, do not let children climb on the door or sit on it.
Installation Warnings
- Do not operate the appliance before it is fully installed.
- The appliance must be installed by an authorised technician.
- When you unpack the appliance, make sure that it is not damaged during transportation. In
case of any defect; do not use the appliance and contact a qualified service agent
immediately. As the materials used for packaging (nylon, staplers, Styrofoam...etc.) may
cause harmful effects to children, they should be collected and removed immediately
5
During
usage
- When you first run your oven a certain smell will emanate from the insulation materials and
the heater elements. For this reason, before using your oven, run it empty at maximum
temperature for 45 minutes. At the same time you need to properly ventilate the environment
in which the product is installed.
- During usage, the outer and inner surfaces of the oven get hot. While opening the oven
door, step back to avoid the hot steam coming out of the oven. There may be a risk of burns.
- Do not put flammable or combustible materials, in or near the appliance when it is operating.
- Always use oven gloves to remove and replace food in the oven.
- Do not leave the cooker while cooking with solid or liquid oils. They may catch fire on
condition of extreme heating. Never pour water on to flames that are caused by oil. Cover the
saucepan or fry pan with its cover in order to choke the flame that has occurred in this case
and turn the cooker off.
- If you will not use the appliance for a long time, plug it off. Keep the main control switch off.
Also when you do not use the appliance, keep the gas valve off.
- Make sure the appliance control knobs are always in the "0" (stop) position when it is not
used.
- The trays incline when pulled out. Be careful not to let hot liquid spill over.
- When the door or drawer of the oven is open, do not leave anything on it. You may
unbalance your appliance or break the cover.
- Do not put heavy things or flammable or ignitable goods (nylon, plastic bag, paper,
cloth...etc.) into the drawer. This includes cookware with plastic accessories (e.g. handles).
- Do not hang towels, dishcloths or clothes from the appliance or its handles.
During cleaning and
maintenance
- Always turn the appliance off before operations such as cleaning or maintenance. You can
do it after plugging the appliance off or turning the main switches off.
- Do not remove the control knobs to clean the control panel.
TO MAINTAIN THE EFFICIENCY AND SAFETY OF YOUR APPLIANCE, WE
RECOMMEND YOU ALWAYS USE ORIGINAL SPARE PARTS AND TO CALL ONLY OUR
AUTHORISED SERVICE AGENTS IN CASE OF NEED.

6
PART
3:
PREP
ARA
TION FOR INST
ALLA
TION AND USE
Manufactured with best quality parts and materials, this modern, functional and practical
oven will meet yourneeds in all respects. Make sure to read the manual to obtain successful
resultsandnottoexperienceanyproblemsinthefuture.The informationgiven belowcontain
rules that are necessary for correct positioning and service operations. They should be read
withoutfailespeciallybythetechnicianwhowillpositiontheappliance.
CONTACTTHEAUTHORIZEDSERVICEFORINSTALLATION OFYOUROVEN!
3.1.CHOOSINGAPLACE FORTHEOVEN
There are several points to pay
attention
to when
choosing
a place for your
oven.
Make sure to take into account our
recommendations
below in order to prevent
any
problems
and
dangeroussituations,
which might occur
later!
When choosing a place for the oven, attention should be paid that there are no flammable
or combustible materials in the close vicinity, such as curtains, oil, cloth etc. which quickly
catchfire.
Furnituresurroundingthe oven mustbemadeofmaterialsresistant toheatmore than50
C°oftheroomtemperature.
Required changes to wall cabinets and exhaust fans above the built-in combined product
as well as minimum heights from the oven board are shown in Figure 1. Accordingly, the
exhaust fan should be at a minimum height of 65 cm from the hob board. If there is no
exhaustfantheheightshouldnotbeless than70cm.
Figure 1

7
Product
sizes
575mm
590mm
570mm
595mm
Insert the oven into cabinet by pushing it forward. Open the oven door and insert 2 screws in
the holes located on the oven frame.While the product frame touches the wooden surface of
cabinet,tightenthescrews.

8
BROWN
YELLOW+GREEN
BLUE
The dimensions and material of the cabinet in which the oven will be installed must be
correct and resistant to increases in temperature. In a correct installation, contact with
electrical or insulated parts must be prevented. Insulating parts need to be fitted in a way to
ensure that they cannot be removed by using any kind of tool. Installing the appliance in the
close vicinity of a refrigerator or a deep-freezer is not recommended. Otherwise, the
performance of the above-mentioned appliances will be negatively affected due to
emanating heat. After removing your oven from its packaging, be sure that the oven is not
harmed. In case, you suspect of any damage to the appliance, do not use it; immediately
contact AuthorizedService.
3.3.WIRINGAND SAFETYOFBUILT_IN OVEN
The
instructions
given below must be
followedwithout
fail during wiring
:
The earthingcable mustbe connectedvia the screwwith the earthingmark.Supply cable
connection must be as shown in Figure 6. If there is no earthed outlet conforming to
regulationsintheinstallationenvironment,calltheAuthorizedServiceimmediately.
Theearthedoutletmustbeinclosevicinityoftheappliance.Neveruseanextensioncord.
Thesupplycableshouldnotcontacttheproduct’shotsurface.
In case of any damage to the supply cable, make sure to call the Authorized Service. The
cablemustbereplacedbytheAuthorizedService.
Wiring of the appliance must be performed by the Authorized Service. H05VV-F type
supplycablemustbeused.
Faulty wiring may damage the appliance. Such damage will not be covered under the
warranty.
The appliance is designed to connect to 220-240V~ electricity is different than the value
givenabove,calltheAuthorizedServiceimmediately.
The
Manufacturer
declares that its holds no
responsibility
for
any
kind of damage
and loss arising from not
complying
with the safety warnings.
Figure 6

9
PART
4:
USING THE OVEN
4.1 CONTROL PANELS
Built-in Oven
Oven Function
Control Knob
Oven Operation Light
Oven Thermostat Knob
Oven Thermostat Light
Oven
Function
Control
Knob:
To select the desired cooking function, turn the knob
to the related symbol (Figure 11). the details of the
oven functions have been explained in Table 1 and
nextpart.
Oven
Thermostat
Knob:
After cooking function set, desired temperature can
be adjusted by oven thermostat knob (figure 12) and
oven start to operate (timer must be adjusted, if
available).
Thermostat signal light will be on or off according to
thermostatoperation.
Max
Figure 11
0
50
100
250
200
150
Figure 12

10
4.2. USING THE OVEN FUNCTION CONTROL BUTTON
Table 1
The oven light, the red warning light and the fan will be turned
on. Performs the function of defrosting the frozen foods.
The oven’s thermostat and warning lights and the lower and
upper heating elements will be switched on.
The oven’s thermostat and warning lights, the fan and the
turbo heater will be switched on.
The oven’s thermostat and warning lights, the fan and the
lower and upper heating elements will be switched on.
The oven’s thermostat and warning lights, the grill heater
will be switched on.
The oven’s thermostat and warning lights, the upper heating
element, the grill heater will be switched on.
Defrost
Function
:
You can start the defrost operation by putting the frozen
food into oven and bringing the knob to the indicated
mark. This function does not cook/bake the food; it only
helps defrost it within a short time. Put the food to be
defrosted on the wire rack that you will place on the third
rack support from the bottom (Figure 13). To collect the
waterto accumulatedue to the meltingice, insertan oven
trayintothelowerrack.
Figure 13

11
Lower-Upper
Heating Element
Function
(Static Coking)
:
In this type of cooking which is described as the traditional method, the heat emanating
evenly from the lower and upper resistors into the oven ensures even cooking of the lower
and upper side of the food that you are cooking.Adjust the thermostat knob of your oven to a
temperature recommendedonthe cookingtable for the cooking operation you willperform.A
preheating of the oven for about 10 minutes is recommended. Leave a food to cook, which is
placed in a suitable container, for the recommended duration. This position is a preferred
functioninmakingcakes, sponge cakes, pastry, baked pasta, lasagna,
pizza.
After a cooking/baking, turn off the oven function control knob and the thermostat knob and
cancelthe timer programif available.Takethecooked/bakefood out of theoven,placeitona
safe place and ensure that the oven completely cools off by keeping the oven door open.
As
the oven will be hot, stay away from the oven and keep your
children
away as
well.
Turbo Fan
Function
:
The turbo fan function evenly disperses the heat in the oven. All foods on all racks will be
cookedevenly.
Adjustthe thermostat knob to the desired degree.Turn the function knob so it will pointto the
Turbo function symbol. After completing the preheating of 10 minutes, place the foods
into the oven, which need to be put into suitable containers. This function is suitable for
cookingmultipledishes.
If you are going to cook using two trays at the same time; while adjusting the cooking
temperature, select the temperature that is the lowest among the levels suitable for your
foods, as shown on the table. Cooking with two trays requires additional cooking time
compared to cooking with one tray. Usually, the foods on both trays do not finish at the same
time. Therefore, take the tray out of the oven, which you observed is finished and continue
thecookingoperationfortheothertray.
After the cooking/baking, turn off the oven function control knob and the thermostat knob
and cancel the timer program ifavailable.Take the cooked/baked food outof the oven, place
it on a safe place and ensure that the oven completely cools off by keeping the oven door
open. As the oven will be hot, stay away from the oven and keep your
children
away
as
well.
Fan and the Lower -Upper Heating Element
Function:
This is the position where the air is coming from the lower and upper heating elements is
circulatedintotheovenbythefanmotorandblade.
Adjust the thermostat knob of your oven to temperature recommended on the cooking
table for the cooking operation you will perform.Turn the oven knob so it will point to the

12
symbol of this function, adjust the oven timer to the recommended time for cooking and
preheat the oven for about 10 minutes. The food placed in a suitable container is put into
the oven and the operation is started. This position is position where usually very good
results are obtained in baking pastry. All parts of the foods will be cooked evenly in this
position.Suitable for
cooking
with one
tray
.
After the cooking/baking, turn off the oven function control knob and the temperature
setting knob and cancel the timer program if available. Take the cooked/baked food
out of the oven, place it on a safe place and ensure that the oven completely cools off
by keeping the oven door open. As the oven will be hot, stay away from the oven and
keepyourchildrenaway aswell.
Grill
Function
:
This function is used for grills. For grills; put the foods on the grill, and the grill on the highest
rack. After placing the oven tray on the 2. Rack, You can start the grill operation. The tray
placedonthe2.Rackwillensurethattheoildroppingfromthefoodwillbecollected.
When
grilling,
the oven door must be closed and the oven
temperature
should be
adjusted to 190°.
Turn your oven’s thermostat knob so it will point to this temperature value.After a preheating
periodof5minutes,putyourfoodintotheoven.
After the cooking,turn off the oven function controlknob and the thermostat knob and cancel
the timer program. Take the cooked/baked food out of the oven, place it on a safe place and
ensure that the oven completely cools off by keeping the oven door open. As the oven
will
be hot, stay away from the oven and keep your
children
away as
well.
Upper Heating Element, Grill
Function
:
This function is used for faster grills and for grills on a larger surface. For grills; put the foods
on the grill, and the grill on the highest rack. After placing the oven tray on the 2. Rack, you
can start the grill operation. 2, the tray placed on the 2. Rack will ensure that the oil dropping
from the foods will be collected. When
grilling,
the oven door must be closed and
the
oven
temperature should
be adjusted to 190°.
Turn your oven’s thermostat knob so it will point to this temperature value.After a preheating
periodof5minutes,putyourfoodsintotheoven.
After the cooking,turn off the oven function controlknob and the thermostat knob and cancel
the timer program if available.Take the cooked/baked food out of the oven, place it on a safe
placeandensurethattheovencompletelycoolsoffbykeepingtheovendooropen.

13
ENERGY
SA
VING
Duringuseofelectricalcookers,itisrequiredtousesaucepanshavingflatbases.
Chooseacookwareofpropersize.
Usingalidwillreducecookingtimes.
Minimizetheamountofliquidorfattoreducecookingtimes.
Whenliquidstartsboiling,reducethetemperaturesetting.
Ovendoorshouldnotbeopenedoftenduringcookingperiod.

14
4.3. USING THE MECHANIC TIMER
010
M20
30
100
40
90
Manual Operation
:
When you bring the Timer button to the position indicating M as
shown on the picture, you can continuously run your oven. When
thetimerbuttonisin0positiontheovenwillnotoperate(Figure15).
80 50
70 60
Figure 15
0
10
M 20
30
100
40
90
Operating by
adjusting
the time
:
Rotatethe timer button clockwisetoa certaintime rangebetween0
- 100 minutes, as shown on thepicture.The oven will stop when the
set time range is completed, and the timer will give an audible
warningonce(Figure16).
80 50
70 60
Figure 16
0
90
80
70 10
60 20
50 30
40
Mechanical Minute Minder
:
Set the desired cooking time by turning timer button clockwise.
At the end of this time period, timer will make a beep sound but
the oven continues working. In order to turn the oven off, you
must take the switch and thermostat of the oven to closed position
(Figure17).
Figure 17

15
min min min
min
1-2-3
1-2-3
1-2-3
2
1-4
1-4
1-2
1-2
1-2
2
1-2
1-2
1-2-3
1-2-3
2
1-2
4
3-4
4

16
4.7.ACCESSORIESUSEDINTHEOVEN
It is recommended that you use the containers indicated on the table depending on the food
you will cook in your oven, you can also use glass containers, cake cutters, special oven
trays suitable for use in your oven, available in the market. Pay attention to the information
given by the manufacturer firm concerning this issue. If small sized containers are used,
place this container on the inner grill wire so it will be precisely on the middle of the wire.
The informationgivenbelowshouldbeimplementedforenamelledcontainers.
If the food to be cooked does not completely cover the oven tray, the food is taken out of the
deep-freezer or if the tray is used to collect the dripping juices of the foods during the grill
operation; deformation might be observed on the tray due to high temperatures forming
during the cooking/frying operation. This is normal, physical state that results during the
heat transfer. Do not leave a glass tray or container in a cold environment immediately after
cookinginthem. Donot placethemoncold andwet surfaces.Ensurethattheyslowlycooloff
placingthemonadrypieceofcloth.Otherwise,theglasstrayorcontainermightbreak.Ifyou
are going to perform a grill operation in your oven, we recommend that use the grill on tray,
supplied together with your product (if your product includes this equipment). This way,
splattering and dripping oils will not make the oven interior dirty. If you are going to use the
large wire grill, insert a tray into one of the lower racks to avoid accumulation of the oils. To
make cleaningeasier,add some waterintoitaswell.In agrillingoperation,use the3.Or the
4.rackandailthegrilltopreventthefoodtobegrilledfromstickingtothegrill.
5. rack
4. rack
3. rack
2. rack
1. rack
WARNING- Fit the
grid correctly into
any correspondent
rack in the oven
cavity and push it to
the end.
Wire grid: Used for grills or placing
different containers other than the
cookingtrayonit.
Deep tray: Usedforbakingstews.

17
PART
5:
CLEANING AND MAINTENANCE OF YOUR OVEN
5.1.CLEANING
Before starting to clean youroven,be sure that all control buttons are off and yourappliance
iscooledoff.Unplugtheappliance.
Do not use cleaning materials containing particles that might scratch the enamelled and
painted parts of your oven. Use cream cleaners or liquid cleaners, which do not contain
particles. As they might harm the surfaces, do not use caustic creams, abrasive cleaning
powders, rough wire wool or hard tools. In the event the excess liquids spilling over your
oven should burn, it may cause a damage to the enamel. Immediately clean up the split
liquids.Donotusesteamcleanersforcleaningtheoven.
Cleaning the
interior
of the
oven
Make sure to unplug the oven before starting to clean it. You will obtain best results if you
clean the oven interior while the oven is slightly warm. Wipe your oven with a soft piece of
cloth dampened with soap water after each use. Then wipe it again, this time with a wetted
cloth, and wipe it dry.Acomplete cleaning using dry and powder type cleaners. For product
with catalytic enamel frames, the rear and side walls of the inner frame do not require
cleaning. However; depending on usage, it is recommended that you replace them after a
certainperiodoftime.
Clearing of the hob part of the
Built-in Oven
For built-in combined products, hobs should be cleaned wiping with a dampened cloth.
Cleaningofthe stainlesssteel partsshouldbedoneonlywith waterandsuchpartsshouldbe
wiped dry with a soft cloth or chamois. Gaps and corners should be cleaned using liquid
detergents or lukewarm vinegar. When cleaning the lids of the models with upper glass
lids, use hot water and rough cloth. Try to clean up without rubbing / scrubbing. You can
use liquid detergents if necessary. Another point to pay attention to that the glass lid
should not be closed until the job boar is completely cooled off.
Cleaning the
vitroceramic
glass
burner
Unplug the appliance before starting the cleaning.
Waitforthevitroceramicglasstocompletelycooloffbeforestartingthecleaning.
Make sure that the cleaning materials you will use do not contain particles that might
scratchtheglass.Usecreamdetergentsorliquidsdetergents.
The vitroceramic surface should be wiped with cold waterandwiped drywith a soft piece
of clothuntilnocleaningmaterialasisleftonthesurface.
You can use the cleaning spatula supplied together with your product, for the cleaning of
splitfoodsandresidues.
Dessert type of foods should be cleaned immediately after day spill withoutwaiting for the
vitroceramicglasstocooloff.

18
Scrubbingwith steel cleaningwires mayharm the vitroceramic glasssurface.Formationof
dustonthesurfaceshouldbecleanedupusingadampenedcloth.
Changes in colour which might occur on the ceramic glass surface do not affect the
functional structure or permanence of the vitroceramic. The reason for the changes in
colour is not the change in the material; it may be because the burnt residues on the
surface are not cleaned up or the pots used have worn the glass surface or because
unsuitablecleaningmaterialswereused.
The cleaning spatula should always be used prior to chemical cleaning substances. With
this spatula, you can clean up the tiniest of dirt’s on the vitroceramic surface. Dirt’s that
are difficult to remove, such as melted plastic, heavy oils, sweet substances, can be
removed easily with the spatula.As the spatula includes a razor, it is dangerous and must
bekeptout ofreachofchildren.
During cleaning with spatula, pay attention notto scrape off the silicon adhesives found on
thesidesoftheglass.
5.2.MAINTENANCE
Replacing the Oven
Light
The change of oven lamp must be done by authorized technician. The rating of the bulb
should be 230V, 25Watt, Type E14,T300 before changing the lamp, the oven should be
pluggedoffanditshouldbecool.
The lamp design is specific for the use in household cooking appliances and it is not suitable
forhouseholdroomillumination.
Other manuals for OO654X
2
Table of contents
Other Omega Oven manuals

Omega
Omega OF910FX User manual

Omega
Omega OBO699W User manual

Omega
Omega OBO650X1 User manual

Omega
Omega OO654X User manual

Omega
Omega OBO960X1 User manual

Omega
Omega OO640X User manual

Omega
Omega OBO669X2 User manual

Omega
Omega OBO61PXTGG User manual

Omega
Omega Europa OA60 User manual

Omega
Omega OBO694XB User manual

Omega
Omega OBO698PXB User manual

Omega
Omega OO654X User manual

Omega
Omega OBO654GG User manual

Omega
Omega OO884XA User manual

Omega
Omega OBO691TGG User manual

Omega
Omega OBO650X2 User manual

Omega
Omega OBO61PX User manual

Omega
Omega OBO888BD User manual

Omega
Omega OO664X User manual

Omega
Omega OO651WA User manual