manuals.online logo
Brands
  1. Home
  2. •
  3. Brands
  4. •
  5. Oncam
  6. •
  7. Security Camera
  8. •
  9. Oncam Evolution EVO-05-PSK User manual

Oncam Evolution EVO-05-PSK User manual

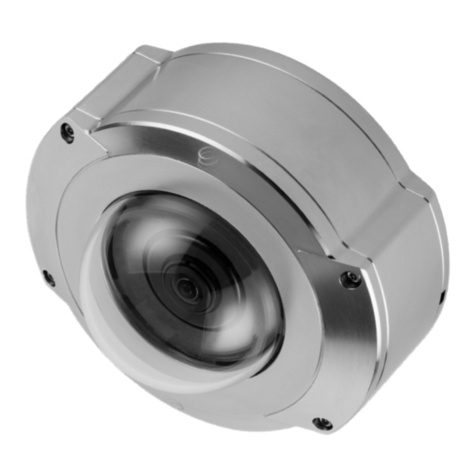
Evolution Stainless Steel Camera
QUICK START GUIDE
PENDANT MOUNT
Welcome
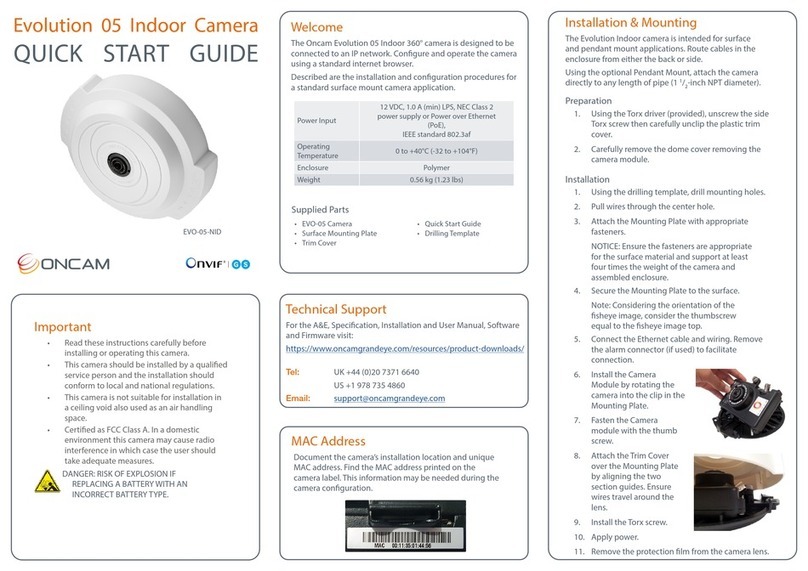
The Oncam Evolution 05 & 12 Stainless Steel 360° cameras
are designed for industrial environments and for connecting
to IP networks. Configure and operate the cameras using a
standard internet browser.
Described is the installation and configuration procedures for
a standard pendant mount camera application.
Installation & Mounting
Use compatible wall, pole and pendant mount brackets with
the Evolution Stainless Steel Pendant Mount camera.
Preparation
1. Remove the four dome
cover screws using the Hex
Screwdriver.
2. Carefully remove the dome
cover.
3. Detach the dome cover from
the safety wire and remove the
camera module.
4. Remove the three Pendant
Mount screws and washers.
5. Aligning the holes, secure the
Sunshield to the Pendant Mount
Adapter using the three screws
and washers.
Installation
1. Use the Pipe Thread Adapter when
connecting to a female 1.5-inch NPT
connection.
2. Attach the Sunshield and Pendant
Mount assembly to the Pipe Thread
Adapter or mounting bracket.
3. Pass the unterminated network
cable through the camera base.
4. Align the camera base to the
Pendant Mount assembly and twist into place.
5. Secure the camera base to the Pendant Mount
assembly.
6. Pull approximately 25 cm (10 in.) of the network cable
through the cable gland.
7. Tighten the cable gland using the supplied spanner.
CAUTION: Ensure all cable entries are sealed to
maintain the IP69K rating.
8. Terminate the network cable and
secure the camera module into
the camera base.
9. Connect the network cable to
the camera.
10. Reattach the dome cover safety wire.
11. Secure the dome cover screws using
the Hex Screwdriver.
Notice: Use the provided screw caps
after fitting the dome cover for NSF
rating and compliance.
Power Input
12 VDC, 1.0 A (min) LPS, NEC Class 2 power
supply or Power over Ethernet (PoE),
IEEE standard 802.3af
Operating
Temperature -40 to +55°C (-40 to +131°F)
Enclosure Electropolished marine grade 316 stainless steel
with polymer bubble
Weight EVO-05 6.30 kg
(13.89 lbs)
EVO-12 6.34 kg
(13.97 lbs)
Important
• Read these instructions carefully before installing or
operating this camera.
• This camera should be installed by a qualified
service person and the installation should conform
to local and national regulations.
• Maintain the IP69K rating by ensuring all cable
entries are sealed.
• Certified as FCC Class A. In a domestic
environment this camera may cause radio
interference in which case the user should take
adequate measures.
DANGER: RISK OF EXPLOSION IF
REPLACING A BATTERY WITH AN
INCORRECT BATTERY TYPE.
EVO-05-PSK
EVO-12-PSK
Supplied Parts
• EVO-05 or EVO-12 Camera • Quick Start Guide
• Pendant Mount Adapter • Hex Screwdriver
• Sunshield • Spanner
• Pipe Thread Adapter • Drilling Template
Technical Support
For the A&E, Specification, Installation and User Manual,
Software and Firmware visit:
oncamgrandeye.com/resources/
Tel: UK +44 (0)20 7371 6640
US +1 978 735 4860
Email: [email protected]
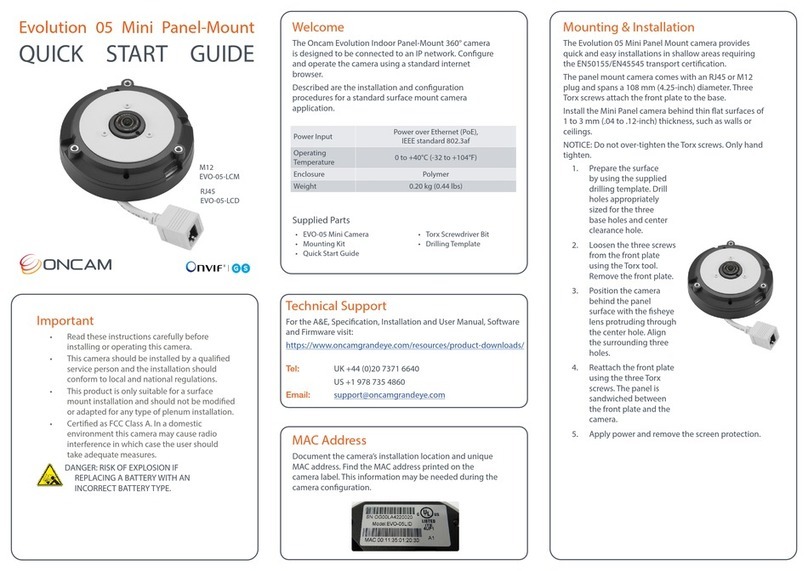
MAC address
Document the camera’s installation location and unique
MAC address. Find the MAC address printed on the camera
label. This information may be needed during the camera
configuration.
Download our FREE OnVu360 mobile application and
put the 360° real time monitoring experience right at
your fingertips.
Scan the QR Code to get it now.
Android iOS
Copyright 2016, 2017 by Oncam Global Group AG. Oncam is a trading name of Oncam Global Group AG. All rights reserved. All screen images
are simulated. Specifications and configurations subject to change without notice. Legal Notice: Parts of this product are protected by patents.
EVO-05-12-PSK-01 |Stainless Steel Pendant |9/2017 |Rev C
Configuring network settings
Powering the camera
Supply power to the camera with 12 VDC or PoE
IEEE802.3af through the integrated RJ45 Ethernet cable.
In order to use the camera you need the IP address.
There are two typical installation types.
• DHCP server or router to automatically assign
unique valid IP addresses to each camera.
• A manually configured network using static IP
addresses.
If your network has a DHCP server, go to Viewing images
for the first time.
Static IP installation
If a DHCP server is not available, the camera adopts the
default IP address 192.168.0.200. Manually assign each
camera with a new unique IP address.
Note: There is a detailed explanation of how to adjust
IP settings in the camera’s User Manual and Camera
Configuration Tool User Manual.
Using the Camera Configuration Tool
Go to the Oncam website (https://www.oncamgrandeye.
com/security-systems/camera-configuration-tool.html) for
downloading the latest version of the Camera Configuration
tool and corresponding User Manual.
The Camera Configuration tool quickly finds the IP and MAC
addresses of all Oncam IP cameras connected to the network.
It also allows you to change network settings, configure the
system and perform software updates on multiple cameras.
Initiate a new scan by clicking the Full Discover button.
Start the application by clicking the CameraConfigurationTool
icon found on your desktop or from the program list (under
Oncam Grandeye). The software scans the network and
provides a list of all connected Oncam IP cameras.
Note: Some functions in this tool require a username and
password. The default username and password is ‘admin’.
Viewing images for the first time
To view live images from any camera on the network:
1. If you know the IP address of the camera, enter this
into the address bar of your web browser (Internet
Explorer, Edge, Firefox or Chrome). The camera should
be on the same network.
2. Enter the Username and Password (default is “admin”).
3. Using the Camera Configuration Tool, select one or
multiple cameras from the camera list
4. Select your browser to open the web interface.
5. Enter your Username and Password (default is
“admin”).
Note: Ensure you have the latest VLC Media Player
(http://www.videolan.org/vlc/index.html) for viewing camera
images on the web interface.
Note: Shown is the Evolution 05 screen.
Note: Shown is the Evolution 12 camera.

This manual suits for next models

1

Other Oncam Security Camera manuals

Oncam Evolution 05 Mini Outdoor User manual

Oncam

Oncam Evolution 05 Mini Outdoor User manual

Oncam EVO-05-LRD User manual

Oncam

Oncam EVO-05-LRD User manual

Oncam Evolution 05 User manual

Oncam

Oncam Evolution 05 User manual

Oncam Evolution EVO-05NMD User manual

Oncam

Oncam Evolution EVO-05NMD User manual

Oncam Evolution 05 User manual

Oncam

Oncam Evolution 05 User manual

Oncam Evolution 12 Series Instruction Manual

Oncam

Oncam Evolution 12 Series Instruction Manual

Oncam M12 User manual

Oncam

Oncam M12 User manual

Oncam C-12 Outdoor Plus User manual

Oncam

Oncam C-12 Outdoor Plus User manual

Oncam Evolution 180 Series Instruction Manual

Oncam

Oncam Evolution 180 Series Instruction Manual

Oncam C-12 Series Instruction Manual

Oncam

Oncam C-12 Series Instruction Manual

Oncam EVO-05LID User manual

Oncam

Oncam EVO-05LID User manual

Popular Security Camera manuals by other brands

AI View S500 installation guide

AI View

AI View S500 installation guide

TRASSIR TR-D3121IR2 manual

TRASSIR

TRASSIR TR-D3121IR2 manual

Sanyo VCC-HD2300 - Full HD 1080p Network Camera Specifications

Sanyo

Sanyo VCC-HD2300 - Full HD 1080p Network Camera Specifications

Verkada CB51 quick start guide

Verkada

Verkada CB51 quick start guide

Instar IN-7011 HD user manual

Instar

Instar IN-7011 HD user manual

Sanyo VCC-WD8575P instruction manual

Sanyo

Sanyo VCC-WD8575P instruction manual

JAI GO-5000M-PGE user manual

JAI

JAI GO-5000M-PGE user manual

Verint Nextive S5503 user guide

Verint

Verint Nextive S5503 user guide

TRASSIR TR-D3181IR3 quick start guide

TRASSIR

TRASSIR TR-D3181IR3 quick start guide

Speco O4LT1 quick start guide

Speco

Speco O4LT1 quick start guide

Arm Electronics C420DN Features

Arm Electronics

Arm Electronics C420DN Features

Digital Watchdog DWC-TT4Wi36 user manual

Digital Watchdog

Digital Watchdog DWC-TT4Wi36 user manual

Panasonic WVMG14 - CCTV CAMERA operating instructions

Panasonic

Panasonic WVMG14 - CCTV CAMERA operating instructions

Axis AXIS 207 installation guide

Axis

Axis AXIS 207 installation guide

Novus NVIP-5VE-4502M/F quick start guide

Novus

Novus NVIP-5VE-4502M/F quick start guide

Axis Q6318-LE installation guide

Axis

Axis Q6318-LE installation guide

Lorex CVC6945PK4 quick start guide

Lorex

Lorex CVC6945PK4 quick start guide

Honeywell 60 Series Configuration guide

Honeywell

Honeywell 60 Series Configuration guide

manuals.online logo
manuals.online logoBrands
  • About & Mission
  • Contact us
  • Privacy Policy
  • Terms and Conditions

Copyright 2025 Manuals.Online. All Rights Reserved.