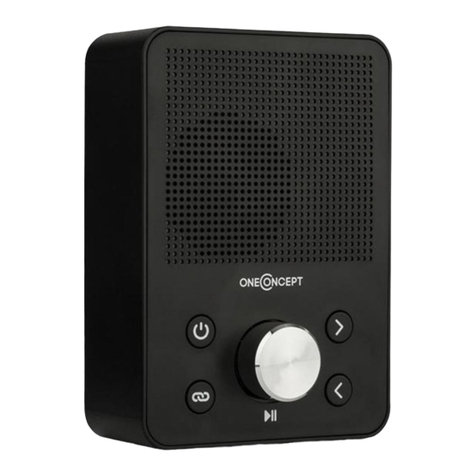
oneConcept 10029987 User manual

Küchenradio (FM & DAB+)
10029987 10029988

2
Sehr geehrter Kunde,
zunächst möchten wir Ihnen zum Erwerb Ihres Gerätes gratulieren.
Bitte lesen Sie die folgenden Anschluss- und Anwendungshinweise sorgfältig durch und befol-
gen Sie diese um möglichen technischen Schäden vorzubeugen.
Sicherheitshinweise und Gewährleistung
• Diese Bedienungsanleitung dient dazu, Sie mit der Funktionsweise dieses Produktes ver-
traut zu machen. Bewahren Sie diese Anleitung daher stets gut auf, damit Sie jederzeit
darauf zugreifen können.
• Sie erhalten bei Kauf dieses Produktes zwei Jahre Gewährleistung auf Defekt bei sachge-
mäßem Gebrauch.
• Bitte verwenden Sie das Produkt nur in seiner bestimmungsgemäßen Art und Weise. Eine
anderweitige Verwendung führt eventuell zu Beschädigungen am Produkt oder in der Um-
gebung des Produktes.
• Ein Umbauen oder Verändern des Produktes beeinträchtigt die Produktsicherheit. Achtung
Verletzungsgefahr!
• Öffnen Sie das Produkt niemals eigenmächtig und führen Sie Reparaturen nie selber aus!
• Behandeln Sie das Produkt sorgfältig. Es kann durch Stöße, Schläge oder den Fall aus be-
reits geringer Höhe beschädigt werden.
• Halten Sie das Produkt fern von Feuchtigkeit und extremer Hitze.
• Lassen Sie keine Gegenstände aus Metall in dieses Gerät fallen.
• Stellen Sie keine schweren Gegenstände auf dieses Gerät.
• Reinigen Sie das Gerät nur mit einem trockenen Tuch.
• Blockieren Sie keine Belüftungsöffnungen.
• Verwenden Sie ausschließlich vom Hersteller oder vom qualizierten Fachhandel empfoh-
lenes Zubehör.
Die Gewährleistung verfällt bei Fremdeingriffen in das Gerät.
• Es wird keine Haftung für Schäden und Fehlfunktion übernommen, die aus der fehlerhaften
Benutzung oder dem fehlerhaften Einbau des Geräts entstehen.
• Kleine Objekte/Verpackungsteile (Plastikbeutel, Karton, etc.): Bewahren Sie klei-
ne Objekte (z.B. Schrauben und anderes Montagematerial, Speicherkarten) und Ver-
packungsteile außerhalb der Reichweite von Kindern auf, damit sie nicht von diesen
verschluckt werden können. Lassen Sie kleine Kinder nicht mit Folie spielen. Es besteht
Erstickungsgefahr!
• Transport des Gerätes: Bitte bewahren Sie die Originalverpackung auf. Um ausreichen-
den Schutz beim Transport des Gerätes zu erreichen, verpacken Sie das Gerät in der Ori-
ginalverpackung.
• Reinigung der äußeren Oberäche: Verwenden Sie keine üchtigen Flüssigkeiten, wie
Insektensprays. Durch zu starken Druck beim Abwischen können die Oberächen beschä-
digt werden. Gummi- oder Plastikteile sollten nicht über einen längeren Zeitraum mit dem
Gerät in Kontakt sein. Nutzen Sie ein trockenes Tuch.
3
Technische Daten
Artikelnummer 10029987, 10029988
Stromversorgung AC 230V ~50Hz
Frequenzbereiche FM: 87.5 - 108MHz
DAB: 174 - 240MHz
Lieferumfang: Gerät, Bedienungsanleitung
Übersicht & Montage

4
Power / Standby 1 11 INFO
Display 2 12 ENTER
UP (oben) 3 13 TIMER 2
MODE (FM/DAB) 4 14 VOLUME -
MENU 5 15 Netzkabel
PRESET 6 16 Antennenanschluss
TIMER 1 7 17 Lautsprecher
VOLUME + 8 18 Standfuß
DOWN (unten) 9 19 Antenne mit Magnetfuß
AUTO SCAN 10 20 Montageplatte (für Unter-Schr.Montage)

5
Bedienung
Inbetriebnahme
Schließen Sie das Gerät an einer gewöhnlichen Haushaltssteckdose mit 230V ~50Hz an.
Das Gerät bezieht die aktuelle Uhrzeit durch die Synchronisierung mit dem Radiosignal, sobald
ein Sender empfangen wird. Die erste Synchronisation kann einige Minuten dauern.
Platzieren Sie die Antenne an einem geeigneten Platz und verbinden Sie sie mit den Antennen-
Buchse an der Rückseite des Radios.
Timer Einstellen
• Drücken Sie TIMER oder TIMER 2 und dann eine der Pfeiltasten (oben/unten), um den je-
weiligen Timer (1 oder 2) zu aktivieren/deaktivieren. Drücken Sie ENTER zum bestätigen.
Das Display zeigt „00:00“.
• Stellen Sie die Stunde mit den Pfeiltasten ein und bestätigen Sie mit ENTER.
• Verfahren Sie mit den Minuten ebenso und bestätigen Sie wiederum mit ENTER.
• Stellen Sie im nächsten Schritt die Alarm-Lautstärke mit den Pfeiltasten ein und bestätigen
Sie mit ENTER. Der Timer läuft nun.
• Sobald die Timer-Zeit abgelaufen ist, erklingt ein Tonsignal (verschiedene Tonsignale für
TIMER 1 und TIMER 2) mit bis zu dem Niveau anschwellender Lautstärke, das Sie einge-
stellt haben.
• Drücken Sie die jeweilige TIMER-Taste, um den Alarm wieder abzuschalten. Anderenfalls
klingt das Tonsignal für eine Dauer von fünf Minuten.
Radio: FM
• Drücken Sie MODE, um den FM-Modus auszuwählen.
• Drücken Sie AUTO SCAN, um einen automatischen Suchlauf bis zum nächsten Sender (im
Frequenzband aufwärts) auszulösen. (Gedrückt halten für Suchlauf abwärts).
• Nutzen Sie die Pfeiltsaten für das manuelle Einstellen der gewünschten Frequenz.
• Drücken Sie ENTER, um zwischen Mono oder Auto zu wählen.
Radio: DAB
• Drücken Sie MODE, um den DAB-Modus auszuwählen.
• Drücken Sie AUTO SCAN, um einen automatischen Sendersuchlauf auszulösen.
Bitte beachten Sie: Bei der ersten Inbetriebnahme, wird automatisch ein vollständiger
Sendersuchlauf mit anschließender Speicherung der gefundenen Sender ausgeführt. Die-
ser Vorgang kann bis zu einigen Minuten dauern. Sie können beliebig oft einen neuen Sen-
dersuchlauf ausführen (SCAN). Der Prozessfortschritt wird rechts im Display dargestellt.
Nach dem Suchlauf wird der zuletzt gefundene Sender abgespielt.
• Nutzen Sie die Pfeiltasten, um den gewünschten Sender auszuwählen.

6
Manuelle Sendersuche:
• Halten Sie ENTER gedrückt, bis „manual tune“ auf dem Display erscheint.
• Nutzen Sie die Pfeiltasten, um das Frequenzband zu durchsuchen.
• Drücken Sie ENTER zweimal, um die Frequenz zu bestätigen und die manuelle Sendersu-
che zu beenden.
Beachten Sie: Bei Multiplex-Kanälen wird die Kanalnummer sowie die Frequenz auf dem
Display gezeigt. Der erste enthaltene Sender wird abgespielt.
Weitere Funktionen
• Sender: Presets Speichern und Aufrufen
Sie können bis zu 10 DAB- und 10 FM-Sender auf Speicherplätzen ablegen.
• Halten Sie PRESET gedrückt, um den aktuellen Sender zu speichern. „PRESET EMPTY
1“ erscheint auf dem Display.
• Nutzen Sie die Pfeiltasten, um den gewünschten Speicherplatz auszuwählen (1 - 10)
und bestätigen Sie mit ENTER. Achtung: Bereits auf dem jeweiligen Speicherplatz
abgelegte Sender werden ohne Rückfrage überschrieben.
• Zum Aufrufen abgespeicherter Sender, drücken Sie PRESET kurz und wählen dann mit
den Pfeiltasten und ENTER den gewünschten Sender aus.
• Auf Werkszustand zurücksetzen
Halten Sie MENU im FM-Modus gedrückt, um ins Systemmenü zu gelangen. Blättern Sie
mit den Pfeiltasten bis Sie SYSTEM RESET erreichen. Drücken Sie ENTER zum Bestätigen.
Achtung: Alle gespeicherten Sender werden gelöscht. Beim erneuten Einschalten wird wie-
der ein vollständiger Sendersuchlauf automatisch ausgeführt.
• Sender-Informationen
Drücken Sie INFO mehrfach, um weiterführende Informationen zum aktuellen Radiosender
auf dem Display anzuzeigen:
DAB: Multiplex Name - Signalstärke - Datum & Uhrzeit - DLS-Info - Programm Typ -
Frequenz - Bit Rate
FM: RDS-Text - Programm Typ - Signalstärke - Datum & Uhrzeit - Audio Modus
• Prune (Sender löschen)
Drücken Sie im DAB-Modus die Taste MENU. Blättern Sie mit den Pfeiltasten zum Menü-
punkt PRUNE. Nutzen Sie die Pfeiltasten, um die zu löschenden Sender auszuwählen und
bestätigen Sie mit ENTER.
Das Gerät startet neu und führt einen vollständigen Sendersuchlauf aus. Achtung: DAB-
Presets werden gelöscht.

7
Hinweise zur Entsorgung
Elektroaltgeräte
Bendet sich die diese Abbildung (durchgestrichene Mülltonne auf Rädern) auf
dem Produkt, gilt die Europäische Richtlinie 2002/96/EG. Diese Produkte dürfen
nicht mit dem normalen Hausmüll entsorgt werden. Informieren Sie sich über
die örtlichen Regelungen zur getrennten Sammlung elektrischer und elektro-
nischer Gerätschaften. Richten Sie sich nach den örtlichen Regelungen und
entsorgen Sie Altgeräte nicht über den Hausmüll. Durch die regelkonforme Ent-
sorgung der Altgeräte werden Umwelt und die Gesundheit ihrer Mitmenschen
vor möglichen negativen Konsequenzen geschützt. Materialrecycling hilft, den
Verbrauch von Rohstoffen zu verringern.
Konformitätserklärung
Hersteller: CHAL-TEC GmbH, Wallstraße 16, 10179 Berlin, Deutschland
Dieses Produkt entspricht den folgenden Europäischen Richtlinien:
2004/108/EG (EMV)
2011/65/EU (RoHS)

8
Dear Customer,
Congratulations on purchasing this product. Please read and follow these instructions, in order
to avoid damaging the item. We do not cover any damages that may arise from improper use
of the item or the disregard of the safety instructions.
Important Safety Advice
• Read all instructions before using.
• To protect against a re, electric shock or personal injury, do not immerse cord, electric
plugs or device in water or other liquids.
• Do not expose the appliance to extreme temperatures. The appliance shall be used in
moderate climates.
• The use of attachments that are not recommended by the appliance manufacturer may
result in re, electric shock or personal injury.
• Do not open the unit by removing any cover parts. Do not attempt to repair the unit. Any
repairs or servicing should be done by qualied personell only.
• Only qualied persons may perform technical work on the product. The product
may not be opened or changed. The components cannot be serviced by the user. The
manufacturer is not responsible for any radio or TV interference caused by unauthorized
modications.
• The appliance is not a toy. Do not let children play with it. Never let children insert foreign
objects into the appliance.
• Never clean the surface of the device with solvents, paint thinners, cleansers or other
chemical products. Instead, use a soft, dry cloth or soft brush.
• We strongly suggest you power off projector when play it for 6 hours constantly one time.
• To protect your eye , do not watch directly at the lens when projector working .
• Save these instructions.
Small objects
Keep small objects (i.e. screws, mounting material, memory cards etc.) and packaging out of
the range of children. Do not let Children play with foil. Choking hazard!
Transporting the device
Please keep the original packaging. To gain sufcient protection of the device while shipment
or transportation, make sure to put it back in its original packaging.
Cleaning the surface
Do not use any volatile liquids, detergents or the like. Use a clean dry cloth.

9
Technical Data
Item # 10029987, 10029988
Power supply AC 230V ~50Hz
Frequency ranges FM: 87.5 - 108MHz
DAB: 174 - 240MHz
Scope of delivery Device, instruction manual
Overview & Mounting

10
Power / Standby 1 11 INFO
Display 2 12 ENTER
UP 3 13 TIMER 2
MODE (FM/DAB) 4 14 VOLUME -
MENU 5 15 Mains cable
PRESET 6 16 Antenna jack
TIMER 1 7 17 Speaker
VOLUME + 8 18 Plastic stand
DOWN 9 19 Antenna with magnetic stand
AUTO SCAN 10 20 Mounting plate (for under-cabinet-
mounting)

11
Operation
Startup
Plug the AC Power Cord into AC wall outlet. Before switching on the unit, make sure that the
voltage of your electricity supply is the same as that indicated on the rating plate.
Put the antenna to a suitable place and connect to the antenna jack on the rear of the device.
Time Setting
This unit will automatically sync the time from radio station once it is connected to the AC. It
may take several minutes for the rst sync.
Setting the Timer
• Press the TIMER 1 or TIMER 2 and press DOWN/UP button to turn on the alarm.
• Press the ENTER button to conrm. The display will show “00:00” (HOUR: MINUTE).
• Press UP/DOWN to select the desired hour and press the ENTER button to conrm.
• Press UP/DOWN to select the desired minute and press the ENTER button to conrm.
• Press UP/DOWN to select the desired alarm volume and press the ENTER to conrm.
• The timer will start and increase gradually to the desired volume setting. (The default
setting is Volume 9. )
• To switch off the timer, Press the TIMER 1 or TIMER 2 button correspondingly.
NOTE: Timer 1 and Timer 2 have two different alarm sound. Both alarms will stop auto-
matically after 5 minutes.
FM Radio
• Press the STANDBY button to turn on the Radio.
• Press the MODE button to select FM band.
• Press the AUTO SCAN button to the next available radio station or hold the AUTO SCAN
button to the previous available radio station.
• For Manual Tuning, press the UP and DOWN button to tune up or down the frequency by
MHz.
• Press Enter button to select the MONO or AUTO mode.
• Press the STANDBY button again to turn off the FM Radio.
DAB Radio
• Press the STANDBY button to turn on the Radio.
• Press the MODE button to select DAB band.
• Press the AUTO SCAN button to the auto full scan.

12
Note: When rst used, the unit scanned the DAB band for available stations. The station
services found were then stored in its memory. You can rescan the band at anytime if you
move to a different area or just refresh the stored list of available stations.
The scanning process will take a few minutes. The number of services found during the
scan will be shown at the right side of the display.
After the scan, the radio will re-tune to the last station playing if it is available. Alterna-
tively, you can continue to browse for another station.
• Press UP/DOWN to select the desired DAB radio Station.
• Press the RADIO ON/OFF button again to turn off the DAB Radio.
Performing a Manual Tuning:
• Press and hold the ENTER button until “Manual Tune” appears.
• Using the UP and DOWN buttons, toggle through the frequencies to tune a station.
• Press the Enter button twice to conrm the frequency and exit from “Manual Tuning”.
Note: The multiplex channel number and frequency is displayed. If a station multiplex
exists on this frequency, the multiplex name will also be displayed and the rst station in
the multiplex will play.
ANCILLARY FUNCTIONS
• Preset function
The unit can store up to 10 DAB and 10 FM stations as presets for instant access to your
favorite stations.
Storing a station preset:
• Tune your desired radio station you wish to store as a preset.
• Press and hold the PRESET button until “Preset Empty 1” appears with the number
ashing.
• Using the UP and DOWN buttons, select the preset number you wish to use and press
ENTER button to store that station into the radio memory.
Note: When you store a preset, the preset number and “Stored” will be displayed to con-
rm the number you selected. You can choose a preset number that is already in use. The
new station details will over-write the stored station.
• Recalling a preset station:
• Press the PRESET button until the rst preset appears.
• Using the UP and DOWN buttons, scroll through the station presets.
• Press the ENTER button to select the station you wish to listen to.

13
• System Reset
If a factory reset is required, follow these steps:
• In FM mode, press and hold the MENU button
• USE UP/DOWN button to select the System Reset.
• Press ENTER when prompted to perform the system reset. The radio will return to DAB
mode and perform an initial DAB+ scan on start-up.
Note: Any presets or setting stored will be permanently deleted.
• Browse station Information
Press the INFO button repeatedly to view information transmitted by the station in DAB /
FM modes.
DAB: Multiplexer name - signal strength - time & date - DLS* information - program
type** - frequency - bit rate
FM: RDS*** information - program type - signal strength - time&date - audio mode
*DLS (Dynamic Label Segment): This is a scrolling message giving real-time information – song titles,
news headlines, or detail of the program and is provided by the broadcaster.
**Program Type: This describes the style of the program being broadcast
***RDS (Radio Data System): Small amounts of digital data supplied by the broadcaster that may
provide song/station details, results, etc.
• Prune
You may remove all unavailable DAB stations from the list.
• In DAB mode, press and hold the MENU button.
• USE UP/DOWN button to select the PRUNE.
• Press ENTER to conrm.
The radio will return to DAB mode and perform an initial DAB+ scan on start-up.
Note: Any presets or setting stored will be permanently deleted.

14
Environment Concerns
According to the European waste regulation 2002/96/EG this symbol on the
product or on its packaging indicates that this product may not be treated as
household waste. Instead it should be taken to the appropriate collection point
for the recycling of electrical and electronic equipment. By ensuring this product
is disposed of correctly, you will hep prevent potential negative consequen-
ces for the environment and human health, which could otherwise be caused
by inappropriate waste handling of this product. For more detailled informa-
tion about recycling of this product, please contact your local council or your
household waste disposial service.
Declaration of Conformity
Manufacturer: CHAL-TEC GmbH, Wallstraße 16, 10179 Berlin, Germany.
This product is conform to the following European directives:
2004/108/EC (EMV)
2011/65/EU (RoHS)

15
Chère cliente, cher client,
Toutes nos félicitations pour l’acquisition de ce nouvel appareil. Veuillez lire attentivement
et respecter les consignes suivantes de branchements et d’utilisation pour éviter d’éventuels
dommages techniques.
Consignes de sécurité
• Ce mode d’emploi sert à vous familiariser aux fonctions de ce produit. Conservez-le bien
an de pouvoir vous y référer à tout moment.
• L’achat de ce produit donne droit à une garantie de deux ans en cas de défectuosité de
l’appareil sous réserve d’une utilisation appropriée de celui-ci.
• Veiller à utiliser le produit conformément à l’usage pour lequel il a été conçu. Une mauvaise
utilisation est susceptible d’endommager le produit ou son environnement.
• Tout démontage ou toute modication de l’appareil porte atteinte à la sécurité du produit.
Attention aux risques de blessure !
• Ne jamais ouvrir le produit de son propre chef et ne jamais le réparer soi-même !
• Manipuler le produit avec précaution. Les chocs, les coups ou les chutes - même de faible
hauteur - peuvent endommager l’appareil.
• Ne pas exposer le produit à l’humidité ou à une chaleur extrême.
• Ne pas introduire d’objets métalliques dans cet appareil.
• Ne pas poser d’objets lourds sur l’appareil.
• Nettoyer l’appareil uniquement avec un chiffon sec.
• Ne pas obstruer les ouvertures d’aération.
• Utiliser uniquement les accessoires recommandés par le fabricant ou par une entreprise
spécialisée et qualiée.
• Baisser le volume sonore avant de brancher un casque à un appareil audio.
• Utiliser le bloc d’alimentation pour raccorder l’appareil au circuit électrique et le brancher
à une prise électrique domestique classique (220-240 V).
Toute ouverture non autorisée de l’appareil entraîne l’annulation de la garantie.
• Le fabricant n’est pas tenu responsable des dégâts et des dysfonctionnements causés par
une mauvaise utilisation ou un mauvais montage de l’appareil.
Petits objets / éléments d’emballage (sac plastique, carton, etc.): Tenir les petits objets
(par exemple les vis et le matériel d’assemblage, les cartes mémoire) et le matériel d’emballage
hors de la portée des enfants pour éviter qu’ils ne les avalent. Empêcher les enfants de jouer
avec les lms de protection. Il existe un risque d’étouffement !
Transport de l’appareil: Conserver l’emballage d’origine. Pour garantir une protection suf-
sante de l’appareil pendant son transport, emballer l’appareil dans son emballage d’origine.
Nettoyage en surface de l’appareil: Ne pas utiliser de liquides volatiles comme ceux con-
tenus dans les bombes insecticides. Une pression trop importante exercée sur la surface de
l’appareil pendant le nettoyage peut l’endommager. Éviter le contact prolongé du caoutchouc
ou du plastique avec l’appareil. Utiliser un chiffon sec.

16
Fiche technique
Numéro d’article 10029987, 10029988
Alimentation électrique AC 230V ~50Hz
Plage de fréquence FM: 87.5 - 108MHz
DAB: 174 - 240MHz
Contenu de l’emballage Appareil, mode d’emploi
Aperçu et montage

17
Marche/veille 1 11 INFO
Afchage 2 12 ENTER
UP (haut) 3 13 TIMER 2
MODE (FM/DAB) 4 14 VOLUME -
MENU 5 15 Cordon d’alimentation
PRESET 6 16 Prise antenne
TIMER 1 7 17 Haut-parleur
VOLUME + 8 18 Pied de soutien
DOWN (bas) 9 19 Pièce d’écartement (pour montage sous
meuble)
AUTO SCAN 10 20 Plaque de montage (pour montage sous
meuble)

18
Utilisation
Mise en marche
Brancher l’appareil à une prise de courant domestique classique de 230 V ~ 50Hz. L’appareil
règle l’heure actuelle grâce à la synchronisation avec le signal radio, à partir du moment où
une station radio est captée. La première synchronisation peut durer plusieurs minutes.
This unit will automatically sync the time from radio station once it is connected to the AC. It
may take several minutes for the rst sync.
Régler le minuteur
• Appuyer sur TIMER ou TIMER 2 puis sur une des touches échées (haut/bas) pour activer/
désactiver chaque minuteur (1 ou 2). Appuyer sur ENTER pour conrmer. L’écran afche
« 00:00 ».
• Régler les heures avec les touches échées et conrmer avec ENTER.
• Procéder de la même manière avec les touches échées et conrmer de nouveau avec
ENTER.
• L’étape suivante consiste à régler le volume du réveil avec les touches échées et conr-
mer avec ENTER. Le minuteur démarre.
• Une fois que le temps du minuteur est écoulé, une sonnerie retentit (différentes sonneries
pour TIMER 1 et TIMER 2) jusqu’au niveau sonore préalablement paramétré.
• Appuyer sur la touche TIMER correspondante pour éteindre le réveil. Autrement, la sonne-
rie retentira pendant 5 minutes.
Radio : FM
• Appuyer sur MODE pour sélectionner le mode FM.
• Appuyer sur AUTO SCAN pour démarrer une recherche automatique de station jusqu’à la
prochaine station détectée (recherche avant sur la bande de fréquence). (Rester appuyer
pour effectuer une recherche arrière).
• Utiliser les touches échées pour effectuer un réglage manuel de la fréquence souhaitée.
• Appuyer sur ENTER pour choisir entre Mono et Auto.
Radio : DAB
• Appuyer sur MODE pour sélectionner le mode DAB.
• Appuyer sur SCAN pour démarrer une recherche automatique de stations.
Remarque : au premier démarrage, une recherche automatique complète des stations est
effectuée, avec une sauvegarde automatique des stations détectées. Ce processus peut
durer plusieurs minutes. Il est à tout moment possible d’effectuer une nouvelle recherche
de stations (SCAN). L’avancement de la recherche s’afche sur la droite de l’afchage. Une
fois la recherche effectuée, la dernière station écoutée sera diffusée.
• Utiliser les touches échées pour sélectionner la station souhaitée.

19
Recherche manuelle de station :
• Rester appuyer sur ENTER jusqu’à ce que « manual tune » apparaisse sur l’afchage.
• Utiliser les touches échées pour parcourir la bande de fréquence.
• Appuyer deux fois sur ENTER pour conrmer la fréquence et terminer la recherche manu-
elle de stations.
Remarque : dans le cas des canaux en multiplexage, le numéro du canal de même que la
fréquence apparaissent sur l’afchage. La première station sera diffusée.
Autres fonction
• Station radio : sauvegarder et sélectionner une présélection
Il est possible de sauvegarder jusqu’à 10 stations DAB et 10 stations FM sur la mémoire
de l’appareil.
• Rester appuyer sur PRESET pour sauvegarder la station en cours d’écoute. « PRESET
EMTPY 1 » s’afche à l’écran.
• Utiliser les touches échées pour sélectionner l’emplacement de sauvegarde souhaité
(1-10) et conrmer avec ENTER. Attention : les stations déjà sauvegardées sur un
emplacement seront écrasées sans préavis par la nouvelle station à sauvegarder.
• Pour diffuser des stations sauvegardées, appuyer brièvement sur PRESET puis sélec-
tionner la station souhaitée avec les touches échées et ENTER.
• Rétablir les paramètres par défaut
Appuyer sur MENU pour accéder aux paramètres du système. Utiliser les touches échées
pour sélectionner SYSTEM RESET. Appuyer sur ENTER pour conrmer. Attention : toutes
les stations sauvegardées seront supprimées. Au prochain redémarrage, l’appareil effectu-
era une recherche automatique complète de stations.
• Informations sur la station
Appuyer plusieurs fois sur INFO pour afcher des informations supplémentaires sur la
station radio en cours d’écoute :
DAB : nom de multiplexage - force du signal - date & heure - info DLS - type d’émission -
fréquence - taux d’échantillonnage
FM : texte RDS - type d’émission - force du signal - date & heure - mode audio
*DLS (Dynamic Label Segment): This is a scrolling message giving real-time information – song titles,
news headlines, or detail of the program and is provided by the broadcaster.
**Program Type: This describes the style of the program being broadcast
***RDS (Radio Data System): Small amounts of digital data supplied by the broadcaster that may provide
song/station details, results, etc.

20
•Prune (supprimer une station)
Appuyer sur la touche MENU en mode DAB. Faire déler les options du menu avec les tou-
ches échées jusqu’à sélection de PRUNE. Utiliser les touches échées pour sélectionner
les stations à supprimer et conrmer avec ENTER.
L’appareil redémarre et effectue une recherche complète des stations.
Attention : les présélections DAB seront supprimées.
Information sur le recyclage
Appareils électriques et électroniques usagés
Vous trouverez sur le produit l’image ci-contre (une poubelle sur roues, barrée
d‘une croix), ce qui indique que le produit se trouve soumis à la directive eu-
ropéenne 2002/96/CE. Renseignez-vous sur les dispositions en vigueur dans
votre région concernant la collecte séparée des appareils électriques et élect-
roniques. Respectez-les et ne jetez pas les appareils usagés avec les ordures
ménagères. La mise au rebut correcte du produit usagé permet de préserver
l’environnement et la santé. Le recyclage des matériaux contribue à la préser-
vation des ressources naturelles.
Déclaration de conformité
Fabricant : Chal-Tec GmbH, Wallstraße 16, 10179 Berlin, Allemagne.
Ce produit est conforme aux directives européennes suivantes :
2004/108/CE (CEM)
2011/65/UE (RoHS)
This manual suits for next models
1
Table of contents
Languages:
Other oneConcept Radio manuals

oneConcept
oneConcept Lausanne User manual

oneConcept
oneConcept TuneUp ST User manual

oneConcept
oneConcept Plug+Play FM User manual

oneConcept
oneConcept TuneUp User manual

oneConcept
oneConcept 10032325 User manual

oneConcept
oneConcept 10026930 User manual

oneConcept
oneConcept Streamo Chef User manual

oneConcept
oneConcept 10008634 User manual