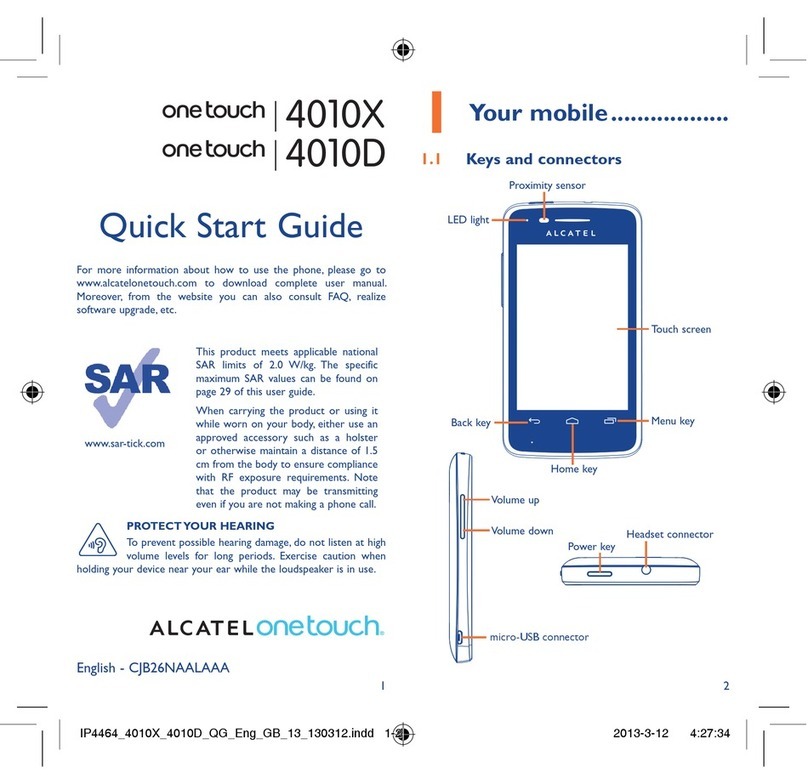
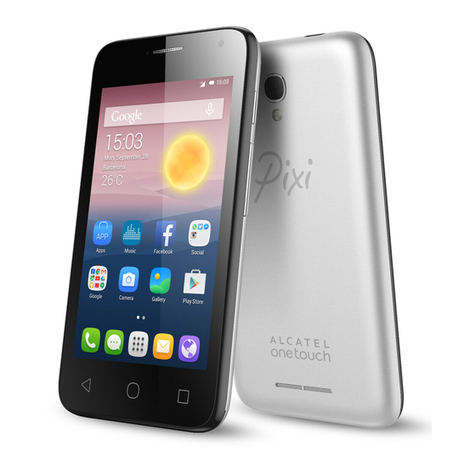
OneTouch Conquest User manual

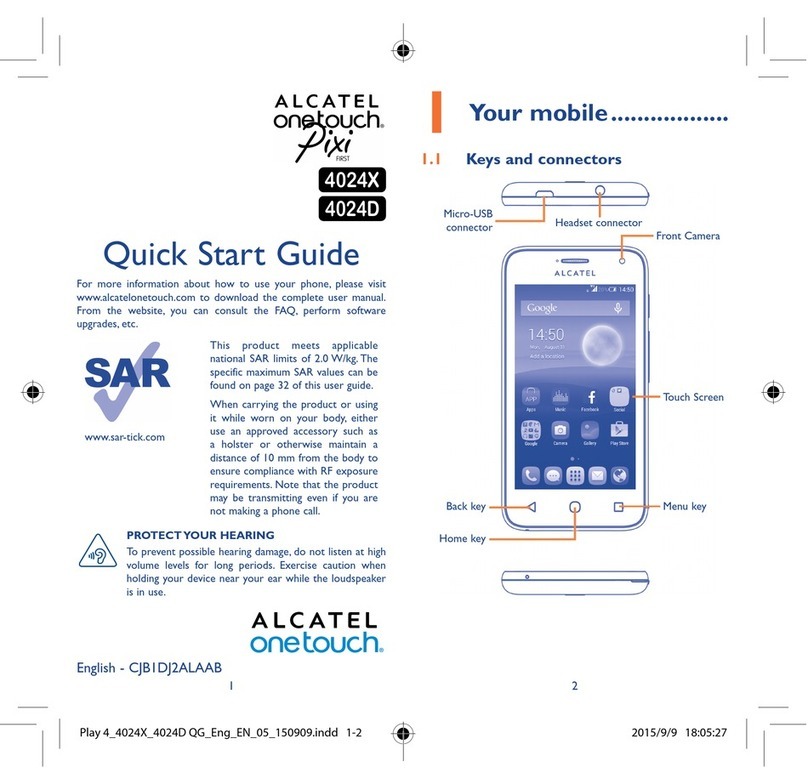
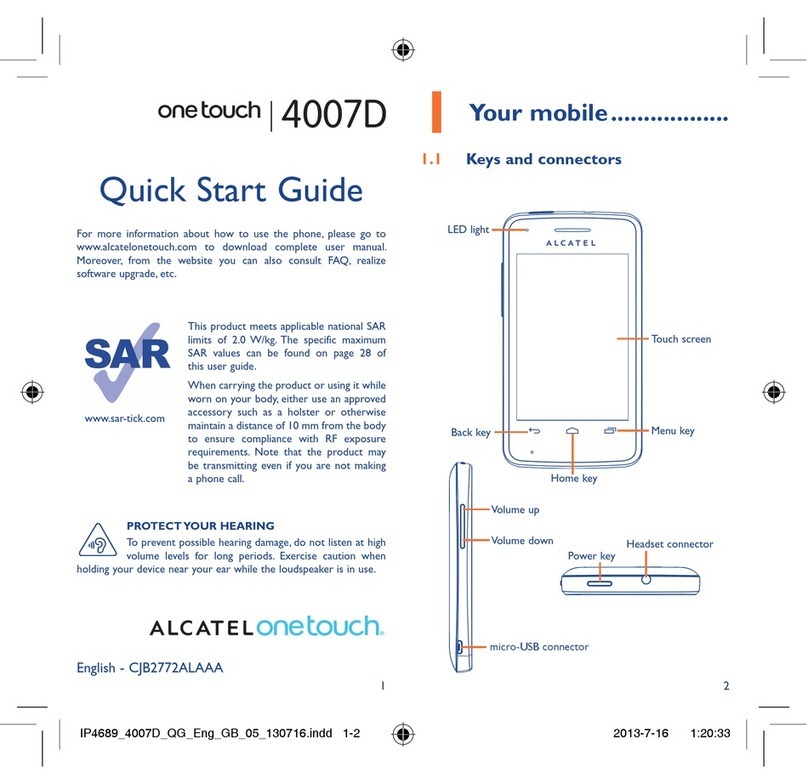
Available applications and services are subject to change at any time.

i
Table of Contents
Introduction 1
AbouttheUserGuide 1
GetStarted 2
PartsandFunctions 2
SIMCard 3
HandlingaSIMCard 3
InsertSIMCard 4
SDCard 5
InsertSDCard 5
UnmountSDCard 6
EraseSDCard 8
BatteryUse 9
ChargetheBattery 10
TurnYourPhoneOnandOff 11
UsetheTouchscreen 12
ActivationandService 13
CompletetheSetupScreens 14
BasicOperations 16
Basics 16
HomeScreenandApplications(Apps)List 16
SelectOptionsandNavigateScreens 16
RecentApplications 16
PhoneSettingsMenu 17
PortraitandLandscapeScreenOrientation 18
CaptureScreenshots 18
Applications 18
LaunchApplications 18
AppList 19
PhoneNumber 20
SilentMode/VibrateMode/AirplaneMode 21
SilentMode 21
VibrateMode 22
AirplaneMode 22
EnterText 22
GoogleKeyboard 23

ii
GoogleVoiceTyping 23
TipsforEditingText 24
GoogleAccount 24
CreateaGoogleAccount 25
SignIntoYourGoogleAccount 27
GooglePlayStore 27
FindandInstallanApp 28
UpdateanApp 28
UninstallanApp 29
GetHelpwithGooglePlay 29
LockandUnlockYourScreen 29
UpdateYourPhone 30
UpdateYourPhoneSoftware 31
UpdateYourProfile 34
UpdateYourPRL 34
YourPhoneInterface 35
HomeScreenBasics 35
HomeScreenLayout 35
ExtendedHomeScreens 36
StatusBar 37
NotificationsWindow 39
CustomizetheHomeScreen 40
ChangetheWallpaper 41
AddShortcutstotheHomeScreen 42
AddWidgetstotheHomeScreen 43
AddFolderstotheHomeScreen 44
PhoneApp 46
PlaceandAnswerCalls 46
CallUsingthePhoneDialer 46
AnswerPhoneCalls 48
In-CallScreenLayoutandOperations 50
PlaceCallsfromContacts/CallLogs 51
PlaceaCallfromContacts 51
CallfromCallLogs 53
OptionalServices 55
VoicemailSetup 55
VisualVoicemail 56
CallWaiting 56

iii
ConferenceCalling 57
CallSettings 59
TTYMode 60
Contacts 61
AddaContact 62
CheckContacts 64
EditaContact 64
DeleteaContact 65
ShareaContact 66
ImportContacts 67
BackUpContacts 69
MessagingandInternet 70
TextandMultimediaMessaging 70
SendaTextMessage 70
SendaMultimediaMessage(MMS) 71
SaveandResumeaDraftMessage 74
NewMessagesNotification 74
ManageMessageConversations 74
TextandMMSOptions 76
CreateandSendGmail 78
CreateandSendaGmailMessage 78
CheckReceivedGmailMessages 79
OpenNewGmailMessages 79
OpenGmailMessages 80
ManageGmailMessages 82
UseGmailLabels 82
DeleteGmailThreads 83
SearchGmailMessages 84
ReportSpamorPhishingGmail 85
AddAnotherGoogle(Gmail)Account 86
SwitchingBetweenGmailAccounts 87
Email 88
SetUpanEmailAccount 88
AddanEmailAccount 89
ComposeandSendEmail 91
OpenNewEmailMessages 91
OpenEmailMessages 91
DeleteanEmailAccount 93

iv
ManageYourEmailInbox 94
DataServicesGeneralInformation 95
Enhanced4GLTE 95
DataConnectionStatusandIndicators 96
ChromeBrowser 96
AddaBookmark 96
ViewBrowserHistory 98
OpenNewBrowserTabs 98
BrowserSettings 99
CameraandVideo 101
TakePicturesandRecordVideos 101
TakeaPicture 101
ViewfinderScreen 103
RecordVideos 103
ViewPicturesandVideosUsingGallery 104
EditPictures 107
SharePicturesandVideos 110
SendPicturesorVideosbyEmail 110
SendaPictureorVideobyMultimediaMessage 111
SendPicturesorVideosUsingBluetooth 113
CameraSettings 115
SwitchCameras 115
SetCameraFunctions 116
UsefulAppsandFeatures 117
Navigation 117
GoogleMaps 117
Hangouts 118
GoogleSearch 120
UseGoogleSearch 120
UseGoogleVoiceSearch 121
Calculator 122
Calendar 123
AddanEventtotheCalendar 123
ViewCalendarEvents 124
SyncCalendars 126
Time 127
SetAlarms 127
AdditionalClockFeatures 127

v
YouTube 128
ViewYouTubeVideos 128
PostaVideotoYouTube 128
GooglePlayMusicApp 129
PlayMusicwithGooglePlay 129
GooglePlayMusicScreenLayout 129
CreatePlaylistsinGooglePlayMusic 130
Notes 130
Connectivity 132
ConnecttoaPCviaUSB 132
TransferFilesbetweenYourPhoneandaComputer 132
Wi-Fi 133
TurnWi-FiOnandConnecttoaWirelessNetwork 133
Wi-FiSettings 134
DisconnectWi-Fi 134
Wi-FiDirect 135
Bluetooth 135
BluetoothInformation 136
EnabletheBluetoothFeature 136
PairBluetoothDevices 136
ConnecttoaPairedBluetoothDevice 137
SendInformationUsingBluetooth 138
ReceiveDataviaBluetooth 138
Settings 140
BasicSettings 140
Wi-FiSettingsMenu 141
BluetoothSettings 144
DataUsageSettings 145
MoreSettings 146
DefaultMessagingAppSettings 146
Sound&NotificationSettings 147
DisplaySettings 147
StorageSettings 148
BatterySettings 149
AppsSettings 149
LocationSettings 150
SecuritySettings 151
ScreenLock 151

vi
DisabletheScreenLock 152
Language&InputSettings 152
BackupandReset 153
Accounts 154
Date&TimeSettings 155
AccessibilitySettings 156
PrintingSettings 157
Regulatory&SafetySettings 157
ActivatethisDeviceSettings 157
AboutPhone 158
ForAssistance 159
Troubleshooting 159
Specifications 160
Index 161

Introduction 1
Introduction
Thefollowingtopicsdescribethebasicsofusingthisguideandyournewphone.
About the User Guide
ThankyouforpurchasingyournewALCATELONETOUCHConquest.Thefollowingtopics
explainhowbesttousethisguidetogetthemostoutofyourphone.
Accessibleservicesmaybelimitedbysubscriptioncontractconditions.
Descriptions in the User Guide
Notethatmostdescriptionsinthisguidearebasedonyourphone'ssetupatthetimeofpurchase.
Unlessotherwisenoted,instructionsbeginfromthephone'shomescreen,whichisdisplayedby
tapping .Someoperationdescriptionsmaybesimplified.
Screenshots and Key Labels
Screenshotsintheuserguidemayappeardifferentlyonyourphone.Keylabelsintheuserguide
aresimplifiedfordescriptionpurposesanddifferfromyourphone'sdisplay.
Other Notations
Intheuserguide,thephonemaybereferredtoeitheras"phone,""device,"or"handset."A
microSD™cardisreferredtoasan"SDCard"ora"memorycard."

Get Started 2
Get Started
Thefollowingtopicsgiveyoualltheinformationyouneedtosetupyourphoneandwirelessservice
thefirsttime.
Parts and Functions
Thesetopicsillustrateyourphone’sprimarypartsandkeyfunctions.
Phone Layout
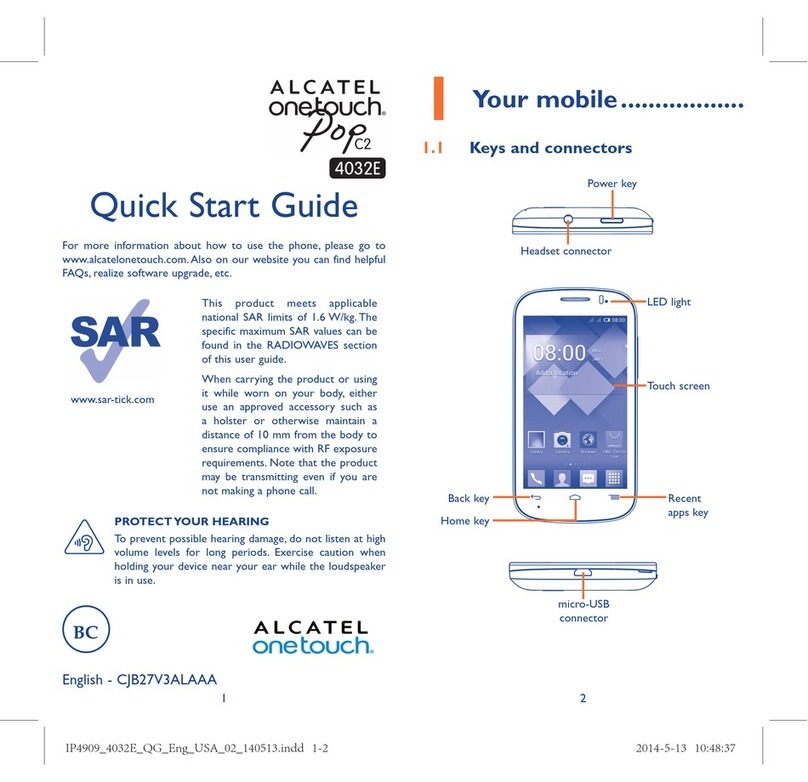
Thefollowingillustrationoutlinesyourphone’sprimaryexternalfeaturesandbuttons.
Part Description
Ambient Light and Proximity
Sensor
Detectshowcloseanobjectistothesurfaceofthescreen.Thisis
typicallyusedtodetectwhenyourfaceispressedupagainstthe
screen,suchasduringaphonecall.
Whiletalkingonthephone,thesensordetectstalkactivityandlocks
thekeypadtopreventaccidentalkeypresses.
Self Camera Lens Takespicturesandrecordsvideoswhilefacingthescreen,and
allowsyoutovideoconference.
Earpiece Allowsyouhearthecallerandautomatedprompts.
Touchscreen Displaysalltheinformationneededtooperateyourphone,such
asthecallstatus,theContactslist,andthedateandtime.Also
providesone-tapaccesstoallofyourfeaturesandapplications.
Recent AppsKeyDisplaysalistofrecentlyusedapplications.

Get Started 3
Part Description
Home KeyReturnsyoutotheHomescreen.
Back KeyAllowsyoureturntothepreviousscreen,orcloseadialogbox,
optionsmenu,theNotificationspanel,oronscreenkeyboard.
LED Displaysaphonenotification,chargingstatus,oralert.
Power/Lock Button Allowsyouturnthephoneonorofforturnthescreenonoroff,or
switchyourphonetosilentmode,vibrationmode,orairplane
mode.
Speaker Allowsyouhearthedifferentringtonesandsounds.Thespeaker
alsoletsyouhearthecaller’svoiceinspeakerphonemode.
Charger/Accessory Jack AllowsyoutoconnectthephonechargerortheUSBcable
(included).
Microphone Transmitsyourvoiceforphonecallsorrecordsyourvoiceor
ambientsoundsforvoicerecordingsandvideos.
Flash Helpsilluminatesubjectsinlow-lightenvironmentswhenthe
cameraisfocusingandcapturingapictureorvideo.
Volume Buttons Allowsyoutoadjusttheringtoneormediavolumeoradjustthe
voicevolumeduringacall.
Camera Allowsyoutakepicturesandvideos.
3.5 mm Headset Jack Allowsyoutoplugineitherastereoheadsetoranoptional
headsetforconvenient,hands-freeconversations.
CAUTION!Insertinganaccessoryintotheincorrectjackmaydamagethephone.
SIM Card
TheSIMcardisanICcardcontainingphonenumberandothercustomerinformation.
Handling a SIM Card
KeepthefollowinginmindwhenhandlingaSIMcard.
n CustomerisresponsibleforanydamagecausedbyinsertingSIMcardinanother-brandICcard
reader,etc.BoostMobileisnotresponsibleinsuchcase.
n AlwayskeeptheICchipclean.
n Wipecleanwithadry,softcloth.
n Avoidapplyinglabels.MaydamageSIMcard.
n SeeinstructionsincludedwithSIMcardforhandling.
n SIMcardisthepropertyofBoostMobile.
n SIMcardisreplaceable(atcost)incaseofloss/damage.
Get Started 4
n ReturnSIMcardtoBoostMobilewhencancellingsubscription.
n ReturnedSIMcardsarerecycledforenvironmentalpurposes.
n NotethatSIMcardspecificationsandperformancemaychangewithoutnotice.
n ItisrecommendedthatyoukeepaseparatecopyofinformationthatisstoredonSIMcard.
BoostMobileisnotresponsiblefordamagesfromstoredinformationthatislost.
n AlwaysfollowemergencyprocedurestosuspendserviceifyourSIMcardorphone(SIMcard
inserted)islostorstolen.Fordetails,contactCustomerService.
n Alwayspoweroffphonebeforeinserting/removingSIMcard.
Insert SIM Card
FollowtheseinstructionstoinsertaSIMcard.Remembertopoweroffyourphonebeforeinserting
aSIMcard.
Note:Yourphone’sSIMcardispreinstalled.Theseinstructionsareforreferenceonly.
1. RemovetheSIM/SDcover.
l Liftgentlyasshown.
2. Useapin topressthesmallcavityuntiltheSIMtraypopsout.
3. PutSIMcardonthetrayandpushintothephone.

Get Started 5
l InsertgentlywithgoldICchipfacingdownward.
4. ClosetheSIM/SDcover.
l Makesureallthetabsaresecureandtherearenogapsaroundthecover.
SD Card
YourphonesupportstheuseofanoptionalSDcard(notincluded)toexpanditsstoragecapacity.It
supportscardsupto32GB.Somecardsmaynotoperateproperlywithyourphone.
SD Card Cautions
Data:InformationstoredonSDCardcanbecomelostorchangedaccidentlyorasaresultof
damage.Itisrecommendedthatyoukeepaseparatecopyofimportantdata.Thecompanyis
notresponsiblefordamagesfromdatathatislostorchanged.
Reading/Writing Data:Neverpoweroffwhilereadingorwritingdata.
Battery Level:Alowbatterychargemaypreventreading/writingtoSDCard.
Handling SD Card:Use/storeSDCardsawayfromthereachofinfantswhichmaycause
chokingifswallowed.
Insert SD Card
FollowthesestepstoinsertanoptionalSDcard(notincluded).Makesuretopoweryourphoneoff
beforeinsertingorremovinganSDcard.
1. RemovetheSIM/SDcover.
l Liftgentlyasshown.

Get Started 6
2. Useapin topressthesmallcavityuntiltheSDtraypopsout.
3. PutSDcardonthetrayandpushintothephone.
l InsertgentlywithgoldICchipfacingdownward.
4. ClosetheSIM/SDcover.
l Makesureallthetabsaresecureandtherearenogapsaroundthecover.
Unmount SD Card
AlwaysunmounttheSDcardbeforeremovingitfromyourphone.

Get Started 7
1. Fromhome,tapApps >Settings .
2. TapStorage.

Get Started 8
3. TapUnmountSD Card>OK.
ThemenuoptionchangesfromUnmount SD CardtoMount SD Card.
Erase SD Card
WhenyouwanttodeleteallthedataonyourSDcard,youcanerasetheinformationfromyour
phone.
1. Fromhome,tapApps >Settings .

Get Started 9
2. TapStorage.
3. TapEraseSD Card>ERASE SD CARD toconfirm.
AlldataontheSDcardiserased,andthecardisformattedforuseonyourphone.
Battery Use
Thefollowingtopicsexplainhowtochargeandcareyourphone’sbattery.
Battery Cautions

Get Started 10
Storage:Avoidstoringorleavingbatterywithnochargeremaining.Savedinformationand
settingsmaybecomelostorchanged,orbatterymaybecomeunusable.Chargeonceeverysix
monthsbeforestoringorleavingunusedforalongperiod.
Bulges:Dependingonuse,bulgesmayappearnearendofbatterylife.Thisdoesnotaffect
safety.
Charge the Battery
FollowinstructionstochargephonebatteryusingeithertheincludedACadapterorviaaUSB
connectiononyourcomputer.
Charge Using the AC Adapter
1. PlugtheUSBconnectorintothecharger/accessoryjackonthebottomofyourphone.
2. PlugtheotherendoftheUSBcableintotheACadapter.
3. PlugtheACadapterintoanelectricaloutlet.
Theindicatorlightilluminateswhenchargingstarts.Thelightgoesoffwhenthebatteryisfully
charged.Fullychargingabatterymaytakeuptothreehours.
4. Aftercharging,disconnectthephonefromthecharger.
UnplugtheACadapterfromtheoutlet,andremovethemicroUSBcablefromthephoneand
theACadapter.
Charge Using a PC Connection
BeforeusingaPCconnectiontochargeyourphone,ensurethatthecomputeristurnedon.
Dependingonthetypeofconnection,phonebatterymaynotcharge.

Get Started 11
1. InsertthesmallendofthemicroUSBcordintothecharger/accessoryjackonthebottomofyour
phone.
2. InsertthelargeendofthemicroUSBcordintoanexternalUSBportonyourcomputer.
3. Aftercharging,removethemicroUSBcablefromboththephoneandthecomputer.
Turn Your Phone On and Off
Theinstructionsbelowexplainhowtoturnyourphoneonandoff.
Turn Your Phone On
n PressandholdthePower/Lock Button.
Yourphonewillpoweron.Dependingonthesettings,youmayseethelockscreen.
l SeeLockandUnlockYourScreenandScreenLockforinformationaboutusingthescreen
lock.
l Thefirsttimeyouturnthephoneonyouwillseethestartupscreens.SeeCompletethe
SetupScreensfordetails.
l Ifyourphoneisnotyetactivated,seeActivationandServiceformoreinformation.
Turn Your Phone Off
1. PressandholdthePower/Lock Buttontoopenthephoneoptionsmenu.
2. TapPower offtoturnthephoneoff.
Yourscreenremainsblankwhileyourphoneisoff(unlessthebatteryischarging).

Get Started 12
Use the Touchscreen
Yourphone’stouchscreenletsyoucontrolactionsthroughavarietyoftouchgestures.
Tap or Touch
Whenyouwanttotypeusingtheonscreenkeyboard,selectitemsonscreensuchasapplicationand
settingsicons,orpressonscreenbuttons,simplytaportouchthemwithyourfinger.
Touch and Hold
Toopentheavailableoptionsforanitem(forexample,acontactorlinkinaWebpage),touchand
holdtheitem.
Swipe or Slide
Toswipeorslidemeanstoquicklydragyourfingerverticallyorhorizontallyacrossthescreen.
Drag
Todrag,pressandholdyourfingerwithsomepressurebeforeyoustarttomoveyourfinger.While
dragging,donotreleaseyourfingeruntilyouhavereachedthetargetposition.

Get Started 13
Flick
Flickingthescreenissimilartoswiping,exceptthatyouneedtoswipeyourfingerinlight,quick
strokes.Thisfingergestureisalwaysinaverticaldirection,suchaswhenflickingthecontactsor
messagelist.
Rotate
Formostscreens,youcanautomaticallychangethescreenorientationfromportraittolandscape
byturningthephonesideways.Whenenteringtext,youcanturnthephonesidewaystobringupa
biggerkeyboard.
Note:TheRotate screen contentssettingneedstobeenabledforthescreenorientationto
automaticallychange.Fromhome,tapApps >Settings >Display>When device is
rotated> Rotate screen contents.
Tip:Youcanalsoaccessthescreenrotationsettingfromthenotificationswindow.Pulldownthe
statusbarandtapAuto-rotatetoselectordeselecttheoption.
Pinch and Spread
“Pinch”thescreenusingyourthumbandforefingertozoomoutor“spread”thescreentozoomin
whenviewingapictureoraWebpage.(Movefingersinwardtozoomoutandoutwardtozoomin.)
Activation and Service
Beforeusingyourphone,youmustsetupyourservicewithBoostMobile.Youwillneedyour
phone’sserialnumber(MEID),printedonastickerinsidethebatterycompartment.
Create Your Account and Pick Your Plan
SetupyourBoostMobileaccount.
Table of contents
Other OneTouch Cell Phone manuals

OneTouch
OneTouch Flash Mini 4031D User manual

OneTouch
OneTouch idol3 6039S User manual

OneTouch
OneTouch Pop3 5065W User manual

OneTouch
OneTouch Fierce XL User manual

OneTouch
OneTouch POP C2 4032E User manual

OneTouch
OneTouch Pixi3 4028A User manual

OneTouch
OneTouch Pixi3 4022X User manual

OneTouch
OneTouch onetouch Pixi 3-35 User manual

OneTouch
OneTouch 4010X User manual

OneTouch
OneTouch Elevate User manual