HOW TO PUT YOUR PPT MINI TOGETHER
NOTE: When you are assembling remember to keep the knobs facing towards you.
Fig. 1
Complete frame without Theatre
and Wing Drapes. (Side View)
(1) (2)
Slide the Front Legs into each end of
the front Crossbar (A) up to stop rings,
tighten knobs. Make sure end caps are
on same side of the crossbar.
With the knobs facing you attach one
of the rear legs at the single-knob end
of Crossbar (B) and tighten knob.
Repeat for Crossbar (C).
(3) (4)
Knobs facing you place double-knob
end of Crossbar (B - Stage Left)
over right front leg (now inserted in
Crossbar (A)) and push down until
it seats. Tighten knob. Repeat for
Crossbar (C - Stage Right).
(See Fig. 1)
Slide Front Verticals through ends
of the Stage Crossbar (D). Make
sure the knobs point towards you and
stage platform is on top. Slide a Wing
Drape Support onto the top of each
Front Vertical with the loops on the
Rod Support Brackets pointing away
from the center of the theatre and
tighten knobs at the required height.
For more details see (5) and (6)
1234
5
6
9
8
8
10
11
12
7
13
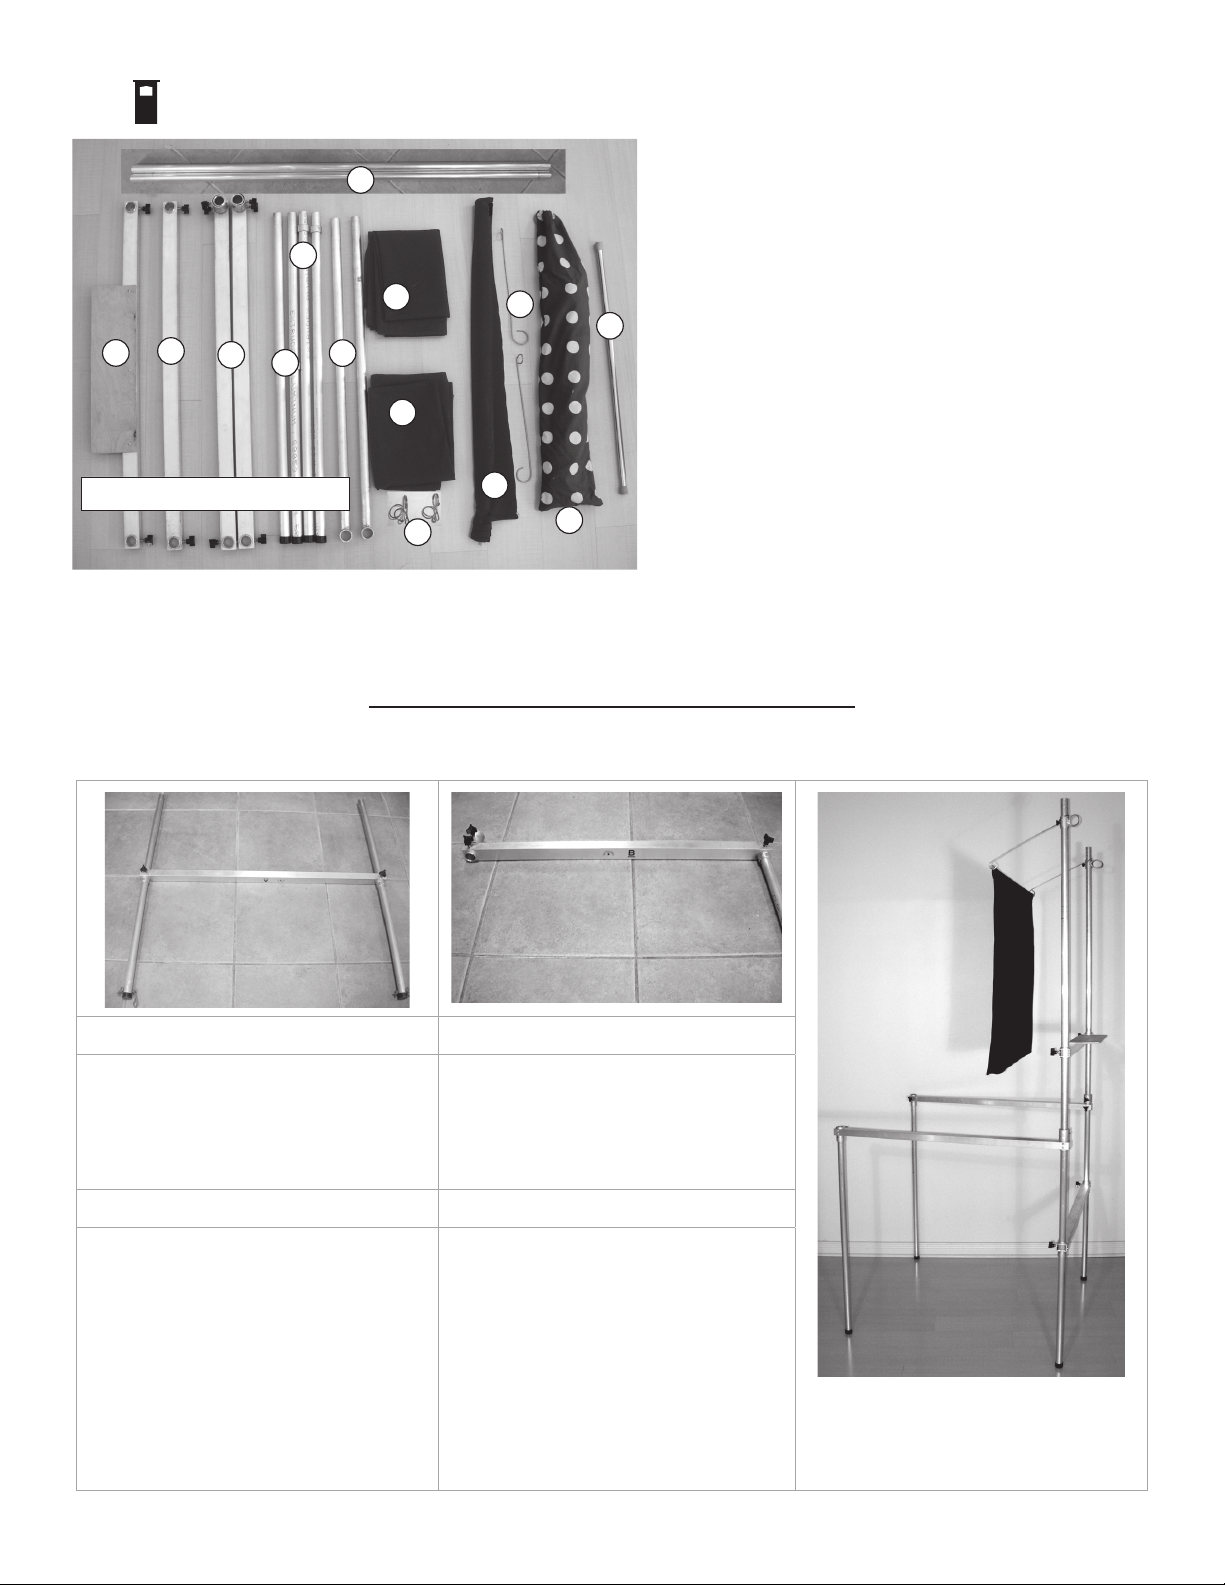
PPT MINI : Components
Specifications
2 00 x 91.4 cm [ 80” x 36” ] (front);
Doorway Puppet Theatre: 2 00 x 109 cm [ 80” x 43” ]
(Stage opening): 53 x 48 cm [21” h x 19”w];
Wings: 200 x 74 cm [80” x 29” ] each;
Stage Platform: 15cm deep x 48 wide [6” deep x 19” wide];
Weight: ~ 11 kgs [~25lbs]
PPT MINI - Components
1. Stage (D)
2. Front Crossbar (A)
3. Side Crossbars (wings) (B & C)
4. Legs (front)
5. Legs (back)
6. Wing Drape Supports
7. Front Verticals (with rod support brackets)
8. Wing Drapes
9. Rod Support Clips
10. Scrim
11. Scrim hangers
12. Doorway Theatre
13. Tension Rod
PPT MINI - ASSEMBLY INSTRUCTIONS
.../ 2


