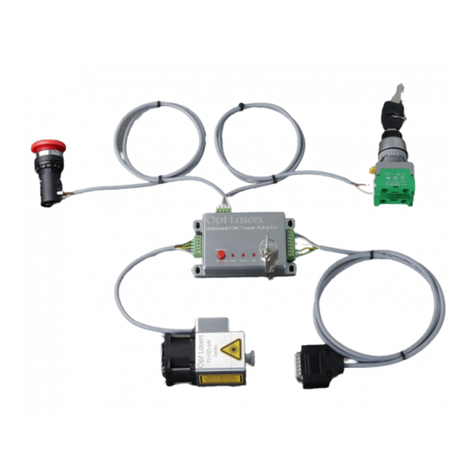
Opt Lasers PLH3D-2W User manual

1
Quick Setup Guide for using a
PLH3D-2W Laser Head with a Prusa
i3 MK3S 3D Printer

2
Table of contents
General Laser Safety Warnings and Precautions .................................................................................... 3
List of parts.............................................................................................................................................. 4
Cable description..................................................................................................................................... 5
How to connect ....................................................................................................................................... 5
G-code ................................................................................................................................................... 17
Generating G-code ................................................................................................................................ 18
Working area......................................................................................................................................... 20
Precautions............................................................................................................................................ 21
Appendix 1: G-Code example................................................................................................................ 22

3
General Laser Safety Warnings and Precautions
Only person with specialized training and appropriate laser safety knowledge can
use and maintain the laser head. The laser head operator must be aware of laser
radiation hazard.
While laser head is operating protection Laser Glasses designed for 190 –540 nm
(OD 7+) should be used. Make sure that all personnel in the same room worn
protection glasses.
Eye exposure to the direct or diffusely reflected laser beam is a hazard. The laser
head beam may cause permanent eye damage.
Skin exposure to the laser beam is a hazard. The laser beam may cause serious skin
burns. Laser beam may easily burn cloth.
It is possible to get serious injury while using this product or being in the vicinity of an
individual using it. Improper use of the laser head can result in injury or death.
Flammable substances exposure to the laser beam may pose fire hazard. The laser
head operation in an explosive atmosphere may be dangerous. The working area
must be well ventilated. During the operation laser beam may ignite gases or
flammable liquids.
Before making any adjustments, changing accessories or performing maintenance,
the laser should be powered off and disconnected from the power supply and CNC
main board.
The laser head must be properly mounted to a rigid body such that it cannot be
moved unintentionally. Unintentional move of the laser head is dangerous.
The unauthorized personnel must have no access to the system into which the laser
head is integrated. The laser head must be stored out of the reach of children.
Untrained persons are not allowed to operate, maintain and observe operation of
the laser head.
Specular reflection materials should not be placed in front of operating lasers head.
Remember, diffused reflection of the laser beam is uncontrolled and may pose
hazard to eye.
Appropriate shielding should be used around the system into which the laser head
is integrated. The system in which laser head is used must be equipped with key
switch and safety interlock.
Responsibility of use or misuse belongs to the end user. Tomorrow’s System and its
affiliates accept no responsibility for use or misuse by the user. If you may not be
able to use this product properly, we recommend that you do not begin use or
cease use immediately.

4
List of parts
Name of the part
Picture
PLH3D-2W Laser Head
for Prusa 3DP
Laser Safety Glasses
Prusa Signal Cable for
PLH3D-2W
PLH3D-2W Mount for
Prusa Printer (3D file to
download)
M3 x 50 screws (2
pieces)
M3 x 6 screws (2
pieces)
Self-adhesive cable
holder

5
Cable description
•connect to
PLH3D-2W
laser head
•connect to
PWR IN
connectors on
EINSY board
•connect to
wire of front
print fan
•connect to
front print fan
connector on
EINSY board
How to connect
1. Download 3D file of PLH3D-2W Mount for Prusa Printer from our website and
print it on your 3D printer.

6
2. Connect PWR- and PWR+ (parallel to wires that have been connected
already)
3. Connect laser control input to the connector on EINSY board (instead of front
print fan cable).

7
4. Check with photo below, if you plugged those in correct slots.

8
5. Connect front print fan cable.
6. View of wires connected.

9
7. Unwrap the cable bundle which connects EINSY board with extruder and
dismount X-carriage-back.

10
8. Pull the black nylon filament guide, P.I.N.D.A. sensor cable and hotend fan
cable through the X-carriage-back to make more space. Push PLH3D-2W laser
head cable through the hole, to the extruder side.

11
9. Push black nylon filament guide, P.I.N.D.A. sensor cable and hotend fan cable
back.
10. Push the PLH3D-2W laser head cable in the channel together with the
P.I.N.D.A. sensor and fan cables. Use zip tie to mount it firmly.

12
11. Set up X-carriage-back back to its place.

13
12. Twist textile sleeve with PLH3D-2W laser head’s cable added to the bundle
and mount the bundle back.

14
13. Unscrew top right and bottom left (view from the front side) of the extruder
motor.

15
14. Push two M3x50 screws through the upper holes of laser head’s holder.
15. Mount PLH3D-2W laser head to the holder (use two M3x6 screws).

16
16. Using M3x50 screws, that were set up in the 13. point, mount PLH3D-2W laser
head’s holder to the extruder’s motor.

17
17. Before starting work with laser, connect the cable. Always remember to cover
heat bed or spring steel sheet with non-reflective material that will protect it
from laser. Laser beam can damage heat bed or spring steel sheet very easily!
G-code
To cut or engrave, it is necessary to generate the appropriate G-code that using the
following commands:
Header
M104 S0
Set hotend temperature to 0
M140 S0
Set bed temperature to 0
G28 W
Auto home (without mesh bed leveling)
G92 X0 Y-86 Z-45
Offset to Y=-86 Z=-45. This way laser spot will be at the
place when normally hotend was.
M107
Print cooling fan off (disable laser)
G0 X0 Y0 Z0 F2000
After this command is done, material can be put on bed
and laser can be connected to cut/engrave
M0 Click to continue
Wait until user push the button

18
Before every G0, G1 commands
M106
Laser ON
SXXX
PWM duty where XXX is number between 0 and 255 (e.g.: 0
= 0% and 255 = 100%)
Footer
M107
Print cooling fan off (disable laser)
G92 X0 Y0 Z0
Reset selected workspace
To see an example of G-code, please refer to Appendix 1.
Generating G-code
The easiest way to generate proper G-code is to use our software: Generator.
1. You will need DXF file from which you will generate G-code.
2. In G-CODE Settings, you have to set Prusa 3D as G-CODE Profile.
3. Set parameters in DXF / Settings / Parameters (set Material thickness as 0 if you
want to engrave) and click Open DXF file to load the DXF file.

19
4. Click Generate G-Code and save it.
5. Now, you can load the generated G-code to your 3D printer and begin to use
the laser.

20
Working area
Normal working area of Prusa i3 MK3S in XY plane is 250mm x 210mm. Tool center
point of the 3D Printer is the nozzle tip but TCP of the laser head is its beam spot.
Because the laser head is mounted in some distance from extruder, tool center point
during work with laser is moved. It is shifted -86mm in Y axis and -45mm in Z axis (if
focus distance is 60mm).
User can add G92 X0 Y-86 Z-45 command at the beginning of g-code file. In this
case, working area is limited to 250mm x 124mm (see picture below).
It is also possible to not limit the working area. To do this, G92 X0 Y0 Z-45 command
has to be used and the table should be enlarged by 86mm in the negative direction
of Y axis.
Table of contents
Other Opt Lasers 3D Printer manuals
Popular 3D Printer manuals by other brands

Polymaker
Polymaker Polysher Operation manual

Createbot
Createbot MaxI Operation manual

Bondtech
Bondtech LGX PRO Quick setup guide

3D Printing Systems
3D Printing Systems UP Plus 3D manual

FLASHFORGE 3D PRINTER
FLASHFORGE 3D PRINTER inventor quick start guide

3D Upfitters
3D Upfitters CR-10 Smart Enclosure Kit installation manual