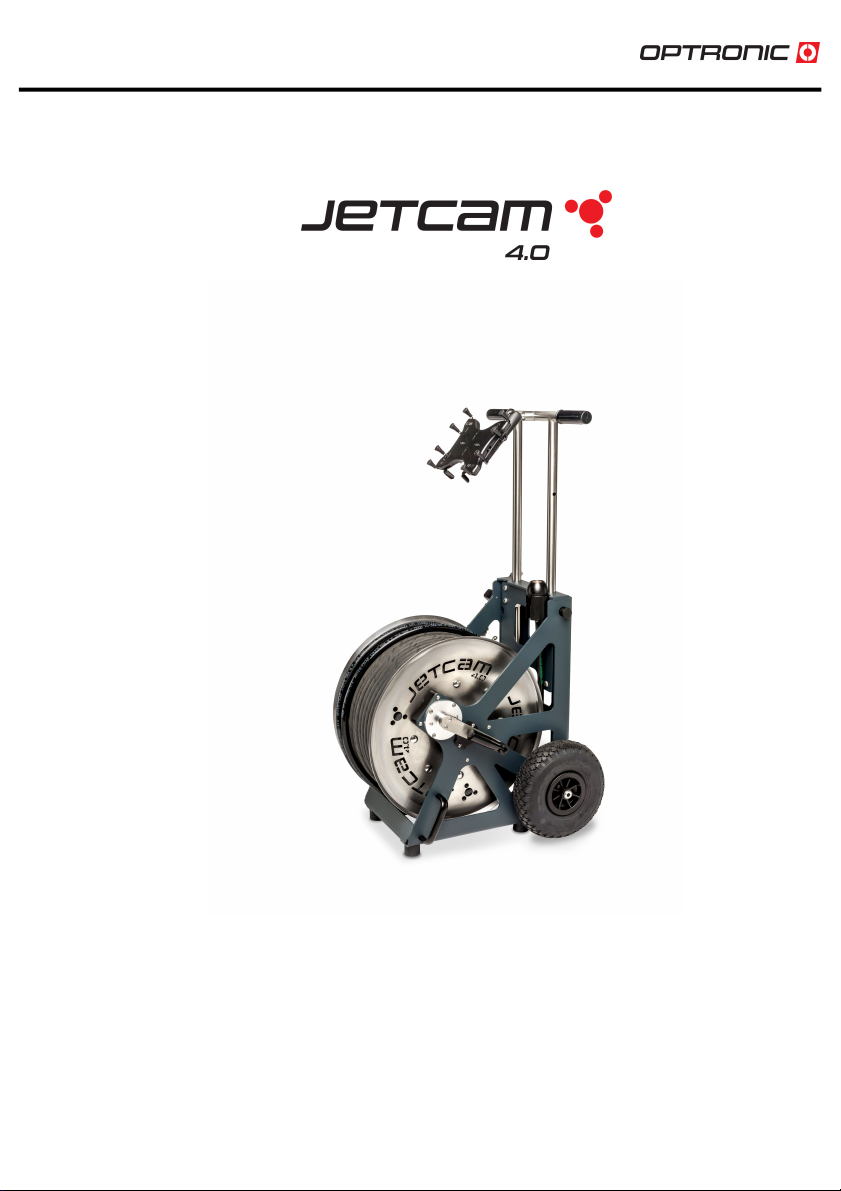
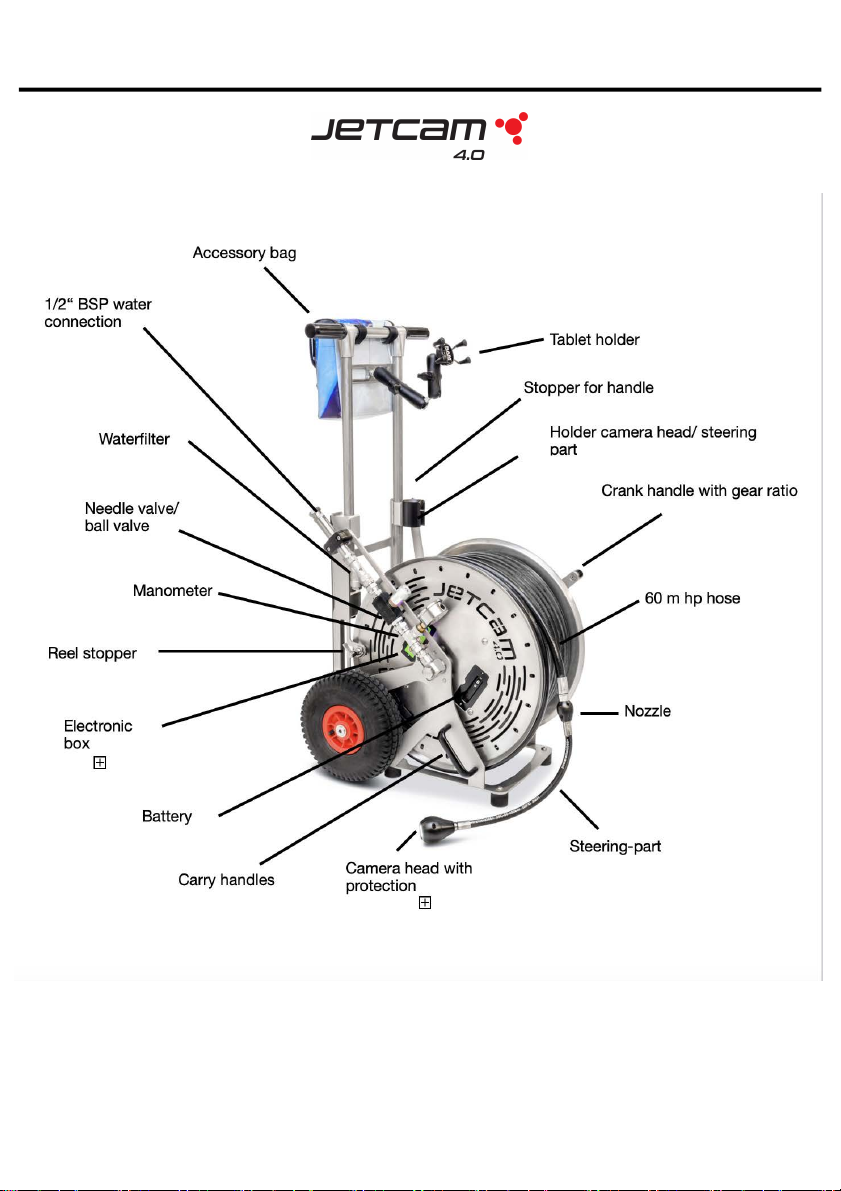
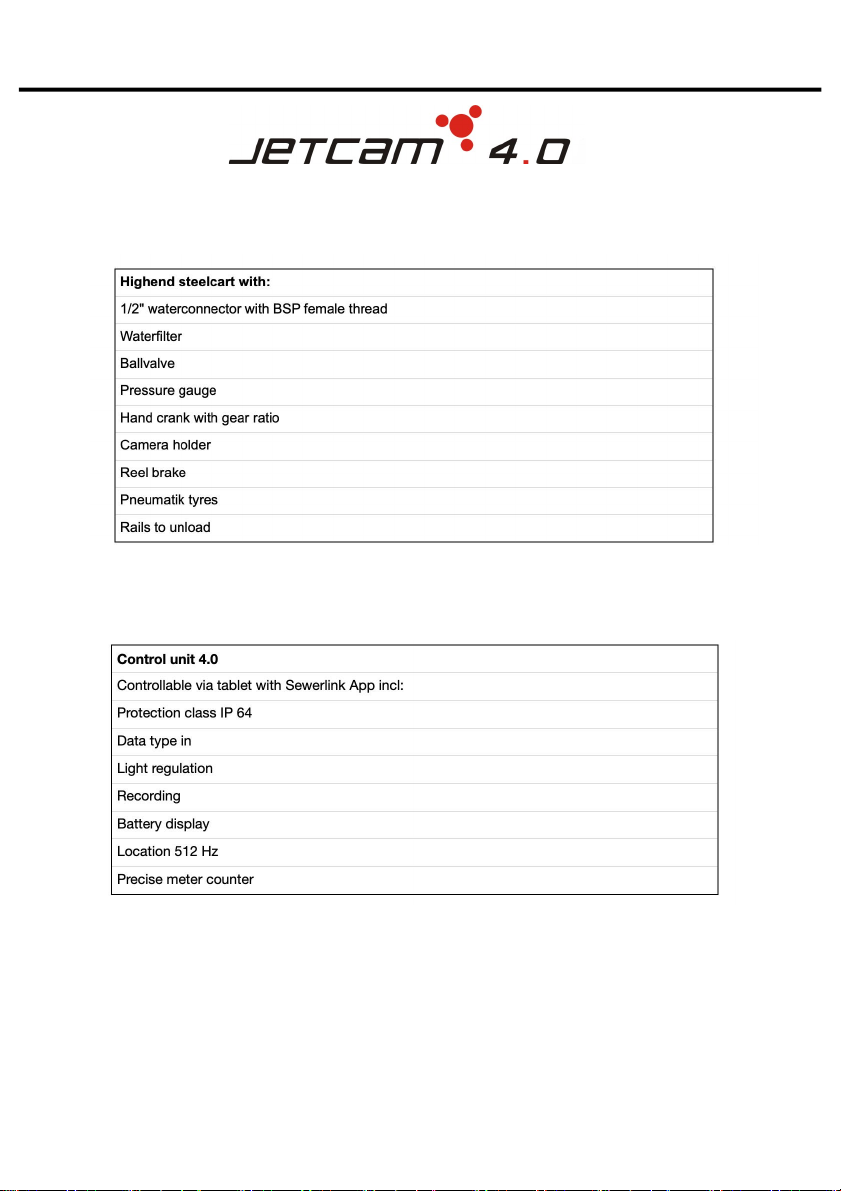
OPTRONIC jetcam 4.0 User manual

V2.0 Page 1
Operating instructions
www.optronic.de

V2.0 Page 2
Table of contents
Preface (Page 3)
Warning notices (Page 4)
Quality features (Page 4)
Description of components (Page 5)
Data sheet (Page 6-8)
Preparation (Page 10)
Preparation (Page 11-12)
Commissioning (Page 13)
Cleaning/inspection using the JetCam (Page 14-15)
Straight sections, elbows, branches, over soil
Cleaning the nozzle (Page 15)

V2.0 Page 3
Preface
Please read through these instructions for use carefully.
It contains valuable instructions on correct use of the JetCam, but also tips for
effective operation.
We wish you all the best when using it.
Team OPTRONIC

V2.0 Page 4
Warnings
·
For cleaning, do not use any high-
pressure cleaners
·
Do not place any heavy objects on the
device
·
Do not perform repair work by yourself,
consult an authorised customer service.
Otherwise, the manufacturer guarantee
shall be invalidated!
·
Do not use when the cable is
damaged.
·
This system must be disposed of in a
professional manner and must not be
disposed of with domestic waste.
Quality
characteristic
Components of the JetCam, such as camera head, impact guard, steering piece,
high-pressure hose may have minimal scratch marks when being delivered. These
marks are the result of our end test.

V2.0 Page 5
Component description

V2.0 Page 6
Factsheet

V2.0 Page 7

V2.0 Page 8
Battery voltage: 14.4 V DC
Charging voltage: 17 V DC
Output: 6.9 Ah (for app. 10 operating hours)
Charging time: app. 7 hours
Possible hazards !
Lithium-Ion batteries are sealed gas tight and are harmless as long as
they are used and handled in line with the manufacturer regulations.
Warning !
Never use battery chargers that are not intended for the battery type!
Do not short-circuit. Do not damage mechanically (puncture, deform, dismantle,
etc.) Do not heat above the permissible temperature or burn. Keep batteries away
from smaller children. Always store batteries dry and cool.

Instructions for use
The JetCam has been optimally designed for your tasks in diameters from
50 to 300 mm
V2.0 Page 9

V2.0 Page 10
Preparation
Please make sure that the following are available at the operating location:
·
a jetter, where the output corresponds approximately to:
40 - 60 litre / min. 100 - 150 bar for JetCam with 3/8" hose
60 - 80 litre / min. 100 - 150 bar for JetCam with 1/2" hose
·
2 open-ended spanners, 27mm for connecting the high-pressure hose of the
jetter to the JetCam
·
Charged battery:
Please note that the rechargeable battery of a brand-new system
is not fully charged when delivered.

V2.0 Page 11
On the camera
Make sure that the camera head is cleaned. To ensure for a clear view as long as
possible, the sapphire glass and the macrolon must be cleaned before or after being
used each time.
Changing the camera head
When fastening the camera head, make sure that the
·
fit on the camera head and steering part match each other
precisely.
·
spring washer (13 x 1.5 mm) is inserted.
·
sealing ring is present and is not damaged.
Ideally operate camera head with Mugel (protection)
The Mugel is used to protect the camerahead and internal
mechanics from excessive abrasion and excessive acceleration
forces. In addition, the alignment of the camera head partially
depends on the Mugel.
Preparatory measures

V2.0 Page 12
Water side
·
Connect the hp-hose of the jetter with 1/2” BSP external thread to
the JetCam (two 27 mm open-ended spanners are required for this
purpose)
·
Make sure that ball valve is completely opened.
·
Clean steering nozzle and nozzle inserts of the nozzle. These
may not be clogged. The cleaning and feed behaviour is influenced significantly
by this.

V2.0 Page 13
·
Download and install the software (Sewerlink) for smartphone, tablet, Wifi
monitor or Laptop at https://www.wincan.com/en/support/downloads/.
Operating instructions for Sewerlink:
https://www.wincan.com/en/support/documentation/
·
Pull out the reel trolley completely
·
Switch the system on / off using the knob on the control box
Switching-on: Press the pushbutton ~1 sec.
Switching-off: Keep the pushbutton pressed for ~3 sec.
-> LED flashes
then press the pushbutton ~1 sec.
·
After switching on the system, the Wlan connection
must be established via the tablet, smartphone or laptop used.
Network name: DrainSteer_SN*
Password: 12345678
After a Wlan connection has been received, the system connected is
displayed in the app.
·
Take the camera out of the holder
·
Unlock the stopper on the reel
·
Position the camera at the start of the pipe
Commissioning

V2.0 Page 14
To avoid water damage or water leaking in an uncontrolled manner, the camera head
along with steering part must be completely inserted into the pipe to be inspected.
Before the system is supplied with pressurised water, hold the hose tight in order not
to loose control over the system!
·
Become a feeling for the pulling behaviour of the hose
·
Become a feeling for the drifting behaviour of the camera head (by the steering
nozzle)
·
The steering nozzle steers the camera head into branches/ laterals/ over dirt.
·
You can control the drifting behaviour by twisting the hose (with or
without strap) in the desired direction.
Cleaning/ic with the
·
The steering nozzle is always aligned downwards from the camera so that the
top side of the camera image is decisive for the direction that should be
travelled.
If a branch can be seen in the camera image, the camera head must be aligned
by twisting on the hydraulic hose so that the branch is in the upper area of the
camera image.

V2.0 Page 15
Elbows
If this should be a problem, the steering nozzle may be aligned in an unfavourable
angle to the pipe and thus may even prevent it from being travelled over.
Solution:
Pull back the hose, twist and as a result, move the elbow at a different angle.
Branches, T-pieces
Move to the branch or T-piece in the position (by twisting the hose) in which you see
the branch or T-piece in the "12 o'clock" position. This guarantees that the steering
nozzle acts precisely against the branch or T-piece. Slowly thread-in and run in.
Moving over soiling / obstacles
Similar as described in “Branches, T-pieces” above, twist the hose until the soiling
can be seen in the 6 o´clock position. This allows the soiling to be run over and if
necessary, removed.
Pipe cleaning
The best cleaning result (depending on the local circumstances) can be achieved with:
·
150 bar, 40 - 60 litres (JetCam with 3/8" hose)
·
150 bar, 60-80 litres (JetCam with 1/2" hose)
·
Nozzle set, rotation nozzle, front jet
Cleaning the nozzles:
Steering nozzle/ jet:
for cleaning the steering nozzle, the nozzle always has to be
disassembled otherwise the reason for the blockage is guided back into
the inside and creates another blockage.
Nozzle:
Dissassembly of the nozzles is also a requirement for cleaning the
nozzle inserts/ jets.
Table of contents
Other OPTRONIC Cleaning Equipment manuals
Popular Cleaning Equipment manuals by other brands

cecotec
cecotec CONGA COLLECT 10000 instruction manual

Tunap
Tunap ICM 2020 operating instructions

ALL-ACCESS
ALL-ACCESS AA1 instructions

Nilfisk-Advance
Nilfisk-Advance Food Ecolab Penguin Foam 1P-CA Directions for use

Formax
Formax FD 2054 AutoSeal instructions

eschmann
eschmann Little Sister UltraSONICA m Instructions for use

IPC
IPC Absolute-C instruction manual

DIP'N DRY MAX
DIP'N DRY MAX 41709 instruction manual

Getinge
Getinge Castle 7900 installation instructions

Streamline
Streamline HIGHLINE TRIKLEENER HP-GP2100306 instruction manual

HOSPECO
HOSPECO SPHERGO POP TUCK n' GO Starter Kit user guide

Resol
Resol SBS 1000 Connection & operation