8 DANE TECHNICZNE
7 KONSERWACJA
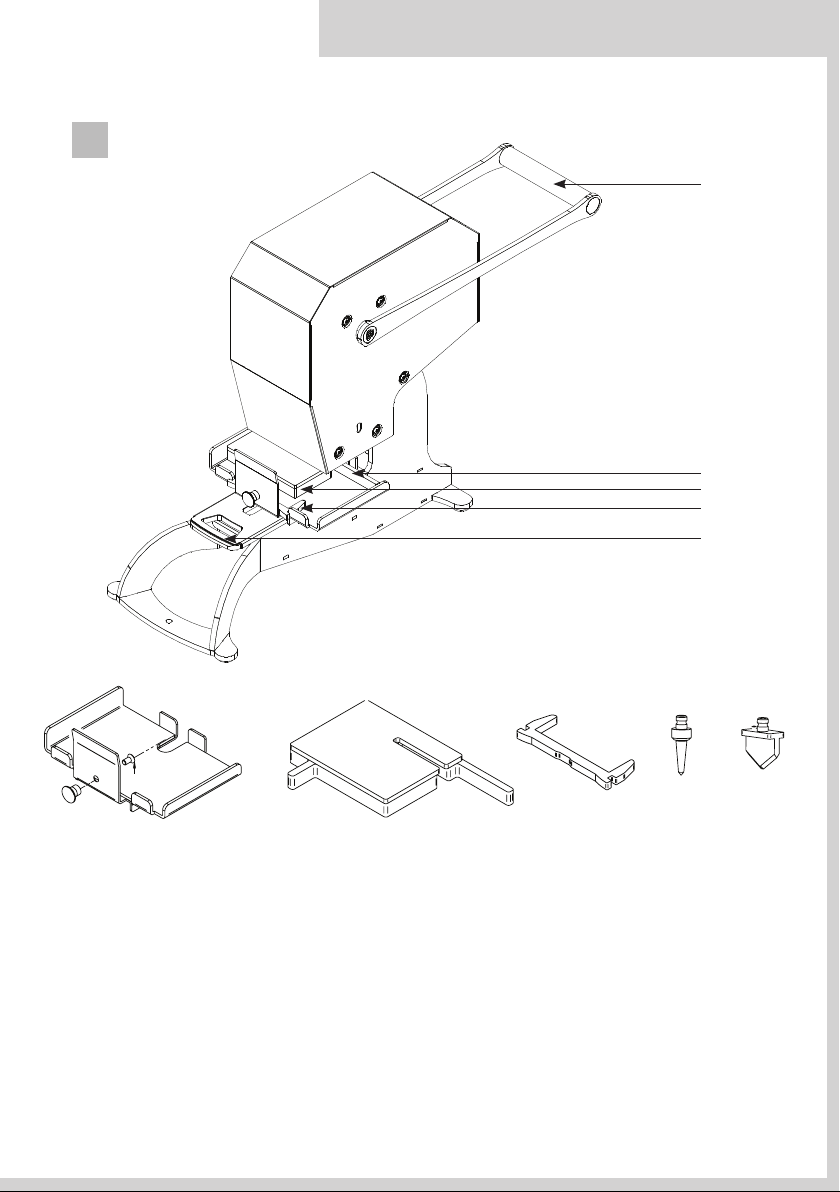
6 WYMIANA NARZĘDZIA
5
PL
12.01.2021 OPUS Sp. z o.o. ● ul. Toruńska 8 ● 44 – 122 Gliwice ● Poland ●www.opus.pl
Należy regularnie czyścic szufladę na odpadki (5). Aby wyczyścić szufladę wysuń ją
z urządzenia, opróżnij i wsuń ponownie.
W przypadku pogorszenia się jakości cięcia / perforacji należy wymienić narzędzie do
przecinania dysków (7) lub narzędzie do perforacji dysków (6). O dostępność narzędzi
zapytaj swojego Dostawcę.
OPUS dataPREDATOR • Instrukcja obsługi
A
• Maksymalna wysokość niszczonego telefonu / tabletu: .............................................. 30 mm
• Maksymalna wysokość niszczonego dysku twardego...................................................27 mm
• Maksymalna wysokość niszczonego dysku SSD i pendrive: ...........................................19 mm
• Maksymalna siła nacisku: ....................................................................................... 1,5 t
• Możliwość wymiany narzędzia: ................................................................................. tak
KLASY OCHRONY (DIN 66399)
• dla dysków HDD 3,5” i 2,5”:......................................................... H3 Nośnik zdeformowany
• dla dysków SSD i pendrive:........................................................ E2 Nośnik pocięty na części
• Wymiary (W x S x G): .......................................................................... 370 x 180 x 578 mm
• Waga netto:........................................................................................................15 kg
• Waga brutto:.......................................................................................................23 kg
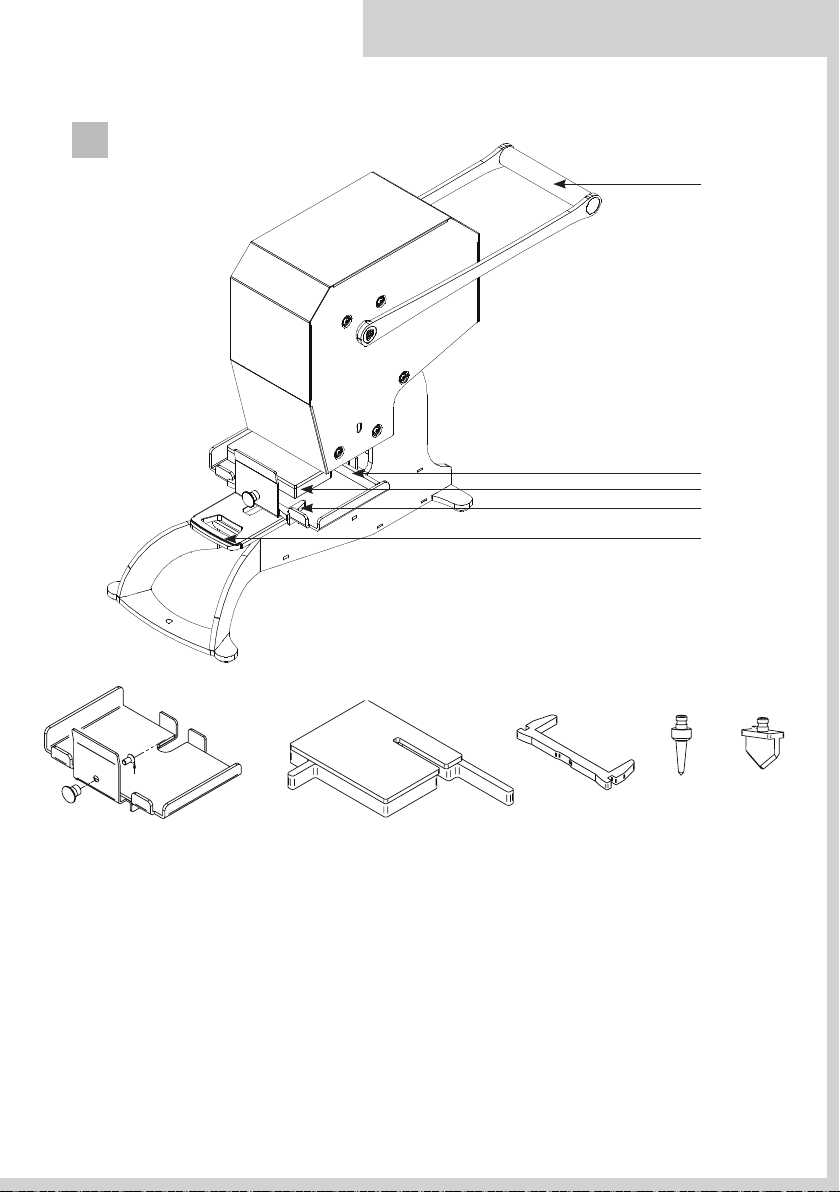
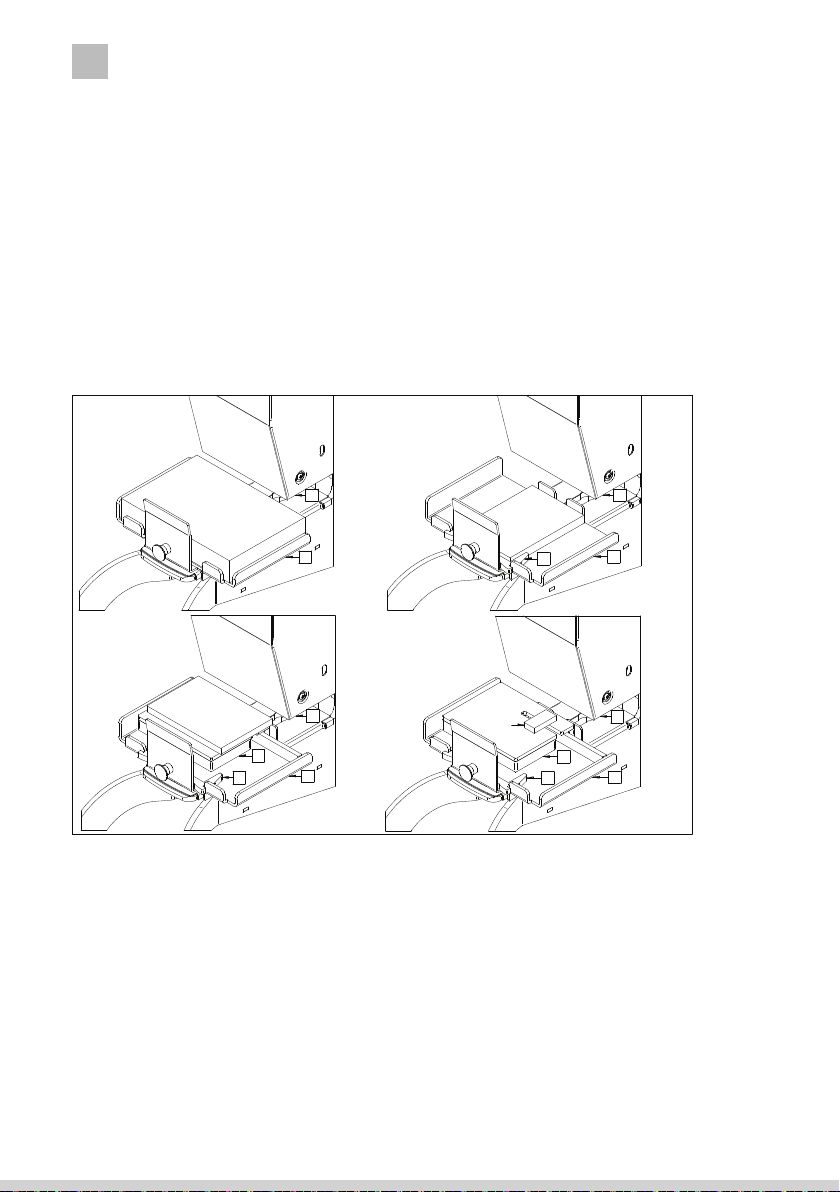
1. Ustaw ramię (1) w pozycji otwartej (poziomo
z tyłu urządzenia).
2. Aby wymienić narzędzie poluzuj śrubę M6 (A)
załączonym kluczem imbusowym, wyjmij
używane narzędzie i zastąp nowym. Następnie
ponownie dokręć śrubę (A).
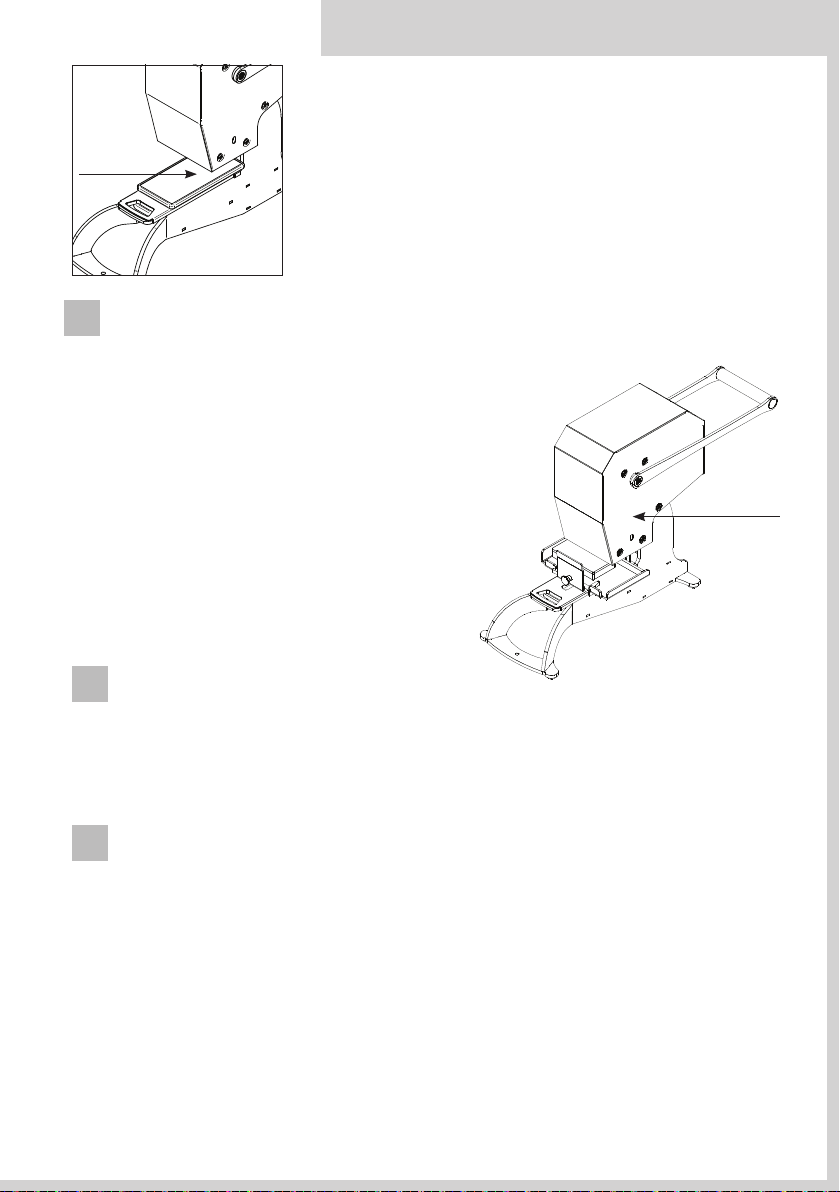
Nie pozostawiaj śruby zabezpieczającej (A) w pozycji
odblokowanej.
Poluzowana śruba zabezpieczająca (A) blokuje ruch
suwaka. Poruszanie dźwignią bez założonego narzędzia
może uszkodzić urządzenie.
3. Standardowo śruba zabezpieczająca (A)
zamontowana jest po prawej stronie, istnieje
jednak możliwość montażu jej z lewej strony.
Uwaga!
Telefony komórkowe i tablety mogą być niszczone wyłącznie
po uprzednim wyjęciu baterii. Zabrania się niszczenia
urządzeń z założoną baterią. Uszkodzenie mechaniczne lub
przebicie baterii grozi pożarem, zatruciem lub oparzeniami.
telefon / tablet