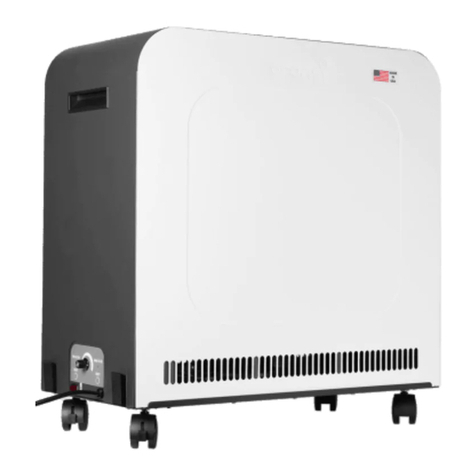
Oransi Erik User manual

!
1!
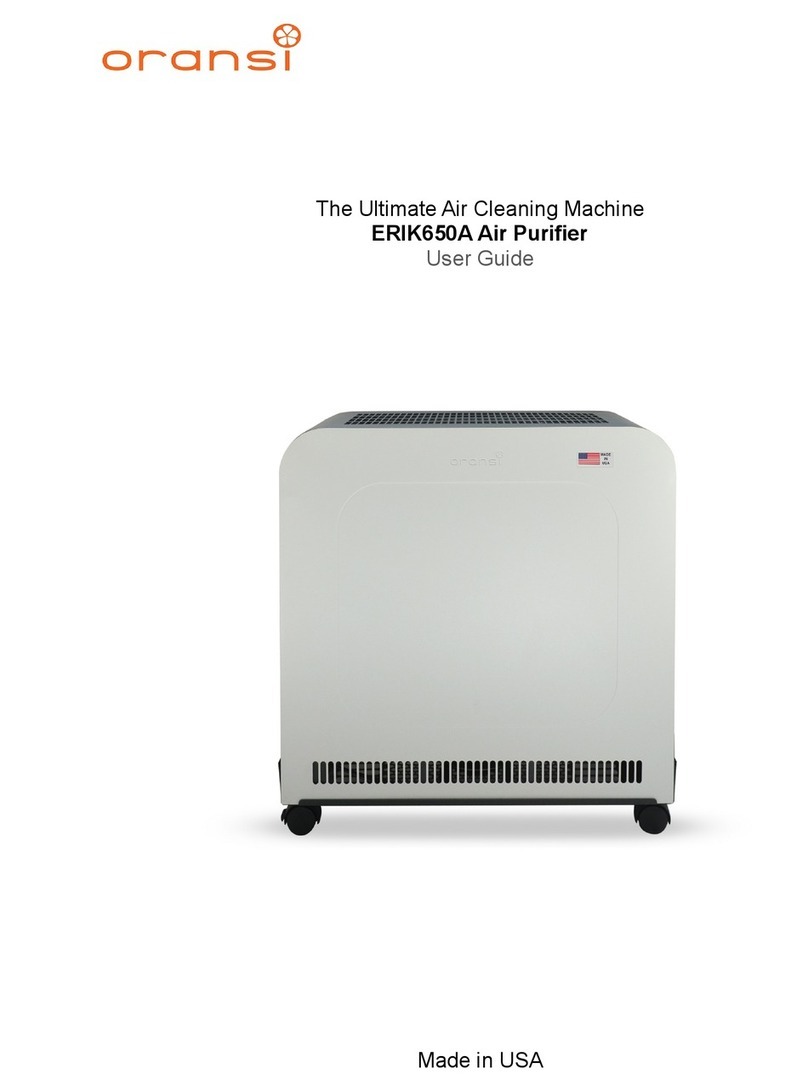
The Ultimate Air Cleaning Machine
Erik Air Purifier Purificateur d’air Erik
User Guide Guide de l’utilisateur
Made in USA Fabriqué aux États-Unis

!
2!
Safety Precautions.
READ ALL INSTRUCTIONS BEFORE USING THIS APPLIANCE. TO REDUCE THE RISK OF FIRE,
ELECTRIC SHOCK, OR INJURY:
1. Do not attempt to service the air purifier in any way other than to replace or clean the air filter.
2. This product operates at 120V AC, 60Hz only.
3. Always unplug the power cord from the electrical outlet when the air purifier is not in use or when
changing the filter.
4. Never run the air purifier unless it is fully assembled.
5. Do not alter the plug in any way.
6. Always turn off the air purifier before unplugging the air purifier from outlet.
7. Do not place the cord near a heated surface.
8. Never operate the air purifier if the plug or cord is damaged or appears damaged. Only qualified
service personnel should ever replace or attempt to replace a damaged power cord.
9. Never use the power cord to pick up, carry, drag, pull, or lift the air purifier. Do not pull the cord
against or around sharp corners and edges.
10. Always remove the plug from its power outlet by holding onto the plug itself and pulling gently.
11. Use care when operating the air purifier by keeping all foreign objects, fingers, body parts, hair,
loose clothing, jewelry, etc away from openings.
12. Do not drop items into the air purifier.
13. Never touch the air purifier or its plug when your hands are wet.
14. If lifting the air purifier, ensure the clasps are properly secured before lifting and lift by the
carrying handles.
15. Do not use outdoors.
16. Do not operate without the filters installed.
17. Only use in an upright position.
18. Use only as described in this manual. Use only Oransi replacement filters.
Save these instructions.
Mesures de sécurité. (French)
LIRE TOUTES LES INSTRUCTIONS AVANT D’UTILISER CET APPAREIL. POUR RÉDUIRE LE RISQUE DE
FEU, DE DÉCHARGE ÉLECTRIQUE OU DE BLESSURE :
1. Ne pas tenter de réparer le purificateur d’air autrement que pour remplacer ou nettoyer le filtre à
air.
2. Cet article fonctionne avec une alimentation de 120V et 60 Hz seulement.
3. Toujours débrancher le cordon d’alimentation de la prise électrique lorsque le purificateur d’air
n’est pas en cours d’utilisation ou lors d’un changement du filtre.
4. Ne jamais faire fonctionner le purificateur d’air s’il n’est pas complètement assemblé.
5. Ne pas modifier la fiche de quelque façon que ce soit.
6. Toujours éteindre le purificateur d’air avant de le débrancher de la prise électrique.
7. Ne pas placer le cordon près d’une surface chauffée.
8. Ne jamais faire fonctionner le purificateur d’air si la fiche ou le cordon sont endommagés ou
semblent être endommagés. Seul un personnel qualifié devrait remplacer ou tenter de remplacer un
cordon d’alimentation endommagé.
9. Ne jamais utiliser le cordon d’alimentation pour soulever, transporter, faire glisser ou tirer le
purificateur d’air. Ne pas tirer sur le cordon le long de coins et de rebords coupants.
10. Toujours retirer la fiche de la prise électrique en tirant doucement sur la fiche elle-même.
11. Faire attention lors de l’utilisation du purificateur d’air en éloignant tous les objets étrangers, les
doigts, les parties du corps, les cheveux, les vêtements amples, les bijoux, etc., des ouvertures.
12. Ne pas faire tomber des éléments dans le purificateur d’air.
13. Ne jamais toucher le purificateur d’air ou sa fiche avec des mains mouillées.
14. Pour soulever le purificateur d’air, s’assurer que les fermoirs sont correctement fixés avant de
soulever et utiliser les poignées de transport.
15. Ne pas utiliser à l’extérieur.
16. Ne pas utiliser sans que les filtres soient installés.
17. Utiliser seulement en position verticale.
18. Utiliser uniquement selon la description de ce guide. Utiliser uniquement les filtres de
remplacement Oransi.
Conservez ces instructions.
!
3!
Contents
2 Safety
2 Important Safety Instructions
4 Chapter 1: At a Glance
4 Overview
4 Inside the Air Purifier
5 User Interface
5 Casters
5 Filter Overview
6 EC Motor/Fan Overview
7 Chapter 2: Getting Started
7 Setting up with a HEPA Filter
8 How to Install the Cover
10 Carbon Filter Kit
12 Where to Use
12 Chapter 3: Replacing Filters
12 How to Replace the Filters
12 Reset the Filter Indicator
13 Warranty
13 10 Year Warranty
Table des matières (French)
2 La sécurité
2 Consignes de sécurité importantes
14!Chapitre 1 : En un coup d’œil
14!Aperçu
15!À l’intérieur du purificateur d’air
15!Interface utilisateur
15!Roulettes
15!Aperçu du filtre
16 Aperçu du moteur/ventilateur CE
18!Chapitre 2 : Avant de commencer
18!Installer un filtre HEPA
19!Installer le couvercle
21!Ensemble de filtres au charbon
23!Où utiliser le purificateur d'air
23!Chapitre 3 : Remplacer les filtres
23!Comment remplacer les filtres
23!Réinitialiser l’indicateur de filtre
24!Garantie
24!Garantie de 10 ans

!
4!
1. At a Glance.
Inside the Air Purifier.
Air Intake
Air Exhaust
Cover Latch
Carrying Handle

!
5!
User Interface.
This air purifier uses a variable speed motor so you can set the fan speed
dial to the desired air flow and noise level.
There is a separate indicator for each filter. The appropriate light will flash
when it is time to replace the filter. The pre-filter has a life of about 6
months and the main filter about 3 years. When the filter has been
replaced, press and hold the reset button for 3 seconds to turn off the
flashing light.
Power Switch – the red Off/Reset switch serves two purposes: it controls
power to the unit and works as a circuit breaker. To operate the air purifier
the reset/On side of the switch must be pressed down. There is no light with
this switch so it will not illuminate when on. This is to keep the unit from
generating light if used in a bedroom.
Casters.
The Erik comes with casters to help in moving the unit. Two of the casters
have a wheel lock and to ease movement so make sure they are unlocked
when moving.
Filter Overview.
Main Filter – our Ultra filter has 195 sq ft of high grade filter media and
each filter is certified to remove more than 99.99% of particles at 0.3
microns or larger. We also offer MERV 16 and 17 main filter options. It is
designed to capture the smallest of airborne particles – specifically the type
that stay suspended in the air and are breathed deep into your lungs. This
is especially effective for asthma, allergy, and COPD sufferers.
Fan Speed
Filter Replace
Indicator

!
6!
Pre-Filter – our 4” thick pre-filter is designed to remove the larger sized
dust and pollen particles and when replaced on schedule extends the life of
the main filter. This filter should be replaced with every 6-9 months of use.
This is available as either a standard or carbon pre-filter. The standard is
recommended for allergy sufferers and the carbon for those who require
light odor removal.
Foam Filter – the foam filter is a permanent filter at the top of the air
purifier by the air intake. It catches the largest dust particles and can be
cleaned by lightly vacuuming or brushing with a broom. This filter cannot be
replaced.
Commercial Carbon Filter – The Commercial Carbon filter can be used in
place of the main HEPA filter for advanced gas, VOC or smoke removal. It
has 14 pounds of activated carbon in an optimized V bank shape for
maximum effectiveness in gas and odor adsorption. To use this filter you
will need to install the carbon filter kit (sold separately).
EC Motor/Fan.
When you selected the Erik Air Purifier you chose the latest
and best German engineered motor available. EC
(Electrically Commutated) motors use electronics to
convert the AC voltage to DC to run the motor.
EC Advantages
•More efficient and use up to 90% less power.
•More reliable since it runs cooler.
•More compact.
•Quieter - no motor hum that you can get with an AC motor.
Why does the motor/fan start and stop more slowly than an AC motor? EC
motors have a soft start programmed into the motor to limit the start-up
current the motor draws (there are electronics built into the motor). The
ramp down after power is removed is only a function of the inertia of the fan
and the friction of the bearing system. A high quality bearing system will
take longer to slow down and stop since the friction is minimized (alignment
is better, lubricant is better, etc.).

!
7!
2. Getting Started.
Setting up with a main HEPA Filter.
1. Unlatch 2 front and 2 rear latches of the cover.
2. Lift the cover straight up by the carrying handles and set to the
ground.
3. Remove the HEPA Filter bracket from inside the housing. If you do
not see the bracket it may have fallen to the bottom of the housing.
4. Place the main HEPA filter into the housing with the rubber seal facing
down. Be careful not to touch the white filter paper.
5. Reinstall the HEPA filter bracket and clasp in place (optional). Insert
the large slot of the HEPA filter bracket into the horizontal opening of
the housing first and lower the other end so that the small notch of
the HEPA filter bracket is pointed upward and just above the clasp as
shown below. The HEPA filter bracket serves as a frame for the pre-
filter so ensure that it is not installed upside down.
HEPA filter bracket (may be silver in color)

!
8!
6. Place the pre-filter on top of the HEPA filter bracket with the wire
frame side pointing down.
7. Re-install the cover and close the latches. The cover only fits one
way. There is a cut out on one side of the cover to make room for the
user interface (fan speed knob, power switch).
Cover Installation Steps
a. Place the cover on
b. Face the small side of the unit that has the fan speed control and
press your hands on each of the two large white sides and lift
about an inch.
c. Lower the cover while pressing the white cover in and away from
you so the white sides rest in the track along the bottom long
sides and the 2 latches properly seat together at the bottom of
the cover.
d. Latch the clamps on the user interface side first and then clamp
the 2 clamps on the other side.
8. Plug in the air purifier and press the power switch to “On” (Reset).
9. Adjust the fan speed knob to the desired speed. It may take a couple
seconds for the fan to begin spinning.

!
9!
Cover is seated in side
runners on the long sides and
latches on short sides are
properly seated together.
Alignment of latches for
proper seating of the cover to
the lower housing.
Cover not properly seated
may bow out preventing the
unit from powering on.

!
10!
Setting up with a main Carbon Filter.
To install the carbon filter kit:
1. Unlatch 2 front and 2 rear latches of the cover.
2. Lift the cover straight up by the carrying handles and set to the
ground.
3. Remove the HEPA Filter bracket. This is not used with the large
carbon filter but should be kept if you intend to use the large HEPA
filter in the future. If you do not see it, this bracket is resting at the
bottom of the housing.
4. Insert the 2” deep white pleated post filter.
5. Insert the Carbon Filter bracket into the housing.

!
11!
6. Place the large carbon filter into the bracket with the V-shaped side
pointed down.
7. Place the 4” deep pre-filter on top of the large carbon filter and center
it with the wire frame side of the filter pointing down.
8. Re-install the cover and close the 2 latches on either side of the cover.
The cover only fits one way. There is cut out on one side of the cover
to make room for the user interface (fan speed knob, filter
replacement indicator, etc). Note: the latch that is near the top of
the interior housing is not used with the carbon filter.
9. Plug in the air purifier and press the power switch to “On” (Reset).
10.Adjust the fan speed knob to the desired speed. It may take a couple
seconds for the fan to begin spinning. For best performance we
suggest running the fan on a lower speed setting to increase contact
time with the carbon filter.
Note: See the instructions on pages 8 and 9 for more details on installing
the cover.

!
12!
Where to Use.
Always operate indoors, preferably on a level surface. Two of the casters
have a wheel lock to hold it in place.
If used in the home, we recommend operating the unit wherever you spend
most of your time – typically a bedroom or living area. Set the fan speed to
a noise level that is comfortable for you. In most cases you can run the air
purifier on a very low fan speed setting so it is quiet. If you have a larger
living area you may want to run it on a higher fan speed when you are not in
the room and then run it on a low speed when you are present.
Since the air is pulled in from the top and exits from the sides and bottom,
you can place anywhere in a room. We recommend keeping it at least 6
inches from a wall. Do not place where curtains or drapes can block the air
intake.
3. Replacing Filters.
How to Replace the Filters
Follow the steps in section 2 to remove the cover and access the filters.
Most filter changes will simply be a replacement of the pre-filter. All of our
used filters can be placed directly in the trash.
Reset the Filter Replace Indicator
Press and hold the Filter Reset button beneath the flashing light for a few
seconds. The light will turn off and the filter counter will reset.
Ordering Replacement Filters
Visit us at oransi.com or contact our customer service team at 888-281-
3948.

!
13!
Warranty.
The Erik Air Purifier carries a 10 year limited warranty. Oransi will replace
your air purifier provided the product is determined to be defective as a
result faulty material or workmanship while in normal use. Oransi's sole
obligation under this warranty is to replace, or at Oransi's discretion, to
repair, free of charge, all defective parts. This warranty will be valid only for
units in possession of the original purchaser and for 10 years from the
original purchase date. Proof of purchase may be required by Oransi's
warranty service representative. All parts or units that are replaced become
the property of Oransi.
10 year warranty remains in effect only if:
1. The Oransi Air Purifier is operated in accordance with the instructions
provided in the Oransi User Manual.
2. The Oransi Air Purifier is connected to a proper power supply (see voltage
label on machine).
3. The unit shows no evidence of tampering, mishandling, neglect,
accidental damage, modification, and/or repair by anyone other than
authorized Oransi service personnel.
4. Ownership of the Air Purifier has never been transferred.
5. Replacement filters are purchased directly from Oransi or an authorized
dealer.
Legal
No one is authorized to make any other warranties on behalf of Oransi. It is
expressly understood that the replacement warranty of Oransi shall be in
lieu of any and all other warranties, express or implied, including warranties
of merchantability or fitness for a particular use or purpose, and further that
Oransi shall not be liable for any loss or damage directly or indirectly arising
from the use of any and all our products, or for any consequential damages
arising from such use. Oransi's sole liability with respect to any defect shall
be for the replacement of the defective part(s). Some states do not allow
such limitations and exclusions, so the above may not apply to you. This
warranty gives specific legal rights. You may also have other rights which
vary from state to state.

!
14!
1. En un coup d’œil.
À l’intérieur du purificateur d’air.
Entrée d’air
Échappement
d’air
Loquet du couvercle
Poignée de transport

!
15!
Interface utilisateur.
Ce purificateur d’air est muni d’un moteur à vitesse variable afin que
vous puissiez régler le cadran de vitesse du ventilateur à la circulation
d’air et au niveau de bruit désirés.
Interrupteur – L’interrupteur rouge Arrêt/Réinitialisation sert à deux
fins : il contrôle l’alimentation de l’appareil et fonctionne comme un
disjoncteur. Pour faire fonctionner le purificateur d’air, le côté
Réinitialisation/En marche de l’interrupteur doit être enfoncé. Cet
interrupteur n’est pas muni d’une lumière; il ne s’allume donc pas
lorsqu’il est en marche. Ainsi, le purificateur d'air peut être utilisé dans
une chambre à coucher puisqu’il ne génère pas de lumière.
Roulettes.
L’unité Erik est dotée de roulettes qui facilitent son déplacement. Deux
des roulettes sont munies de serrures de roue; assurez-vous qu’elles
sont déverrouillées lors du déplacement.
Aperçu du filtre.
Filtre principal – Notre filtre Ultra possède 195 pieds carrés de
médias filtrants de grade supérieur et chaque filtre est certifié pour
enlever plus de 99,99 % des particules de 0,3 micron ou plus. C’est
beaucoup mieux qu’un filtre HEPA. Il est conçu pour capter les plus
petites des particules dans l’air – en particulier le type qui reste en
suspension dans l’air et qui est inhalé profondément dans les
poumons. Ceci est particulièrement efficace pour combattre l’asthme,
les allergies et les personnes souffrant de MPOC.
Vitesse du ventilateur
Indicateur de
remplacement de filtre

!
16!
Préfiltre – Notre préfiltre d’une épaisseur de 4 po est conçu pour
enlever les poussières de plus grande taille et les particules de pollen;
de plus, lorsqu’il est remplacé selon un calendrier fixe, il prolonge la
vie du filtre principal. Ce filtre doit être remplacé à tous les 6 à 9 mois
d’utilisation. Il est offert en version standard ou au charbon. La version
standard est recommandée pour les gens souffrant d’allergies et la
version au charbon convient à ceux qui souhaitent éliminer les légères
odeurs.
Filtre en mousse – Le filtre en mousse est un filtre permanent situé
dans la partie supérieure du purificateur d’air près de l’entrée d’air. Il
capte les plus grosses particules de poussière et peut être nettoyé par
une légère aspiration ou un brossage avec un balai. Ce filtre ne peut
pas être remplacé.
Filtre à charbon commercial – Le filtre à charbon commercial peut
être utilisé à la place du filtre HEPA principal pour éliminer les
molécules de gaz, les COV ou la fumée. Il dispose de 14 kilos de
charbon actif dans un récipient en forme de V optimisé pour offrir une
efficacité maximale dans l’absorption des molécules de gaz et des
odeurs. Pour utiliser ce filtre, vous devrez installer la trousse de filtre à
charbon (vendue séparément).
Moteur/ventilateur CE.
En choisissant le purificateur d’air Erik, vous
avez choisi le tout dernier et le meilleur moteur
d’ingénierie allemande sur le marché. Le moteur CE
(à commutateur électronique) utilise des composants
électroniques pour convertir le courant alternatif en
courant continu afin de faire tourner le moteur.
Avantages du moteur CE
•Plus efficace et utilise jusqu’à 90 % moins d’énergie.
•Plus fiable puisqu’il chauffe moins.
•Plus compact.
•Moins bruyant – pas de bourdonnement du moteur comme c’est
le cas avec un moteur à courant alternatif.
Pourquoi le moteur/ventilateur démarre-t-il et s’arrête-t-il plus
lentement qu’un moteur à courant alternatif? Le moteur CE démarre
de façon progressive afin d’assurer un courant de démarrage faible

!
17!
(les composants électroniques intégrés dans le moteur permettent
cette action). La décélération après la mise hors tension est tout
seulement une fonction de l’inertie de la turbine et le frottement du
système de roulement. Un système de roulement de haute qualité
prendra plus de temps à ralentir et à arrêter puisque la friction est
réduite au minimum (l’alignement est meilleur, le lubrifiant est
meilleur, etc.).

!
18!
2. Avant de commencer.
Installation d’un filtre HEPA
1. Déverrouillez les deux loquets avant et les deux loquets arrière
du couvercle.
2. Soulevez le couvercle par les poignées de transport et déposez-
le par terre.
3. Retirez le support du filtre HEPA. Si vous ne voyez pas le
support, il est peut-être tombé au fond du boîtier.
4. Placez le filtre HEPA principal dans le boîtier avec le joint en
caoutchouc vers le bas. Veillez à ne pas toucher le papier filtre
blanc.
5. Réinstallez le support du filtre HEPA et le fermoir en place
(facultatif). Insérez d’abord la grande fente du support du filtre
HEPA dans l’ouverture horizontale du boîtier et abaissez l’autre
extrémité de sorte que la petite encoche du support à filtre HEPA
pointe vers le haut et se situe juste au-dessus du fermoir,
comme indiqué ci-dessous. Le support à filtre HEPA sert de cadre
au préfiltre afin de s’assurer qu’il n’est pas installé à l’envers.

!
19!
6. Placez le préfiltre sur le dessus du support à filtre HEPA, le côté
du cadre en fil pointant vers le bas.
7. Réinstallez le couvercle et fermez les loquets. Le couvercle
s’installe uniquement dans un sens. Un côté du couvercle est
muni d'une ouverture pour l’interface utilisateur (bouton des
vitesses du ventilateur, interrupteur).
Étapes pour l’installation du couvercle
a. Déposez le couvercle en place.
b. Faites face au petit côté de l’unité où est situé le
régulateur de vitesse du ventilateur et appuyez vos mains
sur chacun des deux grands côtés blancs et soulevez
d’environ un pouce.
c. Abaissez le couvercle tout en appuyant sur le couvercle
blanc et en l’éloignant de vous de sorte que les côtés
blancs restent dans la fente le long des longs côtés et les
deux loquets sont correctement en place ensemble au fond
du couvercle.
d. Verrouillez les loquets sur le côté de l’interface utilisateur
en premier et ensuite les deux loquets de l’autre côté.
8. Branchez le purificateur d’air et appuyez sur l’interrupteur
« On » (Reset).
9. Réglez le bouton de vitesse du ventilateur à la vitesse désirée.
Cela peut prendre quelques secondes avant que le ventilateur
commence à tourner.

!
20!
Le couvercle repose dans les
glissières latérales sur les
côtés longs et les loquets des
côtés courts sont bien en
place.
Alignez les loquets pour bien
asseoir le couvercle sur le
boîtier inférieur.
Une mauvaise installation du
couvercle peut le faire arquer
vers l’extérieur et empêcher
l’unité d’être mise sous tension.
Table of contents
Languages:
Other Oransi Air Cleaner manuals

Oransi
Oransi EJ 120 User manual

Oransi
Oransi max User manual

Oransi
Oransi OI939 User manual

Oransi
Oransi OVHT9908 User manual

Oransi
Oransi finn User manual

Oransi
Oransi OVH2311 User manual

Oransi
Oransi EJ 120 User manual

Oransi
Oransi mod User manual

Oransi
Oransi AirMend User manual

Oransi
Oransi OVHP44 User manual