STARTSTART
INTERVALINTERVAL DURATIONDURATION
99
00
6
6
0
0
33
00
11
55
11
00
11
2
2
00
O
O
F
F
FF
OO
NN
22
mm
i
i
nn
55
3
3
rr
dd
2
2
n
n
dd
DD
A
A
II
L
L
YY
1
1
22
hh
r
r
88
h
h
rr
44
t
t
hh
7
7
tt
hh
OO
NN
CC
EE
22
hh
rr
44
hh
r
r
Features
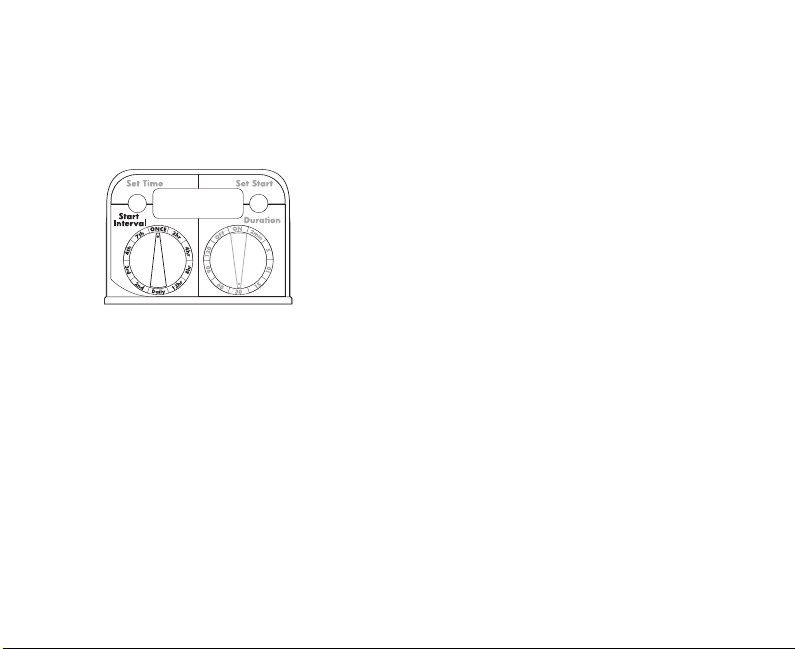
•One button sets time of day,another button sets watering
start time
• Two rotary dials for setting the watering interval and
watering duration.
•Battery operated (three AA), not included.
•Ten watering interval options (once, 2 hr, 4 hr, 8 hr, 12 hr, daily,
2nd day, 3rd day, 4th day, 7th day).
•Ten watering duration options (on, OFF, 2 min, 5 min,
10 min, 15 min, 30 min, 60 min, 90 min, 120 min).
•Manual watering without interrupting the watering interval.
•Weather resistant design.
•Dependable valve design.
•Low power consumtion soleniod.
Battery installation
Note:
Orbit recommends the use of Duracell®orEnergizer®brand
AAalkaline batteries for optimum timer performance.
(see figure 1).
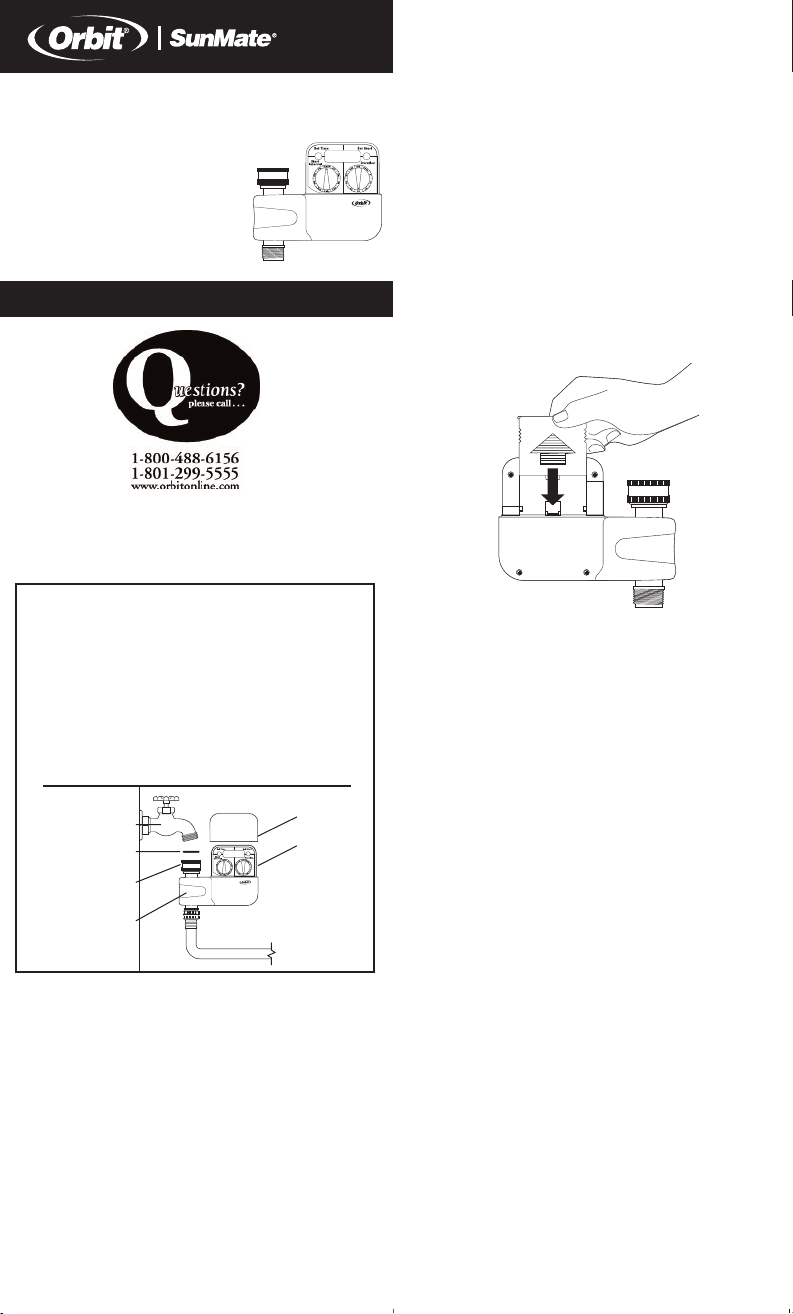
1. Remove the timer cover.
2. Pull the battery compartment out of the timer.
3. Install three AA alkaline batteries. Refer to the battery
compartment for the correct orientation of the batteries,
(see figure 1).
4.Place the battery compartment back in the timer.
•Three fresh AA alkaline batteries should last for an entire
watering season. When the battery voltage is below a safe
operating voltage the valve will not open. The batteries
should be replaced with new ones when this occurs.
5.Replace the timer cover to protect the timer from moisture
and debris.
Figure 1
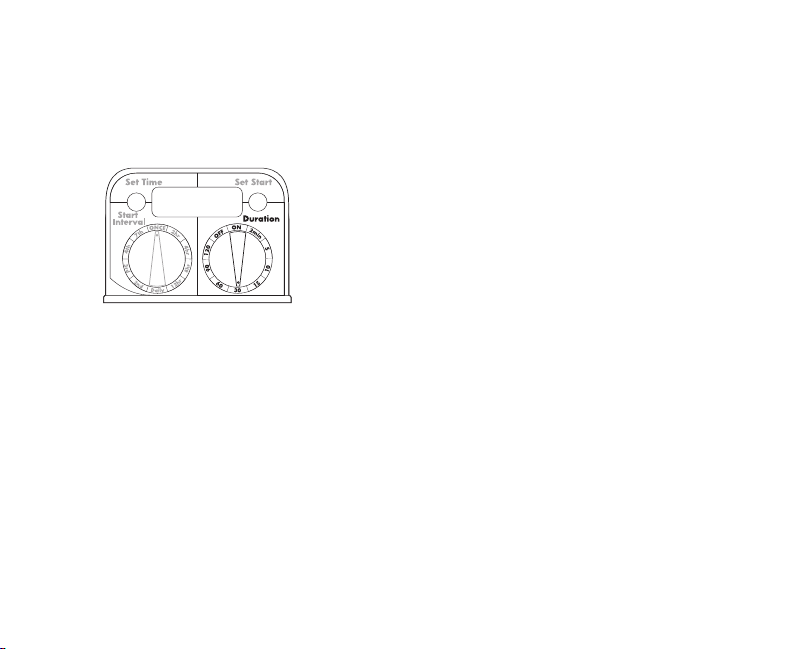
Set the time of day and watering start time
•Press the Set Time button, holding it down for 2 seconds. The
digital readout will cycle through a.m. and p.m. time settings.
Release the Set Time Button just before the correct time of
day is reached. Tap the button to advance the time in 1
minute increments until correct time is reached.
•Press the Set Start button, holding it down for 2 seconds. The
digital readout will cycle through a.m. and p.m. time settings.
Release the Set Start button just before the desired watering
start time is reached. Tap the button to advance the time in 1
minute increments until desired start time is reached.
Note:
The timer valve will close when making entries using the Set
Time and Set Start buttons. Set Time and Set Start settings are
accepted by the timer 5 seconds after buttons are released,
except at the ON setting.
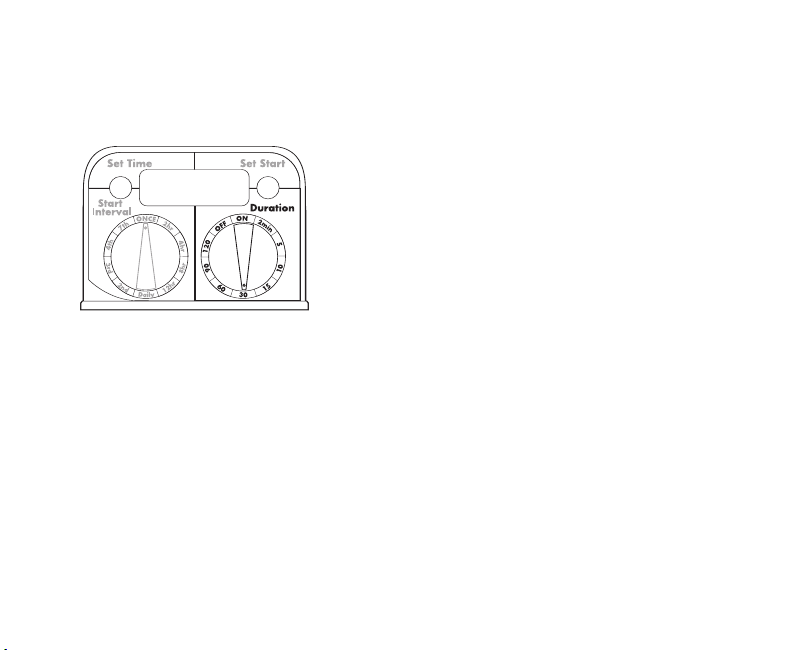
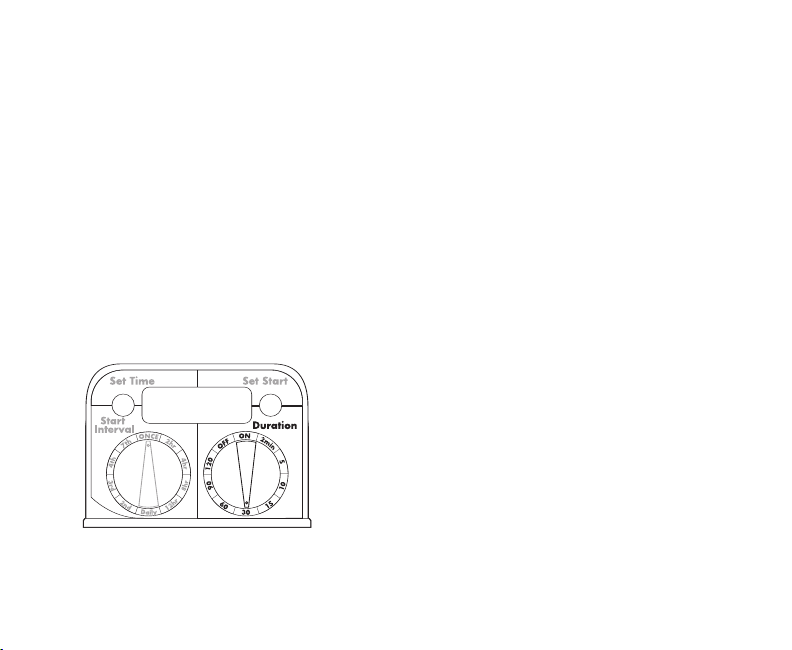
Set the watering start interval
Turn the Start Interval dial to the desired watering interval.
(see figure 2).
Note:
All Start Interval settings begin timing at the Set Start time
shown on the digital readout.
The Start Interval dial has ten possible settings:
• Once – the valve will open once for the amount of time on
the Duration dial and then remains inactive until the Start
Interval dial is rotated to another setting.
•2hr – the water will come on every two hours.
•4hr – the water will come on every four hours.
•8hr – the water will come on every eight hours.
•12 hr – the water will come on every twelve hours.
•Daily – the water will come on once every day.
•2nd day – the water will come on every other day.
Environmental Conditions
Working Temperature: 32 to 122°F
Storage Temperature: -14 to 140°F
Conditions environnementales
Température propre au fonctionnement : 0 à 50°C(32 à 122°F)
Température d’entreposage : -10 à 60°C (-14 à 140°F)
Condiciones ambientales
Temperatura de trabajo: 0 a 50°C (32 a 122°F)
Temperatura de almacenamiento: -10 a 60°C(-14 a 140°F)
HOSE FAUCET
HOSE WASHER
BRASS
CONNECTOR
AUTOMATIC HOSE
FAUCET VALVE
COVER
TIMER
Dual Dial Hose Timer with Electronic Display
Minuterie numérique d’arrossage à deux boutons
Timer Digital de 2 cuadrantes para riego
Timer digitale per irrigazi one a 2 selettori
Digitale Bewässerungs-Zeitschaltuhr
mit zwei Drehschaltern
Orbit®Irrigation Products, Inc.
845 North Overland Rd.
North Salt Lake, Utah 84054
PN 94050-24 Rev A ©2005 Orbit®Irrigation Products, Inc.
All rights reserved. All trade names
are registered trademarks of respective
manufacturers listed.
Model 62040, 27155, 94050 and 91050
Τ π θέτηση μπαταρίασ Σημείωση:
Η Orbit υνι τά τη χρή η αλκαλικών μπαταριών AA
Duracell® ή Energizer® για βέλτι τη απόδο η του
χρονομέτρου. (βλ. χήμα 1).
1. Αφαιρέ τε το κάλυμμα του χρονομέτρου.
2. Τραβήξτε έξω από το χρονόμετρο το
διαμέρι μα των μπαταριών.
3. Τοποθετή τε τρεισ αλκαλικέσ μπαταρίεσ AA.
Ανατρέξτε το διαμέρι μα των μπαταριών για
το ω τό προ ανατολι μό των μπαταριών
(βλ. χήμα 1).
4. Τοποθετή τε το διαμέρι μα των μπαταριών
πάλι το χρονόμετρο.
• Τρεισ καινούριεσ αλκαλικέσ μπαταρίεσ AA
πρέπει να διαρκούν για μια ολόκληρη εζόν
ποτί ματοσ. Όταν η τά η τησ μπαταρίασ
είναι κάτω από μια α φαλή τά η λειτουργίασ
ηβαλβίδα δε θα ανοίξει. Όταν υμβεί αυτό, οι
μπαταρίεσ πρέπει να αντικατα ταθούν
με νέεσ.
5. Επανατοποθετή τε το κάλυμμα του
χρονομέτρου για την προ τα ία του
χρονομέτρου από την υγρα ία και τα
υπολείμματα.
Ρ θμιση τησ ώρασ τησ ημέρασ καιτησ ώρασ
έναρξησ π τίσματ σ
•Πιέ τε το κουμπί Set Time ( ύθμι η ώρασ),
κρατώντασ το πατημένο για 2 δευτερόλεπτα.
Η ψηφιακή ένδειξη θα μεταβεί κυκλικά τισ
ρυθμί εισ ώρασ π.μ. και μ.μ. Αφή τε το κουμπί
Set Timeακριβώσ πριν επιτευχθεί η ω τή ώρα
τησ ημέρασ. Κτυπή τε ελαφρά το κουμπί για να
προχωρή ετε την ώρα ε βήματα του 1 λεπτού,
έωσ ότου επιτευχθεί η ω τή ώρα.
•Πιέ τε το κουμπί Set Start ( ύθμι η έναρξησ),
κρατώντασ το πατημένο για 2 δευτερόλεπτα.
Η ψηφιακή ένδειξη θα μεταβεί κυκλικά τισ
ρυθμί εισ ώρασ π.μ. και μ.μ. Αφή τε το κουμπί
Set Start ακριβώσ πριν επιτευχθεί η επιθυμητή
ώρα έναρξησ ποτί ματοσ.Κτυπή τε ελαφρά το
κουμπί για να προχωρή ετε την ώρα ε βήματα
του 1 λεπτού, έωσ ότου επιτευχθεί η επιθυμητή
ώρα έναρξησ. Β ΥΣΗ ΕΥΚΑΜΠΤΟΥ ΣΩΛΗΝΑ.
ΜΠ ΟΥΤΖΙΝΟΣ ΣΥΝΔΕΣΜΟΣ ΟΔΕΛΑΣΕΥΚΑΜΠΤΟΥ
ΣΩΛΗΝΑ. ΑΥΤΟΜΑΤΗ ΒΑΛΒΙΔΑΒ ΥΣΗΣΕΥΚΑΜΠΤΟΥ
ΣΩΛΗΝΑ. ΚΑΛΥΜΜΑ
Χ ΟΝΟΜΕΤ Ο
Σχήμα 1
Σ
Οδηγόσ εγκατά τα ησ και χρή ησ
Χρονόμετρο εύκαμπτου ωλήνα διπλού
διακόπτη με ηλεκτρονική ένδειξη
Μοντέλο 62040και 91050
PN 62040-24 Αναθ. A ©2005 Orbit®
IrrigationProducts,Inc.
Orbit® IrrigationProducts,Inc.
845 NorthOverland Rd.North Salt Lake, Utah
84054 Η.Π.Α.
Με την επιφύλαξη παντόσ δικαιώματοσ.
Όλεσ οι εμπορικέσ επωνυμίεσ
είναι ήματα κατατεθέντα των αντί τοιχων
κατα κευα τών που παρατίθενται.
Περιβαλλοντικέσ υνθήκεσ
Θερμοκρα ία εργα ίασ: 0 έωσ 50 °C (32 έωσ
1221°F)
Θερμοκρα ία φύλαξησ: -10έωσ 60 °C (-14
έωσ 140 °F)
Conditionsenvironnementales
Tempιrature propre au fonctionnement : 0 ΰ
50°C (32 ΰ122°F)Tempιrature dʼentreposage :
-10 ΰ 60°C (-14 ΰ140°F)Condicionesambien-
tales
Temperatura de trabajo: 0a 50°C (32 a 122°F)
Temperatura de almacenamiento: -10a60°C
(-14 a 140°F)
SUM252172 94050-24 rA 12/23/05 2:52 PM Page 1