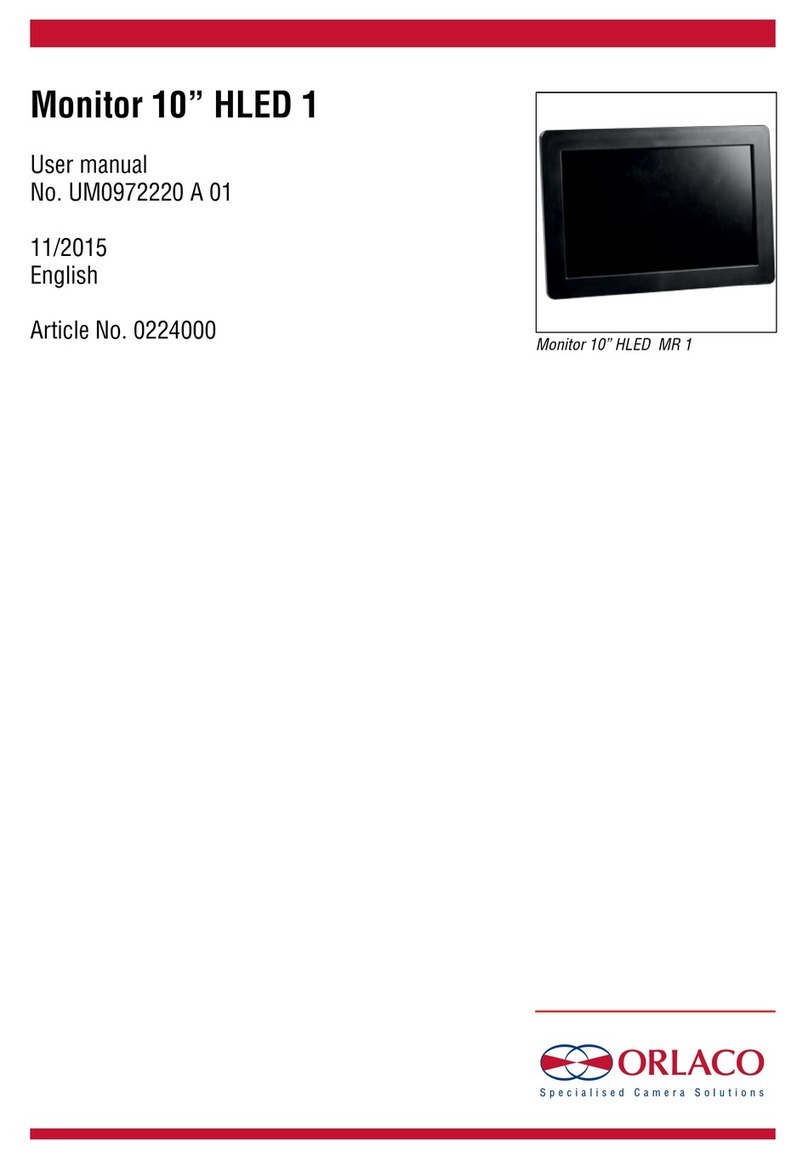
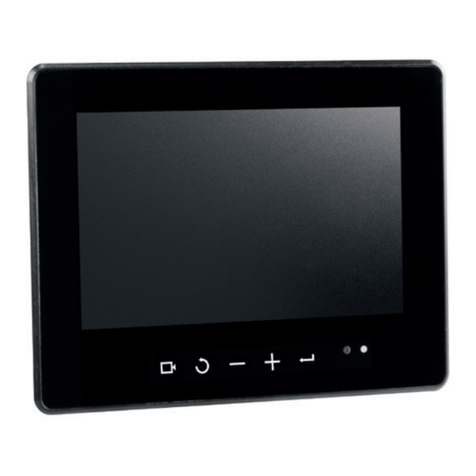
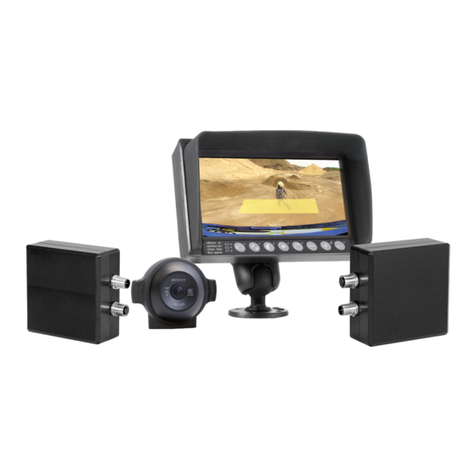
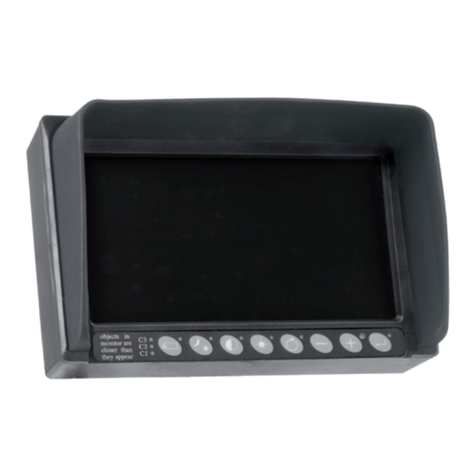
Orlaco 0208500 User manual

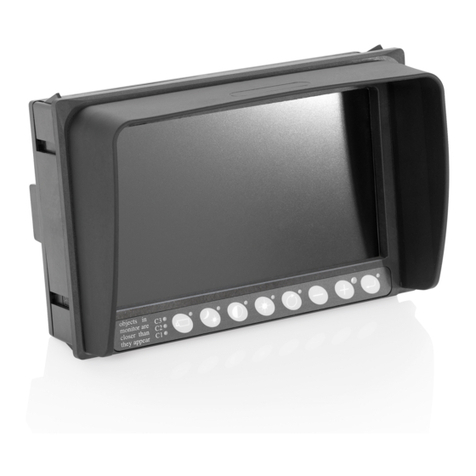
Monitor 7" RLED
Installation manual
Manual No. IM0973270 A 09
11/2012
English
Art. No.:
0208500
0208520
0208550
0208590
0208603
0208612
0208622
0208632
0208642
0208672
0208681
0208691
0208721
0208831
0208871
0208902
0208922
0208950
0208991
0209110
0209190
0209300
0209310
0209400

2IM0973270 A 09
Safety
In order to guarantee safe operation, these safety
instructions must be read before you start using
this equipment.
• Do not open the enclosure. This can cause
damage, short-circuiting or electrical shocks.
• Do not expose the equipment to extreme
temperatures. This can cause deformation of the
enclosure or damage to internal components.
• Repairs may only be made by the manufacturer.
• The equipment must be installed as shown in
this manual.
Before you start using this equipment, please read this manual
carefully and follow all instructions. This installation manual
describes the installation of the equipment, outlines the
connection options and explains how to put the equipment into
operation. We recommend that you keep this manual in a safe
place for reference purposes.
If you have any questions or issues concerning the operation
of this equipment, consult the relevant section in the manual or
contact the Orlaco Products BV Service department.
All data subject to change without notice. All dimensions are for
commercial purpose only. The camera/display systems from
Orlaco comply with the latest CE, ADR, EMC and mirror-directive
regulations, where applicable. All products are manufactured in
accordance with the ISO 9001 quality management system, IATF
16949 quality automotive, ISO 14001 environmental management
systems, where applicable.
Contents page
1. Monitor placement 3
2. Basic system installations 4
2.1. EMC 5
3. RLED variants 6
4. Technical specifications 8
5. Back plate 9
6. Assembly, connections and data RLED 10
7. Maintenance and cleaning 33
8. Disposal 33
9. General terms and conditions 33
10. Version details 34
11. Copyright 35
Monitor 7'' RLED
Installation manual
Do not apply voltage to
the output power of the
monitor!

3
IM0973270 A 09
Bad
Good Moderate
0° 15° 30°
Bad
Good
Moderate
0°
10°
20°
15°
0°
30°
15°
30°
Good
Good
Moderate
Moderate
Bad
Bad
Moderate (incidental)
0°
40°
Bad
Good
Bad (continual)
40 cm 75 cm
150 cm
Moderate Bad
Bad Good
Bad
Good Moderate
0° 15° 30°
Bad
Good
Moderate
0°
10°
20°
15°
0°
30°
15°
30°
Good
Good
Moderate
Moderate
Bad
Bad
Moderate (incidental)
0°
40°
Bad
Good
Bad (continual)
40 cm 75 cm
150 cm
Moderate Bad
Bad Good
Bad
Good Moderate
0° 15° 30°
Bad
Good
Moderate
0°
10°
20°
15°
0°
30°
15°
30°
Good
Good
Moderate
Moderate
Bad
Bad
Moderate (incidental)
0°
40°
Bad
Good
Bad (continual)
40 cm 75 cm
150 cm
Moderate Bad
Bad Good
Bad
Good Moderate
0° 15° 30°
Bad
Good
Moderate
0°
10°
20°
15°
0°
30°
15°
30°
Good
Good
Moderate
Moderate
Bad
Bad
Moderate (incidental)
0°
40°
Bad
Good
Bad (continual)
40 cm 75 cm
150 cm
Moderate Bad
Bad Good
Bad
Good Moderate
0° 15° 30°
Bad
Good
Moderate
0°
10°
20°
15°
0°
30°
15°
30°
Good
Good
Moderate
Moderate
Bad
Bad
Moderate (incidental)
0°
40°
Bad
Good
Bad (continual)
40 cm 75 cm
150 cm
Moderate Bad
Bad Good
1. Monitor placement
The correct placement of the monitor depends on the
type of the vehicle. Please take note of the following
guidelines when installing the monitor.
Obstruction of the eld of vision
The monitor must be placed in such a way that the field
of vision of surrounding traffic and the work area is
obstructed as little as possible.
Obstruction of the operation
The monitor may not obstruct the basic operation (the
handling of the operation functions and the field of vision
on the dashboard) within the vehicle.
The placement of the monitor may not hinder the driver
when getting in or out of the vehicle. Viewing distance
View point on the Monitor
Posture
View point on the Monitor
Viewing direction of the Monitor
Installation manual

4IM0973270 A 09
2. Basic system installations
Two Camera System
One Camera System
Three Camera System
Four Camera System
Installation manual
power
power
power
power

5
IM0973270 A 09
2.1 Electromagnetic compatibility installation instructions (EMC).
Preferred installation
Installation especially for forklifttrucks.
Warning! On vehicles with separated powerwiring like electrical forklifttrucks no other installation is allowed,
the shielding may NOT in any way be connected to the battery:
Color/wire Function Vehicle connection:
Red wire +(plus) power supply +(plus) voltage of the vehicle
(10..60V/Dc, 5A fuse)
White wire -(minus) GND power supply -(minus) of the vehicle
Shielding powercable Eliminates EMC disturbances Chassis of the vehicle
Alternative installation
If no separate 0V/minus is available on the vehicle and the minus of the battery is connected to the chassis of the
vehicle; connection is as follows:
Color/wire Function Vehicle connection:
Red wire +(plus) power supply +(plus) voltage of the vehicle
(10..60V/DC, 5A fuse)
White wire and
Schielding powercable
-(minus) GND power supply
and EMC
Chassis of the vehicle combined
with -(minus) of the vehicle
Preferred installation
Red wire
+ (Plus)
Power supply White wire
-(Minus) GND
Shielding
To +(Plus) voltage
of the vehicle
To - (Minus)
of the vehicle
Red wire
+ (Plus)
Power supply
White wire
-(Minus) GND
Shielding
To the chassis
and -(Minus)
of the vehicle
Alternative installation To +(Plus) voltage
of the vehicle
Connect shielding to the chassis
and -(Minus) of the vehicle. Wire not included.
Connect shielding to the chassis of the vehicle. Wire not included.
Installation manual

6IM0973270 A 09
RLED Art. No. Special feature Mask Video Cable Bracket Power Cable Page
Monitor 7” RLED
PL Zb4 b5
0208500*
Sun mask 0,29 metre
4 pin female LCD Bracket 0,24 metre
5 pin male 10
Monitor 7” RLED
CAN Serial R6B CS
0208520
Sun mask 6 metre
7 pin female Adjustable bracket 90mm 6 metre
8 pin male 11
Monitor 7” RLED
PL R4D
0208550*
Monitor mask 4 metre
4 pin female Adjustable bracket 90mm 4 metre
6 pin male D 12
Monitor 7” RLED
PL R1D1
0208590*
Monitor mask 0,3 metre
4 pin female Adjustable bracket 90mm 1,1 metre
2 pin D 13
Monitor 7” RLED
R 2
0208603
Sun mask 2 metre
4 pin female Adjustable bracket 90mm 2 metre 14
Monitor 7” RLED
4Cam R 2
0208612
Sun mask 2 metre Y-cable
4 pin female Adjustable bracket 90mm 2 metre 15
Monitor 7” RLED
Serial R6B
0208622
Sun mask 6 metre
7 pin female Adjustable bracket 90mm 6 metre
8 pin male 16
Monitor 7” RLED
Serial R 6
0208632
Sun mask 6 metre
7 pin female Adjustable bracket 90mm 6 metre 17
Monitor 7” RLED
CAN 4Cam Z 2
0208642
Sun mask 2 metre Y-cable
4 pin female LCD Bracket 2 metre 18
Monitor 7” RLED
(Cold store) R4 CS
0208672
Sun mask 4 metre
4 pin female Adjustable bracket 90mm 4 metre 19
Monitor 7” RLED
(Cold store) Z4 CS
0208681
Sun mask 4 metre
4 pin female LCD Bracket 4 metre 20
Monitor 7” RLED
Serial Z 6
0208691
Sun mask 6 metre
7 pin female LCD Bracket 6 metre 21
3. RLED variants
*Dedicated OEM product, not for sale!
Installation manual
(Cold store)

7
IM0973270 A 09
*Dedicated OEM product, not for sale!
Installation manual
RLED Art. No. Special feature Mask Video Cable Bracket Power Cable Page
Monitor 7” RLED
PL F 4
0208721*
Sun mask 4 metre
4 pin female Special bracket 4metre 22
Monitor 7” RLED
Serial R11B
0208831
Sun mask 11 metre
7 pin female Adjustable bracket 90mm 11 metre
8 pin male 23
Monitor 7” RLED
CAN SRD R 6
0208871
Sun mask 6 metre
7 pin female Adjustable bracket 90mm 6 metre 24
Monitor 7” RLED
(Cold store) RC 4 CS
0208902
Sun mask 4 metre
4 pin female
Adjustable bracket
144mm + Clamp 4 metre 25
Monitor 7” RLED
(Cold store) PL RC 2D65 CS
0208922*
Sun mask 2,65 metre
6 pin female
Adjustable bracket
90mm + Clamp 2,65 8 Pin male PL 26
Monitor 7” RLED
(Cold store) PL RC 3.3 CS
0208950*
Sun mask 4 metre
4 pin female
Adjustable bracket
144mm + Clamp 4 m 2 pin male PL 27
Monitor 7” RLED
(Cold store) PL RB 4J5 CS
0208991*
Monitor mask 4,5 metre
5 pin female PL Ball joint for bracket 4,5 m 2 pin male PL 28
Monitor 7” RLED
CAN SRD 4 Cam R7-4
0209110
Sun mask 2 metre Y-cable
7 pin female Adjustable bracket 90mm 2 metre 29
Monitor 7” RLED
(Cold store) PL R1.2AMP8 CS
0209190*
Sun mask 2,6 metre
4 pin female Adjustable bracket 90mm 1,2 metre
8 pin male E 30
Monitor 7” RLED
(Cold store) PL R1D2 CS
0209300*
Sun mask 1,4 metre
4 pin female Adjustable bracket 90mm 1,2 metre
3 pin male D 31
Monitor 7” RLED
CAN (Cold store)PL CS
0209310*
Sun mask 0,29 metre
4 pin female -0,24 metre
8 pin male 32
Monitor 7” RLED
CAN (Cold store)PL RB 4D CS
0209400*
Sun mask 4 metre
4 pin female -4 metre
8 pin male 33

8IM0973270 A 09
Type
Automotive 7inch TFT liquid crystal display module LED backlight.
Resolution
WVGA 800xRGBx480 pixels.
Viewing
70° horizontal and 60° vertical (@ CR≥10).
LED Life Time
30000 Hrs.
Typical performance
Center luminance of white: 600cd/m2, Contrast ratio 650:1, Response time 5 ms (Tr).
Softwaremenu Full On-Screen-Display (OSD) functionality in 15 languages: English, Dutch, German, French, Chech, Hungarian, Italian, Polish,
Portuguese, Spanish, Turkish, Swedish, Finnish, Danish, Norwegian.
ABC mode
Improved Auto Brightness Control (ABC) including one-touch day/night setting and adjustable minimum and maximum levels
for automatic control.
Operating temperature
-40°C ..+85°C.
Storage temperature
-40°C ..+105°C.
Electrical
Input voltage range
12...60V
+/-10%.
Power consumption
Max 12W (only for the monitor, total power consumption depending on cameras and other peripherals).
Protection
>70V overvoltageprotection, <10V undervoltageprotection, protected against loaddumps, spikes and surges, reverse polarity
on all wiring.
Power-output
Nominal 2A +/-10% for powering cameras and other peripherals.
Video input
1Vtt, 75Ω, Pal 50 Hz, 4,43MHz color sub carr. NTSC 60 Hz, 3,58MHz color sub carr.
Mechanical
Surface
Hard coating (3H), with AG LR (Low Reflection) polarizer.
UV Resistance
Exposure to intense direct sunlight (UV radiation) may increase the degradation of the display.
Housing
Color Black, material: aluminium & high impact automotive synthetic thermoplastic polymer.
Shock constancy
Shock and vibration resistant for usage on trucks, cranes, fork-lifts, maritime applications, machinery. Random vibration test
9,73G
rms at frequency: 5 to 2000, PSD (g²/Hz) 0,015 to 0,10.
Ingress protection
IP67 according IEC 60529 (dust tight, immersion in water up to 1m for 30 min).
Truck use
Withstand all fluids and materials used in and around trucks like: ammonia solution 5%, ethanol 80-100%, isopropanol
5-10%, soapy water (min. 50% soap per volume), alkaline degreasing compounds(used in high pressure washing equipment).
Certification
Quality & environment
Units are manufactured by Orlaco in the Netherlands; ISO 9001, ISO14001, ISO-TS16949.
Approvals
Approvals in compliance with all relevant EMC- and Automotive directives. Certificates available upon request.
This device complies with Part 15 of the FCC Rules. Operation is subject to the following conditions:
(1) this device may not cause harmful interference, and (2) this device must accept any interference received, including
interference that may cause undesired operation.
Green Passport
All materials are compliant to Green Passport requirements according IMO resolution MEPC.197(62) as adopted on 15 July
2011 (Maritime sector: International Maritime Organization concerning the functions of the Marine Environment Protection
Committee).
Electrical
Input voltage range
18...30V
+/-10%.
Power consumption
Max 12W (only for the monitor, total power consumption depending on cameras and other peripherals)
Protection
>70V overvoltageprotection, <10V undervoltageprotection, protected against loaddumps, spikes and surges, reverse polarity
on all wiring.
Power-output
For powering cameras and other peripherals. Power-output = input voltage. Output current 2A max.
Video input
1Vtt, 75Ω, Pal 50 Hz, 4,43MHz color sub carr. NTSC 60 Hz, 3,58MHz color sub carr.
Installation manual
4. Technical specications
*Different specications for the Serial Monitors
*
** Software menu
For the Radar Monitor Art. no. 0208871 and 0209110 applies; Software Menu Full On-Screen Display (OSD) functionality in 8 of langua-
ges: English, Dutch, German, French, Italian, Polish, Spanish, Swedish.
**
9
IM0973270 A 09
5.2. Cable connection downwards or upwards and changing cable.
First decide if you want to use a downward or upward connection.
1. Position of the JST connector for a downward connection. Please note that the wires are not twisted.
2. The position of the JST connector for an upwards connection.Turn the JST connector clockwise. Please note
that the wires are not twisted.
Cap included with Cable
remove cap
2
1
Turn connector
clockwise
JST connector
Cap
JST connector
Cap
Cable
Plug
Hexagon socket
head Cap screw
120
188
40,5
81
30
30
30
5.1. Backside Monitor 7” RLED
Back plate with 11 x M5 threaded holes, thread length 8 mm.
Make sure to tighten the screws according torque 2.0 Nm.
Back plate
Note by reassembly: Make
sure to tighten the screws according
torque 0.25 Nm / 35.4 ozf·in.
Backside Monitor 7” RLED
5. Back plate RLED
Installation manual

10 IM0973270 A 09
41
2
3
Back side
Solder side 5p male connector: (Secure the power input with a 5A fuse)
1 = Red = Power input: 12...60V/DC
2 = White = Power input: 0V
3 = Blue = Cam No. 1 activated at 7...60V/DC*
4 = Brown = Cam No. 2 activated at 7...60V/DC*
5 = White/Yellow = Cam No. 3 activated at 7...60V/DC*
6 = Grey = N.C.
7 = Yellow = N.C.
*Triggers camera >7V/DC and returns to non triggered <5V/DC.
If multiple cameras are triggered the highest cam. no. has the highest priority.
Solder side 4p female connector:
1 = Coax core = Video in
2 = Coax shielding = Video 0V
3 = Red = Power output: 12V/DC
4 = Black = Power output: 0V
Shielding = Ground
Connectors fixed on the back side of the monitor.
1
2
3
45
Connect instructions: Please refer to your Orlaco system documentation or chapter 2. “Basic System Installations”
User instructions: Please refer to User manual no: UM0972080 for operation.
6. Assembly, connections and data RLED
Article number: 0208500
Cables / Connectors 0,24m multicable (power) with 5p male connector, 0,29m multicable (video) with 4p female
connector Art. no.: 8976741.
Bracket
Anodized aluminium adjustable mounting bracket is supplied. Art. No. : 8974000.
Weight
1,6kg (Monitor, bracket, cables and connectors).
120
124,1
units in mm
188
98,3
49,1
89,6
105
80
54
40
∅6,2 (4x)
Min. bend radius= 50mm
R = 50
89,6
142
54,0
118
63
Installation manual

11
IM0973270 A 09
Cables / Connectors 6m multicable (power) with 8p male IP67 PG7 AU, 6m cable (video) with 7p female IP67 GOLD 423
connector. Art. No.: 8976251.
Bracket A clamping user-adjustable mounting bracket is supplied, Art. No. 2015500.
Weight 1,9kg (Monitor, cables and connectors).
Use Suitable for open-cabin, drive-in/drive-out cold store use.
units in mm
6000
120,0
98,3
49,1
89,6
30,0
∅64,5
40,5 ∅7,0 (4x)
64,0
188,0
Min. bend radius= 50mm
R = 50
97,6
back side
cable connection
downwards
cable connection
upwards
remove cap
Note by reassembly: Make
sure to tighten the screws according
torque 0.25 Nm / 35.4 in.ozf
25
7
4
3
6
1
Solder side 8p male: (Secure the power input with a 5A fuse)
1 = Red = Power input: 18...30V/DC
2 = White = Power input: 0V
3 = Blue = Cam No. 1 activated at 7...30V/DC*
4 = Brown = Cam No. 2 activated at 7...30V/DC*
5 = White/Yellow = Cam No. 3 activated at 7...30V/DC*
6 = Grey = Cam No. 4/Speedometer/Tachograph/Zoom in
7 = Yellow = Parking Brake (only Front Cam)/Zoom out.
8 = N.C.
*Triggers camera >7V/DC and returns to non triggered <5V/DC.
If multiple cameras are triggered the highest camera number has the highest priority.
Solder side 7p female connector:
1 = Coax core = Video in
2 = Coax shielding = Video 0V
3 = Red = Power output: equal to “Power input”
4 = Black = Power output: 0V
5 = Orange = RS232 Rx
6 = Yellow = RS232 Tx
7= Grey = RS232 Rx & Tx 0V
2
5
3
7
4
1
6
8
Connect instructions: Please refer to your Orlaco system documentation or chapter 2. “Basic System Installations”
User instructions: Please refer to User manual no: UM0972080 for operation.
Article number: 0208520
Installation manual

12 IM0973270 A 09
Cables / Connectors 4m multicable (power) with Deutsch DT04-60 6p connector, 4m video cable with 4p molded female
connector. Art. No.: 8976283.
Bracket A clamping user-adjustable mounting bracket is supplied. Art. No.: 2015500
Weight 1,9kg (Monitor, bracket, cables and connectors)
120
units in mm
30
∅64,5
40,5 ∅7 (4x)
64
188
4000
4000
Min. bend radius= 50mm
R = 50
187,5
Bracket mounted on
the lowest position
49,1
65,8
57,1
4
1
23
back side
cable connection
downwards
cable connection
upwards
remove cap
Note by reassembly: Make
sure to tighten the screws according
torque 0.25 Nm / 35.4 in.ozf
Deutsch DT04-6p connector: (Secure the power input with a 5A fuse)
1 = Red = Power input: 12...60V/DC
2 = White = Power input: 0V
3 = Blue = Cam No. 1 activated at 7...60V/DC*
4 = Brown = Cam No. 2 activated at 7...60V/DC*
5 = White/Yellow = Cam No. 3 activated at 7...60V/DC*
6 = Grey = Aux 1
7 = Yellow = N.C.
*Triggers camera >7V/DC and returns to non triggered <5V/DC.
If multiple cameras are triggered the highest cam. no. has the highest priority.
Front side 4p molded female connector:
1 = Coax core = Video in
2 = Coax shielding = Video 0V
3 = Red = Power output: 12V/DC
4 = Black = Power output: 0V
Shielding = Housing
Crimp side
6p male connector
1
2
34
5
6
Connect instructions: Please refer to your Orlaco system documentation or chapter 2. “Basic System Installations”
User instructions: Please refer to User manual no: UM0972080 for operation.
Article number: 0208550
Installation manual

13
IM0973270 A 09
Installation manual
Cables / Connectors 1,1m multicable (power) with Deutsch DT04-2p connector, 0,3m video cable with 4p molded female
connector. Art. No.: 8976651
Bracket
A clamping user-adjustable mounting bracket is supplied. Art. No.: 2015500
Weight
1,9kg (Monitor, bracket, cables and connectors)
120
units in mm
30
∅64,5
40,5 ∅7 (4x)
64
188
1100
300
Min. bend radius= 50mm
R = 50
187,5
Bracket mounted on
the lowest position
49,1
65,8
57,1
4
1
23
back side
cable connection
downwards
cable connection
upwards
remove cap
Note by reassembly: Make
sure to tighten the screws according
torque 0.25 Nm / 35.4 in.ozf
Deutsch DT04-2p connector: (Secure the power input with a 5A fuse)
1 = Red = Power input: 12...60V/DC
2 = White = Power input: 0V
Front side 4p molded female connector:
1 = Coax core = Video in
2 = Coax shielding = Video 0V
3 = Red = Power output: 12V/DC
4 = Black = Power output: 0V
Shielding = Ground
Connect instructions: Please refer to your Orlaco system documentation or chapter 2. “Basic System Installations”
User instructions: Please refer to User manual no: UM0972080 for operation.
Article number: 0208590

14 IM0973270 A 09
Installation manual
Cables / Connectors 2m multicable (power) open wired, 2m video cable with 4p molded female connector.
Art. No.: 8976212.
Bracket A clamping user-adjustable mounting bracket is supplied. Art. No.: 2015500.
Weight 1,9kg (Monitor, bracket, cables and connectors).
120
98,3
49,1
89,6
units in mm
30
∅64,5
40,5 ∅7 (4x)
64
188
2000
Min. bend radius= 50mm
R = 50
97,6
4
1
23
Connections to the monitor: (Secure the power input with a 5A fuse)
1 = Red = Power input: 12...60V/DC
2 = White = Power input: 0V
3 = Blue = Cam No. 1 activated at 7...60V/DC*
4 = Brown = Cam No. 2 activated at 7...60V/DC*
5 = White/Yellow = Cam No. 3 activated at 7...60V/DC*
6 = Grey = Cam No. 4/Speedometer/Tachograph/Zoom in
7 = Yellow = Parking Brake (only Front Cam)/Zoom out.
*Triggers camera >7V/DC and returns to non triggered <5V/DC.
If multiple cameras are triggered the highest camera number has the highest priority.
Front side 4p molded female connector:
1 = Coax core = Video in
2 = Coax shielding = Video 0V
3 = Red = Power output: 12V/DC
4 = Black = Power output: 0V
Shielding = Ground
cable connection
upwards
1
2
3
7
456
back side
cable connection
downwards
remove cap
Note by reassembly: Make
sure to tighten the screws according
torque 0.25 Nm / 35.4 in.ozf
Connect instructions: Please refer to your Orlaco system documentation or chapter 2. “Basic System Installations”
User instructions: Please refer to User manual no: UM0972080 for operation.
Article number: 0208603

15
IM0973270 A 09
Cables / Connectors 2m multicable (power) open wired, 2m Y-cable (video) with two 4p female IP67 PG7 AU
connector. Art. No.: 1002089.
Bracket
A clamping user-adjustable mounting bracket is supplied. Art. No.: 2015500.
Weight
1,9kg (Monitor, bracket, cables and connectors).
120
98,3
49,1
89,6
units in mm
30
∅64,5
40,5 ∅7 (4x)
64
188
total length= 2000
2000
1000
Min. bend radius= 50mm
R = 50
97,6
back side
cable connection
downwards
cable connection
upwards
remove cap
Note by reassembly: Make sure
to tighten the screws according
torque 0.25 Nm / 35.4 in.ozf
Connections to the monitor: (Secure the power input with a 5A fuse)
1 = Red = Power input: 12…60 V/DC
2 = White = Power input: 0 V
3 = Blue = Cam No. 1 activated at 7…60 V/DC*
4 = Brown = Cam No. 2 activated at 7…60 V/DC*
5 = White/Yellow = Cam No. 3 activated at 7…60 V/DC*
6 = Grey = Cam No. 4/Speedometer/Tachograph/Zoom in
7 = Yellow = Parking Brake (only Front Cam)/Zoom out
*Triggers camera >7V/DC and returns to non triggered <5V/DC.
If multiple cameras are triggered the highest camera number has the highest priority.
Solder side 4p female connector:
1 = Coax core = video in
2 = Coax shielding = video 0V
3 = Red = Power output: 12 V/DC
4 = Black = Power output: 0V
Shielding = Ground
1
2
3
7
456
41
2
3
Connect instructions: Please refer to your Orlaco system documentation or chapter 2. “Basic System Installations”
User instructions: Please refer to User manual no: UM0972080 for operation.
Article number: 0208612
Installation manual

16 IM0973270 A 09
Installation manual
Cables / Connectors 6m multicable (power) with 8p male molded connector, 6m multicable (video) with 7p
female molded connector. Art. No. 8976251.
Bracket
A clamping user-adjustable mounting bracket is supplied. Art. No. : 2015500.
Weight
1,9kg (Monitor, bracket, cables and connectors).
units in mm
6000
30
∅64,5
40,5 ∅7 (4x)
64
120
98,3
49,1
89,6
188
Min. bend radius= 50mm
R = 50
97,6
25
7
4
3
6
1
2
5
3
7
4
1
6
8
back side
cable connection
downwards
cable connection
upwards
remove cap
Note by reassemble: make sure
to tighten the screws according
torque 0.25 Nm / 35.4 in.ozf
Solder side 8p male: (Secure the power input with a 5A fuse)
1 = Red = Power input: 18...30V/DC
2 = White = Power input: 0V
3 = Blue = Cam No. 1 activated at 7...30V/DC*
4 = Brown = Cam No. 2 activated at 7...30V/DC*
5 = White/Yellow = Cam No. 3 activated at 7...30V/DC*
6 = Grey = Cam No. 4/Speedometer/Tachograph/Zoom in
7 = Yellow = Parking brake (only Front Cam)/Zoom out.
8 = N.C.
*Triggers camera >7V/DC and returns to non-triggered <5V/DC.
If multiple cameras are triggered the highest cam. no. has the highest priority.
Solder side 7p female connector:
1 = Coax core = Video in
2 = Coax shielding = Video 0V
3 = Red = Power output: equal to “Power input”
4 = Black = Power output: 0V
5 = Orange = RS232 Rx
6 = Yellow = RS232 Tx
7= Grey = RS232 Rx & Tx 0V
Connect instructions: Please refer to your Orlaco system documentation or chapter 2. “Basic System Installations”
User instructions: Please refer to User manual no: UM0972080 for operation.
Article number: 0208622

17
IM0973270 A 09
Connect instructions: Please refer to your Orlaco system documentation or chapter 2. “Basic System Installations”
User instructions: Please refer to User manual no: UM0972080 for operation.
Article number: 0208632
units in mm
6000
120
98,3
49,1
89,6
30
∅64,5
40,5 ∅7 (4x)
64
188
Min. bend radius= 50mm
R = 50
97,6
Cables / Connectors 6m power cable open wired, 6m video cable with 7p molded M16 female connector;
Art. no. 8976331.
Bracket
A clamping user-adjustable mounting bracket is supplied. Art. No. : 2015500.
Weight
1,9kg (Monitor, bracket, cables and connectors).
back side
cable connection
downwards
cable connection
upwards
remove cap
Note by reassembly: Make
sure to tighten the screws according
torque 0.25 Nm / 35.4 in.ozf
Connections to the monitor: (Secure the power input with a 5A fuse)
1 = Red = Power input: 18...30V/DC
2 = White = Power input: 0V
3 = Blue = Cam No. 1 activated at 7...30V/DC*
4 = Brown = Cam No. 2 activated at 7...30V/DC*
5 = White/Yellow = Cam No. 3 activated at 7...30V/DC*
6 = Grey = Cam No. 4/Speedometer/Tachograph/Zoom in
7 = Yellow = Parking Brake (only Front Cam)/Zoom out.
*Triggers camera >7V/DC and returns to non triggered <5V/DC.
If multiple cameras are triggered the highest camera number has the highest priority.
Front side 7p molded female connector:
1 = Coax core = Video in
2 = Coax shielding = Video 0V
3 = Red = Power output: equal to “Power input”
4 = Black = Power output: 0V
5 = Orange = RS232 Rx
6 = Yellow = RS232 Tx
7= Grey = RS232 Rx & Tx 0V
1
2
3
7
456
2
5
7
43
61
Installation manual

18 IM0973270 A 09
Installation manual
Cables / Connectors 2m multicable (power) open wired, 2m Y-cable (video) with two 4p female IP67 PG7 AU
connector. Art. No.: 0303781
Bracket
Anodized aluminium adjustable mounting bracket is supplied. Art. No. : 8974000
Weight
1,7kg (Monitor, bracket, cables and connectors)
120
objects in
monitor are
closer than
they appear
units in mm
188
total length= 2000
2000
98,3
49,1
89,6
105,0
54
∅6,2 (4x)
Controller Area Network (CAN)
Pair of signal wires (CAN_H and CAN_L)
1000
Min. bend radius= 50mm
R = 50
80
40
41
2
3
remove cap
1
2
3
7
456
kabel verbinding
omhoog
Opmerking voor montage: zorg er
voor dat u de schroeven aandraait
volgens koppel 0.25 Nm / 35.4 in.ozf
kabel verbinding
neerwaarts
achterzijde
Aansluiting aan de monitor:(Zeker de voedings ingang met een 5A zekering)
1 = Rood = Voedings ingang: 12...60V/DC
2 = Wit = Voedings ingang: 0V
3 = Blauw = Cam nr. 1 geactiveerd bij 7...60V/DC*
4 = Bruin = Cam nr. 2 geactiveerd bij 7...60V/DC*
5 = Wit/Geel = Cam nr. 3 geactiveerd bij 7...60V/DC*
6 = Grijs = CAN H
7 = Geel = CAN L
*Camera schakelt in >7V/DC en schakelt weer uit <5V/DC.
Als er meerdere camera's worden geactiveerd; het hoogste cameranummer heeft de eerste prioriteit
Soldeerzijde 4p vrouwelijk connector:
1 = Coax kern = Video in
2 = Coax afscherming = Video 0V
3 = Rood = Voedings uitgang: 12V/DC
4 = Zwart = Voedings uitgang: 0V
Afscherming = Aarde
Connect instructions: Please refer to your Orlaco system documentation or chapter 2. “Basic System Installations”
User instructions: Please refer to User manual no: UM0972080 for operation.
Article number: 0208642

19
IM0973270 A 09
Cables / Connectors 4m multicable (power) open wired, 4m multicable (video) with 4p molded female
connector. Art. No.: 8976223.
Bracket A clamping user-adjustable mounting bracket is supplied. Art. No.: 2015500.
Weight 1,8kg (Monitor, bracket, cables and connectors).
Use Suitable for open-cabin, drive-in/drive-out cold store use.
120
98,3
49,1
89,6
units in mm
30
∅64,5
40,5 ∅7 (4x)
64
188
4000
Min. bend radius= 50mm
R = 50
97,6
back side
cable connection
downwards
cable connection
upwards
remove cap
Note by reassembly: Make
sure to tighten the screws according
torque 0.25 Nm / 35.4 in.ozf
Connections to the monitor: (Secure the power input with a 5A fuse)
1 = Red = Power input: 12...60V/DC
2 = White = Power input: 0V
3 = Blue = Cam No. 1 activated at 7...60V/DC*
4 = Brown = Cam No. 2 activated at 7...60V/DC*
5 = White/Yellow = Cam No. 3 activated at 7...60V/DC*
6 = Grey = Cam No. 4/Speedometer/Tachograph/Zoom in
7 = Yellow = Parking Brake (only Front Cam)/Zoom out.
*Triggers camera >7V/DC and returns to non triggered <5V/DC.
If multiple cameras are triggered the highest camera number has the highest priority.
Front side 4p molded female connector:
1 = Coax core = Video in
2 = Coax shielding = Video 0V
3 = Red = Power output: 12V/DC
4 = Black = Power output: 0V
Shielding = Ground
1
2
3
7
456
4
1
23
Connect instructions: Please refer to your Orlaco system documentation or chapter 2. “Basic System Installations”
User instructions: Please refer to User manual no: UM0972080 for operation.
Article number: 0208672
Installation manual

20 IM0973270 A 09
Installation manual
Article number: 0208681
Cables / Connectors 4m multicable (power) open wired, 4m multicable (video) with 4p molded female connector.
Art. No.: 8976223
Bracket
Anodized aluminium adjustable mounting bracket is supplied. Art. No. : 8974000
Weight
1,6kg (Monitor, bracket, cables and connectors)
Use
Suitable for open-cabin, drive-in/drive-out cold store use.
120
188
4000
98,3
49,1
89,6
105
80
54
40
∅6,2 (4x)
R = 50
units in mm Min. bend radius= 50mm
4
1
23
1
2
3
7
456
back side
cable connection
downwards
cable connection
upwards
remove cap
Note by reassembly: Make sure
to tighten the screws according
torque 0.25 Nm / 35.4 in.ozf
Connections to the monitor: (Secure the power input with a 5A fuse)
1 = Red = Power input: 12...60V/DC
2 = White = Power input: 0V
3 = Blue = Cam No. 1 activated at 7...60V/DC*
4 = Brown = Cam No. 2 activated at 7...60V/DC*
5 = White/Yellow = Cam No. 3 activated at 7...60V/DC*
6 = Grey = N.C.
7 = Yellow = N.C.
*Triggers camera >7V/DC and returns to non triggered <5V/DC.
If multiple cameras are triggered the highest camera number has the highest priority.
Front side 4p molded female connector:
1 = Coax core = Video in
2 = Coax shielding = Video 0V
3 = Red = Power output: 12V/DC
4 = Black = Power output: 0V
Shielding = Ground
Connect instructions: Please refer to your Orlaco system documentation or chapter 2. “Basic System Installations”
User instructions: Please refer to User manual no: UM0972080 for operation.
This manual suits for next models
23
Table of contents
Other Orlaco Monitor manuals

Orlaco
Orlaco RLED User manual

Orlaco
Orlaco UM0972225 A 01 User manual

Orlaco
Orlaco RLED User manual

Orlaco
Orlaco ELED Ethernet User manual

Orlaco
Orlaco RLED CAN RB 4D CS User manual

Orlaco
Orlaco 0208203 User manual

Orlaco
Orlaco 0224000 User manual

Orlaco
Orlaco 0206501 User manual

Orlaco
Orlaco HLED 1 User manual

Orlaco
Orlaco RadarEye User manual