manuals.online logo
Brands
  1. Home
  2. •
  3. Brands
  4. •
  5. Orlaco
  6. •
  7. Monitor
  8. •
  9. Orlaco 0206501 User manual

Orlaco 0206501 User manual

MANUAL 2006 • version 1.2
Art.nr. 0206501
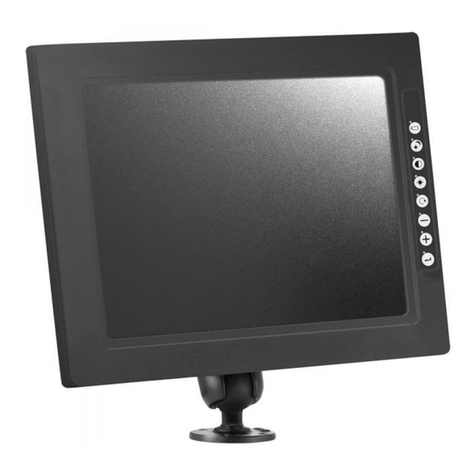
10” LCD colour uni V2.0
Top Side Offshore Technology - Radarstraat 12 - 2901 AV Capelle a/d Ijssel - The Netherlands
Phone: +31 (0) 10 451 5655 - Fax: +31 (0) 10 458 5828 - E-mail: [email protected] - Internet: www.topsideoffshore.com
Technical specifications
Installation
The camera monitor systems by Orlaco are entirely conform the latest CE, ADR, VDE
and EMC specifications and are produced conform the ISO 9001 - 2000 quality system.
10” LCD 0206501 V2.0 Orlaco LCD
Type: TFT (thin film transistor) color active matrix LCD, CCFT backlight
Anti glare and hard coated 3H, 6 bit color 262.144
Size: 10,4" diagonal display, active area contains 800 x 600 pixels
(RGB dots 0.264x0.264). Wide viewing angle (H140°-V110°)
TV System: PAL CVBS video-input
Luminance: High luminance: max. 350 Cd/m2
Contrast ratio: 300:1
Housing: High Pressure Moulded Aluminum (AlSI 12D), Anodized. Rugged finish.
Weight: 3,5 kg
Protection IP51 following DIN/IEC 529
Power input: +12...32V/DC, 20W, protection integrated on loaddump, overvoltage, undervoltage, polarity
Oper. temp: -35°C to +70°C,temperature sensor will (de)activate the LCD at -10°C & +65°C
Approvals: CE EMC EG/2004/104
Settings: All settings are controlled by software menu structure such as: contrast,
brightness, colour, electronic distance markers, mirror image etc.
Software: menu contains English, German, French and Dutch languages.
All data are subject to change without notice.
e4
www.orlaco.com P. 02
6 m
6 m
1
2
3
4
567
•Do not touch the LCD display;
•To clean the display use only a soft
towel without using any agressive
cleaning products;
297,0
254,8
81,7
142,0
1 = Red = Power +12...32V/DC
2 = White = Ground
3 = Blue
4 = Brown
5 = White/Yellow
= Reverse function activated on +12...32/DC
= Camera nr. 2 activated on +12...32V/DC
= Camera nr. 3 activated on +12...32V/DC
6 = Grey = Camera selection +12...32V/DC
7 = Yellow = Not connected
Connection to the monitor
1
23
4
Soldering side of female connector (131084)
1 = Coax core (Video signal)
2 = Coax safeguard(Video ground)
3 = Red (+ 12V/DC)
4 = Black (Feed ground)
Mounting of the monitor bracket
Ø11,0Ø11,0
40,040,0
0 08 ,0 08 ,
Buttons 1 and 2 (Selection/ setting)
Button 3 (Menu/ confirmation)
Button 4 (Option)
Button 5 (Brightness)
Button 6 (Contrast)
Button 7 (Automatic brightness on/off)
Button 8 (Camera selection)
Operator functions
This section describes the basic LCD monitor operation
using the frontpanel buttons. all settings made on the
frontpanel can also be adjusted in the service menu.
Operator menu operation
Press the enter button once to open the operator menu.
The following keys are used to
navigate through the menus :
minus Go to the next menu option
plus Go to the previous menu option
enter Select or activate the highlighted option
option Return to the previous menu
• Camera selection
Press the camera button once.
The camera LED will now blink, indicating that the manual
camera override is active. Use the plus and minus buttons
to select the camera. It is possible to use the other controls
(brightness, contrast, etc) as long as manual camera selection
is active. Press camera once more to leave manual camera
selection mode. The manual camera selection function can be
disabled in the service settings menu.
• Brightness adjustment
Press brightness once to enter brightness adjustement mode.
Now use the plus and minus buttons to select the image brightness.
The camera image settings function can be disabled in the
service settings menu.
• Contrast adjustment
Press contrast once to enter contrast adjustement mode.
Now use the plus and minus buttons to select the image contrast.
Note: The camera image settings function can be disabled in the
service settings menu.
• Saturation adjustment
Press brightness and contrast at the same time to enter saturation
adjustement mode. Now use the plus and minus buttons to select
the imagesaturation. The camera image settings function can be
disabled in the service settings menu.
• Backlight compensation / zero-lux control
Press backlight once to enter backlight compensation / zero-lux
mode. Press the plus button to toggle backlight compensation
between on and off, press the minus button to toggle zero-lux
between on and off, This option is only available when an autofocus
camera is connected to the LCD Part number ( 02065030)
and when the monitor is configured to use an autofocus camera on
this input. Refer to the service menu for more details.
Standby
This option switches the LCD monitor to standby mode.
Press the enter button to switch to power on.
Info
This option shows the Orlaco LCD monitor.
If the user does not press any buttons during a 5 second period,
the LCD monitor will display a small message describing the function
of the current selected menu option.
P. 04
Service menu
Service menu operation
To open the service menu, press the plus , minus and camera
buttons at the same time.
The following keys are used to navigate through the menu
The camera settings menu can be reached from the service main
menu. When entering the menu, use the minus and plus buttons to
select the camera to configure and press the enter button. The yellow
cursor now jumps to the list of items. Use the minus and plus buttons to
select the item to adjust, and press the enter button. If the selection
option is an on/off switch, it will toggle between on and off. If the option
is a numeric value, it is now possible to change the value with the
minus and plus buttons, press the enter button to store the new
setting.The service camera settings menu has the following options
• Mirror
Enable this option to mirror the image (reverse left and right).
• Switch delay
Enable this option if the switchwire is controlled by an intermittent
signal, e.g. from an indicator light.
• Marker
Enable this option to switch the marker on. The marker is displayed
as a horizontal green line.
• Marker position
Adjust the vertical position of the marker. 0 is top of screen,
100 is bottom of screen.
• Graticule position
This option is not available on the 10”LCD models.
• Cinema mode
This option is not available on the 10”LCD models.
• Autofocus
Enable this option if a autofocus camera is connected.
This will enable special options
only available with an AF camera and a SERIAL LCD screen
• Backlight
Backlight compensation is used for an enhanced picture when
looking at dark objects in a light environment.
only available with an AF camera and a SERIAL LCD screen
• Zero-lux
Enable the zero-lux option for increased sensitivity in low-light
environments.
only available with an AF camera and a SERIAL LCD screen
• Pan-tilt
Set this option to 'on' to enable pan/tilt control with the option
button.
• Brightness
Adjust the brightness of the image.
• Contrast
Adjust the contrast of the image.
• Saturation
Adjust the saturation of the image.
• Camera label
In this menu the text-lables for the camera inputs can be defined.
P. 05
System settings;
• Language
This option opens the language selection menu.
The selected language will be used for all OSD menu's.
• On screen display
This option opens the OSD (On Screen Display) settings menu.
This menu has the following options :
• OSD menu help
Enable or disable the automatic help text in OSD menus. If enabled, an
automatic help text wil appear after 5 seconds of inactivity in any menu.
• OSD timeout ( camera label )
Adjust the number of seconds the OSD (camera label ) is visible.
Set to OFF to enables the marker line.
• Keyboard menu
This option opens the keyboard settings menu.
This menu has the following options :
• Keyboard lock
This option opens the keyboard-lock menu.
This opens a submenu where various functions of the LCD monitor can
be disabled to avoid accidental adjustment of monitor settings.
• CAN bus
This option is not available on the 10”LCD models.
• CAN speed
This option is not available on the 10”LCD models.
• CAN protocol
This option selects the higher level CAN protocol to use.
• LCD backlight
This option opens the LCD backlight submenu. In the LCD backlight
menu, two options are available :
• LCD automatic backlight
This option enables the automatic backlight control (ABC). The display
will adapt its brightness to the amount of light in the environment LCD
backlight This option manually sets the LCD backlight brightness, and
is only available if the LCD automatic backlight option is switched off.
• Scanning
This option opens the scanning submenu. This menu has the following
options:
• Scan sequence
This option selects the cameras which will be enabled in the scanning
sequence. if manual override is on this function will not work.
• Scan interval
This option selects the interval between scanning camera switches.
• Camera switch
This option is not available on the 10”LCD models.
• AUX function
Select the function of the AUX1 and AUX2 wires. Set to TCH for
tachometer on AUX1, or KEY for + and - key functions on AUX1/2.
• Default settings
This option opens the restore factory defaults menu. If the Yes option is
chose, the LCD will revert all settings to their factory defaults.
Warning: All user-configured settings will be lost when the factory
defaults are reset.
System setting
P. 06

Other Orlaco Monitor manuals

Orlaco RLED CAN RB 4D CS User manual

Orlaco

Orlaco RLED CAN RB 4D CS User manual

Orlaco 0224000 User manual

Orlaco

Orlaco 0224000 User manual

Orlaco RLED User manual

Orlaco

Orlaco RLED User manual

Orlaco 0208203 User manual

Orlaco

Orlaco 0208203 User manual

Orlaco ELED Ethernet User manual

Orlaco

Orlaco ELED Ethernet User manual

Orlaco HLED 1 User manual

Orlaco

Orlaco HLED 1 User manual

Orlaco UM0972225 A 01 User manual

Orlaco

Orlaco UM0972225 A 01 User manual

Orlaco RLED User manual

Orlaco

Orlaco RLED User manual

Orlaco 0208500 User manual

Orlaco

Orlaco 0208500 User manual

Orlaco RadarEye User manual

Orlaco

Orlaco RadarEye User manual

Popular Monitor manuals by other brands

JVC VM-4200 instructions

JVC

JVC VM-4200 instructions

HP L1950 Service manual

HP

HP L1950 Service manual

I-Inc CY199D user manual

I-Inc

I-Inc CY199D user manual

Acer V771 manual

Acer

Acer V771 manual

LG E2360S Service manual

LG

LG E2360S Service manual

Mod-tronic MT300 user manual

Mod-tronic

Mod-tronic MT300 user manual

EverFocus EN-7517E instruction manual

EverFocus

EverFocus EN-7517E instruction manual

Philips 247E6 user manual

Philips

Philips 247E6 user manual

Philips 190SW8FB Specifications

Philips

Philips 190SW8FB Specifications

Bender VME421H-DM manual

Bender

Bender VME421H-DM manual

Akai PDP4216M Service manual

Akai

Akai PDP4216M Service manual

ATAGO CM-800A-DMF instruction manual

ATAGO

ATAGO CM-800A-DMF instruction manual

Cooler Master GM27-CFX user manual

Cooler Master

Cooler Master GM27-CFX user manual

Gateway VX760 user guide

Gateway

Gateway VX760 user guide

Lenovo ThinkCentre TIO24Gen4Touch user guide

Lenovo

Lenovo ThinkCentre TIO24Gen4Touch user guide

Pioneer PDP-436RXE operating instructions

Pioneer

Pioneer PDP-436RXE operating instructions

Sony Multiscan CPD-1404S Service manual

Sony

Sony Multiscan CPD-1404S Service manual

Philips 170P5EG/00 Service manual

Philips

Philips 170P5EG/00 Service manual

manuals.online logo
manuals.online logoBrands
  • About & Mission
  • Contact us
  • Privacy Policy
  • Terms and Conditions

Copyright 2025 Manuals.Online. All Rights Reserved.