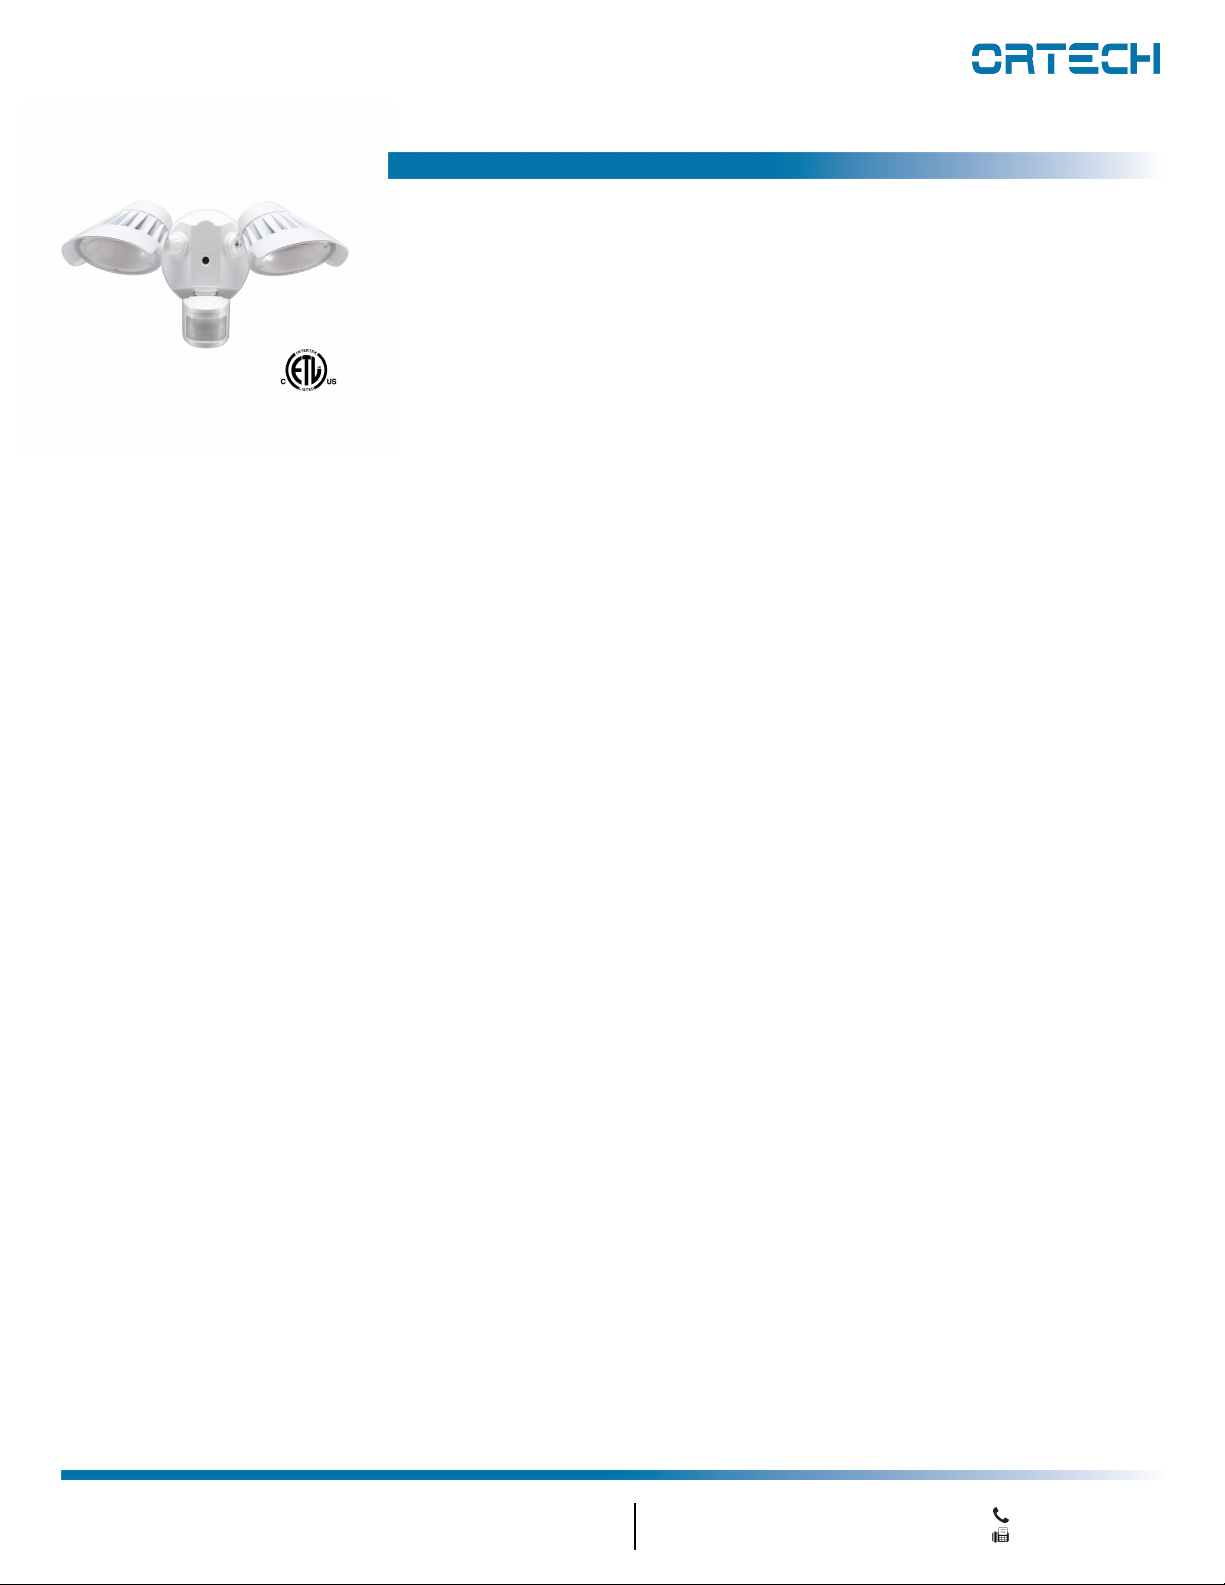
manuals.online logo
Brands
  1. Home
  2. •
  3. Brands
  4. •
  5. Ortech
  6. •
  7. Lighting Equipment
  8. •
  9. Ortech OL-2HS User manual

Ortech OL-2HS User manual

WARNING
LED Security Lights
MODEL OL-2HS
WARNING — THE INSTALLATION MUST BE CARRIED OUT BY
A QUALIFIED ELECTRICIAN.
1. LED Security Lights are suitable for using in dry and damp locations
2. Please keep the LED Security Lights away from any corrosive substance, and please use
dry cloth when you clean it
3. LED Security Lights can only be installed by a qualified electrician
4. Before installation or maintenance, please disconnect the power to prevent electric shock
Instruction Manual
1-888-543-6473
1-888-541-6474
13376 Comber Way
Surrey BC V3W 5V9
[email protected]
www.ortechindustries.com
375 Admiral Blvd
Mississauga, ON L5T 2N1
Application Notice
1. To reduce the risk of death, personal injury or property damage from fire, electric shock, falling parts, cuts / abrasions and other hazards,
please read all warnings and instructions included with and on this product prior to installation
2. For commercial installation, service and maintenance of this product should be performed by a qualified, licensed electrician
3. For residential installation, if you are unsure about the installation or maintenance of this product, consult a qualified licensed electrician
4. DO NOT mount the unit against flammable surfaces
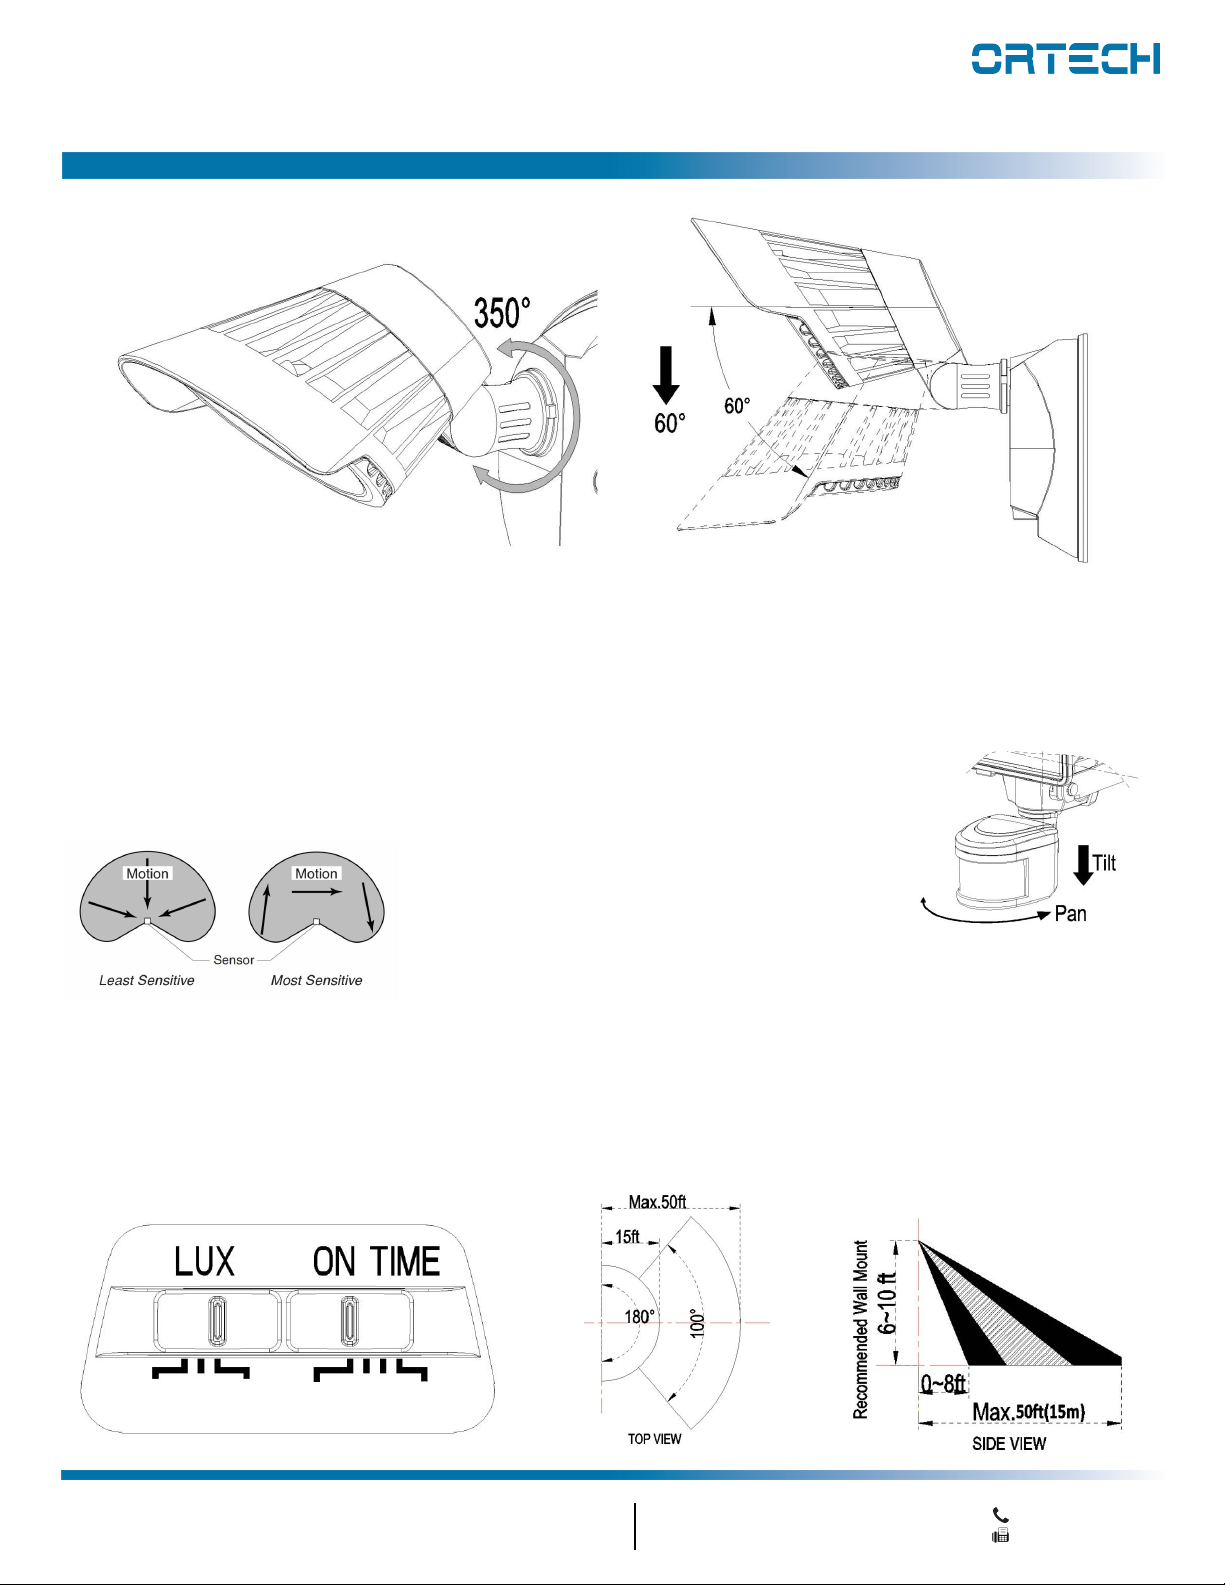
5. It is recommended that this security light is mounted at least 6' 6" off the ground
6. The security light MUST be powered directly to a switched circuit
7. The security light should NOT be used in areas with limited ventilation or high ambient temperatures
8. The security light CANNOT be used with a dimmer switch, motion or occupancy sensor or other electronic switching device
9. This product is intended to be connected to a properly installed and grounded UL listed junction box
WARNING — RISK OF ELECTRICAL SHOCK
•Turn OFF electrical power at fuse or circuit breaker box before wiring product to the power supply
•Verify if the supply voltage is correct before installing (110V-240V)
•Make all electrical and grounded connections in accordance with the National Electric Code and any applicable local code requirements
•All wiring connections should be capped with UL listed wire connectors
WARNING — RISK OF PRODUCT DAMAGE
•NEVER connect fixture with power ON
•DO NOT mount or support product in a manner that can cut the outer jacket or damage the wire insulation
•Avoid covering LED products with insulation, foam or other materials that will prevent convection or conduction cooling
•NEVER connect an LED product directly to dimmer packs, occupancy sensors, timing devices, or other related control devices, unless
individual product specifications deem otherwise
•LED products are Polarity Sensitive. Ensure proper polarity before installation
•Electrostatic Discharge (ESD), can cause damage to LED products. Wear personal grounding equipment during installation and
service of the product
•DO NOT touch the individual electronic components, as it may cause ESD (Electronic Discharge).
ESD will shorten lamp lifetime or alter performance
WARNING — RISK OF INJURY
•Wear gloves and safety glasses at ALL TIMES when removing fixture from carton, installing or servicing the product
•Avoid direct eye exposure to the light source while it is ON. LED lights are extremely bright, under no circumstances should you
stare directly into an LED light, as it may cause irreparable damage to the eyes
•Please dispose of packaging materials and account for all small parts as these can be hazardous to small children
WARNING — RISK OF BURN
•Allow fixture to cool completely before handling. DO NOT touch enclosure of light source
•DO NOT exceed maximum wattage marked on the label
•Keep combustible and other materials that can burn away from the light, lamp / lens
LED Security Lights
Instruction Manual
1-888-543-6473
1-888-541-6474
13376 Comber Way
Surrey BC V3W 5V9
[email protected]
www.ortechindustries.com
375 Admiral Blvd
Mississauga, ON L5T 2N1
PLEASE READ INSTRUCTION BEFORE COMMENCING INSTALLATION AND RETAIN FOR FUTURE REFERENCES.
Electrical products can cause death or injury, or damage to property.
If in any doubt about the installation or use of this product, consult a competent electrician.
MODEL OL-2HS CAUTION
INSTALLATION GUIDE
** Tool Required for Installation
•Phillips screw driver and level
Mounting and
Wiring the Light
DO NOT MOUNT ON THE GROUND.
Recommended installatio height is
6-1/2 ft to 10 ft.
1. Turn OFF power to the circuit breaker
box. DO NOT rely on only the switch
power being turned OFF
2. Install the cross bar (E) to the junction
box and secure with the (2) mounting
screws (I). If installing to a wall or
building, pre-drill holes and use
appropriate plugs / anchors. Then,
install the cross bar to the surface
using the (2) mounting screws (I)
3. On the cross bar, locate GND, attach
the GROUND wire (G) with the
grounding screw (F) to the cross bar
4. Use a wire nut (H) to connect the
grounding wire (G) to the house
ground wire (typically copper). For
proper connection, place wire nut
over wires and twist clockwise
until tight
5. Connect supply wires with wire nuts
(H) as shown in the figure on the
bottom left. BLACK supply wire
connects to BLACK power supply wire
(Live). WHITE product wire connects
to WHITE supply wire (Neutral)
6. You may use the optional gasket (D)
at this time round
7. Install the light fixture (A) to the cross
bar (E). Use silicone sealant (not
included) around the perimeter of the
light to seal for moisture
8. Screw in the stainless steel screw (C)
to hold fixture in place. Insert plastic
screw cover (B) into screw hole
9. Turn ON your electricity after the
installation has been completed
10. Turn ON power switch (if power
switch is not on, the light will NOT
cycle ON or OFF)
CAUTION
Plastic Cover
(Quantity: 1)
Stainless
Steel Screw
(Quantity: 1)
Gasket (optional)
(Quantity: 1)
Light Fixture
(Quantity: 1)
Wire nut
(Quantity: 3)
Grounding Wire
(Quantity: 1)
Stainless Steel
Mounting Screws
(Quantity: 2)
Grounding
Screw
(Quantity: 1) Cross Bar
(Quantity: 1)
** Silicon Sealant recommended
** (not included)
Instruction Manual
1-888-543-6473
1-888-541-6474
13376 Comber Way
Surrey BC V3W 5V9
[email protected]
www.ortechindustries.com
375 Admiral Blvd
Mississauga, ON L5T 2N1
Adjusting Your Light Heads
LED Security Lights
MODEL OL-2HS
CAUTIONINSTALLATION GUIDE
Your light heads can be adjusted by turning the individual light head to desired position.
You can also adjust your light head up and down to your desired position.
WARNING
Risk of fire. DO NOT aim the bulbs at a combustible surface within 3 ft (1m).
Adjusting Your Motion Sensor
Your sensor head can be adjusted by turning the individual light head to detection area.
You can also adjust your sensor head up and down to your detection distance.
Sensor head adjust
Pan: left 170° / right 170°
Tilt: up 0° / down 60°
REMINDER: If fixture is mounted higher
than 8 ft (2.4m), aiming the sensor
down will reduce coverage distance.
The detector is less sensitive to motion
directly towards it.
Installation
For easy installation, select an existing light operated by a wall switch for replacement.
For better performance, mount the fixture about 8 ft (2.4m) above the ground.
If the fixture is mounted higher than 8 ft (2.4m), aiming the sensor down will reduce coverage distance. Setting the Motion Sensor
Detection Range: 50'
Detection Angle: 180°
CAUTION
Keep the sensor at least
2" (51 mm) away from
the lamps.
Sensor Detection Range
Night Dusk Day 5s 1 5 12 min
Instruction Manual
1-888-543-6473
1-888-541-6474
13376 Comber Way
Surrey BC V3W 5V9
[email protected]
www.ortechindustries.com
375 Admiral Blvd
Mississauga, ON L5T 2N1
LED Security Lights
MODEL OL-2HS
INSTALLATION GUIDE
REMINDER
You MUST adjust the motion sensor on the light to the desired area before you can adjust the time and LUX settings.
Time Setting
This setting controls the time span of how long your security light will remain ON. The time setting will allow you to set the time period the light
will stay ON. Slide the switch to the amount of time you would like the light to stay ON (See illustration on the previous page SENSOR DETECTION
RANGE section. Dials are located on the bottom side of the motion detector)
LUX Setting
The LUX setting controls when the light will come ON. It controls the amount of light needed to turn the light ON. The LUX setting is marked by
the sun and moon. Use one of the three predetermined settings as illustrated in the illustration on the previous page SENSOR DETECTION
RANGE section. To adjust the light to come ON when it is darker outside, slide the switch to "L". To adjust the light to come ON at dusk, slide the
switch to "M". To adjust the light to come ON when it is lighter outside, slide the switch to the "H".
Avoid aiming the control at:
•Objects that change temperature rapidly, such as heating vents and air conditioners. These heat sources could cause false triggering
•Areas where pets or traffic may trigger the control
•Nearby large, light coloured objects reflecting light may trigger the shut-off feature. DO NOT point other lights at the sensor
REMINDER
Sensor has a 1-1/2 minute warm up period before it will detect motion. When first turned ON, wait for 1-1/2 minute.
TROUBLESHOOTING
Lights will not come on:
1. Light switch is turned OFF
2. Light is loose or burned out
3. Fuse is blown or circuit breaker is turned OFF
4. Daylight turnoff is in effect (double-check after dark)
5. Incorrect circuit wiring, if this is a new installation
6. Re-aim the sensor to cover desired area
Lights come on for no apparent reason:
1. Light control may be sensing small animals or
automobile traffic (re-aim the sensor)
2. Range is set too high (reduce range setting)
Lights come on in daylight:
1. Light control may be installed in a relatively dark location
Lights stay ON continuously:
1. A lamp is positioned too close to the sensor or pointed at
nearby objects that cause heat to trigger the sensor
(reposition the lamp away from the sensor or nearby objects)
2. Light control is pointed toward a heat source like an air vent,
dryer vent, or brightly-painted heat reflective surface
(Reposition sensor. Reduce Range)
ORTECH reserves the right to modify at any time, without notice,
any or all of our product's features, designs, components and
specifications to meet market changes.
Lights flash ON and OFF:
1. Heat or light from the lamps may be turning the light
control ON and OFF (Reposition the lamps away from
the sensor)
2. Heat being reflected from other objects may be
affecting the sensor (Reposition sensor)
MAINTENANCE
To clean the surface of the light, use mild soap and water.
DO NOT use scouring pads, powders, steel wool or any other abrasive materials. DO NOT immerse in water.

Other Ortech Lighting Equipment manuals

Ortech OE-216-150W User manual

Ortech

Ortech OE-216-150W User manual

Ortech MH20-ST User manual

Ortech

Ortech MH20-ST User manual

Ortech L PL50FT-3000K User manual

Ortech

Ortech L PL50FT-3000K User manual

Ortech OE-DC126 User manual

Ortech

Ortech OE-DC126 User manual

Ortech 1101-5WH User manual

Ortech

Ortech 1101-5WH User manual

Ortech OL-1H User manual

Ortech

Ortech OL-1H User manual

Ortech LPL-2FT-30W User manual

Ortech

Ortech LPL-2FT-30W User manual

Ortech ST-PC1025 User manual

Ortech

Ortech ST-PC1025 User manual

Ortech DISC-RG2 User manual

Ortech

Ortech DISC-RG2 User manual

Ortech OE-126 User manual

Ortech

Ortech OE-126 User manual

Ortech 1051-S User manual

Ortech

Ortech 1051-S User manual

Ortech 2400-3CCT User manual

Ortech

Ortech 2400-3CCT User manual

Ortech VT-40W User manual

Ortech

Ortech VT-40W User manual

Ortech Photo-eBox Plus User manual

Ortech

Ortech Photo-eBox Plus User manual

Ortech OE-212BP User manual

Ortech

Ortech OE-212BP User manual

Ortech OE-212 User manual

Ortech

Ortech OE-212 User manual

Ortech OD-LLG User manual

Ortech

Ortech OD-LLG User manual

Ortech VT-40W User manual

Ortech

Ortech VT-40W User manual

Ortech OE-C212 User manual

Ortech

Ortech OE-C212 User manual

Ortech SL-RGB25M User manual

Ortech

Ortech SL-RGB25M User manual

Ortech WP-100W User manual

Ortech

Ortech WP-100W User manual

Ortech OE-316 User manual

Ortech

Ortech OE-316 User manual

Popular Lighting Equipment manuals by other brands

Hydrel 4400 Series installation instructions

Hydrel

Hydrel 4400 Series installation instructions

Alphalite Alpha Series installation instructions

Alphalite

Alphalite Alpha Series installation instructions

RSA Lighting ACM512IC Specification sheet

RSA Lighting

RSA Lighting ACM512IC Specification sheet

Philips 56432-31-16 user manual

Philips

Philips 56432-31-16 user manual

Teleco OMBREON manual

Teleco

Teleco OMBREON manual

mbt Lighting LZ600RG user manual

mbt Lighting

mbt Lighting LZ600RG user manual

XanLite SO604PGV manual

XanLite

XanLite SO604PGV manual

LIGMAN SANDY 7 installation manual

LIGMAN

LIGMAN SANDY 7 installation manual

Elation KL FRESNEL 4 CW user manual

Elation

Elation KL FRESNEL 4 CW user manual

German Light Products Impression X4 Bar 20 instruction manual

German Light Products

German Light Products Impression X4 Bar 20 instruction manual

LDR Arpa 8/22 150 W LED, 3200K operating instructions

LDR

LDR Arpa 8/22 150 W LED, 3200K operating instructions

EuroLite AKKU Bar-4 HCL user manual

EuroLite

EuroLite AKKU Bar-4 HCL user manual

Collar AquaLighter 3 Marine 30 instructions

Collar

Collar AquaLighter 3 Marine 30 instructions

Waldman LAVIGO DPS Instructions for use

Waldman

Waldman LAVIGO DPS Instructions for use

Bowens ESPRIT 2 125 operating instructions

Bowens

Bowens ESPRIT 2 125 operating instructions

Robus RVA96CCT26730 quick start guide

Robus

Robus RVA96CCT26730 quick start guide

McPhiben CTX Series instruction manual

McPhiben

McPhiben CTX Series instruction manual

Sunforce 84010 manual 

Sunforce

Sunforce 84010 manual 

manuals.online logo
manuals.online logoBrands
  • About & Mission
  • Contact us
  • Privacy Policy
  • Terms and Conditions

Copyright 2025 Manuals.Online. All Rights Reserved.