10
PQ EXF S 08/19 Les instructions d’utilisation sont susceptibles d’être modiées; la version la plus récente de chaque document reste disponible en ligne.
FR Information importante - à lire avant toute utilisation
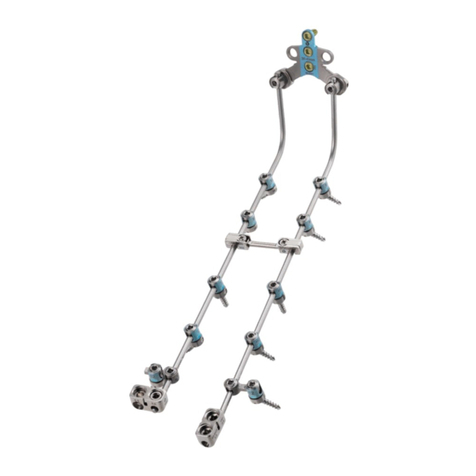
SYSTEME DE FIXATION EXTERNE ORTHOFIX®
Nom du fabricant
ORTHOFIX SRL,Via delle Nazioni 9 - 37012 Bussolengo (VR) Italie
Tél. 0039 (0) 45 6719000 - Fax 0039 (0) 45 6719380
DESCRIPTION ET INDICATIONS POUR L’EMPLOI
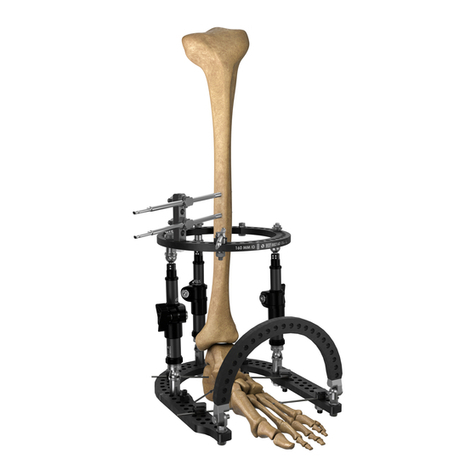
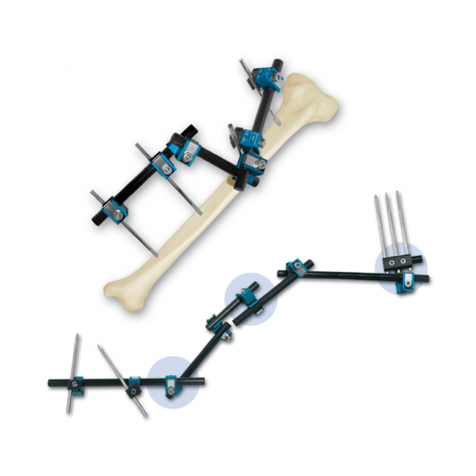
Le Système de Fixation Externe Orthofix se compose d’une série de fixateurs externes monolatéraux ou circulaires destinés à être utilisés avec des fiches à os, des broches filetées ou des fils de Kirschner en association avec le Système
de Fixation des Fragments. Ces dispositifs ont pour mission de stabiliser des segments osseux dans une vaste gamme d’applications, incluant les fractures, les fusions articulaires, les distractions articulaires, les transports osseux, les
allongements et les corrections angulaires. Le Système de Fixation des Fragments est indiqué dans le cas de fractures, avulsions des ligaments osseux et ostéotomies. Les composants du Système de Fixation Externe Orthofix ne sont
pas supposés remplacer un os en bon état ni résister à la tension exercée par une mise en charge complète, notamment en présence de fractures instables ou de pseudarthrose, de consolidation retardée ou de guérison incomplète.
L’utilisation des supports externes (par ex. supports de déambulation) est recommandé et fait partie du traitement. Le système est composé de divers modules à appliquer dans les différents sites anatomiques: tibia, fémur,
bassin, humérus, avant-bras, main et pied. Utilisé convenablement, le Système de Fixation Externe Orthofix préserve la fonction des membres, réduit au minimum le traumatisme chirurgical des structures anatomiques, préserve
la fonction vasculaire et le potentiel ostéogénique des tissus. Lorsque c’est indiqué, il est possible de dynamiser en vue d’améliorer le processus de guérison des fractures. Tous les appareils Orthofix ne sont prévus que pour un
emploi professionnel. Les chirurgiens responsables de l’utilisation des appareils Orthofix doivent connaître parfaitement les procédures de fixation orthopédique ainsi que les principes du système modulaire Orthofix. Pour garantir
une utilisation correcte de son système de fixation, Orthofix a préparé plusieurs manuels et CD-Rom dans lesquels figurent les informations principales (principes généraux, applications chirurgicales, etc.), appelées “Techniques
Opératoires”. Ces manuels disponibles en plusieurs langues représentent un service complémentaire pour les chirurgiens qui ont adopté le Système Orthofix. Pour en recevoir une copie personnelle, s’adresser à Orthofix ou à son
représentant local agréé en fournissant une description de l’appareil à utiliser.
CONTRE-INDICATIONS
Le Système de Fixation Externe Orthofix est exclusivement conçu et vendu pour les types d’utilisation figurant dans ce document.
Son emploi est contre-indiqué dans les cas suivants:
- Patients souffrant de troubles psychologiques ou neurologiques les empêchant de garantir leur capacité ou leur disponibilité à suivre les instructions nécessaires aux soins postopératoires.
- Arthrodiatase de la hanche à l’aide de la fixation externe Orthofix, en cas d’arthropathie inflammatoire, et chez les patients âgés de plus de 45 ans.
- Patients souffrant d’ostéoporose grave, séropositifs (HIV) et patients souffrant de diabète sucré grave et mal contrôlé.
- Patients sensibles aux corps étrangers. Quand il existe un risque de sensibilité au matériel, il convient d’exécuter des tests avant de mettre en place l’implant.
AVERTISSEMENTS ET PRECAUTIONS
1. La compression n’est jamais conseillée en cas de fracture fraîche.
2. Un déplacement axial peut avoir lieu si le corps du fixateur n’est pas aligné et parallèle par rapport à l’os.
3. Une translation interne ou externe peut survenir si le corps du fixateur n’est pas parallèle à la diaphyse.
4. Il convient de veiller soigneusement à ce que les fiches n’entrent pas dans les articulations ou dans les plaques de croissance chez les sujets d’âge pédiatrique.
5.
Les étapes pour la dynamisation et la kinésithérapie doivent être suivies en accord avec chaque cas et en fonction du système de fixation utilisé. Elles doivent être établies lorsqu’elles sont considérées par le chirurgien comme étant
appropriées sur la base d’examens cliniques et radiologiques.
6. Aucun des dispositifs appliqués à un patient, comme les fiches à os, les broches filetées, les fils de Kirschner, les éléments du Système de Fixation des Fragments et en général tout dispositif étiqueté comme “jetable après l’usage”,
y compris les excentriques et les douilles de n’importe quel dispositif de fixation externe, NE DOIT ETRE réutilisé.
7.
La longueur de la fiche et du filetage doit être sélectionnée en fonction des dimensions de l’os et des tissus mous. Le filetage de la fiche est conique, par exemple de 6 à 5mm entre la tige et l’extrémité des fiches standard Orthofix, ou
de 6 à 5,6mm pour les fiches XCaliber. La longueur du filetage choisi doit être telle qu’au moins un filet complet dépasse de la corticale d’entrée et que l’extrémité de la fiche dépasse de la seconde corticale. Les longueurs du filetage
des fiches varient de 10mm en 10mm, de sorte que moins de 10mm de filetage ne dépassent de la corticale d’entrée. Il convient d’éviter une pénétration excessive de la seconde corticale, quel que soit le type de fiche utilisée, pour
ne pas risquer d’endommager les tissus mous. Les fiches à os doivent être insérées de façon que la tige lisse ne pénètre pas la corticale d’entrée pour éviter tout dommage à l’os.
8. En raison du filetage conique des fiches Orthofix, toute tentative de retour en arrière après insertion est susceptible de provoquer un desserrement dans l’os.
9. Le diamètre du filetage doit être sélectionné en fonction de celui de l’os: pour un diamètre osseux supérieur à 20mm, il convient d’utiliser des fiches de 6/5mm ou de 6/5,6mm; pour un diamètre osseux de 12 à 20mm, on utilisera
des fiches de 4,5 à 3,5mm et pour un diamètre osseux de 9 à 12mm, des fiches de 3,5 à 3,2mm.
10. Lorsqu’on utilise des fiches non autoperforantes, il convient de forer préalablement avec des mèches et des guide-mèches appropriés avant de passer à l’insertion proprement dite. Des rainures coïncidant sur les fiches et sur les
mèches aident le chirurgien à choisir la bonne mèche. Les mèches émoussées sont susceptibles de provoquer des lésions thermiques dans l’os et doivent toujours être jetées.
11. Les fiches auto perforantes avec un diamètre de 5mm ou plus ne doivent jamais être insérées avec un moteur, mais toujours manuellement ou avec un mandrin manuel. Les fiches auto perforantes avec un plus petit diamètre
peuvent être insérées à l’aide d’un moteur à vitesse lente.
12. Lorsque les fiches à os XCaliber doivent être coupées, cette opération peut se faire soit avant soit après l’insertion; dans le second cas, la coupe doit se faire avec le fixateur installé et les vis de têtes serrées au maximum. Ne jamais
couper les fiches après l’insertion si on n’a pas encore monté le fixateur, une partie de la force de coupe est susceptible d’être transférée à l’os.
13. Les fiches XCaliber ont été conçues pour être autoperforantes; dans la plupart des cas, nous conseillons de les insérer directement à l’aide d’un vilebrequin. En cas d’insertion de fiches autoperforantes dans l’os diaphysaire, nous
conseillons de pratiquer un forage préalable: si l’os est dur, utiliser une mèche de 4,8mm et un guide mèche; utiliser par contre une mèche de 3,2mm si l’os est moins compact, ou en zone métaphysaire avec peu de corticale.
L’insertion des fiches, avec ou sans forage préalable, devrait être effectuée exclusivement à l’aide d’un vilebrequin ou d’une poignée en T. Il est important d’appliquer une force modérée pour faire pénétrer la fiche dans la première
corticale. Les fiches à os diaphysaires doivent être toujours insérées au centre de l’axe de l’os, de façon à éviter toute perte de tenue. Dans tous les cas, le chirurgien doit faire attention à la force de torsion nécessaire pour insérer
la fiche. Si l’insertion semble plus difficile qu’habituellement, il est préférable de retirer la fiche et de la nettoyer, puis de reprendre le forage avec une mèche de 4,8mm, même si elle a été préalablement utilisée.
14. Les fiches transfixiantes d’un diamètre de 4mm sont auto perforantes et peuvent être insérées au moteur. Ces fiches sont utilisées avec le Fixateur Prefix dans le cas d’un ligamentotaxis temporaire du genou ou de la cheville. Apres
insertion, elles doivent être coupées a la bonne longueur et l’extrémité doit être protégée afin d’éviter que le patient ne se blesse la jambe opposée. Les fiches transfixiantes Orthofix sont des fiches a usage unique et ne doivent en
aucun cas êtres re-utilisées. Elles sont connectées aux Barres Prefix a l’aide de deux portes fiches transfixiantes.
15. Lorsque les fiches doivent être maintenues par une tête à 3 ou 5 logements, il est très important qu’elles soient insérées selon la bonne procédure afin qu’elles soient parallèles entre elles. Pour cela utiliser les guide-fiches dans le
gabarit ou dans la tête prévue à cet effet, et perforer avec un guide-mèche, lorsque cela s’avère nécessaire, adapté au diamètre et à la longueur de la mèche. Les mâchoires des têtes doivent être bien fermées de façon à ce que les
guide-fiches soient bloqués de façon cohérente et solidaire.
16. Lorsque les fiches sont insérées dans une tête à 3 ou 5 logements, et que l’un des logements situé à l’extrémité de la tête est vide, il est important qu’un morceau de fiche soit placé dans ce logement, de façon à ce que la mâchoire
de la tête bloque toutes les fiches avec la même pression.
17. Avec la tête en T du Fixateur Externe XCaliber, la position des fiches proximales peut être soit parallèle soit convergente. Lorsqu’on utilise une tête en T, TOUJOURS insérer la première fiche dans le logement pratiqué dans la tête
droite fixe; les fiches successives doivent être insérées dans la section convergente de la tête en T. Lorsqu’on a choisi le positionnement convergent, placer le fixateur à une distance convenable de l’os avant d’introduire la seconde
fiche, car le fixateur ne peut pas glisser le long des fiches convergentes.
18. Pouraméliorer lastabilité d’unefracture avec unfixateur, ilest recommandé d’appliquerles fichesà osles plusprochesle plusprès possibledufoyer defracture (nousconseillons 2mm auminimum) etde veiller àce qu’ellessoient
équidistantes de chaque côté de la fracture. Le porte- fiche additionnel (10037 ou 91037) est spécialement prévu à cet effet.
19. Lorsque des conditions de charge élevées sont probables, comme la mise en charge avec application fémorale ou en cas de patient particulièrement lourd, il convient d’aligner le corps du fixateur avant de bloquer les joints à rotule
de sorte que l’écrou de blocage du corps soit perpendiculaire au plan des fiches à os. Pour accroître la stabilité, il est également possible d’appliquer et de bloquer l’unité de compression – distraction au corps du fixateur.
20. Les broches filetées et les éléments du Système de Fixation des Fragments sont insérés directement dans l’os. Leur filetage étant cylindrique, il est possible de les retirer en cas de besoin. Lorsque l’épaulement du Système de
Fixation des Fragments est proche de la corticale, il convient de réduire la vitesse d’insertion.
21. Il ne faut pas essayer d’insérer un fil de Kirschner plus d’une fois. En effet la pointe risquerait de s’émousser et, étant donné qu’il s’agit de la seule surface coupante, un échauffement indésirable de l’os pourrait avoir lieu.
22. Utiliser les instruments Orthofix appropriés pour insérer correctement les fiches et les fils de Kirschner.
23. Lorsqu’on utilise un fil de Kirschner ou un guide-fil pour insérer une fraise canulée, une mèche ou une fiche:
a) Le fil de Kirschner ou le guide-fiche doit toujours être NEUF.
b) Vérifier soigneusement le fil avant de l’insérer pour s’assurer qu’il n’y a ni éraflures ni courbures.
c) Lorsqu’on place un instrument ou un dispositif quelconque sur le fil, le chirurgien doit suivre aussi constamment que possible la progression de la pointe du fil pour l’empêcher d’aller trop loin.
d) A chaque passage de l’instrument ou du dispositif, le chirurgien doit s’assurer que le fil et l’intérieur de l’instrument ou du dispositif sont exempts de débris osseux ou autres, susceptibles d’exercer une poussée sur le fil et de
le faire avancer ultérieurement.
0123
