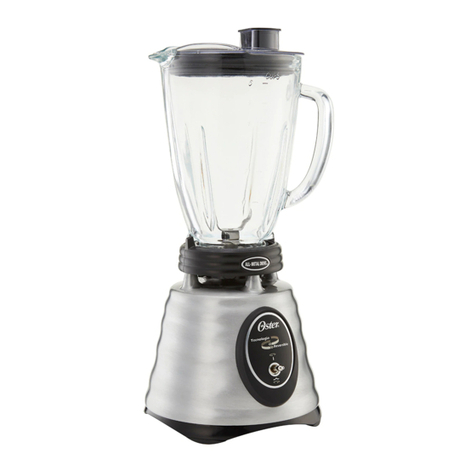
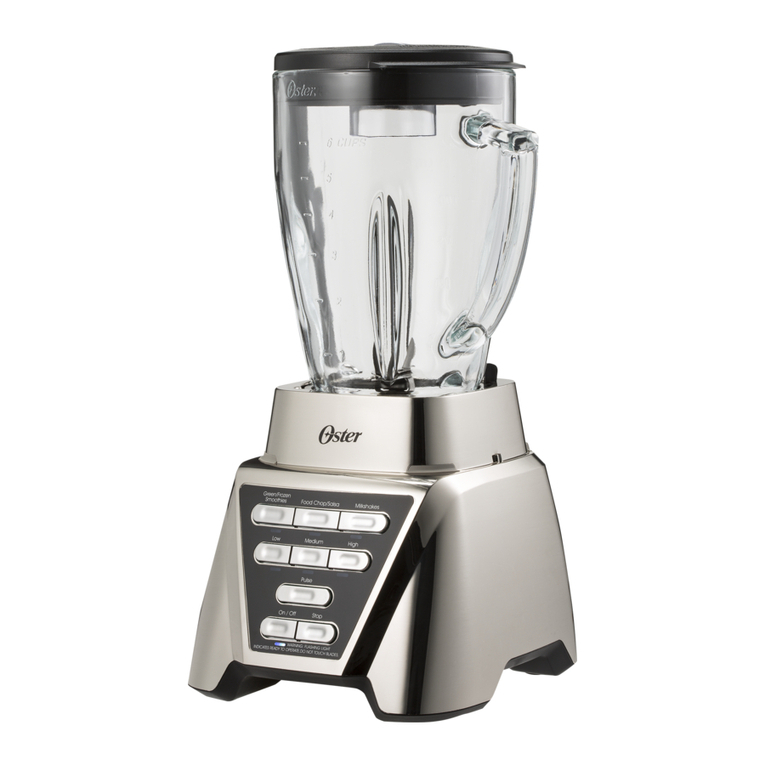
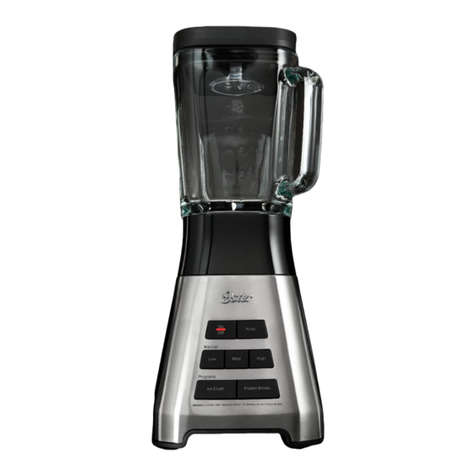
Oster BLSTMB-CT0-050 User manual

BLSTMB-CT0-050

FITTING A PLUG
(UK ONLY)
f the plug is not suitable for the socket outlets in your home, it can be removed and
replaced by a plug of the correct type.
If the fuse in a moulded plug needs to be changed, the fuse cover must be refitted. The
appliance must not be used without the fuse cover fitted.
If the plug is unsuitable, it should be dismantled and removed from the supply cord and
an appropriate plug fitted as detailed. If you remove the plug it must not be connected to
a 13 amp socket and the plug must be disposed of immediately.
If any other plug is used, a 13 amp fuse must be fitted either in the plug or adaptor or at
the distributor board.
This symbol shows that this unit is a Class II appliance so an earth connection
is not required.
English 4
Français / French 9
Deutsch / German 15
Español / Spanish 21
Português / Portuguese 27
Italiano / Italian 33
Nederlands / Dutch 39
Svenska / Swedish 45
Suomi / Finnish 51
Dansk / Danish 57
Norsk / Norwegian 63
Polski / Polish 69
Română / Romanian 75
Fuse
CORD
GRIP
Blue
(Neutral)
Brown
(Live)
Do Not Connect
Mains Wires Her
e

3
y
t
r
e
w
q
u
i
A B C D
d
s
1) g
f
oh

4
IMPORTANT SAFEGUARDS
This appliance can be used by persons with reduced physical, sensory or
mental capabilities or lack of experience and knowledge if they have been
given supervision or instruction concerning use of the appliance in a safe
way and understand the hazards involved. This appliance shall not be used
by children. Children shall not play with the appliance. Keep the appliance
and its cord out of reach of children.
Always disconnect the appliance from the mains supply socket if it is left
unattended and before assembling, disassembling or cleaning.
If the supply cord is damaged, it must be replaced by the manufacturer, its
service agent or similarly qualified persons in order to avoid a hazard.
Never use this appliance for anything other than its intended use. This
appliance is for household use only. Do not use this appliance outdoors.
The blades have very sharp edges. Take care when handling or cleaning
them.
• Always ensure that hands are dry before handling the plug or switching on the appliance.
• Always use the appliance on a stable, secure, dry and level surface.
• This appliance must not be placed on or near any potentially hot surfaces (such as a gas or electric hob).
• Never immerse the motor unit or power cord and plug in water or any other liquid.
• Never let the power cord hang over the edge of a work top, touch hot surfaces or become knotted, trapped or pinched.
• Do not use the appliance if it has been dropped, if there are any visible signs of damage or if it is leaking.
• Never use any accessory or attachment not recommended by the manufacturer.
• Make sure that all attachments are securely and correctly tted before operating the appliance.
• Allow moving parts to come to a stop and unplug the appliance before changing or cleaning accessories.
• Never process hot or boiling liquids. Allow them to cool before processing.
• Avoid contact with moving parts. Keep hands and utensils out of the jug while blending to prevent personal injury
or damage to the blender. A rubber spatula may be used only when the blender is not running and the appliance is
unplugged.
• Do not use the blender without the lid and feeder cap in place.
• Never attempt to place the blade assembly onto the motor unit without the jug.
• Never attempt to t or remove the jug to the motor unit when the motor is running.

5
PARTS
qFeeder cap oOn indicator light
wLid aOn/Off button
eBlending jug – 8-cup (2L) sLow, Medium and High speed buttons
rSeal dPre-programmed function buttons
tBlade fPulse function button
yLocking ring gStop button
uMotor unit hWARNING: THE FLASHING LIGHT INDICATES THAT THE
UNIT IS READY TO USE, DO NOT TOUCH THE BLADES
iControl panel
USING YOUR BLENDER
Before First Use
Never immerse the motor unit or power cord and plug in water or any other liquid.
Wash the blending jug, lid, feeder cap and blade in warm, soapy water or in the dishwasher. Dry thoroughly. Wipe the motor
unit with a damp cloth or sponge. Care should be taken when handling the blades as they are very sharp.
Assemby
Important: The blending jug and blades are subject to wear during normal use. Always inspect the blades for broken,
cracked or loose blades. Do not use the blender if the jug or blades are damaged.
1. Make sure that the blender is unplugged.
2. Turn the blending jug upside down and place it on a flat and stable surface.
3. Push the sealing ring over the blender blades (A).
4. Turn the blades upside down and carefully lower into the bottom of the blending jug (B).
5. Screw the locking ring onto the bottom of the blending jug. Turn clockwise to tighten securely (C).
Note: You can use the feeder cap as a tool to tighten, or remove, the locking ring (D).
6. Turn the blending jug the right side up and push onto the motor base.
Using your Blender
1. Put the ingredients into the blending jug.
2. Fit the lid making sure it is pushed down completely into position.
3. Insert the feeder cap into the lid and turn clockwise to lock securely in place.
4. Plug the power cord into the mains outlet.
5. Press the On/Off button ( ) to turn the blender on.
6. Process your food or beverages. Select the desired speed or function using the buttons on the control panel (refer to
the Functions section).
7. Press the On/Off button ( ) to turn the blender off.
The blender is pre-programmed to turn off automatically if not used for a period of several minutes. All lights will turn off
when the blender automatically powers down.
NOTE: Your blender has an interlock system on the motor unit. This will prevent the motor or the control panel from starting
if the blender jug is not properly placed on the motor unit. If the jug is removed from the motor unit during operation the
blender will stop, and both the Medium and High speed lights will flash continuously.
To restart the blender, turn the blender off by pressing the On/Off button, place the jug on the motor unit, press the On/Off
button again to turn the blender back on and select the desired speed button to begin.

6
Blending tips
• Always place your hand on the lid when operating the blender.
• Never ll the blending jug more than ¾ full. Process in batches if necessary.
• Put liquids into the jug rst, unless the recipe says otherwise. Add more liquid if ingredients are not blending properly.
• Start at a low speed and gradually increase the speed whilst processing.
• Do not remove the lid while in use. Instead, remove the feeder cap to add smaller ingredients.
• Allow hot foods or liquids to cool slightly before processing. Place a folded dishcloth over the top of the blender and
place your hand over the cloth during processing.
• When you work with hot food, remove the feeder cap to vent steam. Tilt the lid away from you partially covering the
opening. Keep hands and other exposed skin away from the lid opening to prevent possible burns.
• When you work with hot liquids, remove the feeder cap and start at a low speed, and then gradually increase to a
faster speed. Do not add liquid over the 4 cup (1L) level. Always keep hands away from steam.
FUNCTIONS
Pre-programmed functions
1. Press the On/Off button ( ) to turn the blender on. The On indicator light will flash. The light will come on, and
remain on when the motor is running.
2. Press the desired function button:
• Green/Frozen Smoothie ( )
• Food Chop/Salsa ( )
• Milkshakes ( )
The corresponding function light will come on, and remain on until the program is finished.
3. To change your selection, press the Stop ( ) button followed by another function button.
4. When the program is finished, the motor automatically stops. You can press the Stop button at any time to cancel the
program. The On indicator light will flash, showing that the blender is ready to use.
Speed functions
Your blender has three speeds: Low, Medium and High (1, 2 and 3). You can use these functions for personal recipes or to
continue blending after a pre-programmed function is finished.
1. Press the On/Off button ( ) to turn the blender on. The On indicator light will flash. The light will come on, and
remain on when the motor is running.
2. Press the desired speed button to start blending. The corresponding speed light will come on, and remain on until you
press the Stop button.
3. Press the Stop button ( ) to cancel processing at any time.
Pulse function
Use the pulse function to crush ice or chop food.
1. Press the On/Off button ( ). The On indicator light will flash.
2. Press and hold the Pulse button ( ). The pulse function operates only as long as the Pulse button is held down.
3. Release the Pulse button to stop.

7
CLEANING
Ensure that the appliance is switched off and unplugged from the supply socket if it is left unattended and before
assembling, disassembling or cleaning.
Do not immerse the motor unit or power cord and plug in water or any other liquid.
Never use harsh, abrasive or caustic cleaners to clean the blender.
The blades have very sharp edges. Take care when handling or cleaning them.
• Carefully remove the blade from the bottom of the jug by turning the locking ring anti-clockwise. Wash the jug, blade,
seal and locking ring in warm, soapy water. Rinse and dry thoroughly.
• Wash the lid and feeder cap in warm, soapy water. Rinse and dry thoroughly. The jug, blade, seal, locking ring, lid and
feeder cap may be washed in a dishwasher.
• Clean the motor unit with a damp cloth and mild detergent.
Quick cleaning method
1. Half fill the blender jug with warm water and add a small amount of detergent. Fit the lid and feeder cap.
2. Press the Pulse function button ( ) for 10-20 seconds.
3. Remove the blending jug and rinse it under running water.
STORING
After cleaning ensure that all parts are thoroughly dry. Reassemble the blender and store in its packing or in a clean, dry
place. Leave the lid open a gap so that no odours are retained. Keep the appliance out of the reach of children.
GUIDE TO PROCESSING FOODS
Food Quantity Special Instructions
Breadcrumbs
1 slice torn into pieces Pulse for up to 20 seconds
5 slices torn into pieces Pulse 4-5 times, then Medium speed
for 20 seconds
Biscuit crumbs 8 whole biscuits Pulse for up to 20 seconds
Mixed nuts 125g Low speed for 5 seconds
Coffee beans 175g beans High speed for 45 seconds
Whole peppercorns 35g High speed for 20 seconds
White rice flour
(gluten-free alternative) 175g white rice e.g basmati High speed for 90 seconds
Meat, boneless and cooked Up to 150g, cut into 2.5cm pieces Pulse 3-5 times depending on
consistency desired
Parmesan 100g, cut into 2.5cm pieces Pulse 10 times
Whipping cream 300ml Medium speed for 30-40 seconds or
High speed for 15-20 seconds
Ice Up to 1L mark on jug Food Chop/Salsa function

8
AFTER SALES SERVICE
These appliances are built to the very highest of standards. There are no user serviceable parts. Follow these steps if the
unit fails to operate:
1. Check that the instructions have been followed correctly.
2. Check that the fuse has not blown.
3. Check that the mains supply is functional.
If the appliance will still not operate, return it to the place it was purchased for a replacement. To return the appliance to the
Customer Service Department, follow the steps below:
1. Pack it carefully (preferably in the original carton). Ensure the appliance is clean.
2. Enclose your name and address and quote the model number on all correspondence.
3. Give the reason why you are returning it.
4. If within the guarantee period, state when and where it was purchased and include proof of purchase (e.g. till receipt).
5. Send it to our Customer Service Department at the address below:
Customer Service Department
Jarden Consumer Solutions (Europe) Limited
Middleton Road, Royton, Oldham
OL2 5LN, UK
Telephone: 0800 525089 (free from UK landlines) or 0161 621 6900 (standard rates apply)
GUARANTEE
Please keep your receipt as this will be required for any claims under this guarantee.
This appliance is guaranteed for 2 years after your purchase as described in this document.
During this guaranteed period, if in the unlikely event the appliance no longer functions due to a design or manufacturing
fault, please take it back to the place of purchase, with your till receipt and a copy of this guarantee.
The rights and benefits under this guarantee are additional to your statutory rights, which are not affected by this guarantee.
Only Jarden Consumer Solutions (Europe) Limited (“JCS (Europe)”) has the right to change these terms.
JCS (Europe) undertakes within the guarantee period to repair or replace the appliance, or any part of appliance found to
be not working properly free of charge provided that:
• you promptly notify the place of purchase or JCS (Europe) of the problem; and
• the appliance has not been altered in any way or subjected to damage, misuse, abuse, repair or alteration by a person
other than a person authorised by JCS (Europe).
Faults that occur through, improper use, damage, abuse, use with incorrect voltage, acts of nature, events beyond the
control of JCS (Europe), repair or alteration by a person other than a person authorised by JCS (Europe) or failure to follow
instructions for use are not covered by this guarantee. Additionally, normal wear and tear, including, but not limited to, minor
discoloration and scratches are not covered by this guarantee.
The rights under this guarantee shall only apply to the original purchaser and shall not extend to commercial or communal
use.
If your appliance includes a country-specific guarantee or warranty insert please refer to the terms and conditions of such
guarantee or warranty in place of this guarantee or contact your local authorized dealer for more information.
Waste electrical products should not be disposed of with household waste. Please recycle where facilities exist. E-mail us at
Jarden Consumer Solutions (Europe) Limited
5400 Lakeside
Cheadle Royal Business Park
Cheadle, SK8 3GQ
United Kingdom

9
IMPORTANTES MESURES DE SÉCURITÉ
LISEZ AVEC ATTENTION ET CONSERVEZ POUR RÉFÉRENCE
Cet appareil peut être utilisé par des personnes aux capacités physiques,
sensorielles ou intellectuelles réduites, ou encore des personnes n’ayant
aucune connaissance ou expérience du produit, à condition d’avoir été
formées à son utilisation correcte et de comprendre les risques encourus.
Cet appareil ne doit pas être utilisé par des enfants. Ces derniers ne doivent
pas jouer avec l’appareil. Tenez l’appareil et son cordon hors de portée des
enfants.
Veillez à débrancher l’appareil de la prise secteur si vous quittez la pièce et
avant toute opération de montage, démontage ou nettoyage.
En cas de détérioration du fil électrique ou de la prise d’alimentation, ils
doivent être remplacés par le fabricant, son agent de service après-vente ou
une personne qualifiée pour éviter tout danger.
N’utilisez ce produit qu’aux fins pour lesquelles il est prévu. Cet appareil
est conçu exclusivement pour une utilisation domestique. N’utilisez pas cet
appareil à l’extérieur.
Les lames sont extrêmement coupantes. Soyez donc très prudent lorsque
vous les manipulez ou que vous les nettoyez.
• Assurez-vous que vos mains sont sèches avant de manipuler la prise ou de mettre l’appareil en marche.
• Utilisez toujours l’appareil sur une surface stable, sûre, sèche et horizontale.
• Cet appareil ne doit pas être placé sur ou près de surfaces potentiellement chaudes (telles que des plaques de cuisson
au gaz ou à l’électricité).
• Ne plongez jamais le bloc-moteur ou son cordon d’alimentation et la prise dans de l’eau ou tout autre liquide.
• Ne laissez pas le cordon d’alimentation pendre dans le vide, toucher des surfaces chaudes ou s’emmêler, se bloquer
ou se pincer.
• N’utilisez pas l’appareil s’il a subi un choc, ou en cas de signes visibles de dommages ou en cas de fuite.
• N’utilisez jamais d’accessoires non recommandés par le fabricant.
• Assurez-vous que tous les accessoires sont solidement et correctement assemblés avant d’utiliser l’appareil.
• Attendez l’arrêt complet des pièces mobiles et débranchez l’appareil avant de changer d’accessoires ou de les
nettoyer.
• N’utilisez pas le mixeur avec des liquides chauds ou bouillants. Attendez d’abord qu’ils refroidissent.
• Évitez tout contact avec les pièces mobiles. Tenez les mains et les ustensiles éloignés du bol du mixeur pendant que le
moteur tourne pour éviter de vous blesser ou d’endommager l’appareil. Utilisez une spatule en caoutchouc uniquement
lorsque le moteur ne tourne pas et que l’appareil est débranché.
• N’utilisez pas le mixeur si le couvercle et le bouchon de remplissage ne sont pas en place.
• Ne tentez jamais de placer la lame sur le bloc-moteur sans utiliser le bol du mixeur.
• Ne tentez jamais d’installer le bol du mixeur sur le bloc-moteur ou de le retirer de ce dernier pendant que le moteur
tourne.

10
GUIDE DES PIÈCES
qBouchon de remplissage sTouches de vitesse (faible, moyenne et élevée)
wCouvercle dTouches de fonctions programmées
eBol du mixeur (8 tasses, 2 l) fTouche Impulsion
rJoint d'étanchéité gTouche Arrêt
tLame hAVERTISSEMENT (en anglais) : THE FLASHING LIGHT
INDICATES THAT THE UNIT IS READY TO USE, DO
NOT TOUCH THE BLADES (LORSQUE LE VOYANT
CLIGNOTE, L'APPAREIL EST PRÊT À L'EMPLOI, NE
TOUCHEZ DONC PAS LES LAMES)
yBague de serrage
uBloc-moteur
iPanneau de commande
oVoyant de marche
aTouche Marche/Arrêt
UTILISATION DU MIXEUR
Avant la première utilisation
Ne plongez jamais le bloc-moteur ou son cordon d’alimentation et la prise dans de l’eau ou tout autre liquide.
Lavez le bol du mixeur, le couvercle, le bouchon de remplissage et la lame à l’eau chaude additionnée de produit vaisselle
ou passez-les au lave-vaisselle. Essuyez-les soigneusement. Nettoyez le bloc-moteur à l’aide d’une éponge ou d’un chiffon
humide. Manipulez les lames avec précaution, car elles sont extrêmement coupantes.
Montage
Important : le bol du mixeur et les lames sont sujets à l’usure dans des conditions normales d’utilisation. Vérifiez que les
lames ne sont pas cassées, fissurées et qu’elles ne se détachent pas. N’utilisez pas le mixeur si le bol ou les lames sont
endommagés.
1. Vérifiez que le mixeur est débranché.
2. Retournez le bol du mixeur et placez-le sur une surface plane et stable.
3. Passez le joint d’étanchéité par-dessus les lames du mixeur (A).
4. Retournez les lames et placez-les avec précaution au fond du bol du mixeur (B).
5. Vissez la bague de serrage sur le fond du bol du mixeur. Tournez-la dans le sens horaire pour la bloquer (C).
Remarque : utilisez au besoin le bouchon de remplissage pour serrer ou desserrer la bague de serrage (D).
6. Orientez le bol du mixeur vers le haut et placez-le sur le bloc-moteur.

11
Utilisation du mixeur
1. Placez tous les ingrédients dans le bol du mixeur.
2. Placez le couvercle sur le bol en veillant à l’enfoncer aussi profondément que possible.
3. Insérez le bouchon de remplissage dans le couvercle et tournez-le dans le sens horaire pour le verrouiller.
4. Branchez le cordon d’alimentation sur une prise murale.
5. Appuyez sur la touche Marche/Arrêt ( ) pour mettre en marche le mixeur.
6. Mixez la boisson ou les aliments. Sélectionnez la vitesse ou la fonction requise à l’aide des touches du panneau de
commande (voir section Fonctions).
7. Appuyez sur la touche Marche/Arrêt ( ) pour arrêter le mixeur.
Le mixeur est programmé pour s’arrêter automatiquement s’il n’est pas utilisé pendant plusieurs minutes. Tous les
voyants lumineux s’éteignent lorsque le mixeur s’arrête automatiquement.
REMARQUE : le bloc-moteur du mixeur est équipé d’un mécanisme de verrouillage, qui empêche le moteur ou le panneau
de commande de démarrer si le bol du mixeur n’est pas installé correctement sur le bloc-moteur. Si vous retirez le bol
du bloc-moteur en cours de fonctionnement, le mixeur s’arrête et les voyants de vitesses moyenne et élevée clignotent
continuellement.
Pour redémarrer le mixeur, arrêtez-le en appuyant sur la touche Marche/Arrêt. Placez ensuite le bol sur le bloc-moteur,
appuyez à nouveau sur la touche Marche/Arrêt pour remettre en marche le mixeur et sélectionnez la touche de vitesse
appropriée.
Conseils de mixage
• Veillez à appuyer d’une main sur le couvercle lorsque vous utilisez le mixeur.
• Ne remplissez pas le bol à plus des trois quarts. Mixez les ingrédients en plusieurs fois si besoin est.
• Sauf indication contraire précisée dans la recette, versez d’abord les liquides dans le bol. Ajoutez du liquide si la
préparation n’est pas homogène.
• Commencez par une faible vitesse et augmentez-la progressivement en cours de mixage.
• N’enlevez pas le couvercle lorsque le mixeur est en cours de fonctionnement. Retirez plutôt le bouchon de remplissage
pour ajouter des ingrédients de petite taille.
• Attendez que les aliments ou les liquides à température très élevée aient légèrement refroidi avant de les mixer. Placez
un torchon plié sur le couvercle du mixeur et appuyez dessus d’une main lorsque le moteur tourne.
• Si vous mixez des aliments à très haute température, enlevez le bouchon de remplissage pour laisser s’échapper la
vapeur. Orientez le couvercle dans la direction opposée à vous en veillant à couvrir partiellement l’orice. Pour éviter
les risques de brûlures, veillez à maintenir les mains et autres parties exposées du corps éloignées de l’orice de
remplissage.
• Si vous mixez des liquides à très haute température, retirez le bouchon de remplissage et démarrez le mixeur à vitesse
faible, puis augmentez progressivement la vitesse. Ne dépassez pas le repère « 1 l » lorsque vous ajoutez du liquide.
Maintenez les mains éloignées de la vapeur.

12
FONCTIONS
Fonctions programmées
1. Appuyez sur la touche Marche/Arrêt ( ) pour mettre en marche le mixeur. Le voyant de marche clignote. Il s’allume
ensuite et reste allumé tant que le moteur tourne.
2. Appuyez sur la touche de fonction appropriée :
• Smoothie vert ou glacé ( )
• Hachage/salsa ( )
• Milkshakes ( )
Le voyant correspondant à la fonction s’allume et reste allumé tant que le moteur tourne.
3. Pour changer de fonction, appuyez sur la touche Arrêt ( ), puis sur une autre touche de fonction.
4. Le moteur s’arrête automatiquement en fin de programme. Appuyez à tout moment sur la touche Arrêt pour annuler le
programme. Le voyant de marche clignote pour indiquer que le mixeur est prêt à l’emploi.
Vitesses
Le mixeur dispose de trois vitesses : faible, moyenne et élevée (1, 2 et 3). Utilisez-les pour préparer vos propres recettes
ou pour continuer à mixer les ingrédients lorsqu’une fonction programmée est terminée.
1. Appuyez sur la touche Marche/Arrêt ( ) pour mettre en marche le mixeur. Le voyant de marche clignote. Il s’allume
ensuite et reste allumé tant que le moteur tourne.
2. Appuyez sur la touche de vitesse appropriée pour démarrer le mixeur. Le voyant correspondant s’allume et reste
allumé tant que le moteur tourne.
3. Appuyez à tout moment sur la touche Arrêt ( ) pour arrêter le mixeur.
Fonction Impulsion
Utilisez la fonction Impulsion pour piler de la glace ou hacher des aliments.
1. Appuyez sur la touche Marche/Arrêt ( ). Le voyant de marche clignote.
2. Appuyez sur la touche Impulsion et maintenez-la enfoncée ( ). La fonction Impulsion est activée tant que vous
appuyez sur la touche Impulsion.
3. Relâchez la touche Impulsion pour arrêter le moteur.
NETTOYAGE
Veillez à arrêter l’appareil et à le débrancher si vous quittez la pièce et avant toute opération de montage, de
démontage ou de nettoyage.
Ne plongez jamais le bloc-moteur ou son cordon d’alimentation et la prise dans de l’eau ou tout autre liquide.
N’utilisez jamais de détergents agressifs, abrasifs ou à base de soude caustique pour nettoyer le mixeur.
Les lames sont extrêmement coupantes. Soyez donc très prudent lorsque vous les manipulez ou que vous les
nettoyez.
• Nettoyez le bloc-moteur à l’aide d’un chiffon humide et d’un détergent doux.
• Retirez avec précaution la lame du fond du bol en tournant la bague de serrage dans le sens anti-horaire. Lavez le bol,
la lame, le joint d’étanchéité et la bague de serrage dans de l’eau chaude additionnée de produit vaisselle. Rincez-les
et séchez-les soigneusement.
• Lavez le couvercle et le bouchon de remplissage à l’eau chaude additionnée de produit vaisselle. Rincez-les et
séchez-les soigneusement. Le bol, la lame, le joint d’étanchéité, la bague de serrage, le couvercle et le bouchon de
remplissage passent au lave-vaisselle.
• Nettoyez le bloc-moteur à l’aide d’un chiffon humide et d’un détergent doux.

13
Méthode de nettoyage rapide
1. Remplissez à moitié le bol du mixeur d’eau chaude et ajoutez quelques gouttes de détergent. Mettez le couvercle et
le bouchon de remplissage en place.
2. Appuyez sur la touche Impulsion ( ) pendant 10 à 20 secondes.
3. Retirez le bol du mixeur et rincez-le sous le robinet.
RANGEMENT
Après avoir nettoyé l’appareil, assurez-vous que chaque pièce est totalement sèche. Remettez les pièces en place et
rangez le mixeur dans son emballage d’origine ou dans un endroit propre et sec. Laissez le couvercle entrouvert pour éviter
les mauvaises odeurs. Gardez l’appareil hors de portée des enfants.
GUIDE DE MIXAGE DES ALIMENTS
Aliment QuantitéInstructions
Chapelure
1 tranche en morceaux Mixez par impulsion pendant
20 secondes au plus
5 tranches en morceaux
Mixez par impulsion 4 ou 5 fois,
puis vitesse moyenne pendant
20 secondes
Miettes de biscuits 8 biscuits entiers Mixez par impulsion pendant
20 secondes au plus
Noix et amandes diverses 125 g Vitesse faible pendant 5 secondes
Café en grains 175 g de café en grains Vitesse élevée pendant 45 secondes
Poivre en grains 35 g Vitesse élevée pendant 20 secondes
Farine de riz (aliment sans gluten) 175 g de riz blanc
(riz basmati, par exemple) Vitesse élevée pendant 90 secondes
Viande, désossée et cuite 150 g au plus, coupés en dés de 2,5 cm Mixez par impulsion 4 ou 5 fois, selon
la consistance requise
Parmesan 100 g, coupés en dés de 2,5 cm Mixez par impulsion 10 fois
Crème fleurette 300 ml
Vitesse moyenne pendant 30 à
40 secondes ou vitesse élevée
pendant 15 à 20 secondes
Glaçons Ne pas dépasser le repère « 1 l » du bol Fonction Hachage/salsa

14
GARANTIE
Veuillez conserver votre ticket de caisse, il vous sera demandé lors de toute réclamation sous garantie.
Cet appareil est garanti 2 ans à partir de la date d’achat, comme indiqué dans le présent document.
Dans le cas peu probable d’une panne résultant d’un défaut de conception ou de fabrication au cours de la période de
garantie, veuillez rapporter l’appareil au magasin où vous l’avez acheté avec votre ticket de caisse et une copie de cette
garantie.
Vos droits statutaires ne sont aucunement affectés par cette garantie. Seul Jarden Consumer Solutions (Europe) Limited («
JCS (Europe) ») peut modifier ces dispositions.
JCS (Europe) s’engage à réparer ou remplacer gratuitement, pendant la période de garantie, toute pièce de l’appareil qui
se révèle défectueuse sous réserve que :
• vous avertissiez rapidement le magasin ou JCS (Europe) du problème ; et
• l’appareil n’ait pas été altéré de quelque manière que ce soit ou endommagé, utilisé incorrectement ou abusivement,
ou bien réparé ou altéré par une personne autre qu’une personne agréée par JCS (Europe) Products Europe.
Cette garantie ne couvre pas les défauts liés à une utilisation incorrecte, un dommage, une utilisation abusive, l’emploi
d’une tension incorrecte, les catastrophes naturelles, les événements hors du contrôle de JCS (Europe), une réparation
ou une altération par une personne autre qu’une personne agréée par JCS (Europe) ou le non-respect des instructions
d’utilisation. De plus, cette garantie ne couvre pas non plus l’usure normale, y compris, mais sans limitation, les petites
décolorations et éraflures.
Cette garantie s’applique uniquement à l’acheteur d’origine et elle n’étend aucun droit à toute personne acquérant l’appareil
pour un usage commercial ou communal.
Si votre appareil est accompagné d’une garantie locale ou d’une carte de garantie, veuillez en consulter les dispositions et
conditions en vigueur, ou vous adresser à votre revendeur local pour en savoir plus.
Les déchets d’équipement électrique ne doivent pas être mélangés aux ordures ménagères. Veuillez recycler si vous en
avez la possibilité. Envoyez-nous un email à [email protected] pour plus d’informations sur le recyclage et la
directive WEEE.
Jarden Consumer Solutions (Europe) Limited
5400 Lakeside
Cheadle Royal Business Park
Cheadle
SK8 3GQ
United Kingdom
15
WICHTIGE SICHERHEITSHINWEISE
LESEN SIE DIESE HINWEISE SORGFÄLTIG DURCH UND VERWAHREN SIE SIE GUT
Dieses Gerät kann von Personen mit eingeschränkten körperlichen,
sensorischen oder geistigen Fähigkeiten oder mangelnder Erfahrung
und Wissen verwendet werden, wenn sie entsprechend in die sichere
Anwendung eingewiesen wurden und die damit verbundenen Gefahren
verstehen. Das Gerät darf nicht von Kindern verwendet werden. Kinder
dürfen das Gerät nicht als Spielzeug verwenden. Achten Sie darauf, dass
sich das Gerät und das dazugehörige Kabel außerhalb der Reichweite von
Kindern befinden.
Trennen Sie das Gerät immer von der Stromzufuhr, wenn Sie es
unbeaufsichtigt lassen, reinigen oder Zubehör entfernen oder befestigen.
Beschädigte Stromkabel müssen durch den Hersteller, den Kundendienst
oder andere qualifizierte Personen ersetzt werden, um Gefahren
auszuschließen.
Setzen Sie das Gerät nie für Zwecke ein, für die es nicht bestimmt ist. Das
Gerät wurde für die Verwendung in Privathaushalten entwickelt. Verwenden
Sie das Gerät nicht im Freien.
Die Kanten der Klingen sind sehr scharf. Lassen Sie beim Reinigen und
sonstigen Umgang mit den Klingen Vorsicht walten.
• Stellen Sie immer sicher, dass Ihre Hände trocken sind, bevor Sie den Stecker berühren oder das Gerät einschalten.
• Verwenden Sie das Gerät nur auf einer stabilen, sicheren, trockenen und ebenen Unterlage.
• Stellen Sie das Gerät nicht in die Nähe von oder auf Oberächen, die heiß werden können (z. B. einen Herd oder
Kochfelder).
• Tauchen Sie die Motoreinheit oder das Stromkabel und den Stecker nicht in Wasser oder andere Flüssigkeiten.
• Achten Sie darauf, dass das Stromkabel nicht über den Rand der Arbeitsäche hängt, heiße Oberächen berührt,
verknotet, eingeklemmt wird oder sich verfängt.
• Verwenden Sie das Gerät nicht, wenn es heruntergefallen ist, Beschädigungen sichtbar sind oder das Gerät leckt.
• Verwenden Sie kein Zubehör, das nicht vom Hersteller empfohlen wird.
• Bevor Sie das Gerät in Betrieb nehmen, vergewissern Sie sich, dass alle Zubehörteile korrekt und sicher angebracht
wurden.
• Bevor Sie Zubehör wechseln oder reinigen, müssen alle beweglichen Teile vollständig zum Stillstand kommen und das
Gerät muss von der Stromversorgung getrennt werden.
• Verarbeiten Sie keine heißen oder kochenden Flüssigkeiten. Lassen Sie diese vor der Verarbeitung abkühlen.
• Berühren Sie Teile nicht, während sie sich bewegen. Greifen Sie während des Mixvorgangs weder mit den Händen
noch mit Kochutensilien in das Gerät, um Verletzungen oder Beschädigungen des Mixers zu vermeiden. Die
Verwendung eines Gummispatels wird empfohlen. Dieser darf jedoch nur verwendet werden, wenn der Mixer nicht in
Betrieb ist und von der Stromversorgung getrennt wurde.
• Verwenden Sie den Mixer nur, wenn Deckel und Nachfülldeckel geschlossen sind.
• Versuchen Sie nicht, die Klinge ohne Gefäß auf die Motoreinheit aufzusetzen.
• Versuchen Sie nicht, das Gefäß von der Motoreinheit abzunehmen, während der Motor läuft.

16
BESTANDTEILE
qNachfülldeckel sGeschwindigkeitstasten niedrig, mittel, hoch
wDeckel dVorprogrammierte Funktionstasten
eMixgefäß (2 l) fPulstaste
rDichtung gStopp-Taste
tKlinge hWARNUNG (auf Englisch): THE FLASHING LIGHT
INDICATES THAT THE UNIT IS READY TO USE, DO
NOT TOUCH THE BLADES (DIE BLINKENDE LEUCHTE
ZEIGT AN, DASS DIE EINHEIT EINSATZBEREIT IST –
BERÜHREN SIE NICHT DIE KLINGEN)
yBefestigungsring
uMotoreinheit
iBedienfeld
oBetriebsleuchte
aEin-/Aus-Schalter
VERWENDUNG DES MIXERS
Vor dem ersten Gebrauch
Tauchen Sie die Motoreinheit oder das Stromkabel und den Stecker nicht in Wasser oder andere Flüssigkeiten.
Spülen Sie das Mixgefäß, den Deckel, den Nachfülldeckel und die Klinge in warmem Wasser mit etwas Geschirrspülmittel
oder in der Spülmaschine. Trocknen Sie die Teile gründlich ab. Reinigen Sie die Motoreinheit nur mit einem feuchten Tuch
oder Schwamm. Die Klingen sind sehr scharf. Reinigen Sie sie nur vorsichtig, um Verletzungen zu vermeiden.
Zusammenbau
Wichtig: Das Mixgefäß und die Klingen werden durch normalen Gebrauch mit der Zeit abgenutzt. Vergewissern Sie sich
immer, dass die Klingen nicht gebrochen, abgesplittert oder lose sind. Verwenden Sie den Mixer nicht, wenn das Gefäß
oder die Klingen beschädigt sind.
1. Vergewissern Sie sich, dass der Mixer nicht an die Stromversorgung angeschlossen ist.
2. Drehen Sie das Mixgefäß auf den Kopf und stellen Sie es auf einer ebenen und stabilen Oberfläche ab.
3. Setzen Sie den Dichtungsring über die Klingen (A).
4. Drehen Sie die Klingen auf den Kopf und führen Sie sie vorsichtig in das Mixgefäß ein (B).
5. Setzen Sie den Befestigungsring auf die Unterseite des Mixgefäßes. Drehen Sie den Befestigungsring im
Uhrzeigersinn fest (C).
Hinweis: Sie können den Nachfülldeckel als Werkzeug zum Festziehen oder Lösen des Befestigungsrings verwenden
(D).
6. Drehen Sie das Mixgefäß wieder richtig herum und setzen Sie es auf die Motoreinheit.
Verwendung des Mixers
1. Füllen Sie die Zutaten in das Gefäß.
2. Setzen Sie den Deckel auf und vergewissern Sie sich, dass er fest sitzt.
3. Setzen Sie den Nachfülldeckel in den Deckel und drehen Sie ihn im Uhrzeigersinn fest.
4. Schließen Sie das Stromkabel an eine Steckdose an.
5. Drücken Sie auf den Ein-/Aus-Schalter ( ), um den Mixer einzuschalten.

17
6. Mixen Sie die Lebensmittel oder Getränke. Wählen Sie die gewünschte Geschwindigkeit oder Funktion mithilfe der
Tasten auf dem Bedienfeld (siehe Abschnitt Funktionen).
7. Drücken Sie auf den Ein-/Aus-Schalter ( ), um den Mixer auszuschalten.
Der Mixer schaltet sich automatisch ab, wenn er über mehrere Minuten nicht verwendet wird. Wenn sich der Mixer
automatisch abschaltet, erlöschen alle Anzeigen.
HINWEIS: Der Mixer ist mit einem Sicherheitsverriegelungssystem an der Motoreinheit ausgestattet. Damit wird verhindert,
dass der Motor oder das Bedienfeld eingeschaltet werden können, wenn das Mixgefäß nicht ordnungsgemäß auf die
Motoreinheit gesetzt wurde. Wenn das Mixgefäß während des Betriebs von der Motoreinheit genommen wird, stoppt der
Mixer und die Leuchten für mittlere und hohe Geschwindigkeit blinken.
Um den Mixer wieder zu starten, schalten Sie ihn mit dem Ein-/Aus-Schalter aus, setzen Sie das Mixgefäß auf die
Motoreinheit, drücken Sie erneut auf den Ein-/Aus-Schalter und wählen Sie die gewünschte Geschwindigkeitstaste.
TIPPS FÜR DAS MIXEN
• Halten Sie immer Ihre Hand auf den Deckel, wenn Sie den Mixer verwenden.
• Das Mixgefäß sollte höchstens dreiviertel voll sein. Teilen Sie die Lebensmittel ggf. in kleinere Mengen auf.
• Geben Sie Flüssigkeiten zuerst in das Gefäß, sofern das Rezept es nicht anders verlangt. Fügen Sie mehr Flüssigkeit
hinzu, falls sich die Zutaten nicht richtig vermischen.
• Beginnen Sie mit einer niedrigen Geschwindigkeit und steigern Sie diese während der Verarbeitung langsam.
• Nehmen Sie während des Betriebs nicht den Deckel ab. Wenn Sie weitere Zutaten hinzufügen möchten, nehmen Sie
stattdessen den Nachfülldeckel ab.
• Lassen Sie heiße Zutaten vor der Verarbeitung immer etwas abkühlen. Legen Sie ein gefaltetes Geschirrtuch über die
Abdeckung des Gefäßes und drücken Sie während des Betriebs mit der Hand auf den Deckel.
• Wenn Sie heiße Zutaten verarbeiten, nehmen Sie den Nachfülldeckel ab, damit Dampf entweichen kann. Heben Sie
den Deckel auf der Ihnen abgewandten Seite an, sodass die Öffnung teilweise bedeckt ist. Halten Sie Ihre Hände und
andere unbedeckte Hautstellen von der Deckelöffnung fern, um Verbrühungen zu vermeiden.
• Wenn Sie heiße Flüssigkeiten verarbeiten, nehmen Sie den Nachfülldeckel ab und beginnen Sie mit langsamer
Geschwindigkeit, die Sie dann nach und nach erhöhen. Beim Einfüllen von Flüssigkeiten darf die 1-l-Markierung nicht
überschritten werden. Achten Sie darauf, dass Ihre Hände nicht mit Dampf in Kontakt kommen.
FUNKTIONEN
Vorprogrammierte Funktionen
1. Drücken Sie auf den Ein-/Aus-Schalter ( ), um den Mixer einzuschalten. Die Betriebsleuchte blinkt. Die Leuchte
leuchtet durchgehend, wenn der Motor in Betrieb ist.
2. Drücken Sie die gewünschte Funktionstaste:
• Smoothies ( )
• Zerkleinern / Salsa ( )
• Milchshakes ( )
Die entsprechende Funktionsanzeige leuchtet, bis das Programm beendet ist.
3. Um die Auswahl zu ändern, drücken Sie die Stopp-Taste ( ) und danach die gewünschte Funktionstaste.
4. Wenn das Programm abgeschlossen ist, stoppt der Motor automatisch. Sie können jederzeit die Stopp-Taste drücken,
um das Programm abzubrechen. Die Betriebsleuchte blinkt, um anzuzeigen, dass der Mixer einsatzbereit ist.

18
Geschwindigkeitsfunktionen
Der Mixer verfügt über drei Geschwindigkeitseinstellungen: niedrig, mittel und hoch (1, 2 und 3). Sie können diese
Funktionen für eigene Rezepte verwenden oder um weiterzumixen, nachdem ein Programm abgeschlossen wurde.
1. Drücken Sie auf den Ein-/Aus-Schalter ( ), um den Mixer einzuschalten. Die Betriebsleuchte blinkt. Die Leuchte
leuchtet durchgehend, wenn der Motor in Betrieb ist.
2. Drücken Sie die Taste für die gewünschte Geschwindigkeit, um den Mixvorgang zu starten. Die entsprechende
Funktionsanzeige leuchtet, bis Sie die Stopp-Taste drücken.
3. Drücken Sie die Stopp-Taste ( ), um den Mixvorgang zu beenden.
Pulsfunktion
Mit der Pulsfunktion können Sie Crushed Ice herstellen oder Lebensmittel zerkleinern.
1. Drücken Sie den Ein-/Aus-Schalter ( ). Die Betriebsleuchte blinkt.
2. Halten Sie die Pulstaste ( ) gedrückt. Die Pulsfunktion läuft nur, solange die Pulstaste gedrückt wird.
3. Lassen Sie zum Stoppen die Pulstaste los.
REINIGUNG
Trennen Sie das Gerät immer von der Stromversorgung, wenn Sie es unbeaufsichtigt lassen, reinigen oder
Zubehör entfernen oder befestigen.
Tauchen Sie die Motoreinheit, das Stromkabel oder den Stecker nicht in Wasser oder andere Flüssigkeiten.
Verwenden Sie keine aggressiven, scheuernden oder säurehaltigen Reinigungsmittel, um den Mixer zu reinigen.
Die Kanten der Klingen sind sehr scharf. Lassen Sie beim Reinigen und sonstigen Umgang mit den Klingen
Vorsicht walten.
• Reinigen Sie die Motoreinheit mit einem feuchten Tuch und mildem Reinigungsmittel.
• Nehmen Sie die Klinge aus dem Mixgefäß, indem Sie den Befestigungsring gegen den Uhrzeigersinn drehen. Reinigen
Sie das Mixgefäß, die Klingen, die Dichtung und den Befestigungsring in warmem Wasser mit etwas Spülmittel. Spülen
Sie die Teile klar ab und trocknen Sie sie gründlich.
• Reinigen Sie den Deckel und den Nachfülldeckel in warmem Wasser mit etwas Spülmittel. Spülen Sie die Teile klar
ab und trocknen Sie sie gründlich. Das Gefäß, die Klingen, die Dichtung, der Befestigungsring, der Deckel und der
Nachfülldeckel können in der Spülmaschine gereinigt werden.
• Reinigen Sie die Motoreinheit mit einem feuchten Tuch und mildem Reinigungsmittel.
Schnellreinigung
1. Füllen Sie das Mixgefäß zur Hälfte mit warmem Wasser und geben Sie einen Spritzer Spülmittel hinzu. Setzen Sie
den Deckel und den Nachfülldeckel auf.
2. Halten Sie die Pulstaste ( ) 10-20 Sekunden gedrückt.
3. Nehmen Sie das Gefäß ab und spülen Sie es mit klarem Wasser.

19
LAGERUNG
Achten Sie nach der Reinigung darauf, dass alle Teile vollkommen trocken sind. Setzen Sie den Mixer wieder zusammen
und lagern Sie ihn in der Verpackung oder an einem sauberen, trockenen Ort. Lassen Sie den Deckel leicht geöffnet, damit
Gerüche entweichen können. Achten Sie darauf, dass sich das Gerät außerhalb der Reichweite von Kindern befindet.
RICHTWERTE FÜR DIE VERARBEITUNG
Lebensmittel Menge Bedienungshinweise
Semmelbrösel
1 Scheibe, grob zerkleinert Pulsfunktion bis zu 20 Sekunden
5 Scheiben, grob zerkleinert
Pulsfunktion 4-5-mal, dann mittlere
Geschwindigkeit für bis zu 20
Sekunden
Kekskrümel 8 ganze Kekse Pulsfunktion bis zu 20 Sekunden
Gemischte Nüsse 125 g Niedrige Geschwindigkeit für 5
Sekunden
Kaffeebohnen 175 g Bohnen Hohe Geschwindigkeit für 45
Sekunden
Ganze Pfefferkörner 35 g Hohe Geschwindigkeit für 20
Sekunden
Reismehl (gluten-freie Alternative) 175 g weißer Reis, z. B. Basmati Hohe Geschwindigkeit für 90
Sekunden
Fleisch, gekocht und ohne Knochen Bis zu 150 g, in 2,5 cm große Stücke
zerteilt
Pulsfunktion 3-5-mal, je nach
gewünschter Konsistenz
Parmesan 100g, in 2,5 cm große Stücke zerteilt Pulsfunktion 10-mal
Schlagsahne 300 ml
Mittlere Geschwindigkeit für 30-40
Sekunden oder hohe Geschwindigkeit
für 15-20 Sekunden
Eiswürfel Bis zur 1-l-Markierung am Mixgefäß Zerkleinern/Salsa-Funktion

20
GARANTIE
Bewahren Sie bitte unbedingt den Kaufbeleg auf. Dieser ist für die Geltendmachung von Garantieansprüchen zwingend
erforderlich.
Die in diesem Dokument beschriebene Gerätegarantie gilt für einen Zeitraum von 2 Jahren ab Kaufdatum.
Sollte das Gerät entgegen allen Erwartungen innerhalb dieses Zeitraums aufgrund eines Konzeptions- oder
Herstellungsfehlers nicht mehr einwandfrei funktionieren, können Sie es zusammen mit dem Kaufbeleg und einer Kopie
dieses Garantiebelegs am Kaufort abgeben.
Die aus dieser Garantie erwachsenden Ansprüche und Leistungen sind als Ergänzung zu Ihren gesetzlichen Ansprüchen
anzusehen. Diese werden von dieser Garantie nicht beeinträchtigt. Diese Bedingungen können ausschließlich durch Jarden
Consumer Solutions (Europe) Limited (“JCS (Europe)”) geändert werden.
JCS (Europe) verpflichtet sich innerhalb der Garantiedauer zur kostenlosen Reparatur oder zum kostenlosen Austausch
des Geräts bzw. von Geräteteilen, die nachweislich nicht ordnungsgemäß funktionieren. Es gelten jedoch folgende
Voraussetzungen:
• Sie müssen den Händler oder JCS (Europe) unverzüglich über das Problem informieren.
• An dem Gerät wurden keinerlei Änderungen vorgenommen, es wurde nur bestimmungsgemäß eingesetzt, nicht
beschädigt und nicht von Personen repariert, die von JCS (Europe) nicht autorisiert wurden.
Mängel, die auf unsachgemäße Nutzung, Beschädigung, nicht zugelassene elektrische Spannung, Naturgewalten,
Ereignisse außerhalb der Kontrolle durch JCS (Europe), Reparaturen oder Änderungen durch Personen, die von JCS
(Europe) nicht autorisiert wurden, oder Nichtbeachtung der Nutzungsanweisungen zurückzuführen sind, werden von dieser
Garantie nicht abgedeckt. Außerdem sind durch normale Gebrauchsabnutzung entstandene Mängel, wie beispielsweise
geringfügige Verfärbungen und Kratzer, von dieser Garantie ausgenommen.
Die im Rahmen dieser Garantie eingeräumten Rechte gelten ausschließlich für den ursprünglichen Käufer und dürfen nicht
auf die kommerzielle oder kommunale Nutzung ausgedehnt werden.
Falls Ihr Gerät mit einer länderspezifischen Garantieoder Gewährleistung geliefert wurde, sollten Sie sich nach deren
Bedingungen und nicht nach dieser Garantie richten. Nötigenfalls kann Ihnen der örtliche Vertragshändler weitere
Informationen geben.”
Elektrische Altgeräte dürfen nicht über den Hausmüll entsorgt werden. Geben Sie, falls möglich, diese Geräte bei
geeigneten Rücknahmestellen ab. Wenn Sie weitere Informationen zur Rücknahme und Entsorgung von Elektrogeräten
erhalten möchten, senden Sie bitte eine E-Mail an die Adresse [email protected].
Jarden Consumer Solutions (Europe) Limited
5400 Lakeside
Cheadle Royal Business Park
Cheadle
SK8 3GQ
United Kingdom
Table of contents
Languages:
Other Oster Blender manuals

Oster
Oster OBL167X User manual

Oster
Oster BLSTAS User manual

Oster
Oster 6700 User manual

Oster
Oster OSTERIZER Beehive User manual

Oster
Oster BLSTDG User manual

Oster
Oster OBL104 User manual

Oster
Oster XPERT PRO BLSTVB-RV0 User manual

Oster
Oster ICE SHAVING BLENDER User manual

Oster
Oster Ironman User manual

Oster
Oster 6800-6839 User manual

Oster
Oster 4094 User manual

Oster
Oster Osterizer Classic Blender User manual

Oster
Oster 004096-009-000 User manual

Oster
Oster Texture Select Pro Series User manual

Oster
Oster BLSTBKP-BR0-000 User manual

Oster
Oster BLSTRM User manual

Oster
Oster BLSTEG7827 Series User manual

Oster
Oster Classic blender User manual

Oster
Oster 2612-049 User manual

Oster
Oster 4126 User manual