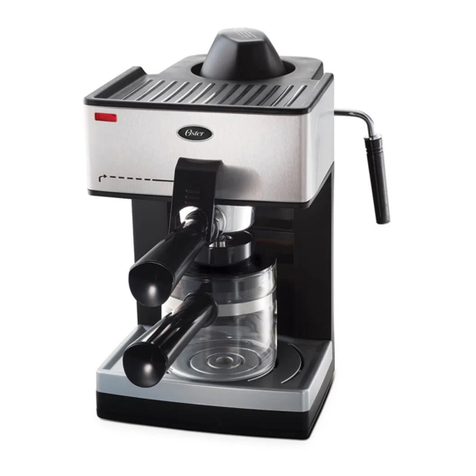
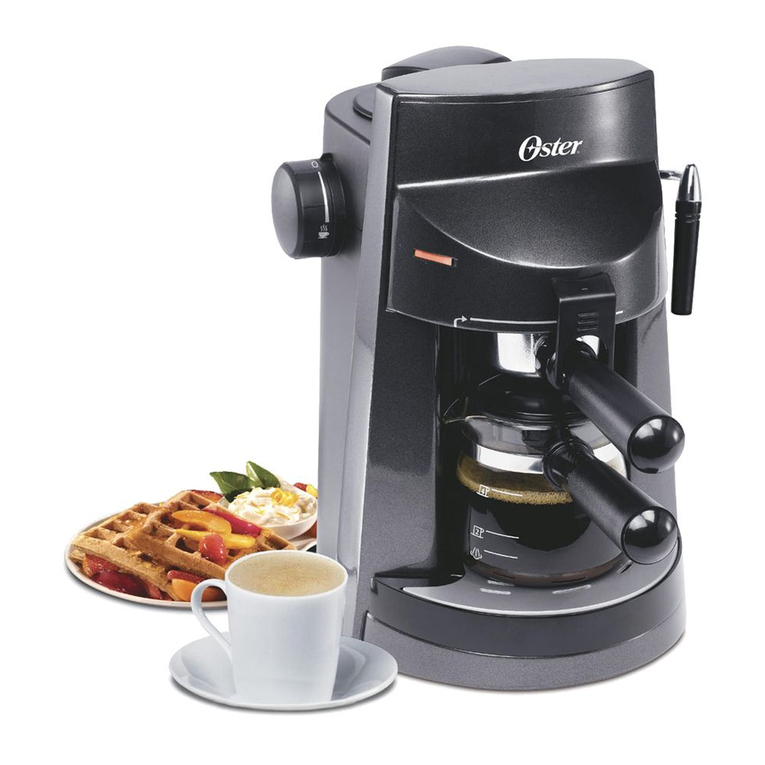
Oster BVSTEM3300 User manual

Manual de Instrucciones
CAFETERA DE VAPOR PARA ESPRESSO Y CAPPUCCINO
LEA TODAS LAS INSTRUCCIONES ANTES DE USAR ESTE APARATO
Instruction Manual
STEAM ESPRESSO & CAPPUCCINO MAKER
READ ALL INSTRUCTIONS BEFORE USING THIS APPLIANCE
MODELO
MODEL BVSTEM3300
BVSTEM3300-013_23SEM1 (LA).indd 1BVSTEM3300-013_23SEM1 (LA).indd 1 2023/6/21 09:242023/6/21 09:24

Español - 1 Español - 2
INTRODUCCIÓN
Bienvenido y felicitaciones por la compra de su nueva Cafetera de Vapor
para Espresso y Cappuccino Oster
®
. Esta cafetera se ha diseñado para
ayudarle a preparar en casa deliciosos espressos, cappuccinos, lattes
y más. Si tiene alguna pregunta acerca de su Cafetera de Vapor para
Espresso y Cappuccino, por favor comuníquese con cualquiera de los
centros de servicio autorizados de Oster
®
.
PRECAUCIONES IMPORTANTES
Cuando se utiliza aparatos eléctricos, siempre se debe seguir medidas
básicas de seguridad para reducir el riesgo de incendio, descarga
eléctrica o lesiones personales, incluidas las siguientes:
1. Lea todas las instrucciones.
2. No toque las superficies calientes. Utilice las asas o perillas.
3. Para protegerse contra descargas eléctricas, no coloque ni sumerja
el cable, los enchufes o el artefacto en agua u otro líquido. Evite
derramar agua sobre el conector.
4. Este artefacto no está diseñado para que lo utilicen niños o personas
con capacidades físicas, sensoriales o mentales reducidas, o con falta
de experiencia y conocimiento. Es necesaria una estrecha supervisión
cuando se usa cualquier artefacto cerca de niños, a menos que se
les haya dado supervisión o instrucción sobre el uso del artefacto
por una persona responsable de su seguridad. Los niños deben ser
supervisados para asegurarse de que no jueguen con el artefacto.
Mantenga la unidad y su cable fuera del alcance de los niños.
5. La limpieza y el mantenimiento de este artefacto no deben ser
realizados por niños sin supervisión.
6. Desenchufe del tomacorriente cuando el artefacto o el reloj de
pantalla (si se incluye) no estén en uso y antes de limpiarlo. Permita
que se enfríe antes de colocarle o retirarle piezas y antes de limpiarlo.
7. No opere ningún aparato que tenga un cable o enchufe dañado o
después de presentar un fallo en su funcionamiento o si ha sido
dañado de manera alguna. No intente reemplazar o cortar un cable
dañado. Devuelva el aparato a un centro de servicio autorizado para
su revisión, reparación o ajuste.
8. El uso de accesorios no recomendados por el fabricante del aparato
podría ocasionar incendio, descarga eléctrica o lesiones personales.
9. No utilice el aparato al aire libre ni con fines comerciales.
10. No permita que el cable cuelgue del borde de la mesa o mostrador, ni
que toque superficies calientes.
11. No lo coloque sobre o cerca de un quemador de gas o eléctrico
caliente, ni en un horno caliente.
12. Siempre conecte primero el enchufe a la unidad, luego enchufe el
cable al tomacorriente de la pared (para electrodomésticos con cables
desmontables). Para desconectar, gire cualquier control a la posición
de apagado, luego retire el enchufe del tomacorriente de la pared.
13. No utilice el artefacto para otro uso que no sea el previsto. El mal uso
puede causar lesiones. Utilice siempre la unidad sobre una superficie
seca, estable y nivelada.
14. ADVERTENCIA: Para evitar el riesgo de lesiones, nunca abra ni
desconecte el compartimiento de preparación (portafiltro) durante el
ciclo de preparación. Enganche siempre correctamente el portafiltro
en el mecanismo de bloqueo. Si no lo hace, el portafiltro puede
desengancharse durante el ciclo de preparación y causar lesiones.
15. Modelos con molinillos de café: Revise el depósito de granos para la
presencia de otros artículos antes de usarlo.
16. La base calefactora y la resistencia pueden permanecer calientes
después del ciclo de preparación. No toque la base calefactora,
ni la resistencia inmediatamente después de que el aparato haya
terminado el ciclo de preparación. Espere a que el aparato se enfríe.
17. No coloque el aparato dentro de ningún tipo de armario mientras esté
en uso.
GUARDE ESTAS INSTRUCCIONES
Este aparato fue desarrollado para uso doméstico y otros lugares similares como:
– Cocinas para empleados de tiendas, oficinas y otros ambientes de trabajo;
– Sitios o fincas;
– Huéspedes de hoteles, moteles y otros ambientes similares a una residencia;
– Entornos como posadas.
AVISOS DE PRODUCTO
1. Coloque la cafetera sobre una superficie plana, dura y nivelada para evitar la
interrupción del flujo de aire debajo de la cafetera espresso.
2. No utilice la cafetera con el tanque de agua vacío.
3. Mantenga despejada el área sobre la cafetera durante el uso, ya que el vapor
caliente escapará de la cafetera.
BVSTEM3300-013_23SEM1 (LA).indd 1-2BVSTEM3300-013_23SEM1 (LA).indd 1-2 2023/6/21 09:242023/6/21 09:24

Español - 3 Español - 4
DESCRIPCIÓN DEL ARTEFACTO CUIDADO: PRESIÓN
Para verificar que el artefacto se encuentra bajo presión siga los siguientes pasos:
1. Gire la perilla de control a la posición de apagado y desconecte el artefacto.
2. Gire la perilla de control a la posición de vapor . Si sale vapor del tubo de vapor,
entonces el tanque de agua sigue bajo presión. Gire la perilla de control a la posición
de apagado .
3. Para liberar la presión, sostenga una jarra con agua debajo del tubo de vapor
y sumérjalo en el agua. LENTAMENTE GIRE LA PERILLA DE CONTROL A LA
POSICIÓN DE VAPOR Y DEJE SALIR EL VAPOR.
4. Cuando el tubo de vapor deje de liberar vapor, gire la perilla de control a la posición
de apagado y remueva lentamente la tapa.
5. No remueva el portafiltro en ningún momento durante el proceso de preparación o
hasta que se haya liberado la presión.
6. Tenga cuidado cuando remueva el portafiltro. Las partes metálicas pueden estar muy
calientes todavía. También puede haber agua caliente flotando en la parte superior
del filtro.
7. Si el café no gotea del portafiltro, significa que este pueda estar bloqueado. Permita
que el artefacto se enfríe, después deje salir el vapor siguiendo las instrucciones que
se indican arriba. El bloqueo puede haber sido causado por café que esté molido
demasiado fino. Consulte la sección de “PROBLEMAS Y SOLUCIONES”.
8. CUANDO LIMPIE EL TUBO DE VAPOR: Coloque una jarra para espumar o una
taza grande con capacidad de por lo menos 325 ml (11 onzas) y llene con agua a la
mitad de la capacidad y coloque debajo del tubo de vapor. Verifique que la punta del
TUBO DE VAPOR esté sumergida en el líquido antes de girar la perilla de control a la
posición de vapor . Espume el agua durante aproximadamente 15 s.
NOTA: Para que su unidad siempre trabaje de manera adecuada, limpie el tubo de
vapor después de cada uso.
ADVERTENCIA: La abertura de llenado no debe abrirse durante el uso.
Perilla de control
Vapor
Apagado
Colar
6
7
9
8
10
3
4
2
5
1
1. Tapa del tanque de agua
2. Perilla de control
3. Luz indicadora
4. Tubo de vapor
5. Cubierta del tubo de vapor
extraible
6. Bandeja de goteo extraible
7. Filtro de café reutilizable
8. Jarra de vidrio con tapa
a prueba de derrames y
capacidad para preparar hasta
4 espressos por ciclo
9. Portafiltro extra grande
10. Cuchara medidora/aplanador
de café
BVSTEM3300-013_23SEM1 (LA).indd 3-4BVSTEM3300-013_23SEM1 (LA).indd 3-4 2023/6/21 09:242023/6/21 09:24

Español - 5 Español - 6
ANTES DE USAR LA CAFETERA POR
PRIMERA VEZ
LIMPIE SU MÁQUINA:
Para limpiar el interior de la cafetera, siga los siguientes pasos utilizando solamente agua.
No sumerja el artefacto en agua ni tampoco toque ninguna parte interna de la cafetera.
NOTA: El portafiltro no está apto para el lavaplatos, solamente lave a mano.
1. Lave la jarra de vidrio, la tapa, el filtro, el portafiltro y la cuchara medidora/aplanador
de café con detergente líquido suave y una esponja o paño suave.
¡PRECAUCIÓN! Asegúrese de que la perilla de control esté fijada
en la posición de apagado .
2. Retire la tapa del tanque de agua.
3. Use la jarra de vidrio para llenar el tanque de agua con agua
filtrada. Enrosque nuevamente la tapa.
4. Inserte el portafiltro vacío (sin café molido) en la máquina y gire
hacia la derecha para asegurar que está en su lugar (Figura 1).
Esto puede resultar difícil la primera vez que se intenta, pero no se
preocupe. La mejor manera de aprender es mirando la forma de la
parte superior del portafiltro. Éste se puede insertar colocándolo a
la izquierda y asegurándolo hacia la derecha. Esto puede requerir
hacer fuerza. El mango debe quedar alineado con el símbolo
de cierre y apuntando directamente hacia usted cuando se para
delante de la máquina.
5. Coloque la jarra de vidrio debajo del portafiltro (Figura 2).
6. Gire la perilla de control de la máquina a la posición de colar .
Mantenga la perilla de control en la posición de colar hasta que ya
no salga agua del portafiltro.
7. Asegúrese de girar la perilla de control hasta la posición de apagado y desenchufe
el aparato.
¡PRECAUCIÓN! No sumerja el cable de alimentación, el enchufe ni la máquina para
espresso en agua ni en ningún otro líquido. No retire la tapa del tanque de agua o el
portafiltro hasta que se libere la presión en la unidad.
Figura 1
Figura 2
COMO PREPARAR CAFÉ ESPRESSO
EL CAFÉ
El café debe estar tostado y recién molido. Usted puede probar con una variedad tostada
italiana o francesa. El café previamente molido solamente retendrá su sabor durante
7 a 8 días, siempre que éste sea almacenado en un contenedor cerrado, en un lugar
frío y oscuro. No lo almacene en el refrigerador o en el congelador. Se recomienda que
muela granos enteros justo antes de utilizarlos. Los granos de café almacenados en un
contenedor cerrado conservaran su sabor durante 4 semanas.
EL MOLIDO
Este es un paso vital en el proceso de preparación de café espresso y requiere mucha
práctica. El café debe ser molido finamente.
• El molido correcto debe tener la misma consistencia de la sal.
• Si se muele demasiado fino, el agua no fluirá a través del café, aun bajo presión. El
molido tiene la apariencia del polvo y se siente como harina cuando se frota entre los
dedos.
• Si el café se muele demasiado áspero, el agua fluirá a través del café demasiado
rápido, y el sabor no se extraerá completamente. Asegúrese de usar un molino de
calidad para obtener una consistencia uniforme en el molido de los granos de café
que usará para preparar su café espresso. Los molinos de café con forma ovalada no
se recomiendan ya que el molido que ofrecen no es consistente.
COMO PREPARAR CAFÉ ESPRESSO
1. Gire la perilla de control a la posición de apagado .
2. Llene la jarra de vidrio con agua fría hasta la marca del número deseado de
porciones que va a preparar de café espresso o cappuccino. Nunca utilice agua tibia
o caliente para llenar el tanque de agua.
3. Retire la tapa del tanque de agua y vierta el agua dentro del tanque. Asegúrese
de medir correctamente la cantidad de agua que es requerida. No llene el tanque
completamente, ya que no habrá espacio suficiente para la generación de vapor.
ATENCIÓN: No vierta agua dentro del tanque mientras el artefacto se encuentre
en funcionamiento. Revise que la perilla de control se encuentre en la posición de
apagado .
4. Enrosque la tapa de nuevo en el tanque de agua. Asegúrese de que quede
correctamente ajustada.
PORCIONES CAFE ESPRESSO MOLIDO FINO AGUA (FRIA)
2 tazas Marca de 2 tazas en el filtro Marca de 2 tazas en la jarra
4 tazas Marca de 4 tazas en el filtro Marca de 4 tazas en la jarra
BVSTEM3300-013_23SEM1 (LA).indd 5-6BVSTEM3300-013_23SEM1 (LA).indd 5-6 2023/6/21 09:242023/6/21 09:24

Español - 7 Español - 8
COMO PREPARAR EN CASA
CAPPUCCINOS Y MÁS
¡PRECAUCIÓN! No retire la tapa del tanque de agua ni el portafiltro hasta que libere la
presión en la unidad.
¡PRECAUCIÓN! Asegúrese de que la unidad esté desenchufada y la perilla de control
esté fijada en la posición de apagado antes de utilizar la máquina.
NOTA: Esta es una máquina manual sin función de apagado automático. Usted puede
controlar la cantidad de espresso que se cuela y por cuanto tiempo espumar la leche
girando la perilla de control.
El café cappuccino es café espresso con leche vaporizada y espuma de leche en la parte
superior. El espumar la leche para el café cappuccino requiere práctica. No se desanime
si no lo hace perfectamente la primera vez. La leche debe ser, la mitad vaporizada (la
parte inferior de la jarra) y la mitad espumosa (la parte superior de la jarra). Puede
tomarse varios intentos antes de que perfeccione este proceso.
Para mejores resultados, recomendamos espumar la leche en una jarra diferente y verter
la leche en su taza de café. La leche y la jarra deben estar frías. No use una jarra que ha
sido lavada recientemente con agua tibia.
1. El primer paso en la preparación del cappuccino es preparar el café espresso. Así
que llene la jarra de vidrio con agua fría hasta la marca designada para el número de
porciones deseadas. Nunca use agua tibia o caliente para llenar el tanque de agua.
2. Siga los pasos en la sección “COMO PREPARAR CAFÉ ESPRESSO”.
3. Llene una taza a la mitad con leche fría y colóquela junto a la máquina. La leche
descremada o del 2% es más fácil de espumar.
4. Si prepara 2 porciones, detenga la preparación de café espresso en la marca de 2
tazas. Gire la perilla de control a la posición de Apagado . Si prepara 4 porciones,
detenga la preparación de espresso en la marca de 4 tazas. Gire la perilla de control
a la posición de Apagado .
5. Usted está ahora listo para espumar y vaporizar la leche. Sostenga la jarra debajo
del tubo de vapor, de manera que el tubo de vapor esté ligeramente sumergido
en la leche. Gire lentamente la perilla de control a la posición de vapor . Mueva
suavemente la jarra en forma circular alrededor de la punta de Vaporización durante
aproximadamente 45 s. Recuerde: la leche y la jarra deben estar muy frías antes de
hacer la espuma.
6. Cuando la leche haya duplicado su volumen, o si usted está usando un termómetro
para bebidas, cuando la leche haya alcanzado los 38°C, inserte el tubo de vapor aun
más adentro de la leche para calentarla más. No caliente la leche a más de 65°C.
Para evitar salpicar leche caliente, no permita que el tubo de vapor quede por arriba
de la superficie de la leche. Después de que haya terminado de hacer la espuma,
gire la perilla de control nuevamente a la posición de apagado .
7. Usted está a listo para preparar el café cappuccino. RECUERDE: Es 1/3 de café
espresso, 1/3 de leche vaporizada y 1/3 de espuma de leche. Vierta el espresso en
una taza con capacidad por lo menos 150 ml. Después añada la leche vaporizada al
espresso y utilizando una cuchara añada la espuma.
COLOCANDO EL CAFÉ
1. Coloque el filtro en el portafiltro.
2. Llene con café recién molido finamente hasta la marca de 2 ó 4 tazas indicadas en el
filtro.
No llene más allá de la marca de 4 tazas. Limpie cualquier exceso de café del borde
del portafiltro. Esto asegurará un ajuste correcto en la cafetera.
ATENCIÓN: Comprima suavemente el café. No llene demasiado el filtro. Esto puede
causar obstrucciones o derrames.
3. Coloque el portafiltro debajo de la cabeza de preparación, coloque el portafiltro
moviendo primero el seguro hacia atrás, coloque el asa a la izquierda hasta que se
ajuste en la ranura. Después, lentamente gire a la derecha hasta que el portafiltro se
localice en la posición de cierre.
4. Verifique que la rejilla de goteo se encuentre en su lugar, sobre la bandeja de goteo.
5. Coloque la tapa sobre la jarra, para que la abertura de la tapa esté hacia el pico, y
colóquela sobre la bandeja de goteo. El asa del portafiltro y el asa de la jarra deben
estar alineadas.
6. Conecte el cable eléctrico en un tomacorriente y gire la perilla de control hacia arriba
al símbolo el cual inicia el proceso de preparación. La luz se encenderá para
indicarle que la cafetera se encuentra funcionando.
7. El café espresso comenzará a fluir dentro de la jarra en aproximadamente tres a
cinco minutos.
8. Cuando el café espresso haya terminado de fluir dentro de la jarra, gire la perilla de
control a la posición de apagado . Desconecte el cable eléctrico y permita que la
presión en la máquina sea liberada. Siga el procedimiento en la sección “CUIDADO:
PRESIÓN” de la página 4.
PRECAUCIÓN: No retire la tapa del tanque o el compartimiento del filtro en ningún
momento mientras el artefacto se encuentre bajo presión o hasta que se haya
enfriado. Siga el procedimiento marcado “CUIDADO: PRESIÓN” para liberar la
presión antes de retirar la tapa.
9. Una vez que la Cafetera se haya enfriado y que toda la presión haya sido liberada,
saque el portafiltro de la cabeza de preparación. Usando el seguro para fijar el filtro
en el soporte, gire el portafiltro hacia abajo para vaciarla. Enjuague el filtro y el
portafiltro con agua.
PRECAUCIÓN: Las partes metálicas del portafiltro pueden estar muy calientes.
Asegúrese de usar el seguro del filtro cuando deseche el café molido. Enfríe estas
partes enjugándolas bajo el chorro de agua fría.
10. Para las instrucciones de limpieza, consulte la sección “Limpieza de su máquina
despues de cada uso”.
BVSTEM3300-013_23SEM1 (LA).indd 7-8BVSTEM3300-013_23SEM1 (LA).indd 7-8 2023/6/21 09:242023/6/21 09:24
Español - 9 Español - 10
CONSEJOS PARA ESPUMAR
Si escucha un sonido de borboteo, la punta del tubo de vapor no está sumergida lo
suficientemente profunda dentro de la leche. Si escucha un sonido de chirrido, la punta
está colocada demasiado profunda dentro de la leche. Ajuste la posición de la jarrita
según sea necesario.
• La formación de espuma ideal debe emitir un sonido de siseo y un movimiento de
remolino creado en la jarrita.
*Toma alrededor de 2.5 min para espumar 120 ml de leche entera /2%/descremada
a 65 °C de temperatura. Puede utilizar un termómetro para obtener resultados
precisos.
• La leche espumada correctamente tiene una microespuma espesa con un acabado
sedoso. Golpee ligeramente la jarrita para liberar las burbujas de aire grandes y
mueva con movimientos circulares para mezclar la leche y lograr una textura sedosa.
• Limpie el tubo de vapor después de cada uso.
LIMPIEZA DE SU MÁQUINA
DESPUÉS DE CADA USO
Mantenga su Cafetera de Vapor para Espresso y Cappuccino Oster
®
funcionando sin
problemas con un cuidado adecuado después de cada uso. Siga estos sencillos pasos
para limpiar su máquina:
PRECAUCIÓN: NO retire la tapa del tanque de agua ni el portafiltro hasta que se libere la
presión en la unidad. Siga las instrucciones en la página 4 antes de proceder.
1. Retire el portafiltro para desechar los granos de café. Alce el clip retenedor del filtro
de manera que esté colocado sobre el borde del filtro, sujete en su lugar mientras
desecha los granos de café (Figura 3). Esto ayuda a mantener el
filtro asegurado en posición.
NOTA: Dejar el portafiltro en la máquina después del colado pude
causar que se cierre incorrectamente, lo cual puede ocasionar
fugas y daño al sellado.
2. Enjuague el portafiltro con agua fresca. Tenga en cuenta que el
portafiltro NO es apto para lavaplatos. ¡Lave solamente a mano!
NOTA: Si no espumó leche, omita los pasos 3-8.
3. Llene con agua una taza y vierta dentro del tanque de agua.
4. Enrosque nuevamente la tapa en el tanque de agua.
5. Llene una taza o la jarrita para espumar hasta la mitad con agua y colóquela de tal
modo que el tubo de vapor quede sumergido dentro del agua.
6. Gire la perilla de control a la posición de vapor y aplique vapor con agua en vez de
leche por 15 segundos. Esto ayudará a enjuagar las piezas internas de la máquina.
7. Una vez que el tubo espumador se enfríe, retire y enjuague la cubierta del tubo
espumador. La cubierta del tubo espumador es la pieza plástica negra. Simplemente,
tire de la parte inferior para retirarla.
8. Limpie el tubo espumador con un paño húmedo.
9. Retire la cubierta de la bandeja de goteo y vacíe el agua o café de la bandeja de
goteo. Seque con un paño limpio. Limpie la superficie exterior de la máquina con
paño húmedo. No utilice estropajos de fibras metálicas ni limpiadores abrasivos.
PRECAUCIÓN: Para protegerse contra descargas eléctricas, no sumerja el cable, el
enchufe ni el aparato en agua ni ningún otro líquido.
Figura 3
8. Siga las instrucciones en la página 4, en la sección marcada con “CUIDADO:
PRESIÓN” para enjuagar cualquier residuo de leche que haya quedado en el tubo de
vapor. Es importante limpiar correctamente el tubo de vapor después de cada uso,
para asegurarse que continúe trabajando correctamente.
9. Desconecte el cable eléctrico y permita que la cafetera se enfríe por completo. No
retire la tapa del tanque o el portafiltro hasta que la presión en la Cafetera haya
sido liberada por completo. Siga los procedimientos en la sección marcada con
“CUIDADO: PRESIÓN” en la página 4 para liberar la presión.
BVSTEM3300-013_23SEM1 (LA).indd 9-10BVSTEM3300-013_23SEM1 (LA).indd 9-10 2023/6/21 09:242023/6/21 09:24

Español - 11 Español - 12
LIMPIEZA Y MANTENIMIENTO
POR EL USUARIO
Una vez cada 1 a 3 meses, dependiendo del uso y el tipo de agua, se recomienda
descalcificar la cafetera para mantener su funcionamiento adecuadamente.
DESCALCIFICACIÓN DE LAS PIEZAS INTERNAS
1. Asegúrese de que la perilla de control esté en la posición de apagado .
PRECAUCIÓN: No retire la tapa del tanque de agua ni el portafiltro hasta que no
libere la presión en la unidad. Consulte las instrucciones en la página 4.
2. Llene el tanque de agua hasta el tope con vinagre blanco
doméstico no diluido (Figura 4).
3. Cuele justo lo suficiente para lograr que salga un poco de vinagre.
4. Haga vapor justo lo suficiente para lograr que salga un poco de
vinagre.
5. Desenchufe la máquina.
6. Deje la máquina reposar toda la noche con la solución de vinagre
dentro del tanque de agua.
7. Deseche el vinagre a través de la apertura superior de la máquina, volteando la
máquina dentro del fregadero.
8. Enjuague el tanque de agua con agua de llave, llenando el tanque hasta la mitad con
agua y vierta el agua dentro del fregadero, repitiendo este paso dos veces.
9. Cuele y haga vapor con agua fresca al menos 4 veces o hasta que no haya olor de
vinagre.
MANTENIMIENTO POR EL USUARIO:
Este aparato no contiene piezas que deban ser reparadas por el usuario. Cualquier
servicio de mantenimiento que no esté descrito en la sección de Limpieza deberá ser
realizado solamente por un representante de servicio autorizado. Consulte la garantía
disponible en línea.
LIMPIEZA DE LA JARRA DE VIDRIO
El agua dura puede dejar depósitos de minerales color blanco dentro de la jarra. El café
decolora estos depósitos, algunas veces dejando unas manchas color café en el interior
de la jarra. Para remover estas manchas, siga los siguientes simples pasos:
1. Use una solución con partes iguales de agua caliente y vinagre blanco.
2. Deje que la solución repose en la jarra durante aproximadamente 20 min y después
deséchela.
3. Lave y enjuague la jarra completamente usando un paño suave. No use limpiadores
abrasivos. Estos pueden dañar el acabado de la jarra, rayándola y causando que se
pueda romper.
Figura 4
CONSEJOS ÚTILES
Asegúrese de que la perilla de control esté en la posición de apagado antes de usar la
máquina.
• El clip retenedor del filtro debe estar en posición hacia atrás cuando se instala el
portafiltro en la unidad.
• No intente girar el mango del portafiltro pasado de la posición de cierre.
• No llene en exceso el filtro con café molido, ya que esto causaría un cierre indebido
del portafiltro, lo que podría resultar en fugas y daños en el sellado.
• Para obtener mejores resultados, solo utilice café molido para espresso de alta
calidad.
• No deje exceso de café molido en el borde del portafiltro. El exceso de granos
molidos en el borde causaría un cierre indebido, lo que podría resultar en fugas y
daños en su sellado.
• No gire la perilla de control a la posición de colar o vapor con el tanque de agua
vacío.
• No deje agua en el tanque de agua entre usos.
• Asegúrese de que el tubo de vapor se sumerja en la leche o en el sustituto de leche
antes de girar la perilla de control a la posición de vapor.
• No guarde el portafiltro en la cabeza de colar. Retire el portafiltro después del colado.
Dejar el portafiltro en la máquina podría causar un cierre indebido, lo que podría
resultar en fugas y daños en su sellado.
• No llene de agua el tanque hasta el tope.
• Esta es una máquina manual sin función de apagado automático. Usted puede
controlar la cantidad de espresso que se cuela girando la perilla de control.
• La leche de 2% crea mejor espuma que los sustitutos de leche.
BVSTEM3300-013_23SEM1 (LA).indd 11-12BVSTEM3300-013_23SEM1 (LA).indd 11-12 2023/6/21 09:242023/6/21 09:24

Español - 13 Español - 14
PROBLEMAS Y SOLUCIONES
PROBLEMA CAUSA SOLUCIONES
El café no sale
• No hay agua en el
tanque.
• El café está molido
demasiado fino.
• Hay demasiado café en
el filtro.
• La tapa no está bien
cerrada, el vapor se
escapa.
• El artefacto no fue
encendido o conectado.
• El café se ha comprimido
demasiado.
• Añada agua.
• Muela los granos de café a un
término medio.
• Llene el filtro solamente hasta
la marca de 4 tazas.
• Apriete la tapa.
• Conecte la unidad en la toma
de corriente.
• Rellene el compartimiento para
filtro con café. NO COMPRIMA.
El café sale alrededor del
borde del compartimiento
para el ltro
• El soporte para filtro no
ha rotado completamente
a “cerrado”.
• Hay granos de café
alrededor del borde del
compartimiento para el
filtro.
• Hay demasiado café en
la canasta del filtro.
• Gire el soporte del filtro
completamente a su posición
para asegurar.
• Limpie el borde, llene
solamente hasta la marca de 4
tazas.
• Llene solamente hasta la marca
de 4 tazas.
No se genera vapor
• El tanque de agua está
vacío.
• Hay demasiada agua
en el tanque – no hay
espacio para el vapor.
• El aparato no está
encendido.
• El tubo para espumar
está bloqueado.
• Llene el tanque de agua con
la cantidad correcta de agua.
Consulte las páginas 5 y 6.
• Vacíe un poco de agua del
tanque.
• Encienda la unidad con la
perilla de control.
• Después de la etapa para
espumar, opere la función para
espumar durante 1 ó 2 s y
extraer el exceso de leche. O
bien, apague la unidad, permita
que se enfríe, desconecte de
la toma de corriente y limpie
el tubo para espumar con una
aguja o palillo de dientes.
La leche no queda
espumosa
• Se terminó el vapor.
• La leche no está lo
suficientemente fría.
• Vierta la cantidad requerida
de agua para preparar café
cappuccino. Consulte la página 7.
• Enfríe la leche y la jarra
para espumar antes de
la preparación de café
cappuccino.
El café sale demasiado
rápido
• El café está molido
demasiado áspero.
• No hay suficiente café en
el compartimiento para el
filtro.
• Use un café molido más
finamente.
• Use más café.
El café salpica fuera del
tubo para espumar
• El tanque de agua está
vacío o bajo, no hay
suficiente presión.
• Una vez que la unidad se ha
enfriado, use más agua para
preparar café espresso.
Recetas de Espresso
Epre co Pann
Caf Bomo
Coloque en un vaso de vidrio
resistente pequeño:
1-1/2 to 2 cucharadas de leche
condensada endulzada
Cuele en el vaso:
Un espresso pequeño
Sirva con una cuchara para
revolver antes de beber.
Caf Cuan
Coloque en una taza pequeña:
1/2 cucharadita de azúcar
Cuele en la taza:
Un espresso pequeño
Revuelva para disolver la azúcar.
Si lo desea, coloque en
una taza:
1/2 cucharadita de azúcar
Cuele en la taza:
Un espresso
pequeño
Revuelva para disolver la
azúcar, luego llene la taza
con:
Crema batida endulzada
BVSTEM3300-013_23SEM1 (LA).indd 13-14BVSTEM3300-013_23SEM1 (LA).indd 13-14 2023/6/21 09:242023/6/21 09:24

Español - 15 Español - 16
Recetas de Latte
La Helad
Coloque en una taza grande:
1 cucharada de azúcar
Cuele en la taza:
Un espresso grande
Incorpore:
1 taza de cubos de hielo
1/2 taza de leche entera u otro tipo de leche
La co Eecias ar
Tart d Calaaz
Coloque en una taza:
2 cucharaditas de azúcar moreno
Una pizca de especias para tarta de calabaza
Cuele en la taza:
Un latte pequeño
Revuelva para mezclar.
La co Nutell
Coloque en una taza:
1 cucharada de Nutella (pasta para untar de
chocolate y nuez moscada)
Preparar en la taza:
Café con leche pequeño
Revuelva para mezclar.
Recetas de Cappuccino
Caf Mc
Coloque en una taza:
2 tcucharaditas de sirope de chocolate
1/2 cucharadita de azúcar
Cuele en la taza:
Un cappuccino pequeño
Revuelva para mezclar.
Cubra con más espuma si lo desea.
Cappuccin co Caramel
Coloque en una taza:
1 cucharada de sirope de caramelo
1/4 cucharadita de azúcar
Cuele en la taza:
Un cappuccino pequeño
Revuelva para mezclar.
Cubra con más espuma si lo desea.
Cappuccin Dulc
Coloque en una taza:
1/2 ucharadita de
azúcar
Cuele en la taza:
Un cappuccino
pequeño
Revuelva para disolver la
azúcar.
Cubra con más espuma si
lo desea.
BVSTEM3300-013_23SEM1 (LA).indd 15-16BVSTEM3300-013_23SEM1 (LA).indd 15-16 2023/6/21 09:242023/6/21 09:24

English-1 English-2
INTRODUCTION
Welcome and congratulations on the purchase of your new Oster
®
Steam
Espresso & Cappuccino Maker. This machine has been designed to help
you prepare at home delicious espressos, cappuccinos, lattes and more.
If you have any questions about your new Steam Espresso & Cappuccino
Maker, please contact any of the authorized Oster
®
service centers.
IMPORTANT SAFEGUARDS
When using electrical appliances, basic safety precautions should always
be followed to reduce the risk of fire, electric shock, and/or injury to
persons including the following:
1. Read all instructions.
2. Do not touch hot surfaces. Use handles or knobs.
3. To protect against electric shock, do not place or immerse cord,
plugs, or appliance in water or other liquid. Avoid spilling water on the
connector.
4. This appliance is not intended for use by children or by persons
with reduced physical, sensory, or mental capabilities, or lack of
experience and knowledge, unless they have been given supervision
or instruction concerning use of the appliance by a person responsible
for their safety. Children should be supervised to ensure that they do
not play with the appliance. Keep the appliance and its cord out of
reach of children.
5. Cleaning and user maintenance shall not be made by children without
supervision.
6. Unplug from outlet when either the appliance or display clock (if
provided) is not in use, and before cleaning. Allow to cool before
putting on or taking off parts, and before cleaning the appliance.
7. Do not operate any appliance with a damaged cord or plug or after the
appliance malfunctions, or has been damaged in any manner. Return
appliance to an Authorized Service Center for examination, repair or
adjustment. Do not attempt to replace or splice a damaged cord.
8. The use of an accessory not recommended by the appliance
manufacturer for use with this appliance may result in fire, electric
shock or injury to persons.
9. Do not use outdoors or for commercial purposes.
10. Do not let cord hang over edge of table or counter, or touch hot
surfaces.
11. Do not place on or near a hot gas or electric burner, or in a heated
oven.
12. Always attach plug to appliance first, then plug cord into the wall outlet
(for appliances with detachable cords). To disconnect, turn any control
to the off position, then remove plug from wall outlet.
13. Do not use appliance for other than intended use. Misuse can cause
injuries. Always use appliance on a dry, stable, level surface.
14. WARNING: To avoid the risk of injury, never open or disengage the
brew chamber (portafilter) during the brew cycle. Always properly
engage the filter holder to the locking mechanism. Failure to do so
may disengage the filter holder during the brew cycle and cause
injuries.
15. Models with coffee grinders: Check hopper for presence of foreign
objects before using.
16. The heating base and heating element is subject to residual heat
following a brewing cycle. Do not touch heating base or heating
element immediately after a brewing cycle. Allow to cool before
handling.
17. Do not place the appliance in a cabinet when in use. hopper for
presence of foreign objects before using.
SAVE THESE INSTRUCTIONS
This appliance is intended to be used in household and similar applications such as:
– Staff kitchen areas in shops, offices and other working environments;
– Farm houses;
– By clients in hotels, motels and other residential type environments;
– Bed and breakfast type environments
PRODUCT NOTICES
1. Place the appliance on a hard, flat, level surface to avoid interruption of airflow
underneath the espresso maker.
2. Do not operate the appliance with an empty water tank.
3. Keep the area above the appliance clear during use, as hot steam will escape the
appliance.
BVSTEM3300-013_23SEM1 (LA).indd 1-2BVSTEM3300-013_23SEM1 (LA).indd 1-2 2023/6/21 09:242023/6/21 09:24

English-3 English-4
DESCRIPTION OF THE APPLIANCE
Control Knob
Steam
OFF
Brew
6
7
9
8
10
3
4
2
5
1
1. Water tank cap
2. Dial control knob
3. Indicator light
4. Steam wand
5. Removable wand cover
6. Removable drip tray
7. Reusable coffee filter basket
8. Glass carafe with spill-proof lid
allows you to prepare up to 4
shots with a single brew
9. Extra-large portafilter
10. Coffee measuring scoop/
tamper
CAUTION: PRESSURE
In order to check if the appliance is under pressure, follow these steps:
1. Turn the control knob to the off position and unplug the appliance.
2. Rotate the control knob to the steam position . If steam comes out of the steam
wand, then the water tank is still under pressure. Turn the control knob to the off
position .
3. To release the pressure, hold a pitcher with water under the steam wand and immerse
it in the water. SLOWLY TURN THE CONTROL KNOB TO THE STEAM POSITION
AND RELEASE THE STEAM.
4. When the steam wand stops releasing steam, turn to the off position and slowly
remove the cap.
5. Do not remove the portafilter at any time during the brewing process or until pressure
is relieved.
6. Use caution when removing the portafilter. The metal parts may still be very hot. Also,
there may be hot water floating on the top of the filter.
7. If coffee does not drip from the portafilter, it could mean it is blocked. Allow the
appliance to cool down, and then release the steam with the instructions above.
The blockage may be caused by too finely ground coffee. See “PROBLEMS AND
CAUSES” section.
8. WHEN CLEANING THE STEAM WAND: Place a frothing pitcher or large cup with at
least 325 mL (11 oz.) capacity half full of water under the steam wand. Make sure the
tip of the steam wand is submerged in liquid before turning the control knob to the
steam position. Froth the water for approximately 15 seconds.
NOTE: In order for your unit to work properly time after time, clean the steam wand
after each use.
WARNING: The filling aperture must not be opened during use.
BVSTEM3300-013_23SEM1 (LA).indd 3-4BVSTEM3300-013_23SEM1 (LA).indd 3-4 2023/6/21 09:242023/6/21 09:24

English-5 English-6
BEFORE USING THE COFFEEMAKER
FOR THE FIRST TIME
CLEAN YOUR MACHINE:
To clean the inside of the unit, follow steps the below steps, using water only. Do not
immerse the appliance in water or attempt to reach any internal parts of the appliance.
NOTE: Portafilter is not dishwasher safe, hand wash only.
1. Wash the glass carafe, filter, portafilter and measuring spoon / tamper tool with mild
liquid detergent and a soft sponge or cloth.
CAUTION! Make sure the control knob is set to the position.
2. Remove the cap from the water tank.
3. Use the glass carafe to fill the water tank with filtered water. Screw the cap back on.
4. Insert the empty portafilter (without grounded coffee) into the
machine on the left and turn clockwise to lock in place (Figure
1). This can be difficult the first time you try it, but don’t worry.
The best way to learn is by looking at the shape of the top of
the portafilter. This can be inserted by placing it on the left and
securing it to the right. This may require force. The handle should
be aligned with the lock symbol and point directly towards you
when you stand in front of the machine.
5. Place the glass carafe under the portafilter (Figure 2).
6. Turn the machine control knob to the position. Keep the control
knob in the brew position until no more water comes out of the
portafilter.
7. Be sure to turn the control knob to the position and unplug the
appliance.
CAUTION! Do not immerse the power cord, plug, or espresso
machine in water or any other liquid. Do not remove the water tank
cap or filter basket until you release the pressure off the unit.
Figure 1
Figure 2
HOW TO BREW ESPRESSO
THE COFFEE
The coffee should be freshly ground, dark roasted variety. You may want to try a French or
Italian roast. Pre-ground coffee will only retain its flavor for 7 – 8 days, provided it is stored
in an air-tight container, in a cool, dark area. Do not store in a refrigerator or freezer. Whole
beans are recommended, to be ground just before use. Coffee beans stored in an air-tight
container will keep up to 4 weeks before they begin to lose their flavor.
THE GRIND
This is a vital step in the espresso making process and takes practice. The coffee must be
of a fine grind.
• The correct grind should look like salt.
• If the grind is too fine, the water will not flow through the coffee even under pressure.
This grind looks like powder and feels like flour when rubbed between fingers.
• If the grind is too coarse, the water flows through the coffee too fast, preventing a
full-flavored extraction. Be sure to use a quality grinder for uniform consistency in your
espresso grind. Oval shaped coffee grinders are not recommended because the grind
is not consistent.
HOW TO MAKE ESPRESSO COFFEE
1. Turn the control knob to the off position .
2. Fill the glass carafe with cold water up to the mark for the desired number of servings.
You are going to prepare espresso or cappuccino coffee. Never use warm or hot
water to fill the water tank.
3. Remove the cap from the water tank and pour the water into the tank. Be sure to
measure correctly the amount of water that is required. Do not fill the tank completely,
since there will not be enough space for steam generation.
ATTENTION: Do not pour water into the tank while the appliance is in functioning.
Check that the control knob is in the position .
4. Screw the cap back on the water tank. Make sure it stays correctly adjusted.
SERVINGS SIZE FINE ESPRESSO GROUND COFFEE WATER (COLD)
2 cups 2-cup marking on filter 2-cup mark on Glass Carafe
4 cups 4-cup marking on filter 4-cup mark on Glass Carafe
BVSTEM3300-013_23SEM1 (LA).indd 5-6BVSTEM3300-013_23SEM1 (LA).indd 5-6 2023/6/21 09:242023/6/21 09:24

English-7 English-8
PLACING THE COFFEE
1. Place the coffee filter basket in the portafilter.
2. Fill with freshly ground coffee up to the 2 or 4 cup mark indicated on the coffee filter
basket. Do not fill beyond the 4 cup mark. Wipe any excess coffee from the edge of
the portafilter. This will ensure a correct fit in the Coffee Maker.
ATTENTION: Gently compress the coffee. Do not overfill the filter. This can cause
clogging or spillage.
3. Place the portafilter under the brew head, move the filter retainer clip to the rearward
position, then position the handle to the left until it fits into the slot. Then slowly turn to
the right until the portafilter is located in the closed position.
4. Check the removable drip tray is in place.
5. Place the lid on the carafe, so the opening of the lid is towards the spout, and place
it on the drip tray. The handle of the portafilter and the handle of the jug must be
aligned.
6. Plug the power cord into an electrical outlet and turn the control knob to the symbol
which starts the brewing process. The light will turn on to indicate the coffee maker is
working.
7. The espresso will begin to flow into the carafe in approximately three to five minutes.
8. When the espresso has finished flowing into the carafe, turn the control knob to
the off position Unplug the power cord and allow the pressure in the machine to
released. Follow the procedure in the “CAUTION: PRESSURE” section of the page 4.
CAUTION: Do not remove the tank cap or portafilter at any time while the appliance
is under pressure or until it has cooled down. Follow procedure marked “CAUTION:
PRESSURE” to release pressure before removing cap.
9. Once the Brewer has cooled and all pressure has been released, remove the
portafilter from the brew head. Using the filter retainer clip to secure the filter basket
to the portafilter, rotate the portafilter down to empty it. Rinse the filter and portafilter
with water.
CAUTION: The metal parts of the portafilter may be very hot. Be sure to use the filter
lock when disposing of ground coffee. Cool these parts by rinsing them under cold
running water.
10. For cleaning instructions, see the “Cleaning your machine after each use” section.
HOW TO PREPARE CAPPUCCINOS
& MORE AT HOME
CAUTION! Do not remove the water tank cap or filter basket until you release the pressure
in the unit. Follow the instructions on page 4 before proceeding.
CAUTION! Make sure the unit is unplugged and the control knob is set to the position
before using the machine.
NOTE: This is a manual machine with no auto shut off feature. You can control how much
espresso is brewed and how long to froth the milk by turning the control knob.
Cappuccino coffee is espresso coffee with steamed milk and milk foam on top. Frothing
milk for cappuccino takes practice. Don’t be discouraged if you don’t do it perfectly the first
time. The milk should be half steamed (the bottom of the jug) and half frothed (the top of
the jug). It may take several tries before you perfect this process.
For best results, we recommend frothing the milk in a different pitcher and pouring the milk
into your coffee mug. The milk and the pticher should be cold. Do not use a carafe that has
recently been washed in lukewarm water.
1. The first step in the preparation of cappuccino is to prepare the espresso coffee. So
fill the glass carafe with cold water to the designated mark for the number of servings
desired. Never use warm or hot water to fill the Water Tank.
2. Follow steps in the “HOW TO BREW ESPRESSO” section.
3. Fill a mug halfway with cold milk and place next to the machine. Skim or 2% milk is
easier to froth.
4. If making 2 servings, stop espresso brewing at the 2-cup mark. Turn the control knob
to the Off position . If you prepare 4 servings, stop the preparation of espresso at
the 4-cup mark. Turn the control knob to the Off position .
5. You are now ready to froth and steam the milk. Hold the pitcher under the steam
wand so that the steam wand is slightly submerged in the milk. Slowly turn the control
knob to the steam position . Gently move the jar in a circular motion around the
steam tip for approximately 45 s. Remember: the milk and the pitcher must be very
cold before frothing.
6. When the milk has doubled in volume, or if you are using a beverage thermometer,
when the milk has reached 38°C, insert the steam wand further into the milk to further
heat it. Do not heat milk above 65°C. To avoid splashing hot milk, do not let the steam
wand rise above the surface of the milk. After you have finished frothing, turn the
control knob back to the off position .
7. You are ready to prepare the cappuccino coffee. REMEMBER: It’s 1/3 espresso, 1/3
steamed milk, and 1/3 milk froth. Pour the espresso into a cup with a capacity of at
least 150 ml. Then add the steamed milk to the espresso and using a spoon add the
foam.
8. Follow the instructions on page 4, in the section marked “CAUTION: PRESSURE”
to rinse any residual milk from the steam wand. It is important to properly clean the
steam wand after each use to ensure it continues to work properly.
9. Unplug power cord and allow coffeemaker to cool completely. Do not remove the tank
lid or portafilter until the pressure in the Brewer has been completely released. Follow
the procedures in the section marked “CAUTION: PRESSURE” on page 4 to relieve
pressure.
BVSTEM3300-013_23SEM1 (LA).indd 7-8BVSTEM3300-013_23SEM1 (LA).indd 7-8 2023/6/21 09:242023/6/21 09:24

English-9 English-10
TIPS TO FROTH
If you hear a gurgling sound, the tip of the steam wand is not submerged deep enough into
the milk. If you hear a grinding sound, the tip is inserted too deep into the milk. Adjust the
position of the jug as necessary.
• Ideal frothing should have a hissing sound and a swirling motion created in the
pitcher.
*Takes about 2.5 min to foam 120 ml of whole/2%/skim milk at 65 °C temperature.
You can use a thermometer to get accurate results.
• Properly frothed milk has a thick microfoam with a silky finish. Tap the pitcher lightly
to release any large air bubbles and swirl in a circular motion to blend the milk for a
silky texture.
• Clean the steam wand after each use.
CLEANING YOUR MACHINE
AFTER EACH USE
Keep your Oster
®
Espresso, Cappuccino & Latte Steamer running smoothly with proper
care after each use. Follow these simple steps to clean your machine:
CAUTION: DO NOT remove water tank cap or filter basket until pressure is released in
unit. Follow the instructions on page 4 before proceeding.
1. Remove the portafilter to discard the coffee beans. Lift the filter
retainer clip so it is positioned over the edge of the filter, hold in
place while you discard the coffee beans (Figure 3). This helps
keep the filter secured in position.
NOTE: Leaving the portafilter in the machine after brewing can
cause it to close improperly, which can lead to leaks and damaged
seal.
2. Rinse the portafilter with fresh water. Please note that the portafilter is NOT
dishwasher safe. Hand wash only!
NOTE: If you did not froth milk, skip steps 3-8.
3. Fill the water measuring jug to the steam mark (Figure 15 on next page) with water
and pour into the water tank.
4. Screw the cap back onto the water tank.
5. Fill a cup or frothing pitcher halfway with water and position so that the frothing wand
is submerged in the water.
6. Turn control knob to steam position and steam with water instead of milk for 15
seconds. This will help rinse the internal parts of the machine.
7. Once the steam wand is cool, remove and rinse the steam wand cover. The steam
wand cover is the black plastic piece. Just pull on the bottom to remove it.
8. Clean the steam wand with a damp cloth.
9. Remove the drip tray cover and empty the water or coffee from the drip tray. Dry with
a clean cloth. Clean the outer surface of the machine with a damp cloth. Do not use
steel wool pads or abrasive cleaners.
CAUTION: To protect against electrical shock, do not immerse cord, plug, or
appliance in water or any other liquid.
Figure 3
BVSTEM3300-013_23SEM1 (LA).indd 9-10BVSTEM3300-013_23SEM1 (LA).indd 9-10 2023/6/21 09:242023/6/21 09:24
English-11 English-12
CLEANING AND MAINTENANCE
BY THE USER
Once every 1 to 3 months, depending on use and type of water, it is recommended descale
the coffee maker to keep it working properly.
DESCALING THE INTERNAL PARTS
1. Make sure the control knob is in the position.
CAUTION: Do not remove the water tank cover or filter holder until release pressure
in unit. See instructions on page 4.
2. Fill the water tank to the top with undiluted white household
vinegar (Figure 4).
3. Brew just enough to get some vinegar to come out.
4. Steam just enough to get some vinegar to come out.
5. Unplug the machine.
6. Let the machine sit overnight with the vinegar solution inside the
water tank.
7. Dispose of the vinegar through the top opening of the machine, turning the machine
inside the sink.
8. Rinse the water tank with tap water, filling the tank halfway with water and pour the
water into the sink, repeating this step twice.
9. Brew and steam with fresh water at least 4 times or until there is no odor of vinegar.
MAINTENANCE BY THE USER:
This appliance contains no user-serviceable parts. Any Maintenance service that is not
described in the Cleaning section must be performed only by an authorized service
representative. Consult the guarantee available online.
CLEANING THE GLASS CARAFE
Hard water can leave white mineral deposits inside the carafe. The coffee discolors these
deposits, sometimes leaving brown spots on the inside from the jug. To remove these
stains, follow these simple steps:
1. Use a solution of equal parts hot water and white vinegar.
2. Let the solution sit in the jar for approximately 20 min and then throw it away
3. Wash and rinse carafe thoroughly using a soft cloth. Do not use cleaners abrasives.
These can damage the finish of the carafe, scratching it and causing it to crack.
Figure 4
USEFUL TIPS
Make sure the control knob is in the position before use the machine.
• The filter retainer clip must be in the rearward position when installing the filter.
• Do not try to turn the portafilter handle past the closed position.
• Do not overfill the filter with ground coffee, as this will cause improper sealing to the
portafilter, which could result in leaks and damage to the seal.
• For best results, use only high-quality ground espresso coffee quality.
• Do not leave excess ground coffee on the edge of the portafilter. Too much grain
ground on the edge would cause improper sealing, which could result in leaks and
damage to its seal.
• Do not turn the control knob to the brew or steam position with the water tank empty.
• Do not leave water in the water tank between uses.
• Make sure the steam wand is immersed in the milk or alternative milks before turning
the control knob to the steam position.
• Do not store the portafilter in the brew head. Remove portafilter after brewing. Leaving
the portafilter in the machine could cause improper closing, which could result in leaks
and damage to its seal.
• Do not fill the tank to the top with water.
• This is a manual machine with no auto power off feature. You can control the amount
of espresso that is brewed by turning the control knob.
• 2% milk creates better foam than alternative milks.
BVSTEM3300-013_23SEM1 (LA).indd 11-12BVSTEM3300-013_23SEM1 (LA).indd 11-12 2023/6/21 09:242023/6/21 09:24

English-13 English-14
PROBLEMS AND CAUSES
PROBLEM CAUSE SOLUTIONS
Coffee does not come out
• No water in reservoir.
• Coffee grind is too fine
• Too much coffee in the
filter basket.
• Water tank cap is
not secure, steam is
escaping.
• Appliance was not turned
on or plugged in.
• Coffee has been tamped/
compressed too much.
• Add water.
• Grind coffee medium ground.
• Fill filter basket only to 4-cup
mark.
• Tighten Water tank cap.
• Plug unit into electrical outlet.
Turn on.
• Refill filter basket with coffee
DO NOT TAMP.
Coffee comes out around
the edge of the lter holder
• Portafilter not rotated to
full lock position.
• Coffee grounds around
the filter basket rim.
• Too much coffee in the
filter head.
• Rotate Portafilter to full lock.
• Wipe off rim; fill only to 4-cup
mark.
• Fill only to 4-cup mark.
No steam is generated
• Water reservoir is empty.
• Too much water in the
reservoir – no room for
steam.
• Appliance is not turned
on.
• Steam wand is blocked.
• Fill reservoir with correct
amount of water. See Page 6.
• Empty some water from
reservoir.
• Turn on unit with control knob.
• Following frothing stage,
operate frothing function for
1 – 2 seconds to extract excess
milk. Or, turn off unit, allow unit
to cool, unplug unit and clean
out steam wand with a needle
or toothpick.
Milk is not foamy after
frothing
• Ran out of steam.
• Milk is not cold enough.
• Pour in the required amount of
water to make cappuccino.See
Page 8.
• Chill milk and frothing pitcher
prior to making cappuccino.
Coffee comes out too
quickly
• Ground coffee is too
coarse.
• Not enough coffee in
filter basket.
• Use a finer grind.
• Use more coffee.
Coffee is splattering out of
steam wand
• Water tank is empty
or low, not enough
pressure.
• Once unit has cooled, use more
water to brew espresso.
Espresso Recipes
Epre co Pann
Caf Bomo
Place in a small heavy glass:
1-1/2 to 2 tablespoons sweetened
condensed milk
Brew in the glass:
Small espresso
Serve with a spoon to stir just
before drinking.
Caf Cuan
Place in a small cup:
1/2 teaspoon sugar
Brew in the cup:
Small espresso
Stir to dissolve sugar.
If desired, place in a cup:
1/2 teaspoon sugar
Brew in the cup:
Small espresso
Stir to dissolve sugar,
then ll cup with:
Sweetened whipped cream
BVSTEM3300-013_23SEM1 (LA).indd 13-14BVSTEM3300-013_23SEM1 (LA).indd 13-14 2023/6/21 09:242023/6/21 09:24
English-15 English-16
Latte Recipes
Ice La
Place in a large cup:
1 tablespoon sugar
Brew in the cup:
Large espresso
Stir in:
1 cup ice cubes
1/2 cup whole or other milk
Pumpki Spic La
Place in a cup:
2 teaspoons brown sugar
Pinch of pumpkin pie spice
Brew in the cup:
Small latte
Stir to blend.
Nutell La
Place in a cup:
1 tablespoon Nutella (chocolate hazelnut spread)
Brew in the cup:
Small latte
Stir to blend.
Cappuccino Recipes
Caf Mch
Place in a cup:
2 teaspoons chocolate syrup
1/2 teaspoon sugar
Brew in the cup:
Small cappuccino
Stir to blend.
Top with additional foam if desired.
Carame Cappuccin
Place in a cup:
1 tablespoon caramel syrup
1/4 teaspoon sugar
Brew in the cup:
Small cappuccino
Stir to blend.
Top with additional foam if desired.
Swee Cappuccin
Place in a cup:
1/2 teaspoon sugar
Brew in the cup:
Small cappuccino
Stir to dissolve sugar.
Top with additional foam
if desired.
BVSTEM3300-013_23SEM1 (LA).indd 15-16BVSTEM3300-013_23SEM1 (LA).indd 15-16 2023/6/21 09:242023/6/21 09:24
Características Eléctricas / Electrical Characteristics
Modelo / Model Voltaje/Voltage Frecuencia/Frequency Potencia/Power
BVSTEM3300-013 127 V~ 60 Hz 950 W
La siguiente información es para México solamente.
The following information is intended for Mexico only.
Impreso en China
Printed in China
P.N. NWL0001531144
BVSTEM3300-013_23SM1 (LA)-GCDS_JC
© 2023 Sunbeam Products, Inc. Todos los derechos reservados.
Garantía limitada de un año – por favor consulte los detalles en el inserto.
© 2023 Sunbeam Products, Inc. All rights reserved.
One year limited warranty – please see insert for details.
www.oster.com
OSTERLATINO / OSTERBRASIL
CAFETERA DE VAPOR PARA ESPRESSO Y CAPPUCCINO OSTER
®
MODELOS: BVSTEM3300-013
LEA EL INSTRUCTIVO ANTES DE USAR EL APARATO
IMPORTADOR: NEWELL BRANDS DE MÉXICO S.A. DE C.V.
BLVD. MANUEL ÁVILA CAMACHO NO. 32 PISO 14, COL. LOMAS DE
CHAPULTEPEC III SECCIÓN, ALC. MIGUEL HIDALGO, C.P. 11000
CIUDAD DE MÉXICO, MÉXICO
ATENCIÓN AL CONSUMIDOR: 55 5366-0800 /800 506 1700
RFC SME570928G90
BVSTEM3300-013_23SEM1 (LA).indd 17BVSTEM3300-013_23SEM1 (LA).indd 17 2023/6/21 09:242023/6/21 09:24
Table of contents
Languages:
Other Oster Coffee Maker manuals

Oster
Oster BVSTDCDW12B User manual

Oster
Oster BVSTEM7300 User manual

Oster
Oster 3296 Technical specifications

Oster
Oster RF Series User manual

Oster
Oster BVST-JBX Series User manual

Oster
Oster BVSTDCUS-049 User manual

Oster
Oster BVSTDC4401 User manual

Oster
Oster BVSTEM6601R User manual

Oster
Oster BVSTPSTX97 Series User manual

Oster
Oster BVSTDCMV13 User manual

Oster
Oster BVSTDC3390 User manual

Oster
Oster 3188 User manual

Oster
Oster BVSTEM7701 User manual

Oster
Oster BVSTDC03B User manual

Oster
Oster BVSTEM6601 User manual

Oster
Oster BVSTDC4410 User manual

Oster
Oster BVSTEM6601 User manual

Oster
Oster BVSTDCS12B User manual

Oster
Oster LMX Series User manual

Oster
Oster Counterforms 4281 User manual