Oster FPSTMC6613A-L User manual

3-CUP MINI FOOD CHOPPER
MINI PICADORA DE ALIMENTOS DE 3 TAZAS
User Guide/ Guía del Usuario:
FPSTMC6613A-G
FPSTMC6613A-L
www.oster.com
P.N. 202295 Rev A
FPSTMC6613A-G_21ESM1
GCDS-OST1642083-LD
For product questions contact:
Sunbeam Consumer Service
USA : 1.800.334.0759
www.oster.com
©2021 Sunbeam Products, Inc. All rights reserved.
Distributed by Sunbeam Products, Inc., Boca Raton, Florida 33431.
Para preguntas sobre los productos llame:
Sunbeam Consumer Service
EE.UU.: 1.800.334.0759
www.oster.com
©2021 Sunbeam Products, Inc. Todos los derechos reservados.
Distribuido por Sunbeam Products, Inc., Boca Raton, Florida 33431.
Printed in China
Impreso en China
Safety
Seguridad
How to use
Cómo usar
Cleaning
Cuidado y Limpieza
Recipes
Recetas
Warranty
Garantía

www.oster.com www.oster.com
12
IMPORTANT SAFEGUARDS
When using electrical appliances, basic safety precautions should always be
followed to reduce the risk of fire, electric shock, and/or injury to persons
including the following:
1. Read all instructions before using this product.
2. To protect against electric shock, do not place or immerse cord, plugs, or
appliance in water or other liquid.
3. This appliance is not intended for use by children or by persons with
reduced physical, sensory, or mental capabilities, or lack of experience
and knowledge. Close supervision is necessary when any appliance is
used near children. Children should be supervised to ensure that they do
not play with the appliance. Keep the appliance and its cord out of reach
of children.
4. Turn the appliance OFF, then unplug from outlet when not in use, before
putting on or taking off parts and before cleaning. Allow to cool before
putting on or taking off parts, and before cleaning. To unplug, grasp the
plug and pull from the outlet. Never pull from the power cord.
5. Flashing light indicates ready to operate (models with stand-by mode).
Avoid any contact with blades or moveable parts. Keep fingers out of
discharge opening (if provided).
6. Do not operate any appliance with a damaged cord or plug or after the
appliance malfunctions, or has been damaged in any manner. Do not
attempt to replace or splice a damaged cord. Return appliance to the
manufacturer (see warranty) for examination, repair or adjustment.
7. For appliances with markings on plug blade: This appliance has
important markings on the plug blade. The attachment plug or entire
cordset (if plug is molded onto cord) is not suitable for replacement. If
damaged, the appliance shall be replaced.
8. The use of accessory attachments not recommended or sold by the
appliance manufacturer may cause fire, electric shock or injury.
9. Do not use outdoors or for commercial purposes.
10. Do not let cord hang over edge of table or counter, or touch hot surfaces,
including the stove.
11. Keep hands and utensils away from the cutting blade while chopping
food to reduce the risk of severe injury to persons or damage to the food
chopper. A scraper may be used but only when the food chopper is not
running.
12. Blades are sharp. Handle carefully, especially when removing the blades
from the bowl, emptying the bowl and during cleaning.
13. To reduce the risk of injury, never place cutting blade on base without
first putting bowl properly in place.
14. Be certain cover is securely locked in place before operating appliance.
Always wait until all moving parts have stopped before removing any lid
or cover.
15. Do not attempt to defeat the cover interlock mechanism.
16. Do not use appliance for other than intended use. Misuse can cause
injuries. Always use appliance on a dry, stable, level surface.
17. Do not operate this appliance when empty.
18. Always check bowl for presence of foreign objects before operating the
appliance.
19. Do not use bowl for food storage, unless otherwise indicated in the
operating instructions.
20. If mixing cup or bowl is chipped, cracked or damaged in any way,
discontinue use of product.
21. If blades appear to be damaged, discard food and discontinue use of
product.
SAVE THESE INSTRUCTIONS
HOUSEHOLD USE ONLY
North American models with polarized plugs:
POLARIZED PLUG
This appliance has a polarized plug (one blade wider than the other).
As a safety feature to reduce the risk of electrical shock, this plug is
intended to fit in a polarized outlet only one way. If the plug does not
fit fully in the outlet, reverse the plug. If it still does not fit, contact a qualified electrician. Do
not attempt to defeat this safety feature or modify the plug in any way. If the plug fits loosely
into the AC outlet or if the AC outlet feels warm do not use that outlet.

www.oster.com www.oster.com
34
POWER CORD INSTRUCTIONS:
A short power-supply cord or detachable power-supply cord is provided to
reduce risks resulting from becoming entangled in or tripping over a longer
cord. Longer detachable power-supply cords or extension cords are available
and may be used if care is exercised in their use. If a long detachable power-
supply cord or extension cord is used on short-cord models:
a. The marked electrical rating of the detachable power-supply cord or extension
cord should be at least as great as the electrical rating of the appliance;
b. When the product is of the grounded type, the extension cord shall be a
grounding type 3-wire cord; and
c. The longer cord should be arranged so that it will not drape over the
counter top or table top where it can be pulled on by children or tripped
over unintentionally.
Thank you for purchasing the Oster® 3-Cup Mini Food Chopper.
Before you use this product for the first time, please take a few moments
to read these instructions and keep it for reference. Pay particular attention
to the Safety Instructions provided. Please review the product service and
warranty statements.To learn more about Oster® products, please visit us at
www.oster.com or call us at 1-800-334-0759.
LEARNING ABOUT YOUR
3-CUP MINI CHOPPER
2-Speed Buttons
Motor
Cover
Chopping Blade
Whisk: For beating egg whites
(only available with model
FPSTMC6613A-G
Bowl
Storage lid (only available
with model FPSTMC6613A-L)
a
b
c
e
d
f
c
b
a
f
e
d
g
g

www.oster.com www.oster.com
56
5Remove the motor and cover and grasp the stem of the
chopping blade. Carefully remove it from the bowl. Empty
processed food from the bowl only after the chopping blade has
been removed.
CAUTION: Blades are sharp! Handle with care.
6To store leftovers, place the storage lid on-top of glass bowl. Note:
Storage lid does not create an air tight lock and is subject to
detaching from bowl if rotated or turned upside down.
FOOD QTY TIME
Almonds & Nuts
Fresh Herbs
Hard Cheese
Garlic Cloves
Chocolate
Onion
Tomatoes
Meat
Egg Whites
Whipping cream
1 1/3 Cup
1 loosely packed Cup
120 grams
1 Cup, peeled
120 grams
1 Cup, cut into quarters
180 grams
2 egg whites
1 cup
Pulse for 15 seconds for coarse chop.
Pulse for 20 seconds for fine chop.
Chop for 50 seconds
Chop for 50 seconds
Pulse for 20 seconds
Chop for 30 seconds
Pulse for 15 seconds
Pulse for 45 seconds to whip
Note: Do not exceed max liquid amount for whipping as it
may cause overflow from unit.
HOW TO:
Assembling the Unit
1 Remove all packaging materials before using.
2
Before using, wash cover, bowl, blade and creamer in warm
soapy water; rinse and dry thoroughly, see CARE AND CLEANING.
3 Place bowl on a flat surface and slide the chopping blade over
the metal shaft at the bottom of the bowl.
4 Place the cover on top of the bowl, so that the upper stem of
the chopping blade comes through the hole in the cover. The
two cut outs on the cover should match up with the two
protrusion on the side of the bowl. Cover needs to be aligned
with bowl.
5 Place the motor on top of the cover, rotating if necessary to
drop into place. The motor will “float” in the opening of the
cover, so that it can be pressed down further to activate the
chopping blade.
Chopping
1Cut food into approximately 1.5 cm
(1/2 inch) pieces and place up to 3
cups of dry food in the bowl at a time.
2Place the cover and motor on top of
the bowl.
3Plug the cord into an outlet. Press and
hold either top silver buttons on the
top of the motor to activate the
chopping blade. Button“I”is for softer
ingredients and button“II”is for harder ingredients.
NOTE: To avoid liquefying the ingredients, do not over chop
them. Use short presses to pulse until desired consistency is
achieved.
4When finished chopping release button, allow chopping
blade to stop rotating before removing contents.

www.oster.com www.oster.com
78
1 Year Limited Warranty
Sunbeam Products, Inc. (“Sunbeam”) warrants that for a period of one
year from the date of initial retail purchase, this product will be free from
defects in material and workmanship, when used in accordance with the
instructions provided.
Sunbeam, at its option, will repair or replace this product or any
component of the product found to be defective during the warranty
period.
Replacement will be made with a new or remanufactured product
or component. If the product is no longer available, replacement may
be made with a similar product of equal or greater value. This is your
exclusive warranty. Do NOT attempt to repair or adjust any electrical or
mechanical functions on this product. Doing so will void this warranty.
This warranty is valid for the original retail purchaser from the date of
initial retail purchase and is not transferable. Keep the original sales
receipt. Proof of purchase is required to obtain warranty performance.
Sunbeam dealers, service centers, or retail stores selling Sunbeam
products do not have the right to alter, modify or any way change the
terms and conditions of this warranty.
This warranty does not cover normal wear of parts or damage resulting
from any of the following: negligent use or misuse of the product, use on
improper voltage or current, use contrary to the operating instructions,
disassembly, repair or alteration by anyone other than Sunbeam or an
authorized Sunbeam service center. Further, the warranty does not
cover: Acts of God, such as fire, flood, hurricanes and tornadoes.
CARE & CLEANING
This appliance should be cleaned after every use.
1Unplug the 3-cup chopper when not in use and before
cleaning.
CAUTION: Do not place or immerse cord, plugs, or
appliance in water or other liquid. Allow the chopping
blade to stop rotating before disassembling.
2Wash the bowl, cover and chopping blade in warm soapy
water. Rinse and dry thoroughly.
NOTE: Cover, bowl, chopping blade, storage lid and whisk
attachment can be placed in dishwasher.
CAUTION: Blades are sharp! Handle with care.
3To clean the motor, wipe the exterior with a damp
cloth or sponge. Dry thoroughly with a soft cloth.
Do not use with hot foods.
This appliance has no user serviceable parts. Any servicing
beyond that described in the Cleaning Section should be
performed by an Authorized Service Representative only.
See warranty section.

www.oster.com www.oster.com
910
PRECAUCIONES IMPORTANTES
Cuando se utiliza cualquier artefacto eléctrico siempre se deben seguir
precauciones básicas de seguridad, incluyendo las siguientes:
1. Lea todas las instrucciones antes de usar.
2. A fin de protegerse contra una descarga eléctrica, no coloque ni sumerja
el cable, los enchufes ni el aparato en agua ni ningún otro líquido.
3. Este aparato no está diseñado para ser utilizado por los niños ni por
personas cuyas capacidades físicas, sensoriales o mentales estén
reducidas, o carezcan de experiencia y conocimiento. Todo aparato
utilizado cerca de los niños requiere la supervisión cercana de un adulto.
Los niños deberán estar bajo supervisión para cerciorarse de que no
jueguen con el aparato. Mantenga el aparato y su cable alejados del
alcance de los niños.
4. Apague el aparato y luego desenchúfelo del tomacorriente cuando no
esté en uso, antes de instalarle o retirarle piezas y antes de limpiarlo.
Permita que se enfríe antes de instalarle o retirarle piezas y antes de
limpiarlo. Para desenchufar, sujete firmemente el enchufe y hálelo fuera
del tomacorriente.
5. Una luz parpadeante indica que el aparato está listo para utilizar
(modelos con el modo de espera). Evite el contacto con las cuchillas y las
piezas móviles. Mantenga los dedos alejados del orificio de descarga (si
es proporcionado).
6. No opere ningún aparato que tenga un cable o enchufe dañado o
después de presentar un fallo en su funcionamiento o se haya dañado
de manera alguna. No intente reemplazar o cortar un cable dañado.
Devuelva el aparato al fabricante (consulte la garantía) para su revisión,
reparación o ajuste.
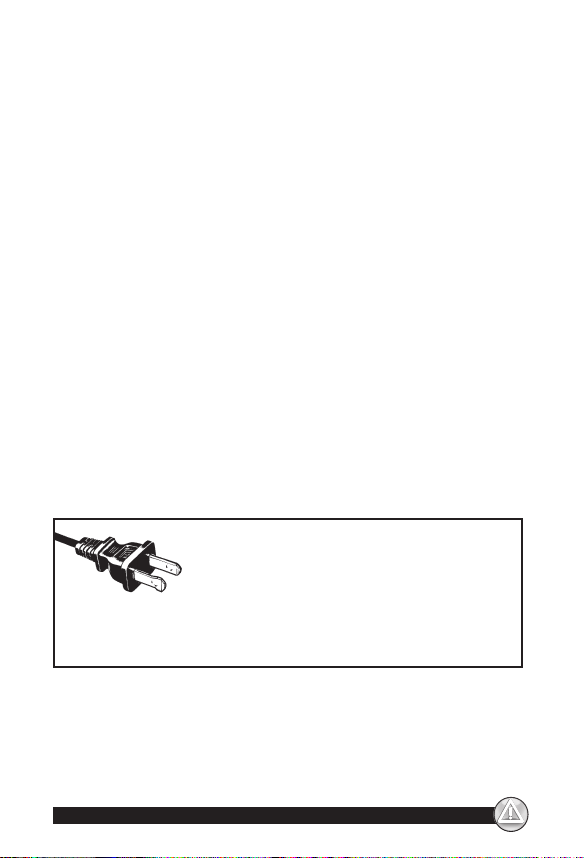
7. Para aparatos con marcas en el contacto del enchufe: Este aparato
tiene marcas importantes en el contacto del enchufe. Ni el enchufe
del accesorio ni el cable (si el enchufe está moldeado en el cable) debe
ser reemplazado. Si alguno de los dos se daña, se debe reemplazar el
aparato.
8. El uso de accesorios no recomendados ni vendidos por el fabricante del
producto podría provocar incendio, descarga eléctrica o lesión personal.
9. No utilice al exterior ni para propósitos comerciales.
What are the limits on Sunbeam’s Liability?
Sunbeam shall not be liable for any incidental or consequential damages
caused by the breach of any express, implied or statutory warranty or
condition. Except to the extent prohibited by applicable law, any implied
warranty or condition of merchantability or fitness for a particular
purpose is limited in duration to the duration of the above warranty.
Sunbeam disclaims all other warranties, conditions or representations,
express, implied, statutory or otherwise. Sunbeam shall not be liable for
any damages of any kind resulting from the purchase, use or misuse of, or
inability to use the product including incidental, special, consequential
or similar damages or loss of profits, or for any breach of contract,
fundamental or otherwise, or for any claim brought against purchaser
by any other party. Some provinces, states or jurisdictions do not allow
the exclusion or limitation of incidental or consequential damages
or limitations on how long an implied warranty lasts, so the above
limitations or exclusion may not apply to you. This warranty gives you
specific legal rights, and you may also have other rights that vary from
province to province, state to state or jurisdiction to jurisdiction.
How to Obtain Warranty Service
In the U.S.A.
If you have any question regarding this warranty or would like to obtain
warranty service, please call 1-800-334-0759 and a convenient service
center address will be provided to you.
In the U.S.A., this warranty is offered by Sunbeam Products, Inc. located in
Boca Raton, Florida 33431.
If you have any other problem or claim in connection with this product,
please write our Consumer Service Department.
PLEASE DO NOT RETURNTHIS PRODUCT TO THIS ADDRESS OR THE
PLACE OF PURCHASE

3-CUP MINI FOOD CHOPPER
MINI PICADORA DE ALIMENTOS DE 3 TAZAS
User Guide/ Guía del Usuario:
FPSTMC6613A-G
FPSTMC6613A-L
www.oster.com
P.N. 202295 Rev A
FPSTMC6613A-G_21ESM1
GCDS-OST1642083-LD
For product questions contact:
Sunbeam Consumer Service
USA : 1.800.334.0759
www.oster.com
©2021 Sunbeam Products, Inc. All rights reserved.
Distributed by Sunbeam Products, Inc., Boca Raton, Florida 33431.
Para preguntas sobre los productos llame:
Sunbeam Consumer Service
EE.UU.: 1.800.334.0759
www.oster.com
©2021 Sunbeam Products, Inc. Todos los derechos reservados.
Distribuido por Sunbeam Products, Inc., Boca Raton, Florida 33431.
Printed in China
Impreso en China
Safety
Seguridad
How to use
Cómo usar
Cleaning
Cuidado y Limpieza
Recipes
Recetas
Warranty
Garantía
Table of contents
Other Oster Kitchen Appliance manuals

Oster
Oster CKSTSKFM12SB User manual

Oster
Oster Electric Skillet User manual

Oster
Oster 2600 SERIES User manual

Oster
Oster 4861 User manual

Oster
Oster CKSTSKSH14 User manual

Oster
Oster CKSTSKFM12 User manual

Oster
Oster FPSTBW8050-KIT User manual

Oster
Oster Electronic Wine Vacuum Cork User manual

Oster
Oster JusSimple User manual

Oster
Oster 2614 User manual

Oster
Oster FPSTEMM803 User manual

Oster
Oster 3165 Technical specifications

Oster
Oster FPSTJE320S User manual

Oster
Oster FPSTHB2620-049 User manual

Oster
Oster CKSTPCECOV57 User manual

Oster
Oster BVST User manual

Oster
Oster 4798 User manual

Oster
Oster ACTIFIT BLSTAFB User manual

Oster
Oster FPSTJE318C User manual

Oster
Oster 4801 User manual