manuals.online logo
Brands
  1. Home
  2. •
  3. Brands
  4. •
  5. OttLite
  6. •
  7. Outdoor Light
  8. •
  9. OttLite 20M83AB2 User manual

OttLite 20M83AB2 User manual

ENGLISH
CONGRATULATIONS!
You’ve purchased the finest in natu-
ral lighting technology with your new
OttLite®product.
STEP 1:
PRODUCT REGISTRATION FORM
Please complete the enclosed Product
Registration Form and return it today
by mail, or register online by going to:
OttLite.com/warranty.
WARNING: To prevent electric shock,
make sure the lamp is not plugged in
until all assembly steps are complete.
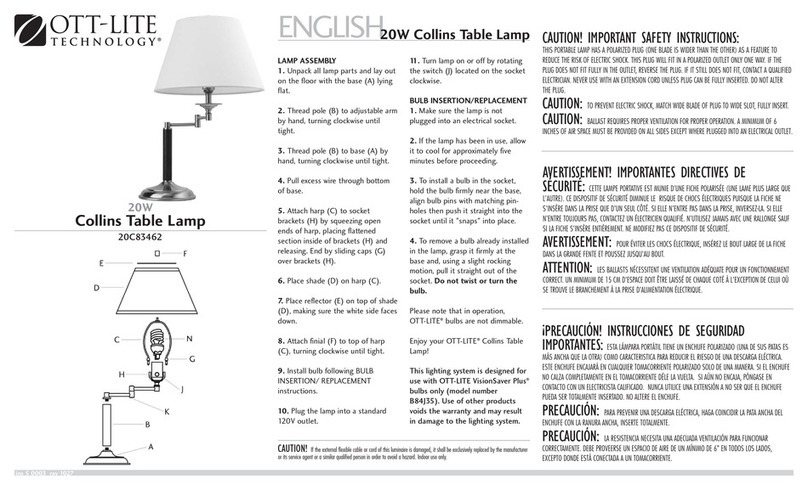
STEP 2: LAMP ASSEMBLY
1. Make sure the lamp is not plugged
into an electrical socket.
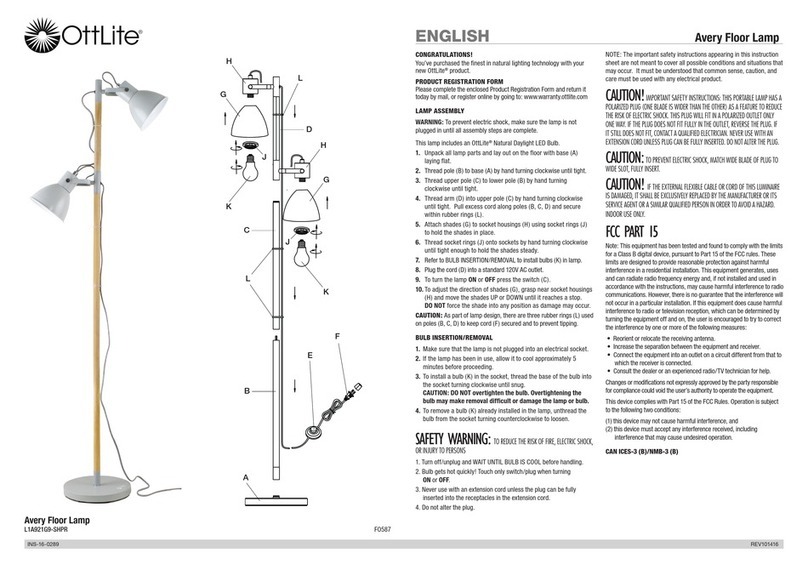
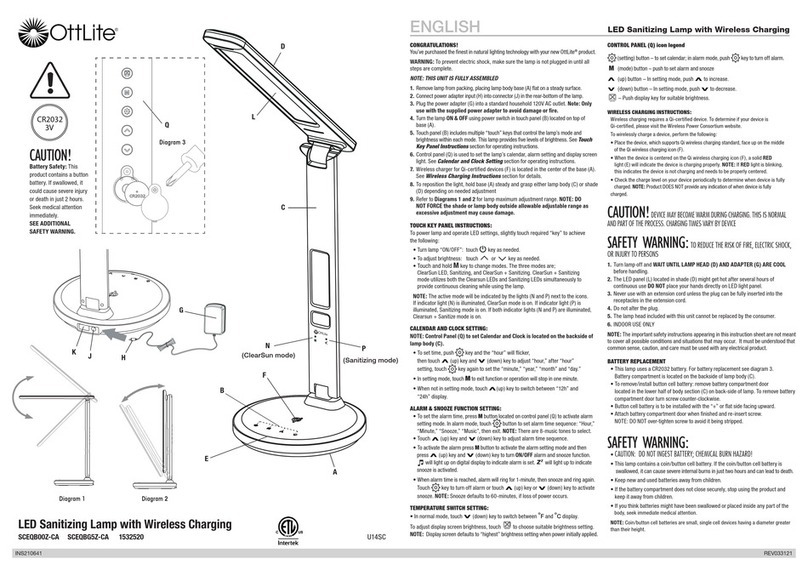
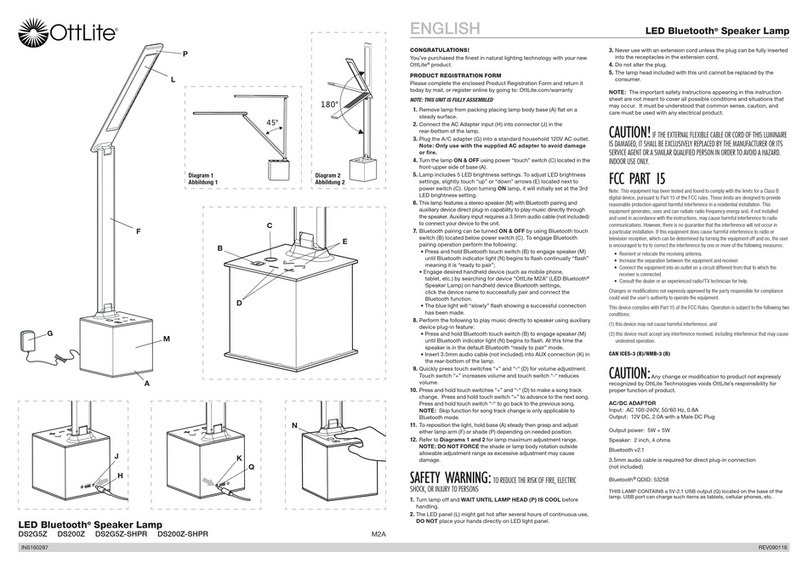
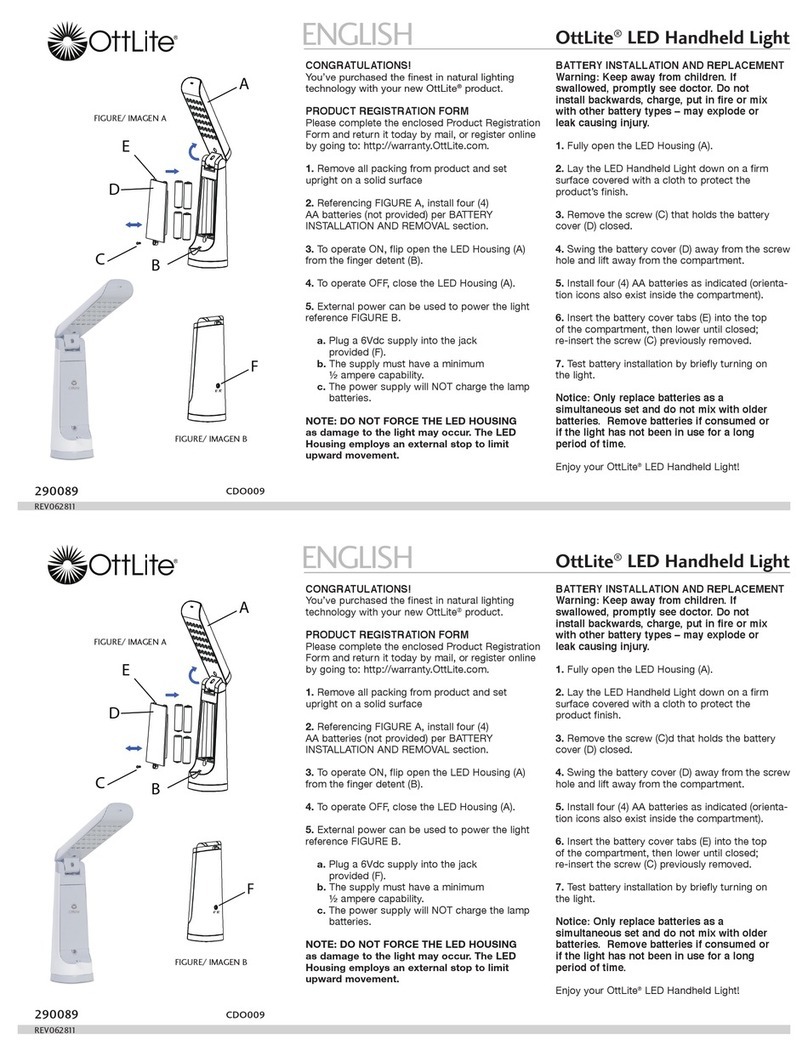
2. Unpack all lamp parts and lay out on
the floor with the base (A) lying flat.
3. Thread pole (B) to base (A) by hand,
turning clockwise until tight.
4. Thread arm (L) to pole (B).
5. If installed, remove socket ring (C)
from socket assembly (F).
6. Place shade (E) on socket assembly
(F).
7. Secure shade (E) in place by thread-
ing socket ring (C) onto socket
assembly (F) and firmly tighten by
hand.
8. Install bulb (K) following BULB
INSERTION/REPLACEMENT
instructions.
9. Plug the lamp into a standard 120V
outlet.
10. Adjust shade height and angle by
turning thumb levers (H, J) coun-
terclockwise to loosen, reposition
shade then turn thumb levers (H, J)
clockwise to tighten.
11. Turn lamp on or off by rotating the
switch (G) located on the socket
clockwise.
STEP 3:
BULB INSERTION/REPLACEMENT
1. Make sure the lamp is not plugged
into an electrical socket.
2. If the lamp has been in use, allow
it to cool approximately 5 minutes
before proceeding.
3. To install a bulb (K) in the socket,
grasp the bulb firmly in your hand
and push the bulb straight into the
socket by applying pressure to the
base of bulb, until it “snaps” into
place. Do not apply pressure to the
glass end of the bulb.
4. To remove a bulb (K) already
installed in the lamp, grasp it firmly
in your hand and pull it straight out
of the socket. Do not twist or turn
the bulb while removing it from the
socket.
5. Turn lamp on or off by rotating the
switch (G), located on the socket,
clockwise.
Please note that in operation, OttLite®
bulbs are not dimmable.
Enjoy your OttLite®Marietta Desk
lamp!
This lighting system is designed
for use with OttLite®type tubes
(Style Number SB20-M). Use of other
products voids the warranty and may
result in damage to the lighting sys-
tem.
CAUTION! IMPORTANT SAFETY INSTRUCTIONS:
THIS PORTABLE LAMP HAS A POLARIZED PLUG (ONE BLADE IS WIDER THAN THE OTHER) AS A FEATURE TO
REDUCE THE RISK OF ELECTRIC SHOCK. THIS PLUG WILL FIT IN A POLARIZED OUTLET ONLY ONE WAY. IF THE
PLUG DOES NOT FIT FULLY IN THE OUTLET, REVERSE THE PLUG. IF IT STILL DOES NOT FIT, CONTACT A
QUALIFIED ELECTRICIAN. NEVER USE WITH AN EXTENSION CORD UNLESS PLUG CAN BE FULLY INSERTED.
DO NOT ALTER THE PLUG.
CAUTION: TO PREVENT ELECTRIC SHOCK, MATCH WIDE BLADE OF PLUG TO WIDE SLOT,
FULLY INSERT.
AVERTISSEMENT! IMPORTANTES DIRECTIVES DE
SÉCURITÉ:
CETTE LAMPE PORTATIVE EST MUNIE D’UNE FICHE POLARISÉE (UNE LAME PLUS LARGE QUE L’AUTRE). CE
DISPOSITIF DE SÉCURITÉ DIMINUE LE RISQUE DE CHOCS ÉLECTRIQUES PUISQUE LA FICHE NE S’INSÈRE DANS
LA PRISE QUE D’UN SEUL CÔTÉ. SI ELLE N’ENTRE PAS DANS LA PRISE, INVERSEZ-LA. SI ELLE N’ENTRE
TOUJOURS PAS, CONTACTEZ UN ÉLECTRICIEN QUALIFIÉ. N’UTILISEZ JAMAIS AVEC UNE RALLONGE SAUF SI
LA FICHE S’INSÈRE ENTIÈREMENT. NE MODIFIEZ PAS CE DISPOSITIF DE SÉCURITÉ.
AVERTISSEMENT: POUR ÉVITER LES CHOCS ÉLECTRIQUE, INSÉREZ LE BOUT LARGE DE
LA FICHE DANS LA GRANDE FENTE ET POUSSEZ JUSQU’AU BOUT.
¡PRECAUCIÓN! INSTRUCCIONES DE SEGURIDAD
IMPORTANTES:
ESTA LÁMPARA PORTÁTIL TIENE UN ENCHUFE POLARIZADO (UNA DE SUS PATAS ES MÁS ANCHA QUE LA
OTRA) COMO CARACTERISTICA PARA REDUCIR EL RIESGO DE UNA DESCARGA ELÉCTRICA. ESTE ENCHUFE
ENCAJARÁ EN CUALQUIER TOMACORRIENTE POLARIZADO SOLO DE UNA MANERA. SI EL ENCHUFE NO CALZA
COMPLETAMENTE EN EL TOMACORRIENTE DÉLE LA VUELTA. SI AÚN NO ENCAJA, PÓNGASE EN CONTACTO
CON UN ELECTRICISTA CALIFICADO. NUNCA UTILICE UNA EXTENSIÓN A NO SER QUE EL ENCHUFE PUEDA SER
TOTALMENTE INSERTADO. NO ALTERE EL ENCHUFE.
PRECAUCIÓN: PARA PREVENIR UNA DESCARGA ELÉCTRICA, HAGA COINCIDIR LA PATA ANCHA
DEL ENCHUFE CON LA RANURA ANCHA, INSERTE TOTALMENTE.
20w Marietta Table Lamp
CAUTION! If the external flexible cable or cord of this luminaire is damaged, it shall be exclusively replaced by the
manufacturer or its service agent or a similar qualified person in order to avoid a hazard. Indoor use only.
INS140101 REV032114
20w Marietta Table Lamp
20M83AB2 20M30BZD 20M48BZ1 S2913
A
B
L
J
H
F
G
E
K
C
FÉLICITATIONS!
Vous avez fait l’achat de la plus
innovatrice technologie naturelle et de
renom en éclairage avec votre produit
OttLite.®
ÉTAPE 1:
FORMULAIRE D’ENREGISTREMENT
DE PRODUIT
Compléter le formulaire d’enregistrement
qui est inclus pour votre produit et nous
le retourner dès aujourd’hui par le retour
du courrier, ou enregistrez-vous en ligne
en allant à :www.ottlite.com/warranty.
AVERTISSEMENT: Pour éviter les
chocs électriques, assurez-vous que
la lampe ne soit pas branchée avant
d’avoir effectué toutes les étapes
de montage.
ÉTAPE 2:
ASSEMBLAGE DE LA LAMPE
1. Assurez-vous que la lampe n’est pas
branchée dans une prise de courant
électrique.
2. Déballez toutes les pièces de la
lampe et disposez-les par terre avec
le socle (A) posé à plat.
3. Fileter la tige (B) à la base (A) à la
main, en tournant dans le sens des
aiguilles d’une montre jusqu’à être
fermement serrée.
4. Bras fileté (L) à la barre (B).
5. Si installé, retirez l’anneau de douille
(C) de l’assemblage douille (F).
6. Placer l’abat-jour (E) sur
l’assemblage douille (F).
7. Sécuriser l’abat-jour (E) place en
filetant l’anneau de douille (C) sur
l’assemblage douille (F) et en serrant
fermement à la main.
8. Montez l’ampoule (K) en suivant
les instructions INSERTION/
REMPLACEMENT DE L’AMPOULE.
9. Branchez la lampe dans une prise
standard de 120V.
10. Ajuster la hauteur et l’angle de l’abat-
jour en tournant les gâchettes de
pouce (H, J) dans le sens contraire
des aiguilles d’une montre pour
dessérer, repositionner l’abat-jour
puis touner les gâchettes de pouce
(H, J) dans le sens des aiguilles
d’une montre pour serrer.
11. Allumez ou éteignez la lampe en
faisant pivoter l’interrupteur (G) dans
le sens des aiguilles d’une montre.
ÉTAPE 3:
INSERTIONREMPLACEMENT
DE L’AMPOULE
1. Assurez-vous que la lampe n’est pas
branchée dans une prise de courant
électrique.
2. Si la lampe a été utilisée, laissez-la
refroidir pendant environ 5 minutes
avant de continuer.
3. Pour installer une ampoule (K)
dans la douille, attrapez fermement
l’ampoule et placez-la directement
dans la douille en appliquant
une pression légère sur la base
de l’ampoule jusqu’à ce qu’elle
« s’enclenche » en position.
N’appliquez pas de pression sur
l’extrêmité en verre de l’ampoule.
4. Pour retirer une ampoule (K) déjà
installée dans la lampe, attrapez-la
fermement et sortez-la directement
de la douille. Ne faites pas pivoter
ou ne tournez pas l’ampoule
lorsque vous la retirez de la douille.
5. Allumez ou éteignez la lampe en
faisant pivoter l’interrupteur (G) dans
le sens des aiguilles d’une montre.
Veuillez noter qu’une fois en marche,
l’intensité des ampoules OttLite®ne peut
pas être réglée.
Profitez de votre lampe de table
Marietta d’OttLite®!
Ce système d’éclairage est conçu
pour être utilisé avec les tubes
OttLite®type (numéro de style
SB20-M). L’utilisation d’autres
produits annule la garantie et risque
FRANÇAIS Lampe de Table Marietta 20w
ATTENTION! Si le câble ou le cordon souple externe de ce lampadaire est endommagé, celui-ci doit être
remplacé exclusive-ment par le fabricant, son agent de service ou toute personne compétente afin d’éviter tout danger. Pour usage
à l’intérieur seulement.
¡FELICITACIONES!
Usted acaba de adquirir la mejor
tecnología de iluminación natural
con su nuevo producto OttLite.®
PASO 1:
FORMULARIO DE REGISTRO
Por favor, llene el Formulario de Registro
de Producto anexo y envíelo por
correo hoy mismo, o regístrese en línea
visitando: OttLite.com/warranty.
ADVERTENCIA: Para prevenir un
choque eléctrico, cerciórese de que
la lámpara no se conecte hasta que
se complete el ensamblaje y todos
los pasos.
PASO 2:
ENSAMBLAJE DE LÁMPARA
1. Asegúrese que la lámpara no esté
enchufada al tomacorriente.
2. Desempaque todas las piezas
de la lámpara y póngalas sobre
el piso poniendo plana la base (A).
3. Enrosque manualmente el poste
(B) en la base (A), girándolo en la
dirección de las manecillas del reloj,
hasta que quede apretado.
4. Enrosque el brazo (L) al poste (B).
5. Si ya está instalado, retire el aro
del soquete (C) del conjunto
de piezas del soquete (F).
6. Coloque la pantalla (E) sobre el
conjunto de piezas del soquete (F).
7. Asegure la pantalla (E) en su lugar,
enroscando el aro del soquete (C) en
el conjunto de piezas del soquete (F)
y apriete firmemente con la mano.
8. Instale el bombillo (K) siguiendo
las instrucciones de INSTALACIÓN/
REEMPLAZO DE BOMBILLO.
9. Conecte la lámpara en un
tomacorriente estándar de 120V.
10. Ajuste la altura y el ángulo
de la pantalla girando las palancas
de dedo (H, J) en contra de las
manecillas del reloj para aflojarlos,
vuelva a colocar la pantalla y gire
las palancas de dedo (H, J) en
la dirección de las manecillas del
reloj, hasta que queden apretados.
11. Encienda y apague la lámpara
girando el interruptor del soquete (G)
en dirección de las manecillas
del reloj.
PASO 3:
INSTALACIÓN/REEMPLAZO
DE BOMBILLO
1. Asegúrese que la lámpara no está
conectada a un tomacorriente.
2. Si la lámpara ha estado en uso,
permita que se enfríe durante
aproximadamente 5 minutos antes
de proceder.
3. Para instalar un bombillo (K) en
el soquete, tómelo firmemente en
mano y empuje el bombillo derecho
hacia el soquete aplicando presión
a la base hasta que “encaje” en su
sitio. No aplique presión al cristal del
bombillo.
4. Para retirar el bombillo (K) que ya
está instalado en la lámpara, tómelo
firmemente en su mano y hálelo del
soquete. No gire o de vuelta al
bombillo al retirarlo del soquete.
5. Encienda y apague la lámpara
girando el interruptor del soquete (G)
en dirección de las manecillas
del reloj.
Por favor tenga en cuenta que durante
la operación, los bombillos OttLite®
no son graduables.
¡Disfrute su lámpara de mesa
Marietta de OttLite®!
Este sistema de iluminación
está diseñado para ser utilizado
únicamente con bombillo OttLite®
typo (número de estilo SB20-M).
El uso de otros productos anula la
garantía y pudiera resultar en daños
al sistema de iluminación.
ESPAÑOL
¡PRECAUCIÓN! Si el cable o cordón flexible externo de esta luminaria está dañado, debe ser exclusiva-
mente reemplazado por el fabricante o su agente de servicio o una persona calificada similar a fin de evitar un riesgo. Sólo para
uso en interiores.
Lámpara de Mesa Marietta 20w
INS140101 REV032114
20w Marietta Table Lamp
20M83AB2 20M30BZD 20M48BZ1 S2913
A
B
L
J
H
F
G
E
K
C

This manual suits for next models

2

Other OttLite Outdoor Light manuals

OttLite X12478 User manual

OttLite

OttLite X12478 User manual

OttLite CDO009 User manual

OttLite

OttLite CDO009 User manual

OttLite 15486RBS User manual

OttLite

OttLite 15486RBS User manual

OttLite 2598311P User manual

OttLite

OttLite 2598311P User manual

OttLite Hampton User manual

OttLite

OttLite Hampton User manual

OttLite DS2G5Z User manual

OttLite

OttLite DS2G5Z User manual

OttLite 25992PB2 User manual

OttLite

OttLite 25992PB2 User manual

OttLite CS59029 User manual

OttLite

OttLite CS59029 User manual

OttLite 25C92462 User manual

OttLite

OttLite 25C92462 User manual

OttLite EasyView CSP57WGC User manual

OttLite

OttLite EasyView CSP57WGC User manual

OttLite Avery User manual

OttLite

OttLite Avery User manual

OttLite L1A83219-SHPR User manual

OttLite

OttLite L1A83219-SHPR User manual

OttLite 8FTPN4 User manual

OttLite

OttLite 8FTPN4 User manual

OttLite F26WGC User manual

OttLite

OttLite F26WGC User manual

OttLite Cambridge Floor Lamp User manual

OttLite

OttLite Cambridge Floor Lamp User manual

OttLite Alexander Floor Lamp User manual

OttLite

OttLite Alexander Floor Lamp User manual

OttLite 25883A32 User manual

OttLite

OttLite 25883A32 User manual

OttLite 571PN3 User manual

OttLite

OttLite 571PN3 User manual

OttLite 526WG3 User manual

OttLite

OttLite 526WG3 User manual

OttLite V23WGT User manual

OttLite

OttLite V23WGT User manual

OttLite 20C83462 User manual

OttLite

OttLite 20C83462 User manual

OttLite SCEQB00Z-CA User manual

OttLite

OttLite SCEQB00Z-CA User manual

OttLite 25783ABR User manual

OttLite

OttLite 25783ABR User manual

OttLite VisionSaver Plus Marietta User manual

OttLite

OttLite VisionSaver Plus Marietta User manual

Popular Outdoor Light manuals by other brands

Vista 2165 installation instructions

Vista

Vista 2165 installation instructions

Griven DUNE instructions

Griven

Griven DUNE instructions

Sagitter MICROBAR 54C user manual

Sagitter

Sagitter MICROBAR 54C user manual

Unilamp FLEXILINK instruction manual

Unilamp

Unilamp FLEXILINK instruction manual

LIGMAN BRISBANE 5 manual

LIGMAN

LIGMAN BRISBANE 5 manual

Landa IM 5000 MIRA Series quick start guide

Landa

Landa IM 5000 MIRA Series quick start guide

LIGMAN ODESSA 19 installation manual

LIGMAN

LIGMAN ODESSA 19 installation manual

LightPro Emerald 3 Manual and safety instructions

LightPro

LightPro Emerald 3 Manual and safety instructions

LIGMAN EU-20256 Installation and service manual

LIGMAN

LIGMAN EU-20256 Installation and service manual

screwfix 3345F Instruction leaflet

screwfix

screwfix 3345F Instruction leaflet

LIGMAN LADOR 42 installation manual

LIGMAN

LIGMAN LADOR 42 installation manual

Inspire Mood PL-0212-BK instruction manual

Inspire

Inspire Mood PL-0212-BK instruction manual

WOODLAND SCENICS JUST PLUG JP5953 quick start guide

WOODLAND SCENICS

WOODLAND SCENICS JUST PLUG JP5953 quick start guide

Vaxcel T0649 Assembly and installation instructions

Vaxcel

Vaxcel T0649 Assembly and installation instructions

LIGMAN NYB-30002 installation manual

LIGMAN

LIGMAN NYB-30002 installation manual

Nemo SKILLED installation instructions

Nemo

Nemo SKILLED installation instructions

STEINEL SensorLight L400 S user manual

STEINEL

STEINEL SensorLight L400 S user manual

Silicon Solar TM1218GH-1W instruction manual

Silicon Solar

Silicon Solar TM1218GH-1W instruction manual

manuals.online logo
manuals.online logoBrands
  • About & Mission
  • Contact us
  • Privacy Policy
  • Terms and Conditions

Copyright 2025 Manuals.Online. All Rights Reserved.