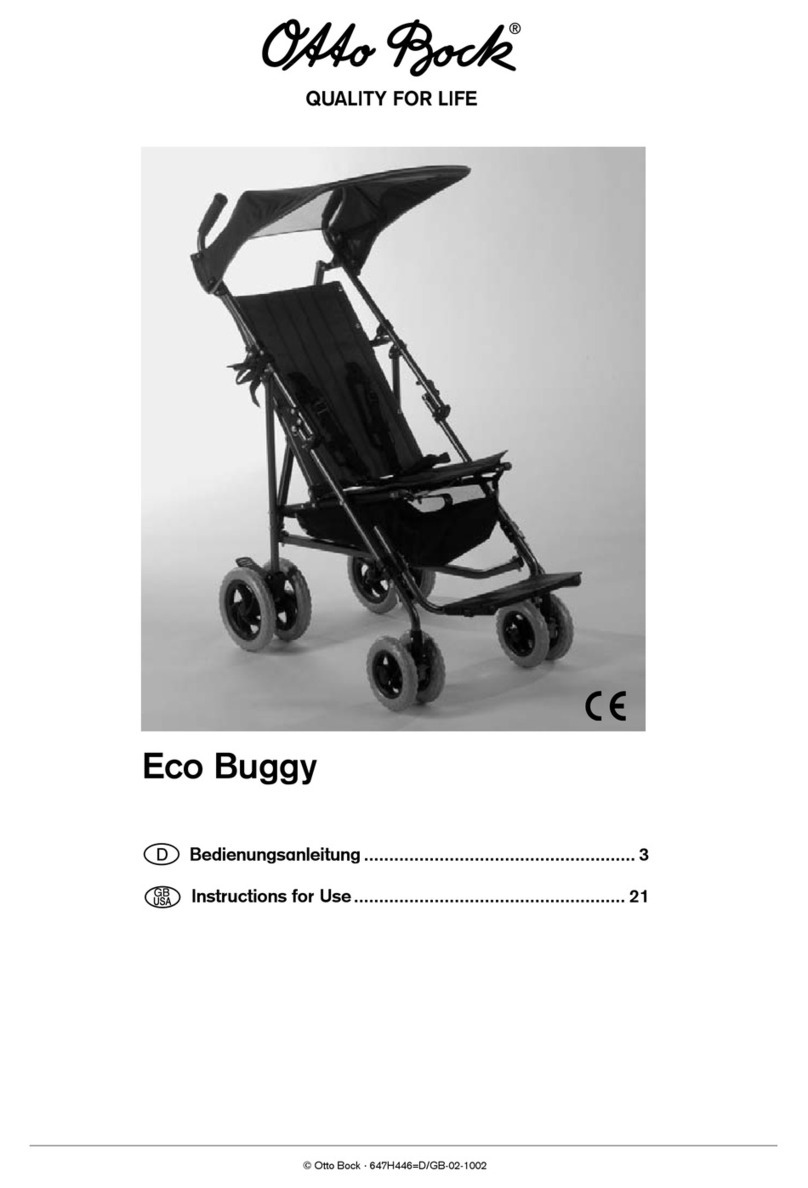
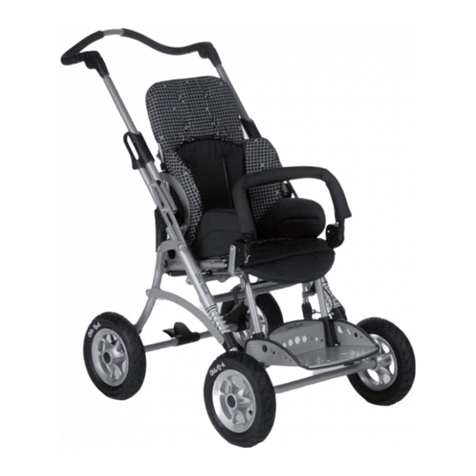
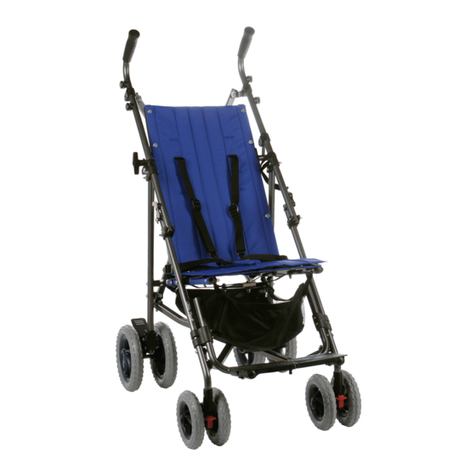
Otto Bock ECO BUGGY User manual

QUALITY FOR LIFE
Eco Buggy Bedienungsanleitung ................4
Eco Buggy Instructions for Use ..................8
Eco Buggy Mode d´emploi .........................12
Eco Buggy Instruzione d´uso.....................16
Eco Buggy Instrucciones de uso ..............20
Eco Buggy Bruksanvisning........................24
Eco Buggy Gebruiksaanwijzing.................28

4
3
5 6
9
10 11 12
13 14
1 2
15
7 8
➙

16 17

4
Bedienungsanleitung für Eco Buggy
Inhaltsverzeichnis Seite
Vorwort..................................................................................................................................................................5
Verwendungszweck .............................................................................................................................................5
Konformitätserklärung ........................................................................................................................................5
Tips zu Ihrer Sicherheit .......................................................................................................................................5
Auspacken und Aufstellen ..................................................................................................................................6
Verstell- und Anpassmöglichkeiten ...................................................................................................................6
Zubehör:
Ablagetasche .........................................................................................................................................................7
Beckengurt .............................................................................................................................................................7
Wartung und Pflege .............................................................................................................................................7
Gewährleistungsbedingungen............................................................................................................................7
Technische Daten.................................................................................................................................................7
Technische Änderungen vorbehalten!

5
Vorwort
Sie haben sich für den Eco-Buggy entschieden und bekommen hiermit ein hochwertiges Produkt aus unserem
Haus. Damit Sie recht lange viel Freude mit diesem Kinderwagen haben, und er Ihnen hilft, den Alltag zu erleich-
tern, überreichen wir Ihnen dieses Handbuch.
Es zeigt Ihnen die korrekte und einfache Bedienung und gibt Ihnen Hinweise für die erforderliche Pflege und
Wartung.
Um Beschädigungen auf Grund von Bedienungsfehlern zu vermeiden und eine optimale Nutzung zu ermögli-
chen, lesen Sie bitte sorgfältig die nachfolgenden Anleitungen bzw. Hinweise.
Ergeben sich darüber hinaus Fragen oder Probleme, wenden Sie sich bitte an Ihren Fachhändler.
Wir wünschen Ihnen eine problemlose Nutzung und hoffen, daß unsere Produkte Ihren Erwartungen entsprechen
und Ihnen eine Hilfe sind.
Verwendungszweck - Indikation
(Quelle: Hilfsmittelkatalog u. Hilfsmittelverzeichnis der Krankenkassen, BRD)
Die Versorgung mit Reha-Karren bzw. Buggys ist dann angezeigt, wenn gehunfähige Schwerbehinderte, vor-
nehmlich Kinder und Jugendliche, transportiert werden müssen, die nicht in der Lage sind, sich selbst mit einem
Rollstuhl fortzubewegen.
Gehunfähigkeit bzw. stark ausgeprägte Gehbehinderung durch:
• Lähmungen
• Gliedmaßenverlust
• Gliedmaßendefekt und/oder -deformität
• Gelenkkontrakturen
• Gelenkschäden
• sonstige Erkrankungen
Konformitätserklärung
Otto Bock erklärt als Hersteller in alleiniger Verantwortung, daß dieses Produkt mit den Anforderungen der
Richtlinie 93 / 42 / EWG übereinstimmt.
Tips zu Ihrer Sicherheit
Machen Sie sich vor dem Gebrauch zuerst mit Handhabung und Funktion des Produktes vertraut:
➜Der Eco Buggy darf nur auf ebenem und festem Untergrund verwendet werden.
➜Überwinden von Treppen und Anheben sicherheitshalber bitte durch zwei Personen.
➜Überfahren Sie Stufen, Bodenschwellen und Treppen nur mit auf die Hinterräder angekipptem Fahrgestell
(nach oben - rückwärts ziehend, nach unten - vorwärts langsam herablassend).
➜Heben Sie den Kinderwagen nur an fest verschweißten oder verschraubten Bauteilen an.
- Vorderrahmenrohr über den Vorderrädern
- Hinterachse
- Schiebegriffe / Schiebebügel
➜Halten Sie den Buggy beim Befahren von Steigungen und Gefällen mit beiden Händen fest an den Schiebe-
griffen. Bei Fahrten quer zur Steigung kann der Buggy sonst seitlich umkippen, beim Befahren von Gefäll-
strecken wegrollen.
➜Vermeiden Sie es, den Buggy an Gefällstrecken abzustellen, falls es dennoch notwendig sein sollte, bitte in
Rückwärtsrichtung mit arretierten Bremsen.
➜Vor Verlassen des Kinderwagens, bzw. vor Ein- und Aussteigen immer Bremsen schließen.
➜Das Fußbrett darf nicht zum Ein und Aussteigen benutzt werden.
➜Die maximale Gesamtzuladung des Eco Buggys beträgt 50 kg.
➜Beide Faltsicherungen müssen vor Benutzung des Rehabuggys fest eingerastet sein.
➜Die Fußbank muß vor Benutzung des Rehabuggys fest geschlossen und eingerastet sein, da der Vorder-
rahmen sich sonst verbiegen könnte.
➜Das Anhängen von schweren Taschen o. ä. kann die Stabilität negativ beeinflussen.
➜Lassen Sie Ihr Kind im Reha-Kinderwagen nie unbeaufsichtigt. Auch dann nicht, wenn es durch Begurtung
gesichert ist, und die Bremsen festgestellt sind.

6
Auspacken und Aufstellen
In der Originalverpackung finden Sie folgende Komponenten vor (siehe Titelbild)
• Faltbuggy zusammengefaltet mit beigelegter Fußbank
• Anleitung und benötigtes Werkzeug
• Zubehör je nach Bestellung
Zum Einbau der Fußbank gehen Sie bitte wie unter „Verstellung der Fußbankhöhe“ ( Abb. 14) beschrieben vor.
Zum Auffalten des Buggys gehen Sie bitte folgendermaßen vor:
• Entfernen Sie bitte zunächst ggf. Verpackungsbänder oder Transportsicherungen (Abb. 1).
• Fassen Sie den Buggy bei den Schiebegriffen (Abb. 2) und falten Sie ihn so weit wie möglich auf (Abb.3und4).
• Bringen Sie die Faltsicherungen, rechts und links, zum Einrasten, indem Sie den Buggy am Schiebegriff und
am jeweiligenVorderrahmen fassen (Abb. 5) und mit leichtem Druck in Richtung Boden drücken.
•Vergewissern Sie sich, daßbeide Faltsicherungen geschlossen sind (Abb. 6).
• Drücken Sie den Falthebel (Abb. 7) zum Auffalten der Schere bis zum Anschlag ein.
• Fußbank (Abb. 8) von außen nach innen drehen und die Fußbretter herunterklappen.
• Die Haltelasche mit der Spitze zuerst in das Langloch einstecken und dann seitlich zusammenführen bis der
Rastbolzen hörbar einrastet.
Die Fußbank mußvor Benutzung des Rehabuggys fest geschlossen und eingerastet sein, da der Vorder-
rahmen sich sonst verbiegen könnte.
Achtung Klemmgefahr:
Nicht an anderen als den beschriebenen beweglichen Teilen, insbesondere dem Scherenmechanismus,
anfassen .
Zum Zusammenfalten des Buggys gehen Sie bitte folgendermaßen vor:
•Bringen Sie die Rückenlehne in die vorderste Position (Abb. 9).
• Lösen Sie den Riegel unter der Fußbank (Abb. 10) und ziehen Sie die Fußbretter auseinander.
• Klappen Sie die Fußbretter nach außen neben die Vorderräder (Abb. 11).
• Ziehen Sie die Faltschere unter dem Sitz auf (Abb. 12).
• Öffnen Sie die Faltsicherungen, rechts und links, am Vorderrahmen (Abb. 13).
• Verfahren Sie nun wie unter “Auffalten” beschrieben, nur in umgekehrter Reihenfolge.
Verstell- und Anpaßmöglichkeiten
Lenkstop (Abb. 11)
Zum Schließen des Lenkstops schieben Sie den rotenArretierschlitten nach oben. Zum Öffnen nach unten drük-
ken.
Verstellung der Rückenneigung (Abb. 9)
Zunächst Flügelmuttern lösen, der Rücken läßt sich stufenlos in der Neigung verstellen.
Flügelmuttern wieder schließen.
Bei Verstellung unter Belastung darauf achten, daßdie Rückenlehne kontrolliert, ggf. durch
Unterstützung mit dem Oberschenkel, nach dosiertem Aufdrehen der Flügelmuttern geneigt wird.
Plötzliches Neigen der Rückenlehne unter Belastung kann zum Umstürzen des Buggys führen.
Verstellung der Fußbankhöhe (Abb. 14)
Die Fußbank läßt sich nach Öffnen der Schrauben im Lochraster von 2 cm nach oben und unten verstellen.
Hierzu benötigen Sie einen Kreuzschlitz-Schraubendreher der nicht im Lieferumfang enthalten ist.
Betätigen der Bremsen (Abb. 15)
Zum Schließen der Bremsen Auslösehebel mit der Fußspitze nach unten drücken.
Zum Öffnen der BremsenAuslösehebel mit dem Fuß nach oben drücken.
Zum Erzielen einer sicheren Bremswirkung immer beide Bremsen feststellen.
Zubehör
Alle Zubehörteile sind durch Fachpersonal zu installieren, sofern sie nicht schon vom Hersteller installiert
wurden.
Dennoch wurden zum besseren Verständnis einige Montagehinweise für Fachpersonal hier aufgeführt.

7
Ablagetasche (Abb. 16) max. 5 kg
Die Ablagetasche wird am Vorderrahmen links und rechts verschraubt und am Hinterrahmen mit Druckknöpfen
befestigt. Sie kann von vorne unter dem Sitz und von hinten befüllt werden.
Beckengurt (Abb. 17)
Zum Öffnen die Kunststoffzungen des Schnappverschlusses zusammendrücken und aus dem Gehäuse ziehen.
Zum Schließen die Kunststoffzungen soweit in das Gehäuse einschieben, bis das Schloß hörbar einschnappt.
Wartung und Pflege
➜Alle Rahmen- und Kunststoffteile nur mit im Haushalt üblichen milden Reinigungsmitteln säubern.
➜Keine Benutzung im Salzwasser. Vermeiden Sie nach Möglichkeit, dass Sand oder sonstige Schmutzpartikel
die Lagerung der Räder angreifen können.
➜Nach allen Einstellarbeiten die zuvor gelösten Verschraubungen wieder gut schließen.
➜Regelmäßig Schraubverbindungen überprüfen.
Gewährleistung
Eine Gewährleistung kann nur übernommen werden, wenn das Produkt unter den vorgegebenen Bedingungen
und zu den vorgesehenen Zwecken eingesetzt wird (siehe auch unsere allgemeinen Verkaufs-, Liefer- und
Zahlungsbedingungen).
Technische Daten
Maße und Gewicht Modell 3210
Sitztiefe 30 cm
Sitzbreite 35 cm
Sitzneigung 15°
Sitzwinkel 90° - 110°
Höhe Rückenlehne 55 cm
Neigung Rückenlehne um ca. 20 °
Abstand Sitzkante zum Fußbrett einstellbar von 20 cm – 30 cm
(34 cm mit festgestellten Vorderrädern)
Gewicht (Grundausstattung) ca.. 9 kg
max. Gesamtzuladung 50 kg
Faltmaße (LxBxH) ca. 115 cm x 42 cm x 29 cm
Raddurchmesser vorn 17 cm
Raddurchmesser hinten 21 cm

8
Eco Buggy –Instructions for Use
Table of Contents Page
Preface ..................................................................................................................................................................9
Intended Use.........................................................................................................................................................9
Declaration of Conformity ...................................................................................................................................9
Safety Tips ............................................................................................................................................................9
Unpacking and Preparing the Buggy for Use..................................................................................................10
Adjustment and Adaptation Possibilities ........................................................................................................10
Accessories:
Storage Bag .........................................................................................................................................................10
Lap Belt ................................................................................................................................................................11
Servicing and Cleaning .....................................................................................................................................11
Terms of Warranty..............................................................................................................................................11
Technical Data .................................................................................................................................................... 11

9
Preface
With the Eco Buggy you have purchased a high-quality Otto Bock product that contributes to facilitate everyday
life.
TheseInstructionsfor Use show youthecorrect method andeasyhandling of the EcoBuggyand gives instructions
for the required cleaning and servicing.
To avoiddamagecausedby improperhandlingandto allowoptimaluseof theEcoBuggy,please read thefollowing
instructions thoroughly.
If you have further questions or problems, please contact your healthcare provider.
We hope that our products will meet your expectations and offer efficient support to you.
Intended Use –Recommendations
(Source: Catalogue and index for orthopedic appliances of the health insurance companies, FRG)
Rehab buggies are indicated for the transport of patients with severe disabilities – mainly children and adolescents
– who are unable to walk and or to move independently in a wheelchair.
Typical use would be for patients with walking inability or severe walking impediments due to:
• palsies
• paralysis
• loss of limbs
• defected / deformed limbs
• joint contractures
• joint defects
• other diseases
Declaration of Conformity
Otto Bock as manufacturer with sole responsibility declares that this product conforms to the requirements of the
93 / 42 / EEC Guidelines.
Safety Tips
Before using the Eco Buggy you should become familiar with the handling and functions of this product:
➜The Eco Buggy may be used only on solid level ground .
➜For safety reasons, ascending/descending stairs and lifting the buggy should be done by two persons.
➜For clearing obstacles like steps, curbs and stairs, tilt the buggy onto the rear wheels
(for ascending: pull the buggy backwards; for descending: slowly lower the buggy in forward direction).
➜Lift the buggy only by components which are firmly attached (by welding or screw connection).
- Front frame tube above the front wheels
- Rear axle
- Push handles / pushbar
➜Firmly hold the buggy at the push handles on slopes and inclines. Otherwise, the buggy might tip over to the
side when pushing horizontally on gradients or roll away when pushing down hills.
➜Avoid leaving the buggy on inclines; if required however, please position it in backward direction and engage
the wheel locks.
➜Before leaving the buggy and before getting into or out of the buggy, always engage the wheel locks.
➜The footplate must not be used for getting into or out of the buggy.
➜The maximum total load of the Eco Buggy is 50 kg.
➜Before using the rehab buggy, firmly engage both folding guards.
➜Firmly close and engage the footrest before using the rehab buggy to avoid bending of the front frame.
➜Attaching heavy bags or similar to the buggy can have an adverse effect on the stability of the buggy.
➜Never leave your child alone in the rehab buggy, not even with safety belts and wheel locks applied.

10
Unpacking and Preparing the Buggy for Use
The original package contains the following components (see picture on the front page)
• Buggy, folded, with enclosed footrest
• Instructions for use and necessary tools
• Accessories as ordered
For assembling the footrest, please proceed as described under „Adjusting the Footrest Height“ (fig. 14)
For unfolding the buggy please proceed as follows:
• Remove any transport straps or transport guards (fig. 1).
• Grasp the buggy at the push handles (fig. 2) and unfold it as far as possible (fig. 3 and 4).
• Engagethefolding guardson therightand leftbygraspingthebuggy atthepush handleandatthecorresponding
front frame (fig. 5) and slightly pressing towards the ground.
•Make sure that both folding guards are closed (fig. 6).
• Press the folding lever (fig. 7) up to the stop to unfold the scissor construction.
• Turn the footrests (fig. 8) from the outer to the inner side and flip down the footplates.
• Insert the holding bracket with the tip first into the long hole and laterally bring the footplates together until you
hear the ratchet bolt engage.
Before using the rehab buggy, the footrest must be closed and engaged, otherwise it will cause the front
frame to strain / bend.
Attention, danger:
Do not grasp the buggy at other point other than the described components. Especially, do not grasp the
components of the scissor mechanism.
For folding the buggy please proceed as follows:
•Bring the backrest in the most anterior position (fig. 9).
• Release the locking bar below the footrest (fig. 10) and pull the footplates apart.
• Swing the footplates to the outside beside the front wheels (fig. 11).
• Pull open the folding scissor below the seat (fig. 12).
• Open the folding guards on the right and left at the front frame (fig. 13).
• Now proceed as described under "Unfolding", but in reverse order.
Adjustment and Adaptation Possibilities
Swivel Lock (fig. 11)
To engage the swivel lock, push the red locking slide upwards. For opening, push the locking slide downwards.
Adjusting the Back Inclination (fig. 9)
After loosening the thumb nuts, the back inclination is continuously adjustable.
Retighten the thumb nuts.
When making adjustments under load unscrew the thumb nuts to a certain degree only and make sure to
make controlled adjustments, for example by supporting the backrest with your thigh.
Sudden adjustments of the back inclination under load can cause the buggy to tip over.
Please ensure after any adjustments made all thumb nuts should be retightened.
Adjusting the Footrest Height (fig. 14).
After opening the screws the footrest height can be adjusted using the different holes at 2 cm distance.
To do this, you need a Phillips head screwdriver, which is not included in the delivery.
Activating the Wheel Locks (fig. 15)
To close the wheel locks, press the release lever downwards with your foot.
To open the wheel locks, press the release lever upwards with your foot.
Always ensure both wheel locks are engaged.
Accessories
All accessories which have not yet been installed by the manufacturer must be installed by skilled staff.
Storage Bag (fig. 16) max. 5 kg
The storage bag is attached to the anterior frame on the left and right by means of screws and to the posterior
frame by means of push buttons. It can be filled from the both the front and rear beneath the seat.
11
Lap Belt (fig. 17)
To open press together the plastic tongues of the snap lock und pull out of the housing. To close, push the plastic
tongues into the housing until you hear the lock engage.
Servicing and Cleaning
➜Use only a standard mild detergent for cleaning all frame and plastic components.
➜Do not use the buggy in salt water. If possible, keep sand or other particles from damaging the wheel bearings.
➜After all adjustments are made retighten all screw connections.
➜Check the screw connections on a regular basis.
Warranty
The Otto Bock Warranty applies only when the product is used according to the specified conditions and for the
intended purposes, following all manufacturer’s recommendations (see our general terms of sales, delivery and
payment).
Technical Data
Dimensions and weight Model 3210
Seat depth 30 cm
Seat width 35 cm
Seat inclination 15°
Seat angle 90° - 110°
Backrest height 55 cm
Backrest inclination by approx. 20 °
Distance between seat edge and footplate adjustable from 20 cm – 30 cm
(34 cm with locked front wheels)
Weight (standard equipment) approx. 9 kg
Max. total load 50 kg
Folding dimensions (LxWxH) approx. 115 cm x 42 cm x 29 cm
Front wheel diameter 17 cm
Rear wheel diameter 21 cm

12
Mode d‘emploi pour ECO BUGGY
Sommaire Page
Avant-propos ......................................................................................................................................................13
Domaine d‘application / Indications.................................................................................................................13
Déclaration de conformité.................................................................................................................................13
Consignes de sécurité.......................................................................................................................................13
Déballage et montage ........................................................................................................................................14
Possibilités de réglage et d‘adaptation............................................................................................................14
Accessoires
Sac de rangement................................................................................................................................................15
Sangle de bassin..................................................................................................................................................15
Entretien et maintenance ..................................................................................................................................15
Conditions de garantie ......................................................................................................................................15
Caractéristiques techniques .............................................................................................................................15

13
Avant-propos
Enoptantpour lapoussetteEco-Buggy,vousavez fait l’acquisitiond’unproduit hautdegamme denotrefabrication.
Nous vous offrons ce manuel pour que vous ayez plaisir à tirer toute satisfaction de votre poussette, longtemps et
de manière optimale en vue de vous faciliter la vie de tous les jours.
Ce manuel vous explique le maniement simple et correct de la poussette, indique les précautions à prendre pour
éviter de l‘endommager et décrit les quelques règles à suivre dans le cadre de l‘entretien minime sur ce produit.
Nousvousrecommandons de lireattentivementles instructions.Vous yapprendrezcomment monter correctement
la poussette, tout en évitant les erreurs de maniement susceptibles de l‘endommager.
Pour toute question ou tout renseignement, nous vous invitons à prendre contact avec votre revendeur.
Nous vous souhaitons un usage satisfaisant de la poussette et espérons que notre produit répondra à toutes vos
attentes.
Domaine d‘application / Indications
L‘utilisation de poussettes REHA est indiquée pour le transport des handicapés moteurs lourds, notamment des
enfants et adolescents qui ne sont pas en mesure de se déplacer par eux-mêmes dans un fauteuil roulant.
Incapacité totale ou handicap moteur caractérisé pour cause de :
• Paralysies
• Perte d‘un membre inférieur
• Déformation ou difformité des membres
• Contractions articulaires
• Lésions des articulations
• Autres affections
Déclaration de conformité
Otto Bock HaelthCare GmbH déclare, en sa qualité de fabricant et portant seul la responsabilité, que ce produit
est conforme aux exigences de la Directive 93/42/CEE.
Consignes de sécurité
Afin d‘éviter chutes et situations dangereuses, il est recommandé de vous entraîner avec votre nouvelle poussette
de manière à vous familiariser avec son maniement et son mode de fonctionnement.
➜La poussette ne doit être utilisée que sur un terrain plat où rien n‘échappe à votre vue.
➜Il est recommandé, par mesure de sécurité, de franchir les escaliers avec l‘Eco-buggy en la soulevant à deux
personnes.
➜Franchir les marches, les dos d‘âne et les escaliers uniquement avec le châssis basculé sur les roues arrière.
(Enmontantles escaliers-tirer lapoussettederrière vous. Endescendant les escaliers-laisseraller lapoussette
tout en la maintenant fermement).
➜Ne soulever la poussette que par les éléments soudés ou vissés.
- Tube du cadre avant par-dessus les roues avant
- Essieu arrière
- Poignées / guidon
➜Tenez le Buggy fermement à deux mains dans les descentes ou montées. Lors d‘un trajet en amont, le Buggy
pourrait basculer sur la côté , lors d‘un trajet en aval il pourrait échapper à votre contrôle.
➜Evitez de garer le Buggy sur un terrain en pente. Si ceci est indispensable, garer le en position de récul en
bloquant les freins.
➜Veillez àbloquerles freinslorsdes manoeuvresde transfertdel‘enfant horsde lapoussetteou danslapoussette.
➜Ne pas utiliser le repose-pieds comme appui lors des manoeuvres de transfert.
➜La charge maximale supportée par l‘Eco Buggy est de 50 kg.
➜Avant l‘utilisatoin du Buggy, les deux dispositifs de sécuritéanti-pliage doivent être bien enclenchés.
➜Le repose-pieds doit être parfaitement fixé et bloquée afin d‘éviter une déformation du cadre avant.
➜Les sacs ou autres objets lourds, suspendus à la poussette, peuvent compromettre sa stabilité.
➜Ne jamais laisser un enfant sans surveillance dans la poussette, même s‘il est bien retenu par les ceintures de
sécurité et que les freins sont bien enclenchés.

14
Déballage et montage
Vous trouverez dans l‘emballage d‘origine les éléments suivants:
• Poussette pliante Eco-bubby en position pliée avec supports de repose-pieds inclu
• Notice d‘emploi et outils nécessaires
• Accessoires commandés.
Pour monter le repose-pieds veuillez suivre les instructions décrites sous „Réglage en hauteur du repose-pieds“
(ill. 14), s‘il vousplaît.
Pour déplier le Buggy procédez comme suit :
• Enlever tout ruban d‘emballage et sécurités de transport (ill. 1).
• Prenez le Buggy par les poignées (ill. 2) et ouvrez-le au maximum ((ill.3 et 4).
• Enclenchez les sécurités anti-pliage , côté droit et gauche, en prenant le Buggy par la poignée et le cadre
avant (ill. 5) tout en appuyant doucement vers le sol.
•Vérifiez que les deux sécurités anti-pliage soit bien enclenchées. (ill. 6).
• Poussez le levier de pliage (ill. 7) jusqu‘à la butée pour ouvrir le „ciseau“.
• Faites pivoter les repose-pieds de l‘extérieur vers l‘intérieur et rabattez les palettes (ill. 8) .
• Introduire la patte de fixation par la pointe dans le trou oblique, puis la relier sur le côté jusqu‘à l‘enclenchement
audible du boulon.
Le repose-pieds doit être parfaitement fixéet bloquée afin d‘éviter une déformation du cadre avant.
Attention: risque d‘écrasement des doigts.
Ne touchez que le parties mobiles décrites ci-dessus. Ne jamais toucher le mécanise de ciseau.
Pour plier le Buggy procédez comme suit:
•Positionner le dossier tout en avant (ill. 9).
• Défaire le verrouillage sous le repose-pieds (ill. 10) et séparer les palettes.
• Faire pivoter les palettes vers l‘extérieur à côté des roues avant. (ill. 11).
• Déplier le ciseau sous le siège (ill. 12).
• Ouvrir les sécurités anti-pliage, côté droit et gauche sur le cadre avant (ill. 13).
• Procédez ensuite comme décrit sous „déplier“, mais dans l‘ordre inverse. “
Possibilités de réglage et d‘adaptation
Blocage directionnel des roues avant (ill. 11)
Pour libérer les roues avant poussez le traîneau rouge vers le haut. Pour bloquer la direction, poussez le traîneau
rouge vers le bas.
Réglage de l‘inclinaison du dossier (ill. 9)
D‘abord desserrer les manettes en étoile. L‘inclinaison du dossier peut alors être réglée de façon continue (sans
palier). Resserrer les manettes en étoile.
Si la poussette est chargée lors du réglage du dossier, desserrer légèrement les manettes en étoile, puis
vérifier que le dossier est parfaitement contrôlé. Si nécessaire, le soutenir avec la jambe.
Un dossier abaissébrusquement en charge risque de provoquer le basculement de la poussette.
Réglage en hauteur du repose-pieds (ill. 14)
Après avoir dévissé les vis de plaque à trous, le repose-pieds peut se déplacer par cran dans une limite de 2 cm
vers le haut ou vers le bas.
Pour faire cela vous avez besoin d’un tournevis Philips, ce qui n’est pas inclu dans la livraison.
Activation des freins (ill. 15)
Pour mettre les freins, pousser le levier vers le haut avec la pointe du pied
Pour enlever les freins, pousser le levier vers le bas avec le pied.
Pour une efficacitéoptimale du freinage, toujours activer les deux freins.
Accessoires
Les accessoires n‘ayant pas étépré-installés par le fabricant doivent impérativement être montés par un
technicien.
Pourunemeilleure compréhension, nousavonsintégré dansla noticequelques instructions demontagedestinées
au personnel qualifié.

15
Sac de rangement (ill. 16) max. 5 kg
Le sac de rangement sera vissé au cadre avant du côté gauche ou du côté droit. Ensuite il sera fixé au cadre
arrière à l‘aide de boutons à pression. On peut accèder au sac par l‘avant our par l‘arrière.
Sangle de bassin (ill. 17)
Pour ouvrir la sangle, appuyer sur les deux languettes en plastique de la fermeture par Clic et les retirer du boîtier.
Pour fermer la sangle , introduire les deux languettes dans le boîtier jusqu‘à ce qu‘on entend le „Clic“.
Entretien et maintenance
➜Nettoyerle cadreettouteslespièces enmatière plastiqueuniquement avecdesproduitsnettoyantsdomestiques.
➜Ne pas utiliser votre poussette dans de l‘eau saline. Eviter dans la mesure du possible que le sable ou d‘autres
particules pénètrent et risquent d‘attaquer les logements de roue
➜Aprèstoutesles opérations deréglage,resserrerbien à fondtoutesles vis quiontété préalablement dévissées.
➜Contrôler régulièrement les articulations de vis.
Garantie
La garantie n‘est accordée que pour une utilisation conforme aux instructions du fabricant (voir aussi nos
conditions générales de vente).
Caractéristiques techniques
Dimensions et poids Modèle 3210
Profondeur d‘assise 30 cm
Largeur d‘assise 35 cm
Inclinaison de l‘assise 15°
Angle d‘assise 90° - 110°
Hauteur du dossier 55 cm
Inclinaison du dossier à env. 20 °
Distance entre l‘assise et le repose-pieds réglable de 20 cm – 30 cm
(34 cm avec des roues avant fixes)
Poids (équipement de base) env. 9 kg
Charge maximale 50 kg
Dimensions „plié“ (L x l x H) env. 115 cm x 42 cm x 29 cm
Diamètre des roues avant 17 cm
Diamètre des roues arrières 21 cm

16
Istruzione d‘uso del passeggino Eco Buggy
Indice del contenuto Pagina
Premessa ............................................................................................................................................................17
Campo d‘impiego ...............................................................................................................................................17
Dichiarazione di conformità..............................................................................................................................17
Consigli per la vostra sicurezza .......................................................................................................................17
Disimballo e disposizione .................................................................................................................................18
Regolazioni e adattamenti.................................................................................................................................18
Accessori:
Bauletto portaoggetti............................................................................................................................................19
Cintura per bacino................................................................................................................................................19
Manutenzione e cura..........................................................................................................................................19
Condizioni di garanzia .......................................................................................................................................19
Dati tecnici ..........................................................................................................................................................19
Salvo modifiche tecniche!

17
Premessa
Complimenti per aver scelto il passeggino Eco-Buggy, un prodotto di qualità della Otto Bock HealthCare. Per
facilitarvi all‘uso del passeggino e garantirvene un impiego prolungato, abbiamo messo a vostra disposizione
questo manuale d‘istruzione.
Esso contiene le indicazioni per un uso corretto e le avvertenze sulla cura e la manutenzione dell‘ausilio. Per
evitare eventuali danni al prodotto, dovuti a trascuratezza o a un uso improprio, leggete attentamente le seguenti
istruzioni.
Per qualsiasi richiesta o dubbio, non esitate a rivolgervi al vostro rivenditore autorizzato.
Ci auguriamo che il manuale possa esservi di aiuto per utilizzare al meglio e senza difficoltà il vostro prodotto e che
esso risponda alle vostre aspettative.
Campo d‘impiego - Indicazioni
L‘impiego delle carrozzine e dei passeggini delle Reha è indicato per il trasporto di bambini e ragazzi con gravi
difficoltà o assenza di deambulazione dovute a:
• paralisi
• perdita degli arti
• deformazioni agli arti
• contrazioni muscolari
• lesioni alle articolazioni
• altre patologie
e incapaci di condurre l‘ausilio in autonomia.
Dichiarazione di conformità
La Otto Bock dichiara, sotto la propria unica responsabilità, che questo prodotto è conforme agli obblighi della
direttiva CEE 93/42.
Consigli per la vostra sicurezza
Prima di usare il passeggino, leggete le indicazioni sulle sue funzioni ed esercitatevi a manovrarlo.
➜Eco Buggy può essere utilizzato solo su terreni piani e sicuri.
➜Per superare scale o piani, per motivi di sicurezza, è necessaria la presenza di due persone che sollevino il
passeggino.
➜Superate gradini, bordi di marciapiede e scale, solo col telaio ribaltato sulle ruote posteriori (verso l‘alto -
tirandolo all‘indietro, verso il basso - fascendolo scendere lentamente in avanti).
➜Sollevate il passeggino, afferrandolo solo nelle parti ben saldate tra loro o avvitate.
- tubo del telaio anteriore sopra le ruote anteriori
- asse posteriore
- manopole / manubrio
➜Durante la guida su terreni in pendenza, afferrate il passeggino per il manubrio e tenetelo ben stretto. Durante
il percorso su pendii in senso trasversale, il passeggino può ribaltarsi di lato; in pendenza può rotolare via.
➜Evitate di posteggiare il passeggino su terreni in pendenza. Se ciò fosse indispensabile, posizionatelo rivolto
verso la salita e azionate il freno.
➜Prima di lasciare il passeggino e durante la salita e la discesa da esso, azionate sempre i freni.
➜La pedana non deve essere usata per salire e scendere dal passeggino.
➜Il carico massimo di Eco Buggys è di 50 kg.
➜Prima di utilizzare Eco Buggy, incastrate entrambi i fermi che bloccano il passeggino in apertura.
➜Prima dell‘impiego, la pedana deve essere bloccata, altrimanti il telaio anteriore potrebbe piegarsi.
➜Non appendete al passeggino borse pesanti che potrebbero comprometterne la stabilità.
➜Non lasciate il vostro bambino incustodito sul passeggino, nemmeno qualora sia assicurato dal sistema di
cinture e qualora i freni siano azionati.

18
Disimballo e disposizione
Nell‘imballo originale sono contenuti i seguenti componenti (vedi immagine in copertina).
• Passeggino piegato e pedana a parte
• Istruzione e attrezzi necessari
• Accessori in base all‘ordine
Per montare la pedana, leggete il paragrafo „Regolazione dell‘altezza della pedana“ (fig. 14).
Per aprire il passeggino, seguite la seguente procedura:
• Togliete i nastri adesivi che avvolgono l‘imballo e tutti i fermi per il trasporto (fig. 1).
• Afferrate le manopole del passeggino (fig. 2) ed apritelo completamente (figg. 3 e 4).
• Bloccateiduefermilaterali finoall‘incastrocon unamano,conl‘altraintanto tenetestrettoil telaiodel passeggino,
(fig. 5) e premetelo leggermente verso il terreno.
•Accertatevi che i due fermi laterali siano ben bloccati (fig. 6).
• Premete la leva sotto il sedile (fig. 7) per aprire la pinza fino all‘incastro.
• Ruotate la pedana (fig. 8) dall‘esterno all‘interno e abbassatele.
• Introducete la linguetta nel foro allungato e spingetela all‘interno fino a sentirne il rumore d‘ incastro.
Prima di usare il passeggino, accertatevi che la pedana sia ben fissata, altrimenti il telaio anteriore potrebbe
piegarsi.
Attenzione alle dita:
Afferrate solo le parti continue del telaio, per evitare di schiacciarvi le dita.
Per chiudere il passeggino, osservate la seguente procedura:
•Portate lo schienale in posizione piùavanzata (fig. 9).
• Allentate il fermo sotto la pedana (fig. 10) e separate le due parti di essa.
• Ribaltate le due metà della pedana, portandole di fianco al telaio anteriore (fig. 11).
• Tirate il morsetto sotto il sedile (fig. 12).
• Sbloccate i fermi destro e sinistro sul telaio anteriore (fig. 13).
• Procedete in senso inverso rispetto a quanto descritto alla voce “Apertura del passeggino”.
Regolazioni e adattamenti
Blocco ruote piroettanti (fig. 11)
Per azionare il blocco ruote piroettanti, spingete i fermi verso l‘alto. Per disattivarlo, spingete gli stessi verso il
basso.
Regolazione dell‘inclinazione dello schienale (fig. 9)
Svitate i dadi ad alette e reclinate lo schienale fino a raggiungere la posizione desiderata.
Riavvitate i dadi ad alette.
Se effettuate la regolazione caricando il passeggino, accertatevi che lo schienale venga reclinato tramite
rotazione dosata dei dadi ad alette e controbilanciate la reclinazione dello schienale premendo le cosce
sul sedile.
Una reclinazione improvvisa dello schienale puòportare ad un ribaltamento del passeggino.
Regolazione dell‘altezza della pedana (fig. 14)
Allentando le viti negli appositi alloggiamenti, potete regolare la pedana di 2 cm verso l‘alto e verso il basso. In
questo caso vi occorre un cacciavite con testa a croce, non contenuto nel kit di attrezzi.
Azionamento dei freni (fig. 15)
Per attivare i freni, con l‘avampiede premete la levetta verso il basso.
Per disattivare i freni, spingete la levetta verso l‘alto.
Per ottenere un‘efficace azione frenante, azionate sempre entrambi i freni.

19
Accessori
Tutti gli accessori devono essere montati da personale competente, a meno che non siano giàstati montati
dal produttore.
Tuttavia per facilitarvi la comprensione del montaggio degli accessori, abbiamo messo a disposizione delle
indicazioni, destinate a personale competente.
Bauletto portaoggetti (fig. 16) max. 5 kg
Il bauletto portaoggetti va avvitato a destra e a sinistra del telaio anteriore e fissato al telaio posteriore tramite i
bottoncini automatici.
Cintura per bacino (Abb. 17)
Perslacciarla,premete fralorole linguetteinplastica dellachiusuraa scattoedestraetele dalproprioalloggiamento.
Per allacciarla, introducete le linguette nell‘alloggiamento, fino ad udirne un chiaro rumore di incastro.
Manutenzione e cura
➜Tutte le parti del telaio e le parti in plastica vanno pulite con un detergente delicato di uso comune.
➜Non immergete il passeggino in acqua salata. Evitate, se possibile, che sabbia o particelle di sporco penetrino
nelle ruote.
➜Dopo aver effettuato le regolazioni, stringete nuovamente bene viti e dadi.
➜Fate controllare regolarmente tutti i collegamenti a vite.
Garanzia
La garanzia è valida solo qualora il prodotto venga impiegato alle condizioni indicate e agli scopi previsti
(v. anche le nostre condizioni generali di vendita, di consegna e di pagamento).
Dati tecnici
Misure e pesi Modello 3210
profondità sedile 30 cm
larghezza sedile 35 cm
inclinazione sedile 15°
angolo sedile 90° - 110°
altezza schienale 55 cm
inclinazione schienale di ca. 20 °
distanza sedile pedana regolabile da 20 cm a 30 cm
(34 cm con ruote anteriori fisse)
peso (dotazione standard) ca. 9 kg
carico massimo 50 kg
passeggino chiuso (LxBxH) ca. 115 cm x 42 cm x 29 cm
diametro ruota anteriore 17 cm
diametro ruota posteriore 21 cm

20
Instrucciones de uso para el Eco Buggy
Índice Seite
Prólogo................................................................................................................................................................21
Campo de aplicación .........................................................................................................................................21
Declaración de conformidad.............................................................................................................................21
Recomendaciones para su seguridad .............................................................................................................21
Desenvolver y montaje ......................................................................................................................................22
Posibilidades de regulación y adaptación.......................................................................................................22
Accesorios:
Bolsa para accesorios..........................................................................................................................................23
Cinturón pélvico ...................................................................................................................................................23
Mantenimiento y cuidados ................................................................................................................................23
Garantía...............................................................................................................................................................23
Datos técnicos....................................................................................................................................................23
Nos reservamos el derecho a cambios técnicos!
Other manuals for ECO BUGGY
4
Table of contents
Languages:
Other Otto Bock Stroller manuals

Otto Bock
Otto Bock Kimba Home User manual

Otto Bock
Otto Bock Kimba Cross User manual

Otto Bock
Otto Bock Kimba neo User manual

Otto Bock
Otto Bock ECO BUGGY User manual

Otto Bock
Otto Bock Kimba neo User manual

Otto Bock
Otto Bock ECO User manual

Otto Bock
Otto Bock Kimba neo User manual

Otto Bock
Otto Bock Lisa User manual

Otto Bock
Otto Bock Kimba Operating instructions

Otto Bock
Otto Bock ECO BUGGY User manual