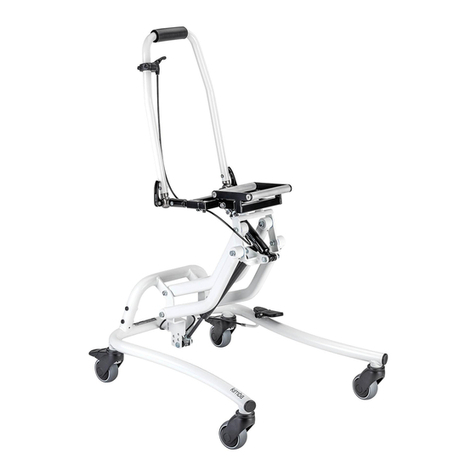
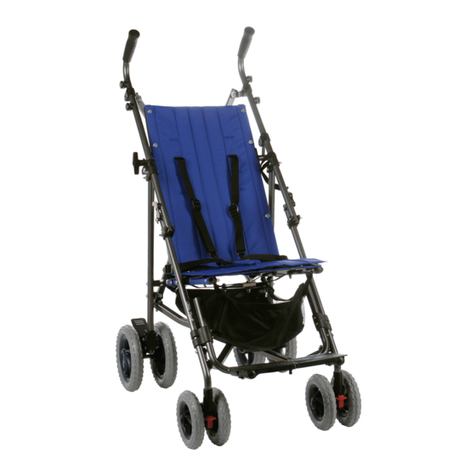
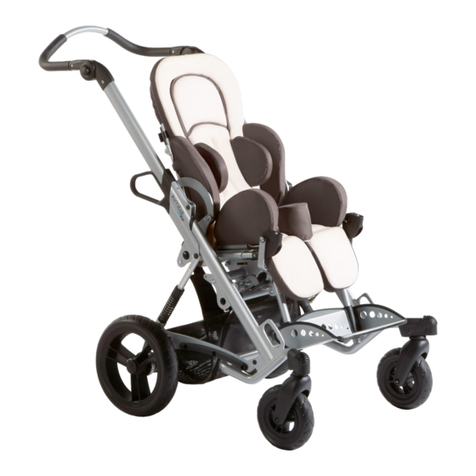
Otto Bock Kimba neo User manual

2 | Ottobock Kimba neo

Foreword1 5..............................................................................................................................................................
Product Description2 5............................................................................................................................................
Function2.1 5..............................................................................................................................................
Product Overview2.2 6.................................................................................................................................
Safety3 8....................................................................................................................................................................
Explanation of Warning Symbols3.1 8.............................................................................................................
General safety instructions3.2 9.....................................................................................................................
Safety Instructions for Use3.3 9.....................................................................................................................
Further Information3.4 11..............................................................................................................................
Name plate and warning labels3.5 11.............................................................................................................
Name plate3.5.1 11.........................................................................................................................................
Warning Labels3.5.2 12..................................................................................................................................
Delivery4 13...............................................................................................................................................................
Scope of Delivery4.1 13................................................................................................................................
Standard Equipment4.2 13............................................................................................................................
Options4.3 13.............................................................................................................................................
Storage4.4 13..............................................................................................................................................
Preparation for Use5 13..........................................................................................................................................
Assembly5.1 13...........................................................................................................................................
Usage6 15..................................................................................................................................................................
Information on Use6.1 15..............................................................................................................................
Multifunctional Seating Unit (Standard Seat)6.2 16..........................................................................................
Removing and mounting the seating unit6.2.1 16................................................................................................
Rotating the seating unit6.2.2 17......................................................................................................................
Adjusting the tilt-limiting mechanism after rotating the seat6.2.3 17.......................................................................
Adjusting the backrest angle6.2.4 18................................................................................................................
Adjusting the seat angle6.2.5 19.......................................................................................................................
Alternative Seating Systems6.3 19.................................................................................................................
Adjusting the seat angle6.3.1 19.......................................................................................................................
Footrest (Multifunctional Seating Unit)6.4 20...................................................................................................
Adjusting the knee angle6.4.1 20......................................................................................................................
Folding up the footrest6.4.2 21.........................................................................................................................
Push bar6.5 21............................................................................................................................................
Adjusting the push bar6.5.1 21.........................................................................................................................
Brake6.6 22................................................................................................................................................
Engaging the wheel lock6.6.1 22......................................................................................................................
Suspension6.7 22........................................................................................................................................
Adjusting the suspension6.7.1 22.....................................................................................................................
Additional options6.8 23...............................................................................................................................
Front wheels6.8.1 23......................................................................................................................................
"Fixed" Front Wheels6.8.1.1 23..........................................................................................................................
"Swiveling" Front Wheels with Integrated Swivel Lock6.8.1.2 23............................................................................
Tip-Assist6.8.2 24...........................................................................................................................................
Grab rail6.8.3 24............................................................................................................................................
Armrests6.8.4 24............................................................................................................................................
Headrests6.8.5 25..........................................................................................................................................
Headrest supports6.8.5.1 25..............................................................................................................................
Integrated headrests6.8.5.2 25...........................................................................................................................
Safety belts6.8.6 26........................................................................................................................................
Lap belt6.8.6.1 26.............................................................................................................................................
Four-point belt6.8.6.2 26....................................................................................................................................
Five-point belt6.8.6.3 27.....................................................................................................................................
Table of contents
Ottobock | 3Kimba neo
Table of contents

Positioning aids6.8.7 28..................................................................................................................................
Thoracic supports6.8.7.1 29...............................................................................................................................
Abductor6.8.7.2 29............................................................................................................................................
Pelvic band6.8.7.3 29........................................................................................................................................
Chest and shoulder support6.8.7.4 30.................................................................................................................
Fixation Vest6.8.7.5 30.......................................................................................................................................
Groin strap6.8.7.6 31.........................................................................................................................................
Neck Support6.8.7.7 32.....................................................................................................................................
Lumbar Padding6.8.7.8 33.................................................................................................................................
Hook-and-loop foot straps6.8.7.9 33....................................................................................................................
Tray6.8.8 34...................................................................................................................................................
Canopy6.8.9 34..............................................................................................................................................
Rain cover6.8.10 36..........................................................................................................................................
Summer/winter slip sack6.8.11 36......................................................................................................................
Frame padding6.8.12 37...................................................................................................................................
Storage basket6.8.13 37...................................................................................................................................
Buggy Board6.8.14 38......................................................................................................................................
Platform for Respirator6.8.15 39.........................................................................................................................
Cup Holder6.8.16 39........................................................................................................................................
Footrest Padding6.8.17 40................................................................................................................................
Anti-Slip Upholstery6.8.18 40.............................................................................................................................
Incontinence Cover6.8.19 40.............................................................................................................................
Disassembly/Transport6.9 42........................................................................................................................
Use in a Wheelchair Accessible Vehicle6.10 43.................................................................................................
General Safety Instructions6.10.1 43..................................................................................................................
Permitted Use6.10.2 44.....................................................................................................................................
Required Options6.10.3 44................................................................................................................................
Mygo Seating System - Specifics6.10.3.1 44..........................................................................................................
Adjusting the Seating Unit6.10.4 44....................................................................................................................
Adjusting and Securing the Seat Angle6.10.5 44..................................................................................................
Multifunctional Seating Unit6.10.5.1 44..................................................................................................................
Mygo Seating System6.10.5.2 45..........................................................................................................................
Adjusting and securing the back angle6.10.6 46..................................................................................................
Multifunctional Seating Unit6.10.6.1 46..................................................................................................................
Mygo Seating System6.10.6.2 46..........................................................................................................................
Securing the Product in the Vehicle6.10.7 46.......................................................................................................
Securing the User in the Product6.10.8 47..........................................................................................................
Care6.11 49..................................................................................................................................................
Care Instructions6.11.1 49................................................................................................................................
Detaching/Attaching the Padding (Multifunctional Seating Unit)6.11.2 49................................................................
Cleaning6.11.3 49............................................................................................................................................
Disinfection6.11.4 49........................................................................................................................................
Maintenance7 49......................................................................................................................................................
Maintenance intervals7.1 50..........................................................................................................................
Maintenance Tasks7.2 50.............................................................................................................................
Disposal8 50.............................................................................................................................................................
Disposal Information8.1 50............................................................................................................................
Legal Information9 51..............................................................................................................................................
Service life9.1 51.........................................................................................................................................
Liability9.2 51..............................................................................................................................................
CE Conformity9.3 51....................................................................................................................................
Warranty terms9.4 51...................................................................................................................................
Appendices10 51........................................................................................................................................................
Technical Data10.1 51....................................................................................................................................
4 | Ottobock Kimba neo
Table of contents
1 Foreword
INFORMATION
Date of the last update: 2013-07-26
►Please read this document carefully.
►Follow the safety instructions.
INFORMATION
►These instructions for use (user) can be viewed and downloaded from the homepage www.ottobock.com. It is
possible to increase the display size of the PDF document stored there.
►Please note that the instructions for use are revised regularly. The latest version can be viewed and down
loaded on the respective product page at www.ottobock.com.
►For further questions about the instructions for use (user), please contact the qualified personnel who issued
the product to you.
You have purchased a high-quality product for use every day, at home and outdoors.
Please read these instructions for use before you start using the product. Familiarise yourself with the handling,
functions and use of the product before using it. Observe all safety information and instructions in order to prevent
the possibility of injury. Store these instructions for use in a safe place for future reference.
Please note the following in particular:
• Attendants (persons who operate and push the product) must be instructed in the use of the product by quali
fied personnel.
• The product has been adapted to the needs of the user. Subsequent changes may be made only by qualified
personnel. We recommend checking the product settings regularly in order to assure optimal fit over the long
term. A fitting is required every six months for children in particular.
• If you have any questions or cannot solve a problem, despite reading these instructions for use, please contact
the qualified personnel who fitted the product or the manufacturer's service department (please see inside
back cover or back cover for addresses).
• The product may only be combined with the options listed here. The manufacturer assumes no liability for com
binations with third-party medical devices and/or accessories not included in the modular system. Please also
observe the information in the section "Liability".
• Service and repairs to the product may only be carried out by qualified personnel. If you have any problems,
please contact your specialist dealer. This ensures that any necessary repairs will be made exclusively with
authentic Ottobock spare parts.
• The manufacturer assumes no liability for combinations with seating systems that have not been approved by
the manufacturer (see the section "Liability").
• The manufacturer reserves the right to make technical changes to the model described in these instructions for
use.
2 Product Description
2.1 Function
The rehab buggy is intended solely for transporting children with walking disabilities or who are unable to walk.
The rehab buggy has been approved for transporting only one child aged 1 to 10 years (depending on the size and
weight of the child). It is operated by an attendant (conveyance by another person).
The rehab buggy can be used indoors and outdoors. It is fully adjustable to provide an optimised, individual fitting.
Ottobock | 5Kimba neo
Foreword

2.2 Product Overview
1
Kimba Neo – outdoor mobility base with multifunctional seating unit and "swiveling" front wheels option
1 Plug-on rear wheel 6 Angle-adjustable backrest
2 "Swiveling" front wheel (option) 7 Adjustable push bar
3 Front lashing ring 8 Release handle, folding mechanism
4 Adjustable footrest 9 Rear lashing ring
5 Removable seat with lateral supports 10 Suspension
6 | Ottobock
Product Description
Kimba neo

2
Kimba neo – outdoor mobility base with multifunctional seating unit and "swiveling" front wheels option
1 Plug-on rear wheel 6 Adjustable push bar
2 "Swiveling" front wheel (option) 7 Release handle, folding mechanism
3 Swivel lock 8 Separate seat tilt feature on frame
4 Front lashing ring 9 Rear lashing ring
5 Seat adapter 10 Suspension
Ottobock | 7Kimba neo
Product Description

3
Kimba neo – outdoor mobility base with "fixed" front wheels
1 Plug-on rear wheel 5 Adjustable push bar
2 Plug-on "fixed" front wheel 6 Release handle, folding mechanism
3 Front lashing ring 7 Suspension
4 Seat adapter 8 Rear lashing ring
3 Safety
3.1 Explanation of Warning Symbols
WARNING Warnings regarding possible risks of severe accident or injury.
CAUTION Warnings regarding possible risks of accident or injury.
NOTICE Warnings regarding possible technical damage.
8 | Ottobock
Safety
Kimba neo

3.2 General safety instructions
CAUTION
Lack of familiarisation with instructions for use
Injuries due to user error
►Read the instructions for use before using the product.
►Familiarise yourself with the handling, functions and use of the product before using it. You can compromise
the safety of the user if you do not follow these instructions.
3.3 Safety Instructions for Use
Hazards during preparation for use
WARNING
Independent modification of settings
Risk of tipping, falling or malposition
►Do not modify the settings established by the qualified personnel. Only the settings described in the section
"Usage" in these instructions for use may be adjusted independently.
►In case of problems with the settings (unsatisfactory seating position, front wheels wobble etc.) please con
tact the qualified personnel who adjusted your product.
►Discuss all changes to the settings with the qualified personnel/therapist in advance in order to minimise
health hazards and avoid putting the therapy results at risk.
WARNING
Improper handling of packaging materials
Risk of suffocation
►Keep packaging materials away from children.
Hazards when boarding
CAUTION
Brake not engaged when getting in/out
User may fall or tip over
►Before the user gets into the buggy or out of it, always engage and check the wheel lock.
►Engage the wheel locks to prevent the rehab buggy from moving on uneven ground or during transfers (e.g.
into a car).
Hazards while driving
WARNING
Danger from pushing too fast
User may fall or tip over
►The steering casters may begin to wobble at higher speeds and lead to an abrupt stop, causing the rehab
buggy to tip over at the front.
►Therefore, push the rehab buggy only at normal walking speed or engage the steering lock (see section
"Use"). It is not permissible to let go of the pushbar while pushing the buggy or to thrust it away from you.
WARNING
Impermissible use
Risk of user tipping, rolling over
►Using a rehab buggy beyond normal conditions may be dangerous.
►Please note that this product is not suitable for jogging, running, skating, etc.
►Do not exceed the maximum load capacity (see section "Technical Data").
Ottobock | 9Kimba neo
Safety

CAUTION
Unsupervised parking
Falling, the user may fall out
►Never leave the user unattended, even if the seat belts are fastened and the wheel locks are engaged.
CAUTION
Incorrect centre of gravity
Risk of user tipping, rolling over
►When reaching for objects, the user must not lean too far out of the seat.
►Put the seat tilt into neutral position (0-5°) before negotiating slopes and obstacles on slopes or ramps.
►Always provide support to the rear when negotiating slopes and obstacles on slopes or ramps.
►Do not move the product with a negative seat angle setting (seat tilted forward).
►Never park the product on slopes with the user in the seat.
CAUTION
Hanging heavy bags on the buggy may change the centre of gravity
User may tip or roll over
►Do not hang heavy bags or the like on the pushbar.
CAUTION
Risky operation
The user may fall or tip over, and may cause accidents with other traffic participants
►Push slowly when crossing obstacles (e.g. steps, curbs) and negotiating uphill or downhill slopes and
inclines.
►Never cross obstacles at an angle. Always approach obstacles head on (at an angle of 90°).
►Raise the front wheels before crossing obstacles.
►Avoid collisions with obstacles and dropping off curbs/ledges.
►Avoid driving cross-country.
Hazards when overcoming obstacles
WARNING
Negotiating stairs and obstacles
Risk of falling, tipping over
►Only negotiate stairs and obstacles with the help of additional attendants.
►Use available equipment (e.g. ramps or elevators).
►Never use escalators with a user in the product.
CAUTION
Improper lifting by attendants
User may fall or tip over
►Attendants may lift the buggy only by welded or permanently attached components. It is particularly danger
ous to lift the buggy by the footrest, push bar, lap bar, or armrests.
Hazard in case of damaged skin
CAUTION
Prolonged contact with broken skin
Redness and pressure marks
►Check before using the product that the skin is not broken in areas subject to prolonged pressure (e.g., but
tocks, back and rear side of the thighs).
►No liability is assumed for injuries caused by the use of the product with broken skin.
10 | Ottobock
Safety
Kimba neo

Hazards due to fire, heat and cold
CAUTION
Seat cushion or backrest cover may ignite
User may sustain burns
►The seat cushion and backrest cover are not highly flammable, but there is a possibility they may catch fire.
Therefore utmost caution is required near open flame.
►Keep away from any sources of fire, especially burning cigarettes.
CAUTION
Extreme temperatures
Risk of hypothermia or burns on components, failure of components
►Do not expose the product to any extreme temperatures (e.g. direct sunlight, sauna, extreme cold).
Hazards due to improper use of the rehab buggy
CAUTION
Loss off stability due to improper loading
User may fall or tip over
►Please note that any additional load may have a negative impact on the stability of the rehab buggy.
►Do not hang heavy bags or the like on the push bar.
NOTICE
Overloading
Damage to the product through user error
►Do not exceed the maximum load capacity (see the section "Technical Data").
►Please note that all options and add-on components will reduce the remaining load capacity.
NOTICE
Use under incorrect environmental conditions
Risk of damage to the product
►Do not use the product in salt water.
►If possible, prevent sand or other dirt particles from coming into contact with the wheel bearings and locking
mechanism.
NOTICE
Impermissible loading when folded
Deformation, problems when unfolding
►Never place heavy objects on the folded rehab buggy.
3.4 Further Information
INFORMATION
Even in the event of compliance with all applicable guidelines and standards, alarm systems (e.g. in department
stores) may respond to your product. Should this happen, remove your product from the area where the alarm
was triggered.
3.5 Name plate and warning labels
3.5.1 Name plate
Label Meaning
AType designation
BManufacturer article number
CMaximum load capacity (see the chapter "Technical Data")
DManufacturer information/address/country of origin
Ottobock | 11Kimba neo
Safety

Label Meaning
ESerial number
FEuropean Article Number/Global Trade Item Number
GRead the instructions for use before using the product.
The name plate "Outdoor mobility base" is
located on the back connecting tube of the
base frame.
The name plate "Seating unit" is located on
the bottom back plate.
HCE marking – product safety according to EU guidelines
3.5.2 Warning Labels
Label Meaning
Attention: Please observe the maximum load capacity of the
mobility base!
(See the section "Technical Data")
Fixation point for fastening the product in wheelchair access
ible vehicles
WARNUNG/WARNING
ACHTUNG! Lassen Sie Ihr Kind nicht unbeaufsichtigt!
ATTENTION! Never leave your child unattended!
ACHTUNG! Dieser Sitz ist für Kinder unter 6 Monaten nicht
geeignet!
ATTENTION! This seating unit is unsuitable for children aged
below 6 months!
12 | Ottobock
Safety
Kimba neo

4 Delivery
4.1 Scope of Delivery
The product is delivered pre-assembled, with the rear wheels and seating unit removed, and packed in a crate.
The scope of delivery includes:
• Outdoor mobility base, folded
• Multifunctional seating unit (standard option) or an alternative seating system
• Additional options as ordered (already assembled)
• Instructions for Use (User)
4.2 Standard Equipment
The standard equipment includes:
• Foldable outdoor mobility base
• Multifunctional seating unit (standard option) or an alternative seating system
• Padding
• Adjustable footrest
• Removable rear wheels
• "Swiveling" front wheels with integrated swivel lock or "fixed" front wheels
• Height-adjustable push bar
• Wheel lock
4.3 Options
The basic equipment may have been adapted to the needs of the user by adding options. For the use of these
options, please see section "Use".
4.4 Storage
Store the product in dry condition. Maintain an ambient temperature of -10°C to +40 °C.
Note regarding the tyres
• Tires contain chemical substances that can react with other chemical substances (such as cleaning agents,
acids, etc.).
• Direct exposure to sunlight or UV radiation causes the tyres to age more quickly. As a result, the tread surface
hardens and corner pieces break out of the tread.
• Avoid unnecessary parking outdoors. The tyres should be replaced every 2 years regardless of wear and tear.
5 Preparation for Use
5.1 Assembly
CAUTION
Exposed pinch points
Risk of crushing or pinching the fingers
►Do not reach into the folding mechanism when folding/unfolding.
CAUTION
Improper assembly
Risk of the user falling or tipping over
►After each assembly, verify the proper fit of the removable wheels. The quick-release axles must be firmly
locked in the wheel attachment.
►Before using the product, the folding mechanism must be firmly locked in place.
►When attaching the seating unit, make sure it clicks audibly onto the mobility base.
►Secure the seating unit using the seat lock.
The following steps must be taken to make the rehab buggy ready for use:
Attaching the rear wheels
1) If wheel locks are engaged: disengage wheel locks.
Ottobock | 13Kimba neo
Delivery

2) Depress the locks on the wheels (see Fig.4, item 1).
3) Push the rear wheels onto the axle until the lock clicks into place audibly.
Attaching the front wheels (only possible for the fixed front wheels)
1) Depress the locks on the wheels (see Fig.5, item 1).
2) Push the front wheels onto the axle until the lock clicks into place audibly.
Unfolding the rehab buggy (when the seating unit is detached)
1) Unfold the push bar (see Fig.6, item 1). To unfold the push bar: see Page21.
2) Fold out the rehab buggy by pulling the push bar (see Fig.6, item 2; see Fig.7).
→The release handles of the folding mechanism click into place automatically after folding out (see Fig.6, item
3).
4 5
6 7
Attaching the seat (multifunctional seating unit)
CAUTION
Non-activated tilt-limiting mechanism
Risk of the user falling out
►Note that prior to rotating the seating unit, the tilt-limiting mechanism must be adjusted, because otherwise
the seat's tilt angle will not be limited.
INFORMATION
The product can also be equipped with alternative seating systems. In this case, please observe the information in
the separate instructions for use for the seating system.
1) Place the seat on the rear tube of the seat adapter at an angle of approximately 45° (see Fig.13).
2) Press the front edge of the seat onto the mobility base until the gripper jaw audibly snaps on to the front tube of
the seat adapter (see Fig.9).
3) Slide the seat lock to the left to engage it (see Fig.10).
4) Check that the seat and the mobility base are securely connected. You can do this, for example, by pulling
back the backrest.
14 | Ottobock
Preparation for Use
Kimba neo

INFORMATION
Other settings and adjustments are described in the section "Usage".
8 9
10
6 Usage
6.1 Information on Use
WARNING
Independent modification of settings
Risk of tipping, falling or malposition
►Do not modify the settings established by the qualified personnel.
►In case of problems with the settings (unsatisfactory seating position, caster wheel wobble etc.) please con
tact the qualified personnel who adjusted your product.
WARNING
Impermissible use
Risk of user tipping, rolling over
►Please note that this product is not suitable for jogging, running, skating, etc.
CAUTION
Failure to check for proper functioning
User tipping over or falling
►In the interest of the user's safety, check the product for correct function before each use.
►Please also read the instructions in the section "Maintenance" > "Maintenance Intervals".
Ottobock | 15Kimba neo
Usage

CAUTION
Lack of driving experience
Risk of tipping, falling
►Practise using the product on level, open ground first.
INFORMATION
Please also observe the safety instructions in the section "Safety" > "Safety Instructions for Use".
In the interest of user safety, the following inspection must be conducted prior to use:
1) Verify firm seating of the rear wheel.
2) Verify firm locking of the seat and back angle adjustment mechanism.
3) Verify the functionality of all belt buckles on the safety belts and/or positioning aids.
6.2 Multifunctional Seating Unit (Standard Seat)
INFORMATION
The product can also be equipped with alternative seating systems. In this case, please observe the information in
the separate instructions for use for the seating system.
6.2.1 Removing and mounting the seating unit
CAUTION
Incorrect mounting of the seating unit
Seat can become loose and cause the user to fall out
►When attaching the seating unit, make sure it clicks audibly onto the mobility base.
►Secure the seating unit using the seat lock.
To facilitate transportation of the rehab buggy in a passenger vehicle or to divide the weight into two units for lift
ing, the seating unit can be easily detached from and reattached to the outdoor mobility base.
Detaching the seating unit
1) Slide the seat lock to the right to open it (see Fig.11).
2) Stand next to the seating unit and hold the seat by the top of the backrest with one hand.
3) Pull the release lever located under the seat up to the edge of the seat (see Fig.12).
→The clutch will now release the seat adapter.
4) Tip the seat back at an angle of approx. 45° and then lift it up (see Fig.8).
11 12
16 | Ottobock
Usage
Kimba neo

13
Mounting the seating unit
See the section "Assembly: Mounting the seating unit".
Rotating and mounting the seating unit
If the seat is rotated before mounting, the tilt-limiting mechanism then has to be adjusted for safety reasons. See
the section "Assembly: Mounting the seating unit" and the two sections that follow.
6.2.2 Rotating the seating unit
CAUTION
Non-activated tilt-limiting mechanism
Risk of the user falling out
►Note that prior to rotating the seating unit, the tilt-limiting mechanism must be adjusted, because otherwise
the seat's tilt angle will not be limited.
The seating unit can be mounted onto the mobility base in two directions (facing forward or backward) (see
Fig.14, see Fig.15).
To remount the seating unit after rotating it 180°, the tilt limit must be adjusted (see the following section).
14 15
6.2.3 Adjusting the tilt-limiting mechanism after rotating the seat
The seat adapter is equipped with an additional standard safety feature in the form of a tilt-limiting mechanism (see
Fig.16). This feature ensures that the seat angle of the seating unit cannot be adjusted forward or backward bey
ond the permissible limits.
The tilt-limiting mechanism must be adjusted as follows every time the seating unit is rotated:
1) Activate the seat tilt feature (see Fig.20) and move the seating unit forward until it reaches the stop.
→The seat is now tilted forward approx. 10%.
2) Remove the seating unit (see Page16).
→The seat adapter is now freely accessible.
3) Pull the key ring (see Fig.16/see Fig.17, item1) to release the locking pin.
Ottobock | 17Kimba neo
Usage

4) Move the limit hook (see Fig.16/see Fig.17, item2) into the desired position depending on the direction in
which the seating unit was installed:
→Limit hook down (see Fig.16): mount seat facing forward.
→Limit hook up (see Fig.17): mount seat facing backward.
5) Make sure that the locking pin clicks fully/audibly into place after adjustment.
6) Mount the seating unit (see Page16).
7) Check that the tilt-limiting mechanism is functioning:
→For this purpose, activate the seat tilt feature (see Fig.20) and move the seating unit forward/back.
→The adjustment range of the seating unit must not exceed approx. 10° to the front and 35° to the rear. If this
is not the case, the limit hook (see Fig.16/see Fig.17, item2) is not in the correct position and must be
adjusted accordingly (see steps 2–6).
16 17
6.2.4 Adjusting the backrest angle
CAUTION
Change in centre of gravity following back angle adjustment
The user may fall out
►After each modification of the back angle, check the tilt stability. To do so, hold the product with both hands
by the push handle.
The backrest can be adjusted as needed in a range from 90° to 180°:
1) Twist the lower knob counterclockwise to release the back angle adjustment (see Fig.107).
2) Move the backrest forward/backward to the desired position. The maximum position is lying flat (see Fig.19)
INFORMATION: Please note that in the maximum position (lying flat), the footrest must be adjusted so
that the user's feet can comfortably reach it.
3) Turn the knob clockwise to fixate the back angle.
18 19
18 | Ottobock
Usage
Kimba neo

6.2.5 Adjusting the seat angle
CAUTION
Incorrect use of the seat tilt feature
User may tip over or fall out
►Before operating the seat tilt feature (seat angle adjustment), practise without the seated user at first.
►Always engage the brake before operating the seat tilt feature (changing the seat angle).
►When adjusting the seat tilt feature, secure the user from falling out to the front or rear (e.g., by holding the
upper body). If necessary, place your other hand at the backrest or under the seat to secure the user.
►Do not reach into the adjustment mechanism when changing the seat tilt settings.
The seat can be adjusted as needed within a range of -10° to +35°:
1) Twist the upper knob clockwise to release the adjustment mechanism (see Fig.20).
NOTICE! Damage to the seat adjustment. Turn the knob with normal manual force to the stop, until
you feel a clear resistance. Excessive turning of the knob will damage the adjustment mechanism.
2) Set the seat angle to the desired position (see Fig.21).
CAUTION! With one hand, secure the occupant against falling out (e.g. by holding the upper body).
3) Release the knob.
→The adjustment mechanism will lock automatically.
4) Press the backrest gently to the front/back to make sure that the seat angle is securely set. If this is not the
case, the position of the upper knob must be checked.
20 21
6.3 Alternative Seating Systems
INFORMATION
When using an alternative seating system, please observe the information in the separate instructions for use
provided with the seating system.
The instructions for the multifunctional seating unit (standard seat) apply in the following cases:
• Detachment/attachment of the seating unit: see Page16
• Rotation of the seating unit: see Page17
• Adjustment of the tilt-limiting mechanism after rotation of the seat: see Page17
6.3.1 Adjusting the seat angle
CAUTION
Incorrect use of the seat tilt feature
User may tip over or fall out
►Before operating the seat tilt feature (seat angle adjustment), practise without the seated user at first.
►Always engage the brake before operating the seat tilt feature (changing the seat angle).
►When adjusting the seat tilt feature, secure the user from falling out to the front or rear (e.g., by holding the
upper body). If necessary, place your other hand at the backrest or under the seat to secure the user.
►Do not reach into the adjustment mechanism when changing the seat tilt settings.
The alternative seating system can be adjusted as needed within the range from -10° to +35°:
Ottobock | 19Kimba neo
Usage

1) Stand to the left of the rehab buggy and hold on to the backrest for safety reasons (see Fig.22, item1).
2) Twist the knob on the upper front part of the frame in the direction indicated by the arrow to release the adjust
ment mechanism (see Fig.22, item2).
NOTICE! Damage to the seat adjustment. Turn the knob with normal manual force only to the stop
(until you feel a clear resistance). Excessive turning of the knob could damage the adjustment mech
anism.
3) Set the seat angle to the desired position (see Fig.23).
4) Let go of the knob and the adjustment mechanism will lock automatically.
5) Press the backrest gently to the front/back to make sure that the seat angle is securely set. If this is not the
case, the position of the knob must be checked.
22 23
6.4 Footrest (Multifunctional Seating Unit)
CAUTION
Getting into buggy when the footrest is folded down is dangerous
User may fall or tip over
►Fold up the footrest before the user gets in.
CAUTION
Improper lifting by attendants
User may fall or tip over
►The footrest must not be used to lift the rehab buggy.
INFORMATION
The product can also be equipped with alternative seating systems. In this case, please observe the information in
the separate instructions for use for the seating system.
6.4.1 Adjusting the knee angle
The knee angle of the footrest can be adjusted within a range of 0° to +90° as needed:
1) Open the adjustment lever (see Fig.24).
2) Adjust the knee angle.
3) Firmly close the adjustment lever.
4) Prior to use, check the secure position of the footrest. To do so, press the footrest down.
→The knee angle must not change.
20 | Ottobock
Usage
Kimba neo
Other manuals for Kimba neo
8
Table of contents
Other Otto Bock Stroller manuals

Otto Bock
Otto Bock ECO BUGGY User manual

Otto Bock
Otto Bock Kimba Spring User manual

Otto Bock
Otto Bock Kimba Cross User manual

Otto Bock
Otto Bock Kimba Home User manual

Otto Bock
Otto Bock ECO BUGGY User manual

Otto Bock
Otto Bock ECO User manual

Otto Bock
Otto Bock ECO BUGGY User manual

Otto Bock
Otto Bock Kimba neo User manual

Otto Bock
Otto Bock Kimba Spring User manual

Otto Bock
Otto Bock ECO BUGGY User manual