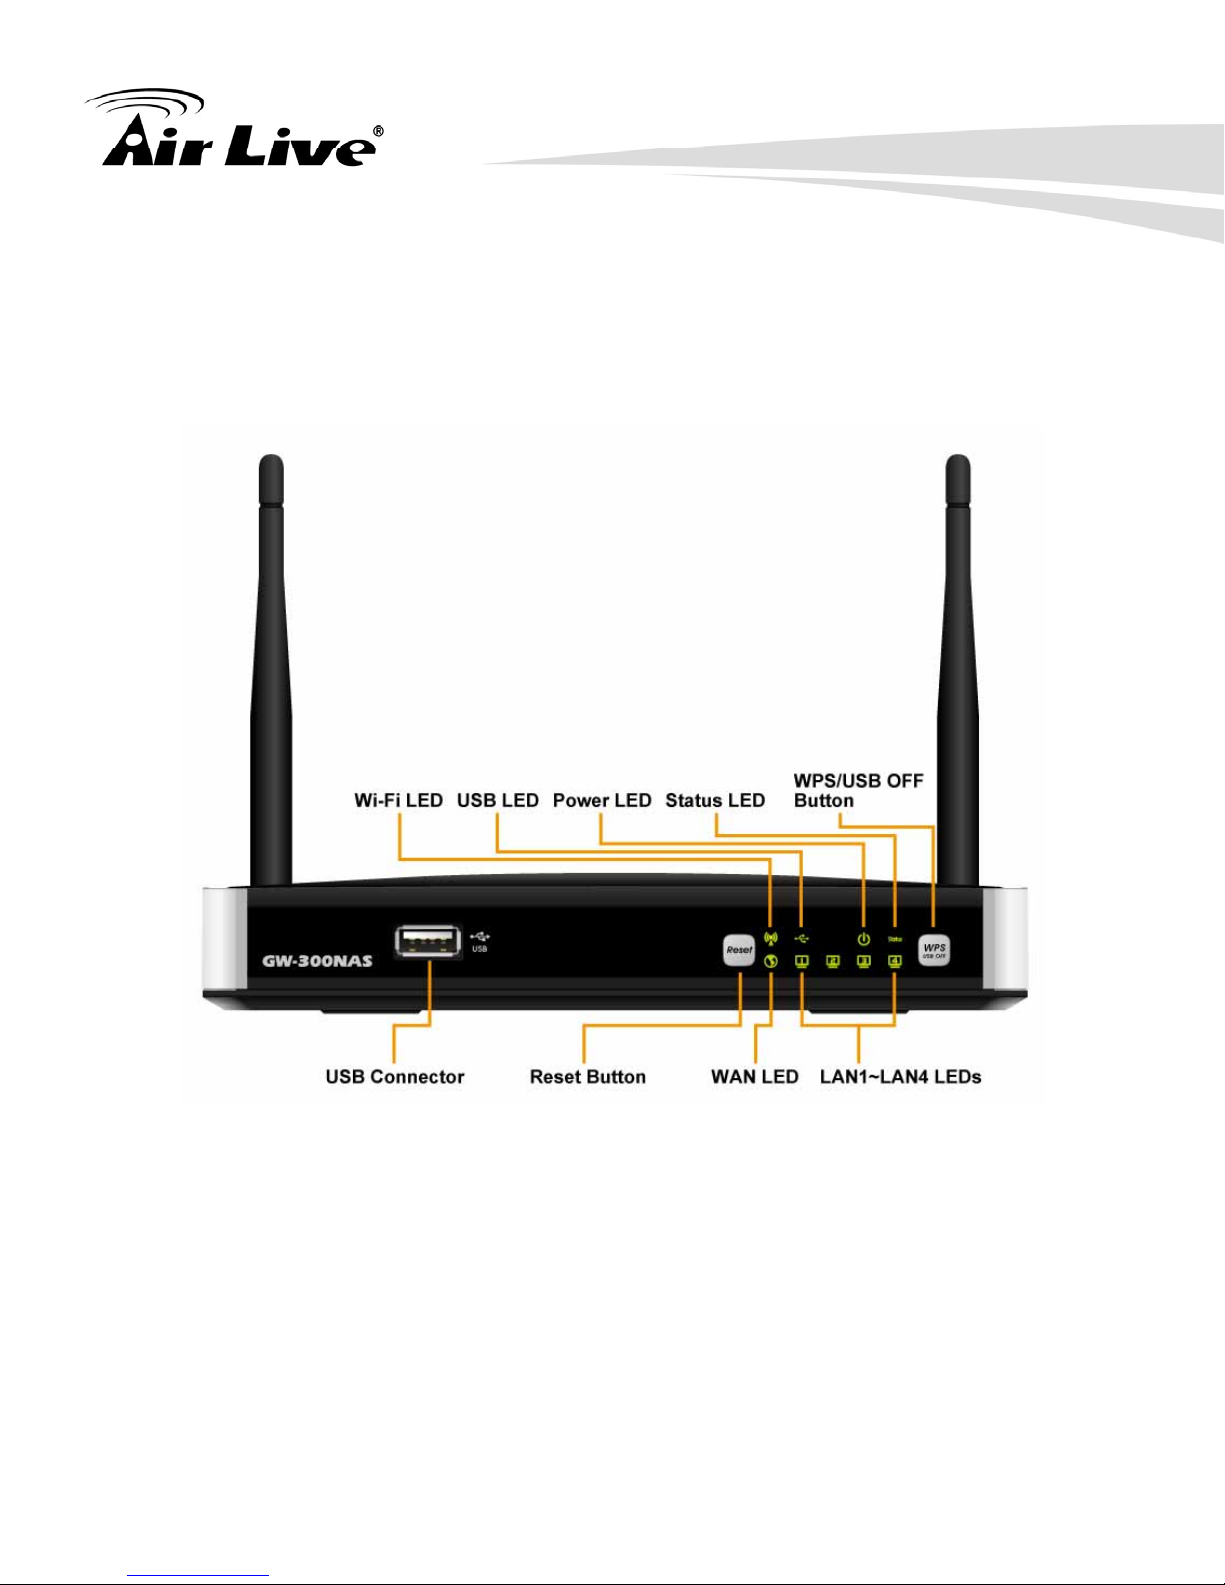
Copyright and Disclaimer
AirLive GW-300NAS User’s Manual
Copyright & Disclaimer
The contents of this publication may not be reproduced in any part or as a whole, stored,
transcribed in an information retrieval system, translated into any language, or transmitted in
any form or by any means, mechanical, magnetic, electronic, optical, photocopying, manual, or
otherwise, without the prior written permission.
Trademarks
All products, company, brand names are trademarks or registered trademarks of their
respective companies. They are used for identification purpose only. Specifications are subject
to be changed without prior notice.
FCC Interference Statement
This equipment has been tested and found to comply with the limits for a Class B digital device
pursuant to Part 15 of the FCC Rules. These limits are designed to provide reasonable
protection against radio interference in a commercial environment. This equipment can
generate, use and radiate radio frequency energy and, if not installed and used in accordance
with the instructions in this manual, may cause harmful interference to radio communications.
Operation of this equipment in a residential area is likely to cause interference, in which case
the user, at his own expense, will be required to take whatever measures are necessary to
correct the interference.