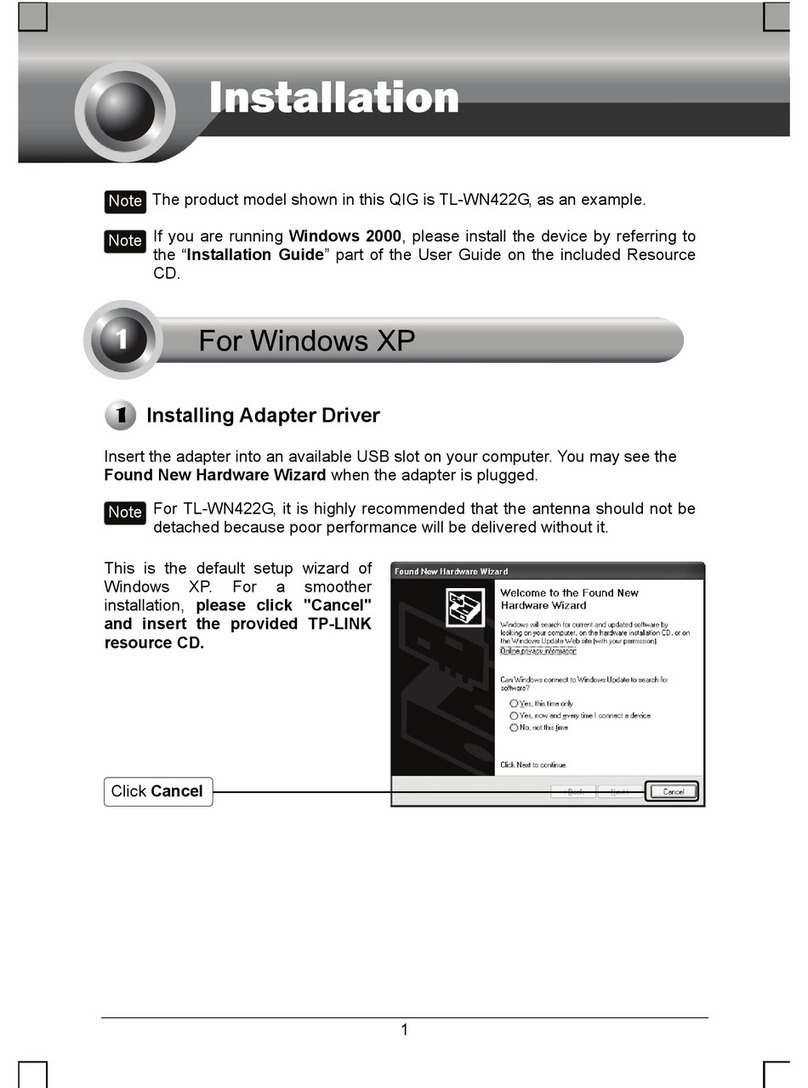
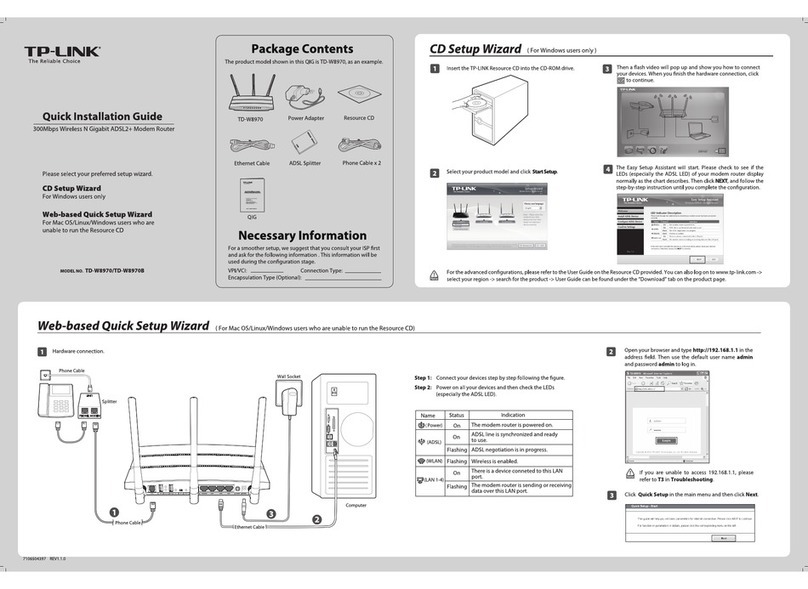
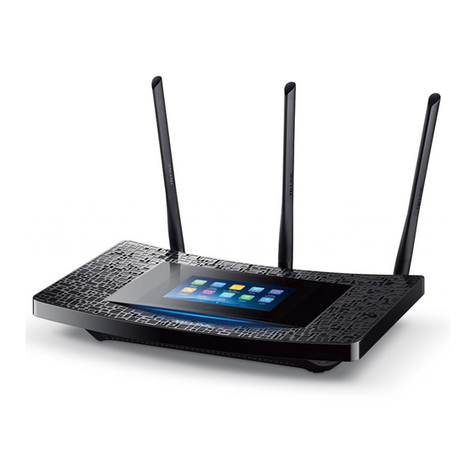
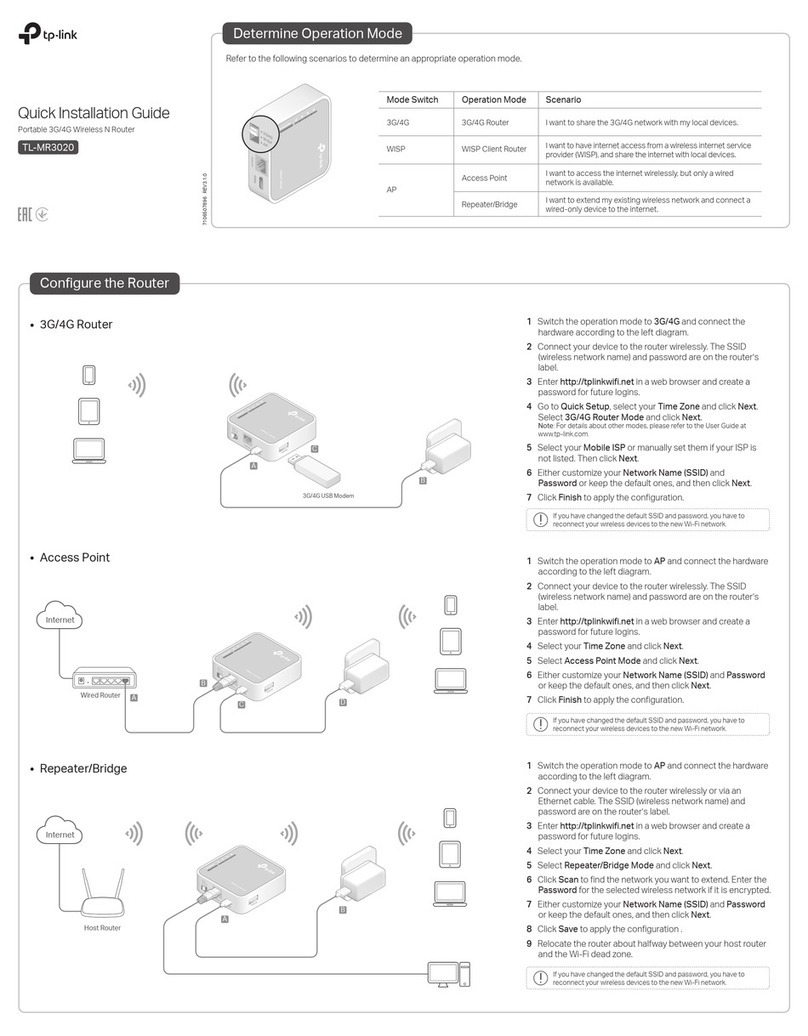
To unify and extend your network, you can set up a network between the router and the extender via AP clone.
AP clone enables the extender to automatically synchronize wireless settings (such as the SSID and wireless
password) with the router, providing you a secured network roaming experience.
Please follow the steps below to get started.
5
Choose the wireless band for your wireless
network and then click Next. In this example,
both 2.4GHz and 5GHz bands are chosen.
8
Click Reboot to make your settings take eect.
6
Set a new name and password for your 2.4GHz
wireless network and then click Next.
The default wireless network name is
TP-LINK_2.4GHz_XXXXXX, and the default wireless
password is printed on the bottom label.
7
The default wireless network name is
TP-LINK_5GHz_XXXXXX, and the default wireless
password is printed on the bottom label.
Set a new name and password for your 5GHz wireless
network and then click Next.
www.tp-link.com
TP-LINK TECHNOLOGIES CO., LTD.
Technical Support
www.tp-link.com/en/support/faq
For all other technical support, please contact us by using the following details:
For more troubleshooting help, go to
To download the latest Firmware, Driver, Utility and User Guide, go to http://www.tp-link.com/en/support/download/
Singapore
Tel: +65 6284 0493
Fee: Depending on rate of dierent carriers.
Service time: 24hrs, 7 days a week
USA / Canada
Toll Free: +1 866 225 8139
Service time: 24hrs, 7days a week
Malaysia
Toll Free: 1300 88 875 465
E-mail: support.my@tp-link.com
Service time: 24hrs, 7days a week
Tel: +86 755 2650 4400
Fee: Depending on rate of dierent carriers,
IDD.
Service time: 24hrs, 7 days a week
Global
Tel: +44 (0) 845 147 0017
Fee: Landline: 1p-10.5p/min, depending on
the time of day. Mobile: 15p-40p/min,
depending on your mobile network.
Service time: 24hrs, 7days a week
UK
Tel: 0 800 505 508
Fee: Free for Landline; Mobile: Depending on
rate of dierent carriers
Service time: Monday to Friday 10:00 to 22:00
Ukraine
Germany / Austria
Tel: +49 1805 875 465 (German Service)
+49 1805 TPLINK
+43 820 820 360
Fee: Landline from Germany: 0.14EUR/min.
Landline from Austria: 0.20EUR/min.
E-mail: support.de@tp-link.com
Service Time: Monday to Friday, 09:00 to
12:30 and 13:30 to 18:00. GMT+1 or GMT+2
(DST in Germany)
* Except bank holidays in Hesse
Italy
Tel: +39 023 051 9020
Fee: Depending on rate of dierent carriers.
Service time: Monday to Friday,
09:00 to 13:00; 14:00 to 18:00
Switzerland
Tel: +41 (0) 848 800 998 (German Service)
Fee: 4-8 Rp/min, depending on rate of dierent
time
Service time: Monday to Friday, 09:00 to 12:30
and 13:30 to 18:00. GMT+ 1 or GMT+ 2 (DST)
Australia / New Zealand
Tel: AU 1300 87 5465 (Depending on 1300 policy.)
NZ 0800 87 5465 (Toll Free)
Service time: 24hrs, 7 days a week
Turkey
Tel: 0850 72 444 88(Turkish Service)
Fee: Depending on rate of dierent carriers.
Service time: 9:00 to 21:00, 7days a week
Russian Federation
Tel: 8 (499) 754 5560 (Moscow NO.)
8 (800) 250 5560 (Toll-free within RF)
Service time: From 9:00 to 21:00 (Moscow time)
*Except weekends and holidays in RF
Tel: (+62 )021 6386 1936
Fee: Depending on rate of dierent carriers.
Service time: Sunday to Friday, 09:00 to
12:00, 13:00 to 18:00 *Except public holidays
Indonesia
Poland
Tel: +48 (0) 801 080 618
+48 223 606 363 (if calls from mobile phone)
Fee: Depending on rate of dierent carriers.
Service time: Monday to Friday 9:00 to 17:00
GMT+1 or GMT+2 (DST)
France
Tel: 0820 800 860 (French service)
Email: support.fr @tp-link.com
Fee: 0.118 EUR/min from France
Service time: Monday to Friday, 9:00 to 18:00
*Except French Bank holidays
Toll Free: 0800 608 9799 (Portuguese Service)
Service time: Monday to Friday, 9:00 to 20:00;
Saturday, 9:00 to15:00
Brazil
Appendix 1: USB Features Introduction and Application
USB port of the router can be used to share your file, media, storage space, and printer across your local network.
Besides, by setting up an FTP server, you can access your files whenever you are connected to the Internet.
Scan the QR code to
access the Application
Guide for USB features.
http://www.tp-link.com/app/usb
Remote Access via FTP Server Media Sharing
Local Storage Sharing Printer Sharing
Troubleshooting
APCLONE
/PAIR
RESET
/WPS
Configure the Router (Continued)
1
Unify and Extend Wi-Fi Network via AP Clone
2
The router supports both 2.4GHz and 5GHz networks while the extender supports only 2.4GHz network. So the
extender can only synchronize wireless settings of 2.4GHz network.
Appendix 2: Additional Features
You can set up additional features by referring to the Technical Support page on the TP-LINK website or the User
Guide on the resource CD.
●Open ports for Game Console FAQ ID: 72
●Set up Bandwidth Control FAQ ID: 194
●Set up Parental Control FAQ ID: 350
●Set up Access Control FAQ ID: 359
●Set up/Change the wireless security settings FAQ ID: 256
●Upgrade the firmware FAQ ID: 296
●Restore the factory default settings FAQ ID: 426
●Add a powerline adapter via pair button FAQ ID: 319
●Look over the hardware version FAQ ID: 97
Scan the QR code to access
the Technical Support page.
http://www.tp-link.com/en/support/faq
Extender
SSID: abc
Password: a1b2c3d4
SSID: abc
Password: a1b2c3d4
ON/OFF POWER
WIFI
ON/OFF
WAN LAN4 LAN3 LAN2 LAN1 USB
Router
Wall Socket
Plug the extender into a wall socket near the router.
1Place the extender in your desired location. The extender will automatically synchronize wireless settings with
the router whenever the router's wireless settings are changed.
4
Press the AP CLONE/PAIR button on the router’s side panel and the router’s Power LED will blink.
2
USB port
Press the AP CLONE/PAIR button on the extender’s bottom and the extender’s Power LED will blink quickly.
In about 20 seconds, both Powerline LEDs will be solid on. The router and the extender have formed a powerline
network. Then both Power LEDs will be solid on. The AP clone process is completed.
Wall Socket
3
If your router does not work properly, you can reset it and then
configure it again. With the router powered on, press and hold the
RESET/WPS button on the side panel for about 10 seconds before
releasing it.
4. How do I restore my router’s conguration to its
factory default settings?
3. What can I do if I forget my password?
1) Verify all the hardware connections. The computer should be
connected to a LAN port of the router.
2) Turn off the router and turn it back on.
3) Try another cable/web browser/computer.
4) Check the IP settings of your computer, and ensure that it is set to
"Obtain an IP address automatically".
2. What can I do if I cannot open the web-based
management page?
1. What can I do if I cannot access the Internet?
Make sure that your computer can access the Internet when
connected directly to the modem using an Ethernet cable.
Make sure that all cables are connected correctly. Try different
Ethernet cables to ensure they are working properly.
Check whether you are able to access the router’s web
management page. If not, please refer to “What can I do if I
cannot open the web-based management page?”.
Log in the web management page (http://tplinklogin.net),
choose menu “Network > WAN”, and ensure that WAN
Connection Type is Dynamic IP; this is the suitable connection
type for most DSL/Cable modem and other network.
For cable modem users, please try rebooting the modem first. If
the problem persists, choose menu “Network > MAC Clone”,
click Clone MAC Address and then click Save.
If the problem persists, please contact our technical support for
further assistance.
1)
2)
3)
4)
5)
5. What can I do if AP clone fails?
Make sure that the router and extender are plugged into wall sockets
under the same electric meter.
Follow the instructions described in this QIG to perform AP clone again.
Restore both the router and extender to factory defaults and perform
AP clone before configuring the router.
If the problem persists, please contact our technical support for further
assistance.
1)
2)
3)
●For the web management page password:
The default user name and password are both admin. If you have
changed them, please restore the router to factory default settings.
●For the wireless password:
The default wireless password is printed on the bottom label. If you
have changed it, please find it on the Wireless Security page of the
router’s web management page.

