manuals.online logo
Brands
  1. Home
  2. •
  3. Brands
  4. •
  5. Panasonic
  6. •
  7. Accessories
  8. •
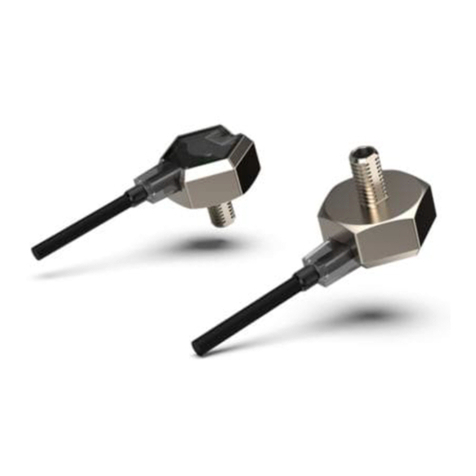
  9. Panasonic PIMITES GS1 User manual

Panasonic PIMITES GS1 User manual

AGS1
6
ORDERING INFORMATION
PRODUCT TYPES
Note: Packaging format: Tape and reel (Outer carton: 5,000 pcs. Inner carton: 1,000 pcs.)
MAXIMUM RATING
1-AXIS
ACCELERATION SENSOR GS1 SENSOR
Product name Operation power supply
voltage
Acceleration detection
range Detection sensitivity Part number
1-axis Acceleration sensor GS1 5 V DC ±2g 1 V/g AGS11151
Item Unit Standard value Remarks
min. typ. max.
Maximum allowable voltage V –0.3 — 7 Ta=25°C
Storage temperature range °C –40 — 85
Operation temperature range °C –40 — 85
Anti-shock characteristic g 5,000 —
FEATURES
1. High precision and high sensitivity
±5% FS overall accuracy and 1 V/g
detection sensitivity.
2. High reliability
Detection errors due to temperature
fluctuation reduced to a minimum.
3. Compact size
6.2 (L) mm ×8.5 (W) mm ×1.6 mm (H)
(typ.)
APPLICATIONS
1. Car navigation system
Distinguish between regular roads and
highways (inclination sensor)
2. Automotive control
Skid prevention system, 4 WD-ABS,
Rollover prevention system (inclination
and acceleration detection)
3. Other applications
Projectors (trapezoidal compensation),
Elevators, Medical caregiving devices
(inclination detection)
Ultra-small devices
[pi mi teIs]
RoHS Directive compatibility information
http://www.nais-e.com/
Type
1: Built-in ASIC
Number of detectable axis (Method)
1: 1-axis Acceleration Sensor (Electrostatic capacitance method)
Detection sensitivity
1: 1 V/g
AGS 11151
Package type/Size
1: Ceramic package/6.2 x 8.5 mm
Operation power supply voltage/Output type
5: 5 V DC/Analog output
AGS1
7
ELECTRICAL CHARACTERISTICS
Notes: 1. The acceleration unit “g” means 9.8 m/s2.
2. VDD=5 V when there is no indication.
3. Maximum error from linear output that connects +2 g and –2 g output.
4. “C1” is a ceramic capacitor installed between the VDD and GND terminals. “C2” is a ceramic capacitor installed between the Vout and
Ext-Cap terminals.
5. The frequency characteristics can by changed depending on the C2 capacitance value. Please refer to “Recommended circuit diagram” on
the following page. Note that the maximum frequency response is 200 Hz.
REFERENCE DATA
Item Unit Standard value Remarks
min. typ. max.
Acceleration detection range g –2 — 2
Operation power supply voltage V 4.75 5 5.25 –40 to 85°C
Current consumption mA — 5 7 0g, Ta=25°C
Sensitivity V/g 0.97 1 1.03 Ta=25°C
Temperature sensitivity characteristic V/g –0.05 — 0.05 –40 to 85°C
Offset voltage (0 g) V 2.4 2.5 2.6 Ta=25°C
Offset voltage temperature characteristic V –0.125 — 0.125 –40 to 85°C
Other axis sensitivity % –5 — 5 Ta=25°C
Non-linearity Note 3) %FS –1 — 1 Ta=25°C
Tu r n-on time Note 4) ms — 10—
0g, Ta=25°C
C1=220nF, C2=27nF
Frequency response Note 5) Hz DC 60 — –3dB point, C2=27nF
1. Output characteristics 2. Inclination angle - Output voltage
characteristics
3. Offset voltage temperature characteristics
(Typical value)
-1.0 -0.5 0.0 0.5 1.0
1.0
1.5
2.0
2.5
3.0
3.5
4.0
Acceleration, G
Output voltage (measured value), V
-100
-80 -60 -40 -20 20 40 60 80 1000
1.0
1.5
2.0
2.5
3.0
3.5
4.0
Inclination angle, °
Output voltage (measured value), V
Te mperature, °C
Offset voltage range, V
-60 -40 -20 0 20 40 60 80 100
-0.150
-0.100
-0.050
0.000
0.050
0.100
0.150
4. Sensitivity temperature characteristics
(Typical value)
5. Frequency characteristics
(Typical value)
Note: The frequency characteristics can by changed
depending on the C2 capacitance value. Please
refer to “Recommended circuit diagram” on the
following page.
Te mperature, °C
-60 -40 -20 0 20 40 60 80 100
-0.060
-0.040
-0.020
0.000
0.020
0.040
0.060
Sensitivity range, V/g
Frequency, Hz
11060100
-7.00
-6.00
-5.00
-4.00
-3.00
-2.00
-1.00
0.00
(C2=27nF)
Gain, dB
AGS1
8
DIMENSIONS mm inch
RECOMMENDED CIRCUIT DIAGRAM
PACKAGING FORMAT (Tape and reel)
Tolerance: ±0.2 ±.008
Leave terminal “NC (No. 1, 3, 7, 8 and 10 to 14)”
unconnected.
The No. 2 and No. 6 terminals are connected
internally.
Recommended PC board pad
8
14
17
050907
AGS11151
14 8
17
8.5
.335
4-0.5
4-.020
P1.27×4
P.500×4
10-0.5
10-.020
6.2
.244
1.6
.063
1.6
.063
4.2
.165
Te r minal
No. Abbreviation Te r minal
No. Abbreviation
NC NC
GND VDD
NC NC
Vout NC
Ext-Cap NC
GND NC
NC NC
.028
0.7
P1.27±0.05×4=5.08
P.050±.002×4=.200
.031
0.8 .031
0.8
8.1±0.06
.319±.002
1.4
.055 6.9
.272
DC5V
C1:
220nF
Min.
VDD Vout
GND Ext
-Cap
Sensor
Output
C2:
27nF
The frequency characteristics value can by changed
depending on the C2 capacitance value.
-3dB bandwidth is expressed in the formula below.
f-3dB=1
Tape dimensions Dimensions of tape reel
Notes 3)
Direction of picking
050927
AGS11151
050927
AGS11151
(1.75)
(.069)
(1.9)
(.075)
(.061 dia.)
(1.55 dia.)
165°to 180°
(1.55 dia.)
(.061 dia.)
(12.0)
(.472)
(2.0)
(.079)
(12.0)
(.472)
(5.5)
(.217)
(4.0)
(.157)
Embossed carrier tape
Top cover tape
2
1
(12.4)
(.489) A
(254 dia.)
(10.000 dia.)
AGS1
9
NOTES
To ensure reliability, please verify quality
under conditions of actual use.
1. Mounting
Use lands on the printed-circuit boards to
which the sensor can be securely fixed.
2. Soldering
Ta ke steps to minimize the effects of
external heat.
Damage and changes to characteristics
may occur due to heat deformation.
Use a non-corrosive resin type of flux.
1) Manual soldering
• Set the soldering tip from 260 to 300°C
(30W), and solder for no more than 5
seconds.
• Please note that output may change if
the pressure is applied on the terminals
when the soldering.
• Thoroughly clean the soldering iron.
2) Reflow soldering
• The recommended reflow temperature
profile conditions are given below.
• We recommend the screen solder
printing method as the method for cream
solder printing.
• Please refer to the recommended PC
board pad for the PC board foot pattern.
• Self alignment may not always work as
expected; therefore, please carefully
adjust the position of the terminals and
pattern.
• The profile temperature is the value
measured on the PCB near the terminals.
• When doing reflow soldering on the
back of the PC board after performing
sensor reflow, please fix the sensor with
adhesive and so on.
3) Solder reworking
• Finish reworking in one operation.
• For reworking of the solder bridge, use
a soldering iron with a flat tip. Please do
not add more flux when reworking.
• Please use a soldering iron that is
below the temperature given in the
specifications in order to maintain the
correct temperature at the tip of the
soldering iron.
4) Too much temperature on the
terminals will cause deformation and loss
in effectiveness of the solder. Therefore,
please avoid dropping and careless
handling of the product.
5) When cut folding the PC board after
mounting the sensor, take measures to
prevent stress to the soldered parts.
6) The sensor terminals are designed to
be exposed, so contact of the terminals
with metal shards and the like will cause
output errors. Therefore, please be
careful and prevent things such as metal
shards and hands from contacting the
terminals.
7) To prevent degradation of the PC
board insulation after soldering, please
be careful not to get chemicals on the
sensor when coating.
3. Connections
• Please perform connections correctly in
accordance with the terminal connection
diagram. In particular, be careful not to
reverse wire the power supply as this will
cause damage or degrade to the product.
• Do not connect terminals that are not
used. This can cause malfunction of the
sensor.
4. Cleaning
• Avoid ultrasonic cleaning since this may
cause breaks or disconnections in the
wiring.
5. Environment
• Please avoid using or storing the sensor
in a place exposed to corrosive gases
(such as the gases given off by organic
solvents, sulfurous acid gas, hydrogen
sulfides, etc.) which will adversely affect
the performance of the sensor.
• When installing the sensor, you must
provide a capacitor as shown in the
recommended circuit diagram.
• Since the internal circuitry may be
destroyed if an external surge voltages is
supplied, provide an element which will
absorb the surges.
• Malfunctioning may occur if the product
is in the vicinity of electrical noise such as
that from static electricity, lightning, a
broadcasting station, an amateur radio,
or a mobile phone.
• Please do not use the sensor in a
location where it may be sprayed with
water, etc.
• Avoid using the sensor in an
environment where condensation may
form.
Furthermore, its output may fluctuate if
any moisture adhering to it freezes.
• Avoid using the sensor where it will be
susceptible to ultrasonic or other high-
frequency vibration.
6. Other handling precautions
To assure reliability, check the sensor
under actual loading conditions. Avoid
any situation that may adversely affect its
performance.
• Caution is required because differences
in the acceleration detection range and
the method of connection can lead to
accidents.
• The actual acceleration should be within
the rated acceleration range. Damage
may occur if it is outside of this range.
• Static electricity can damage the
sensor. Be very careful when handling.
T1
T2
T3
t1t2
T1= 150 to 180°C 302 to 356°F
T2= 230°C 446°F
T3= Max. 240°C 464°F
t1= 60 to 120 sec.
t2= With in 30 sec.
Other Panasonic Accessories manuals

Panasonic SU-7 Series User manual

Panasonic

Panasonic SU-7 Series User manual

Panasonic MA3S1330G User manual

Panasonic

Panasonic MA3S1330G User manual

Panasonic Light Emitting Diodes LN840RPX User manual

Panasonic

Panasonic Light Emitting Diodes LN840RPX User manual

Panasonic MA27P070G User manual

Panasonic

Panasonic MA27P070G User manual

Panasonic MA22D39 User manual

Panasonic

Panasonic MA22D39 User manual

Panasonic EQ-500 Series User manual

Panasonic

Panasonic EQ-500 Series User manual

Panasonic MA3S132D User manual

Panasonic

Panasonic MA3S132D User manual

Panasonic MA3XD11 User manual

Panasonic

Panasonic MA3XD11 User manual

Panasonic MN34120PAJ User manual

Panasonic

Panasonic MN34120PAJ User manual

Panasonic MA2S7840G User manual

Panasonic

Panasonic MA2S7840G User manual

Panasonic MA4X160A User manual

Panasonic

Panasonic MA4X160A User manual

Panasonic MA3J700 User manual

Panasonic

Panasonic MA3J700 User manual

Panasonic Light Emitting Diodes LN360GPX User manual

Panasonic

Panasonic Light Emitting Diodes LN360GPX User manual

Panasonic KX-HNS103 User manual

Panasonic

Panasonic KX-HNS103 User manual

Panasonic MALS068G User manual

Panasonic

Panasonic MALS068G User manual

Panasonic CX-400 Series User manual

Panasonic

Panasonic CX-400 Series User manual

Panasonic MA22D28 User manual

Panasonic

Panasonic MA22D28 User manual

Panasonic MA4SD01 User manual

Panasonic

Panasonic MA4SD01 User manual

Panasonic MA2J7040G User manual

Panasonic

Panasonic MA2J7040G User manual

Panasonic EX-FC1 User manual

Panasonic

Panasonic EX-FC1 User manual

Panasonic MA3X717E User manual

Panasonic

Panasonic MA3X717E User manual

Panasonic EX-F70 SERIES User manual

Panasonic

Panasonic EX-F70 SERIES User manual

Panasonic MA3X704D User manual

Panasonic

Panasonic MA3X704D User manual

Panasonic HG-C1000L Series User manual

Panasonic

Panasonic HG-C1000L Series User manual

Popular Accessories manuals by other brands

Quincy lab 140AE-1 operating manual

Quincy lab

Quincy lab 140AE-1 operating manual

HomePro ZIR000 user manual

HomePro

HomePro ZIR000 user manual

DOL 20SCR Technical user guide

DOL

DOL 20SCR Technical user guide

RAB Smart Task installation manual

RAB

RAB Smart Task installation manual

Kemppi KMS 300 quick guide

Kemppi

Kemppi KMS 300 quick guide

Stearns 57,500 Series Installation and service instructions

Stearns

Stearns 57,500 Series Installation and service instructions

iGuzzini TWILIGHT COPENAGHEN manual

iGuzzini

iGuzzini TWILIGHT COPENAGHEN manual

Adelaide Annexe & Canvas Avan Deluxe installation guide

Adelaide Annexe & Canvas

Adelaide Annexe & Canvas Avan Deluxe installation guide

OHAUS 5000 instruction manual

OHAUS

OHAUS 5000 instruction manual

HOME8 WLS1300 quick start guide

HOME8

HOME8 WLS1300 quick start guide

MAXBOTIX MaxSonar quick start guide

MAXBOTIX

MAXBOTIX MaxSonar quick start guide

ioSmart iSmart56 Installation and user guide

ioSmart

ioSmart iSmart56 Installation and user guide

Focusrite Scarlett 18i8 user guide

Focusrite

Focusrite Scarlett 18i8 user guide

Velleman ED38105 user manual

Velleman

Velleman ED38105 user manual

JumpSport SkyBounce user manual

JumpSport

JumpSport SkyBounce user manual

Prima-Temp PRIYA Instructions for use

Prima-Temp

Prima-Temp PRIYA Instructions for use

Tefcold BC85I-BC85I W user manual

Tefcold

Tefcold BC85I-BC85I W user manual

Vaisala WMS302 user guide

Vaisala

Vaisala WMS302 user guide

manuals.online logo
manuals.online logoBrands
  • About & Mission
  • Contact us
  • Privacy Policy
  • Terms and Conditions

Copyright 2025 Manuals.Online. All Rights Reserved.