5
Preparation
4
Safety Precautions
This appliance is not intended for use by persons
(including children) with reduced physical, sensory
or mental capabilities, or lack of experience and
knowledge, unless they have been given
supervision or instruction concerning use of the
appliance by a person responsible for their safety.
Children should be supervised to ensure that they
do not play with the appliance. Keep infants away
from the appliance.
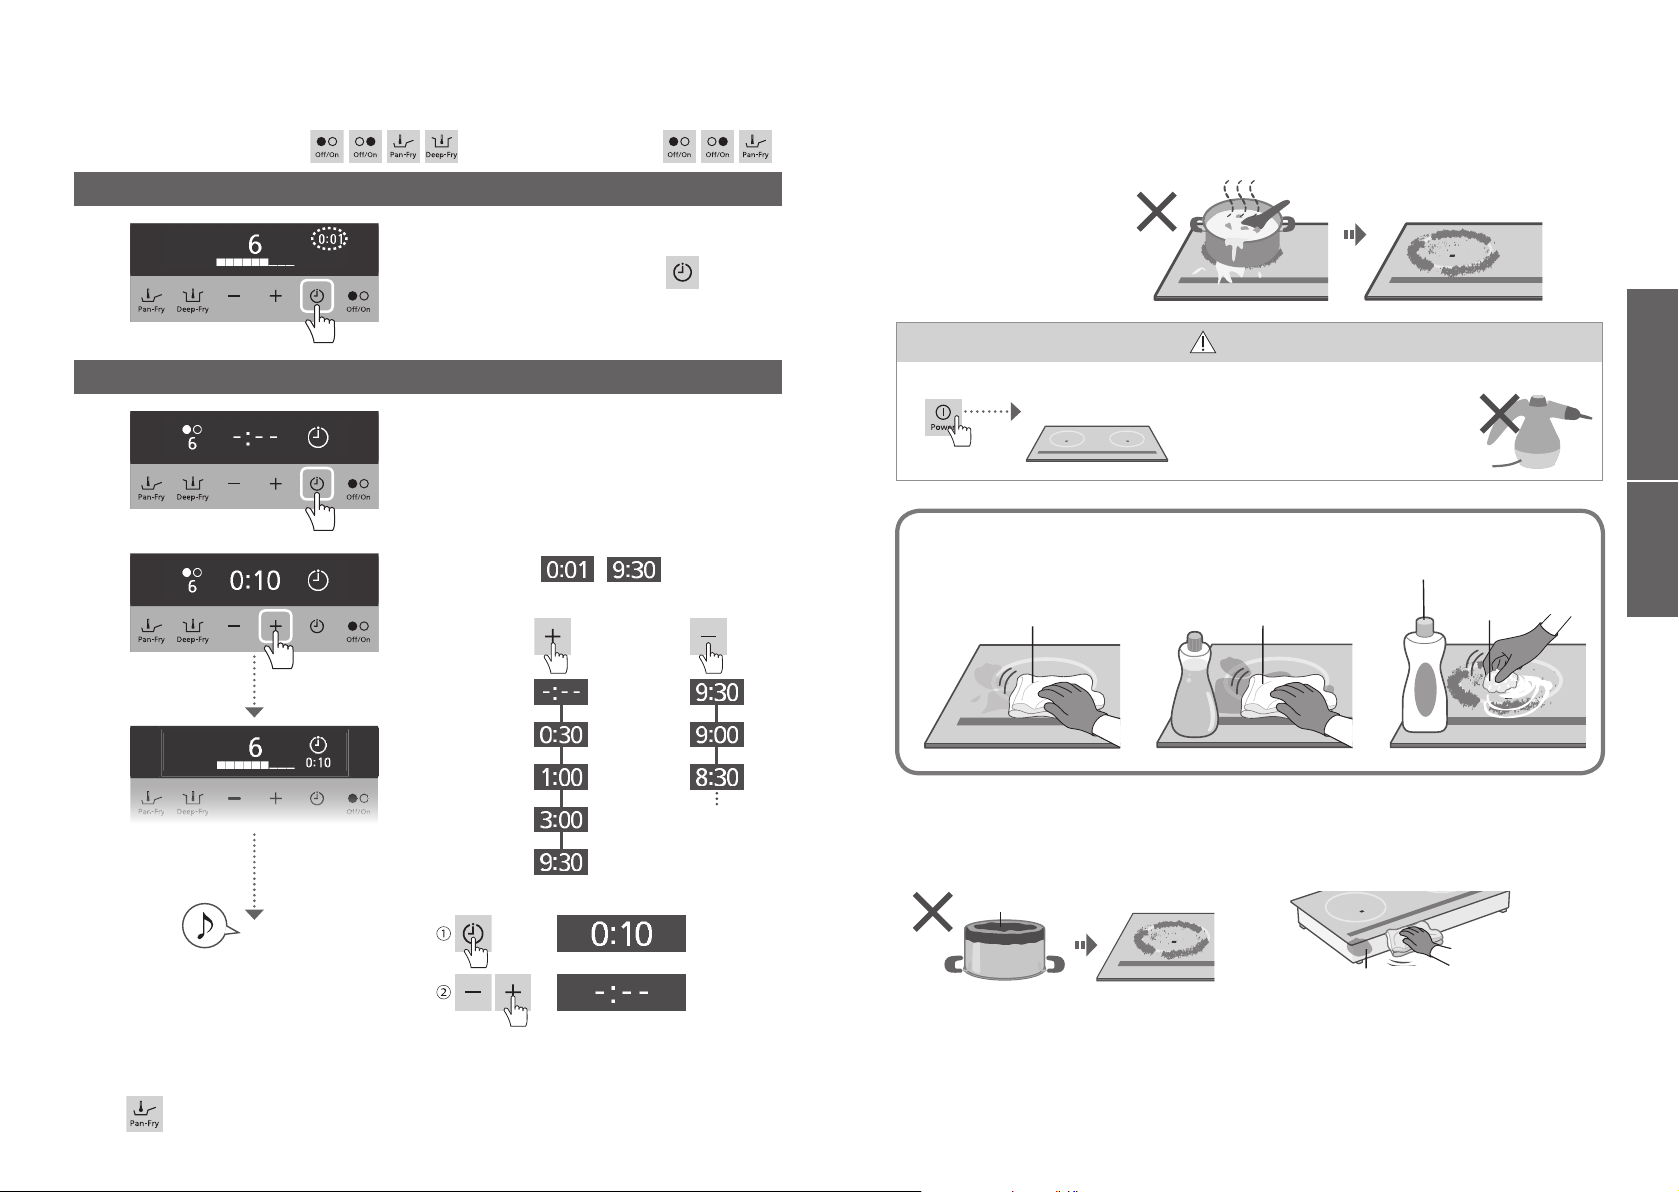
WARNING
To avoid re, explosion or electric shock
■Do not apply excessive pressure.
It may crack the top plate.
■WARNING: If the top plate is cracked, do not
touch. Turn off the main power switch to avoid
the possibility of electric shock.
■Danger of re: Do not store items on the
cooking surfaces.
■Do not place combustible materials near the
appliance.
■
After use, turn off the appliance by its control and
do not rely on the pot detector (safety features).
■Turn off the circuit breaker when not using the
appliance for long period of time.
■Do not disassemble, repair or modify the
appliance by yourself.
Gas cylinder
Canned goods
Gas cooker
If the power cord is damaged, it must be replaced by the manufacturer, its
service agent or a qualifi ed person in order to avoid a hazard.
In case of a malfunction or breakdown
●Smell of burning
●Feeling electricity through the top plate
●Cracked top plate
●Extremely hot power cord
●The power shuts off when the cord is moved.
1Power 2Circuit
breaker 3Call.
Off Off
To avoid injuries or burns
CAUTION: Hot surfaces
■Do not touch the top plate.
■Metallic objects such as knives, forks, spoons,
lids and aluminum foil should not be placed on
the hob surface since they can get hot.
To avoid injuries or burns caused by bumping
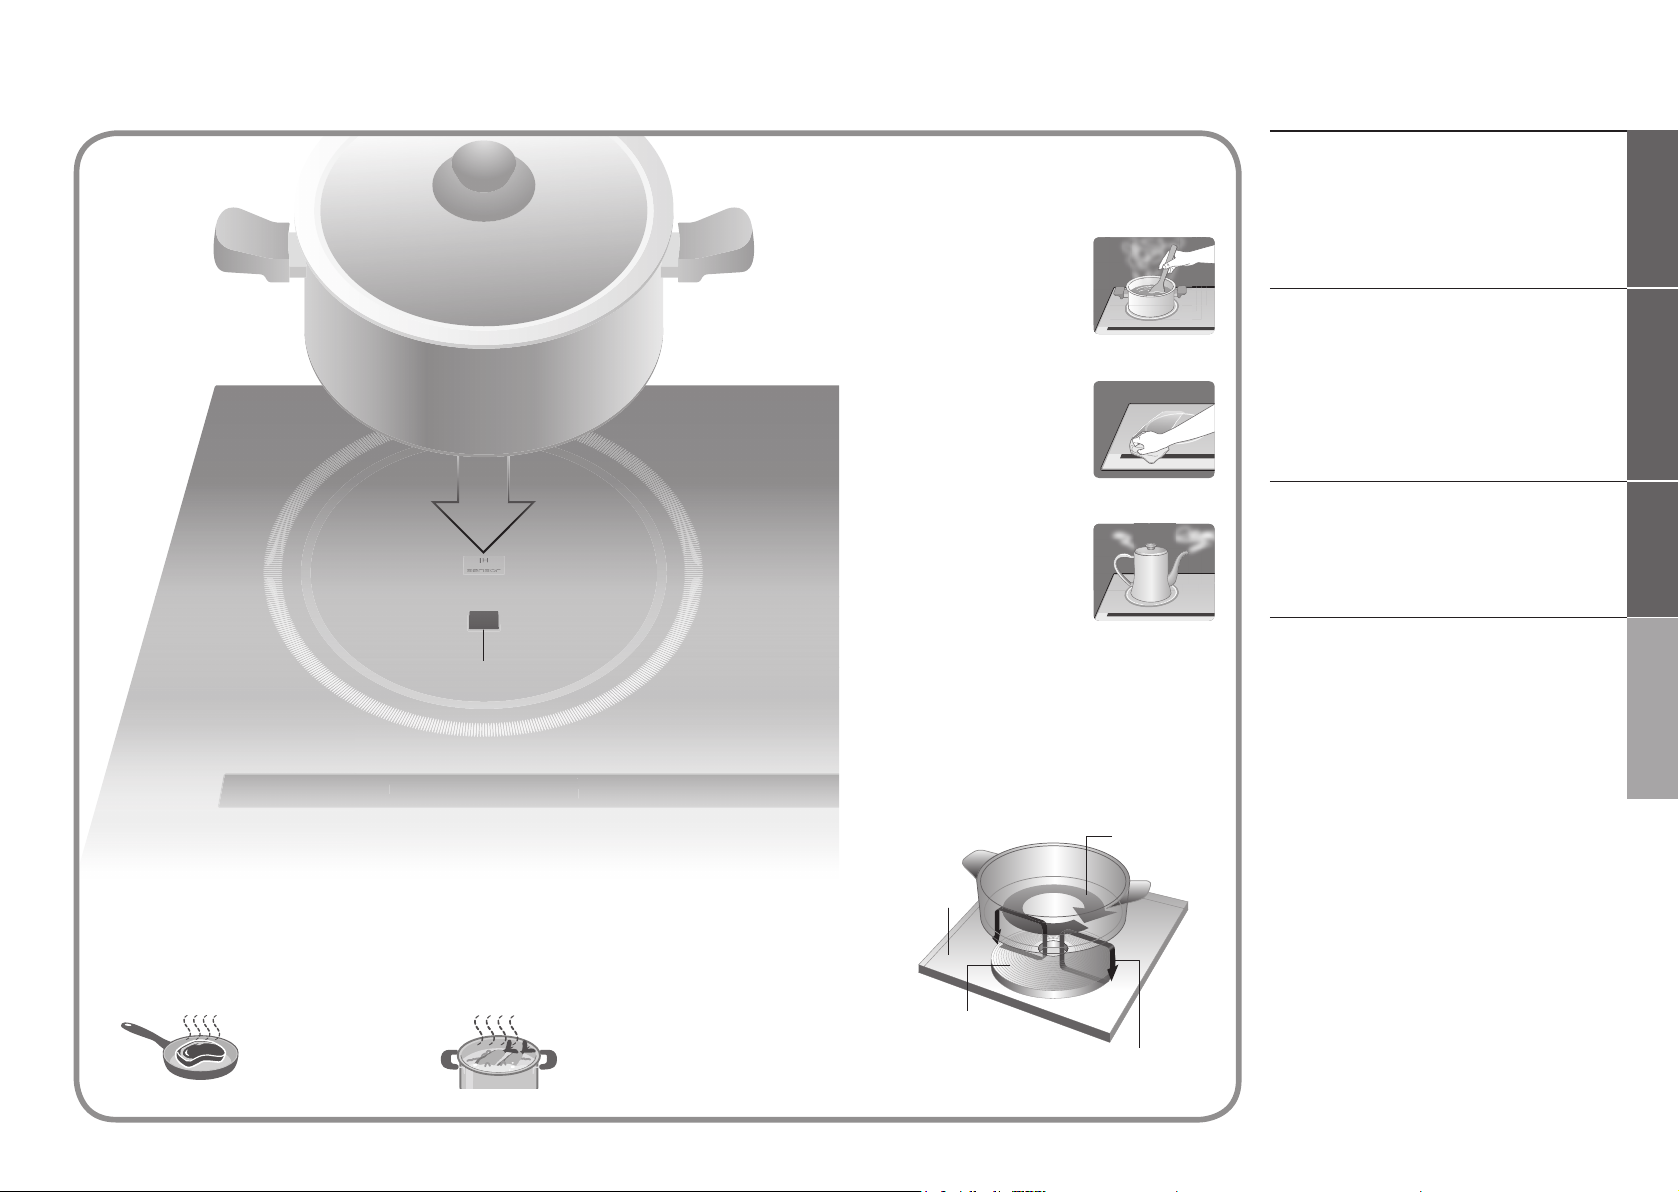
■Stir liquids before heating.
Liquids may splatter.
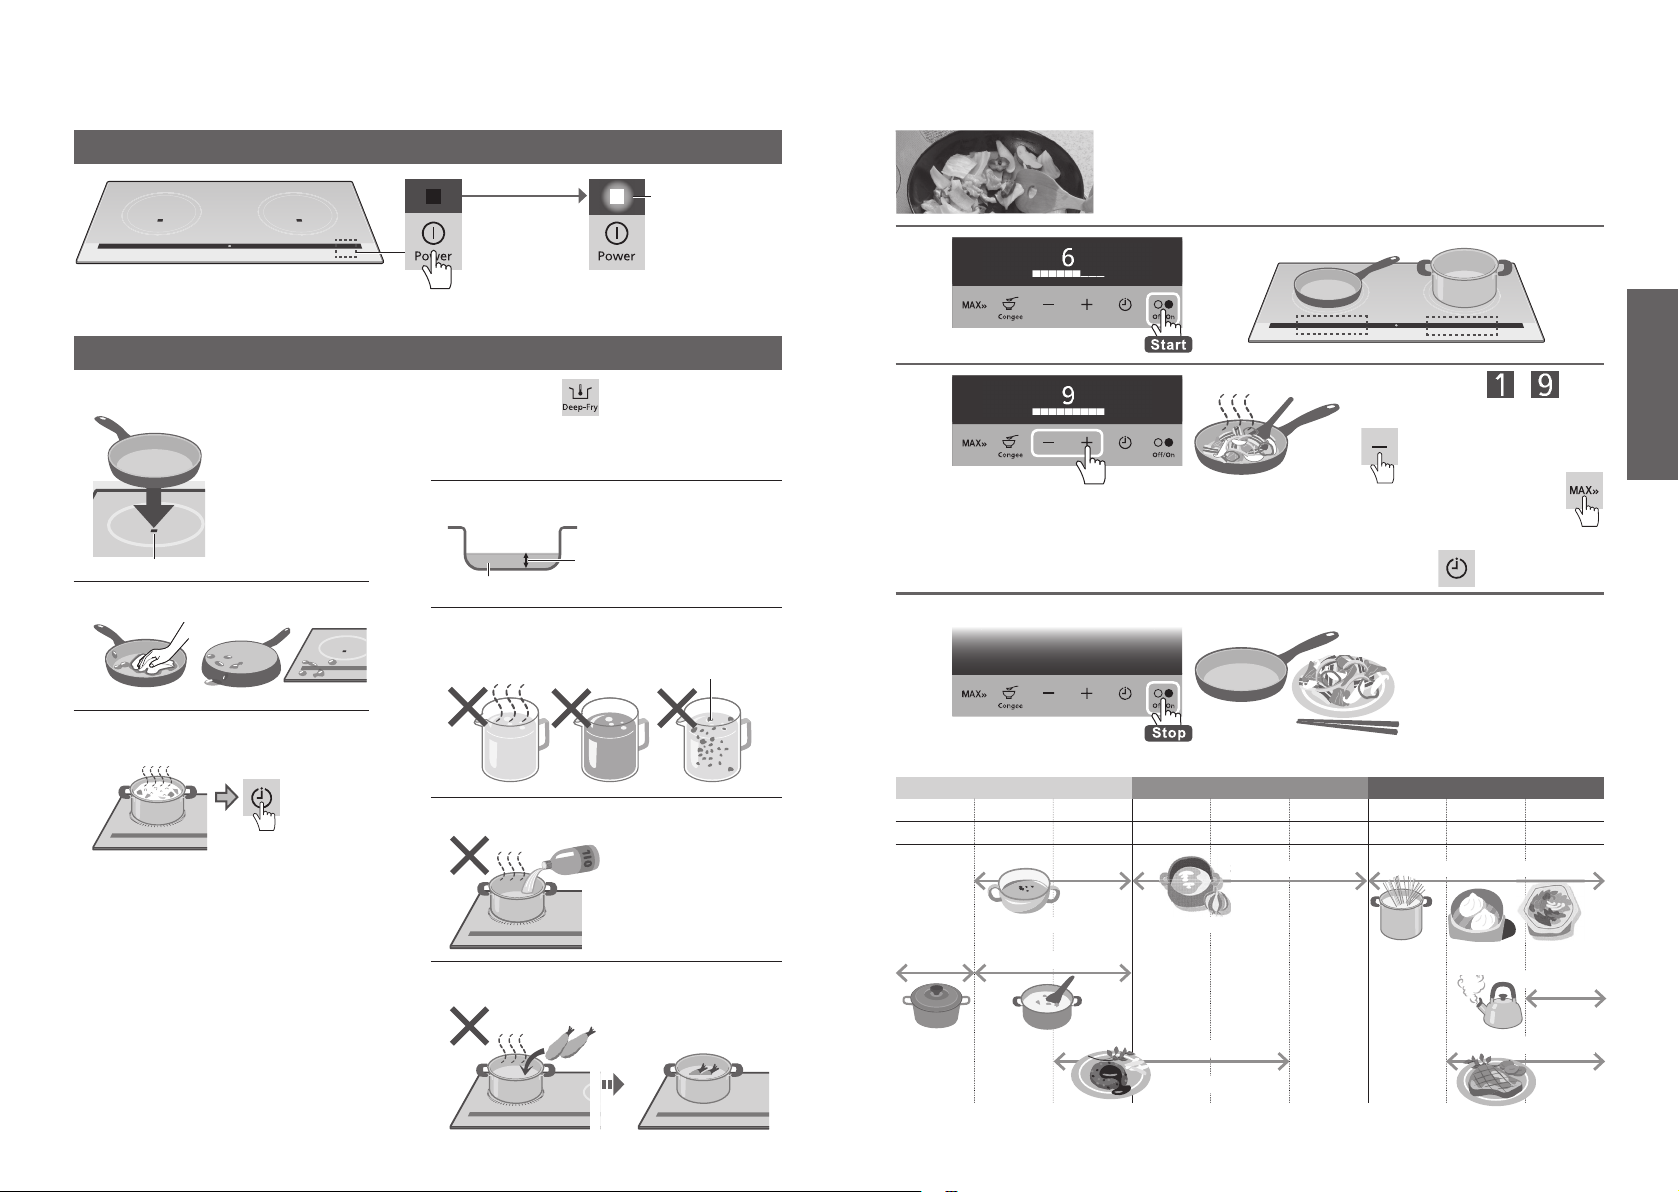
To avoid res from overheated oil
■
WARNING: Unattended cooking on a hob with fat
or oil can be dangerous and may result in a fi re.
■Set to or below for preheating.
■Do not overheat oil.
For proper function of the IR sensor
■Wipe water off.
■Cover the sensor.
For deep-frying:
■Use .
■Observe the amount of oil.
At least 1 cm
200 g (0.22 L) minimum
IR sensor