manuals.online logo
Brands
  1. Home
  2. •
  3. Brands
  4. •
  5. Panasonic
  6. •
  7. Handset
  8. •
  9. Panasonic KX-TPA60 User manual

Panasonic KX-TPA60 User manual

Panasonic
KX-TPA60
Before you start
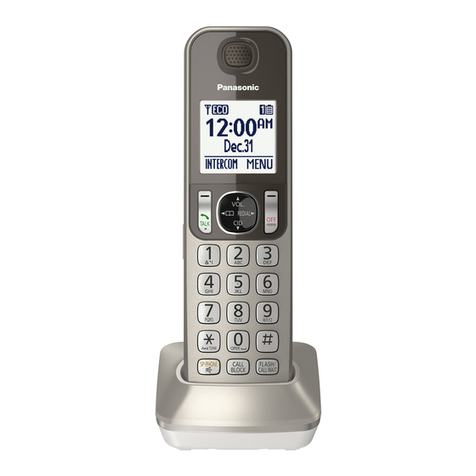
Wireless Handset package content: Wireless
handset, Power supply station, Rechargeable
batteries AAA and Belt clip. Base Station
package content: Base station and Ethernet
cable.
Insert both batteries into the handset. Attach
the power adaptor to the Power supply station
and plug it in. Attach the Ethernet cable to the
socket behind and attach the other end of this
cable to an internet modem, router or switch
socket designed for IP Telephones. If your
switch does not support PoE (Power on
Ethernet), it is necessary attach the power
adaptor to the Power supply station and plug
it in. Both adaptors are sold as an optional
accessory and will be added to the Wireless
handset and Base Station packages.
ATTENTION: Base Unit and Power Supply
Station have different power adaptors (6,5V
Base Unit, 5,5V Power Supply Station). The first
launch of the phone can take several minutes,
during which the phone is updated, and
eventually reboots itself. Please do not
disconnect it from the power. The handset can
be registered up to 4 Base Units. Up to 8
handsets can be registered to a single Base
Unit. To add a new handset press and hold the
location button (on the right side) on the Base
unit for about 3 seconds. The STATUS
indicator will flash red. On a not registered
handset, press and hold “OK” until “Please
Wait …..”displays. After “Registered” is
displayed on the LCD, the registration is
completed. If the telephone is already
registered to a Base station, do the
registration using the telephone menu. After
the phone is registered to the network, the
date and time appears. Everything is ready
and you can start making calls. Right in the
telephone a list of telephone contacts has
been made ready for you to use, which is
updated once a day. For additional settings
use the web page portal-uc.gtsce.com. To sing
in, use the username and password you
received at the handover.
1. Making a Call
To make a call dial the required number and
press “Talk”. To end the call, press “Cancel”.
2. Speed Dial
To set up the speed dialling, press and hold (0-
9) button. Press "Menu" and select "Edit",
enter the contact name and těhen the phone
number. Then it is possible to select "Auto
Call“, the phone number is dialled on
prolonged holding, or "Manual", the phone
number is dialled while pressing the „Talk“
button.
3. Telephone Directory
Within the Virtual PBX service there are three
different telephone directories: Enterprise,
Enterprise-Common and Personal.
Enterprise directory contains all active users of
the company, external numbers cannot be
saved here (e.g. employee mobile numbers or
external partner telephone numbers). All users
have it read-only Into the Enterprise-Common
directory any number can be saved. For its
administration it is necessary to log in to the
portal-uc.gtsce.com portal as an administrator
of a company or branch. All other users have it
read-only.
Personal directory is intended for user private
contacts and is available on all devices and
UC-One applications. Administration (adding,
editing or deleting items) can be done via the
portal-uc.gtsce.com portal.
4. Searching in Telephone Directory
An item in the telephone directory can be
searched by entering a name: Press the status
button „Tel. Directory“, and then select the
type of the directory and confirm by „OK“.
Enter the name or the first letters of that name
and confirm „OK“. In T9 mode just press the
key once, the phone searches for all the items
corresponding the letters below the key. This
method is significantly faster. Select the
required item and press „OK“. Select the
required telephone number and press the
„Talk“ button to make a call. Switching
between the insert modes can be done by
clicking the right status button.
5. Call Register
Press the “Outgoing log” soft key. Then a list
of outgoing calls will appear. To display a list
of incoming calls, press the “Incoming log”
soft key. Scrolling through the list is done
using the navigation buttons. Select an item
from the list to delete it. Press the “Menu” soft
key. Select “Delete” and confirm “OK”. Then
select “Yes” and again confirm “OK”. To
delete all items, select “Delete all” instead. To
make a call press “Talk”.
6. Redial
The last phone number dialled is stored in the
redial list (each 32 digits max.) If the Redial key
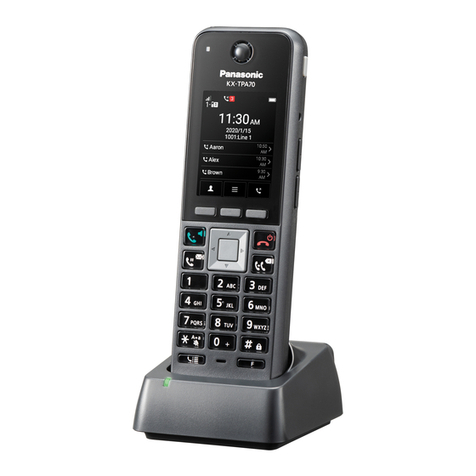
Color Display
Headset Socket
Handset Locator
Button
Status Indicator
Microphone
Soft keys
Navigator Key
Keypad
Panasonic
KX-TPA60
is assigned to dial key, you can dial the last
dialled number by pressing the “FUNC” button
and then “Redial”.
7. Call Hold and Park
To hold the call, first, press the „HOLD“
button, the caller hears music. To return to the
call on hold press the „HOLD“ button again.
Parking: To set up during a call press the
„Func“ button and then „Park“. Afterwards
enter the number, you want to park the call on
and press „#“ to park the call on your number.
To restore the parked call press the „Park“ soft
key and enter the number, where the call is
parked or press „#“ again to restore the
parked call on your number.
8. Call Transfer
Call transfer without consultation: Press the
„BLIND“ button during the call. Dial the
number of a participant, you want to transfer
the call and press „Dial“.
Call transfer with consultation: Press the
„TRANSFER“ button during the call. Dial the
number of a participant, you want to transfer
the call and press „#“ or, „Dial“. You can talk
the other participant, transferring can be done
by pressing the “TRANSFER” button and
hanging up.
9. Three –Participant Conference Call
During the call you can add to the ongoing
conversation another participant so you can
make a conference call. To make the
conference call press the “FUNC” during the
call and then select „Conference“. Dial the
number of a participant you want to add and
press “Dial”. After the call is received press
the “Conference” soft key.
10. Making a call to another handset within the
base station
Press the “Menu” soft key and then
“Intercom”. Select the handset, you want to
speak with and confirm “OK”. These internal
calls have different ringtone. The selection is
only available in case there are at least two
handsets registered on the base station.
11. Loudspeaker Mode Call,Adjusting Volume
Turning on/off the Loudspeaker mode call: By
clicking the “Talk” button.
Adjusting Volume: During a call you can adjust
the volume by pressing the “Up” and “Down”
button (level 1-6). Similarly, adjust the volume
during an ongoing loudspeaker mode call.
12. Language Settings
Serves to change the language of the display
option. The language setting of the telephone
is dependent on the user profile settings in the
portal-uc.gtsce.com portal. You can download
up to 10 languages. To change the language
right on the telephone select “Setting
Handset” in “Menu”. Then select “Display
Option”. Pressing the “Language” button will
display list of languages that you can set up by
pressing “OK”. The handset reboots itself
afterwards.
13. Power On/Off
To turn the power of the handset on or off,
press and hold “Power” button. In „Menu“ ->
„Setting Handset“ -> „Incoming Option“ ->
„Power Save“ you can also set up Power
SaveMode, which automatically turns off the
ringer, LCD backlight and key backlight after a
set number of seconds have passed while
receiving a call.
14. Noise Reduction
When Noise Reduction is enabled,
environmental noise is reduced. Receiver
volume is increased according to the level of
environmental noise. It cannot be used in
Hands-free mode. Noise Reduction can be
enabled by default for regular use, or toggled
on/off during a call. To activate the mode
press in menu “Setting Handset”. Select „Talk
Option“ -> „Noise Reduction“. Press “On” to
activate, to deactivate press “Off”. Confirm
“OK”.
15. Voice Message Listening
If you receive a voice message, the „Voice
message“ text and icon is displayed and a
number of voice messages in voice mail. Press
and hold the “HOLD” button. Select the line,
for which the “Voice message” icon is
displayed and confirm “OK”. If there is only
one line configured for the handset, skip the 2
step. This function cannot be used, if there is
call on hold.
16. Buttons and Icons
Talk
HOLD
Power/Cancel
Transfer
Telephone
Directory
Menu
Incoming log
Outgoing log
Intercom
Conference

Other manuals for KX-TPA60

6

Other Panasonic Handset manuals

Panasonic KX-TGA820EX User manual

Panasonic

Panasonic KX-TGA820EX User manual

Panasonic KX-TGEA60M User manual

Panasonic

Panasonic KX-TGEA60M User manual

Panasonic KX-TGA810E User manual

Panasonic

Panasonic KX-TGA810E User manual

Panasonic KXTGA935 - DIGITAL CORDLESS HANDSET INSTALL Instruction Manual

Panasonic

Panasonic KXTGA935 - DIGITAL CORDLESS HANDSET INSTALL Instruction Manual

Panasonic KX-PRXA15E User manual

Panasonic

Panasonic KX-PRXA15E User manual

Panasonic KX-TGA910FX User manual

Panasonic

Panasonic KX-TGA910FX User manual

Panasonic KX-TG4321B User manual

Panasonic

Panasonic KX-TG4321B User manual

Panasonic KX-TGA101C User manual

Panasonic

Panasonic KX-TGA101C User manual

Panasonic TGP600 User manual

Panasonic

Panasonic TGP600 User manual

Panasonic KX-TGA523 User manual

Panasonic

Panasonic KX-TGA523 User manual

Panasonic KX-TGA659 User manual

Panasonic

Panasonic KX-TGA659 User manual

Panasonic KX-TGA300B - Cordless Extension Handset User manual

Panasonic

Panasonic KX-TGA300B - Cordless Extension Handset User manual

Panasonic KX-TGDA63 User manual

Panasonic

Panasonic KX-TGDA63 User manual

Panasonic KX-PRSA10C User manual

Panasonic

Panasonic KX-PRSA10C User manual

Panasonic KX-TGA807FX User manual

Panasonic

Panasonic KX-TGA807FX User manual

Panasonic KX-TGFA30N User manual

Panasonic

Panasonic KX-TGFA30N User manual

Panasonic KX-TGA106M - Cordless Extension Handset User manual

Panasonic

Panasonic KX-TGA106M - Cordless Extension Handset User manual

Panasonic KX-UTG200 User manual

Panasonic

Panasonic KX-UTG200 User manual

Panasonic KX-TGA671EXB User manual

Panasonic

Panasonic KX-TGA671EXB User manual

Panasonic KX-TGDA30CX User manual

Panasonic

Panasonic KX-TGDA30CX User manual

Panasonic KX-THA12 User manual

Panasonic

Panasonic KX-THA12 User manual

Panasonic KX-TGA660 User manual

Panasonic

Panasonic KX-TGA660 User manual

Panasonic KX-TGA641 User manual

Panasonic

Panasonic KX-TGA641 User manual

Panasonic KX-PD503UD User manual

Panasonic

Panasonic KX-PD503UD User manual

Popular Handset manuals by other brands

2N 1120101B user manual

2N

2N 1120101B user manual

Sony Xperia XZ2A manual

Sony

Sony Xperia XZ2A manual

Mocet DH300 quick start guide

Mocet

Mocet DH300 quick start guide

Clarity XLC8HS user guide

Clarity

Clarity XLC8HS user guide

Alcatel-Lucent 8212 user manual

Alcatel-Lucent

Alcatel-Lucent 8212 user manual

Alcatel 8118 quick guide

Alcatel

Alcatel 8118 quick guide

GE 27918 user guide

GE

GE 27918 user guide

ToughShield C-mii1 user manual

ToughShield

ToughShield C-mii1 user manual

Snom M80 quick start guide

Snom

Snom M80 quick start guide

Aiphone LAR-2 instructions

Aiphone

Aiphone LAR-2 instructions

Zte V779M user manual

Zte

Zte V779M user manual

GE Masoneilan VariPak 28001 Quick setup guide

GE

GE Masoneilan VariPak 28001 Quick setup guide

Mitel 5604 Quick reference guide

Mitel

Mitel 5604 Quick reference guide

SpectraLink 7420 user guide

SpectraLink

SpectraLink 7420 user guide

Uniden DCT646 Series owner's manual

Uniden

Uniden DCT646 Series owner's manual

GE 27956 user guide

GE

GE 27956 user guide

Kirk 4080 user guide

Kirk

Kirk 4080 user guide

SHORE TEL 420 quick guide

SHORE TEL

SHORE TEL 420 quick guide

manuals.online logo
manuals.online logoBrands
  • About & Mission
  • Contact us
  • Privacy Policy
  • Terms and Conditions

Copyright 2025 Manuals.Online. All Rights Reserved.