manuals.online logo
Brands
  1. Home
  2. •
  3. Brands
  4. •
  5. Panduit
  6. •
  7. Enclosure
  8. •
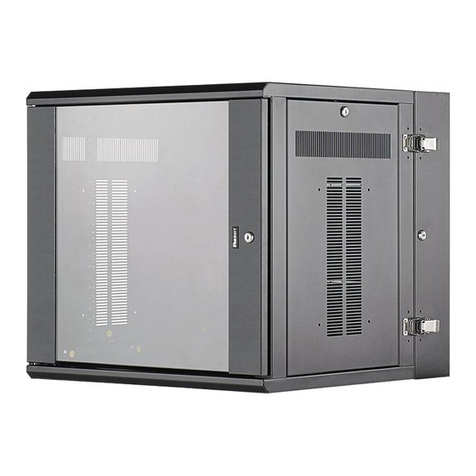
  9. Panduit NET-ACCESS CN3 User manual

Panduit NET-ACCESS CN3 User manual

INSTRUCTIONS CM385E
© Panduit Corp. 2009, 2010
FOR TECHNICAL SUPPORT www.panduit.com/resources/install_maintain.asp
NET-ACCESS Cabinet for Cisco Nexus 7018 Switch
CN3
CN7018-EXT
CN7018-EXTND*
CNAE7018
Page 1 of 12
CNPS7018*
Component Guide
(1) Base Cabinet
(2) Cable Management Finger Kits
(1) Hardware Kit
(2) #12-24 Threaded Equipment Rail Sets
(2) Top Side Extensions
(2) Top Front/Rear Extensions
(2) Bottom Door Shoe Extensions
(2) Bottom Side Extensions
(1) Inlet Duct Assembly
(2) Side Panels
(1) Hardware Kit
(2) Split Door Sets
(1) Exhaust Duct Assembly
(1) Bottom Duct Assembly
For installation instructions for the CN3 cabinet, please reference
instruction sheet CM317C.
(2) Vertical Side Supports
(4) Lower Horizontal Supports
(1) Inlet Duct Seal Bracket
(5) Mounting Brackets
#2 Phillips Screwdriver
Needle Nose Pliers
1/8” Allen Key
1/2” Socket Wrench
3/8” Socket Wrench
TOOL LIST
7/16” Socket Wrench
5/16” Socket Wrench
3/8” Wrench
(1) Hardware Kit
#3 Phillips Screwdriver
*(1) CNPS7018 kit is needed
per cabinet side
*CN7018-EXTND does not contain doors
(1) Hardware Kit
INSTRUCTIONS CM385E
For Technical Support: www.panduit.com/resources/install_maintain.asp
Page 2 of 12
Remove J-Hooks
CN3 Cabinet Preperation
Remove all (4) J-Hooks from CN3 cabinet by removing
(2) #12-24 screws per J-Hook as shown.
All four rails are fully adjustable. To change depth, loosen three (3) 5/16 x 3/4” mounting bolts per cabinet rail using a 1/2” socket
wrench and slide rails flush with cabinet posts. Retighten the mounting bolts to 14ft.-lbs. Proper torque ensures equipment rails are
bonded to the cabinet frame.
5/16” Mounting Bolt
(use 1/2” socket wrench)
Adjusted Rails
J-Hook
#12-24 Screws
Reposition Equipment Rails
Remove Door Shoe Bumpers and Bushing
Remove (3) door shoe bumpers and (1) door rod bushing from
each door shoe on the CN3 cabinet as shown.
5/16” Mounting Bolt
(use 1/2” socket wrench)
Bumpers
Door Rod Bushing
INSTRUCTIONS CM385E
For Technical Support: www.panduit.com/resources/install_maintain.asp
Page 3 of 12
7.75”
CISCO NEXUS 7018 SWITCH CRADLE MUST BE mounted so that the shaded area shown below is kept clear to allow for proper fit of
all switch ducting to cabinet. See view below for Panduit-suggested cradle position (refer to Cisco for cradle installation instructions).
NOTE: If casters are installed on
N
ET
-A
CCESS
cabinet, SWITCH CRADLE MUST BE installed so that the bottom six (6) rack spaces are kept
clear to allow for proper fit of all switch ducting to cabinet, and that cabinet casters do not interfere with switch ducting (11.25” above bottom
edge of equipment rail).
Requirements for Switch Installation
Install switch cradle (Cisco p/n: N7K-
C7018-BSK=) so that slots of cradle
align with tapped holes of equipment
rails at 5th - 7th rack spaces (Bottom
of switch cradle mounting flange will
be positioned 7.75” above bottom
edge of equipment rail).
See Detail View
Detail View
THIS AREA MUST BE KEPT CLEAR
TO ALLOW FOR SWITCH DUCTING
INSTALLATION
INSTRUCTIONS CM385E
For Technical Support: www.panduit.com/resources/install_maintain.asp
Page 4 of 12
Exhaust Duct Installation
NOTE: DO NOT break yellow banding on ducting cartons until ducting is ready for installation.
Install (2) universal ducting brackets on the top and bottom surfaces of the exhaust duct using (6) #10-32 pan head Phillips screws and
(6) #10 lockwashers. Mount duct assembly to cabinet posts using (7) # 12-24 serrated hex head screws through ducting brackets and slotted
flange as shown. The top flange of duct assembly should be positioned above the top surface of switch.
Assembled
Universal Ducting
Bracket
#10-32 Pan Head
Phillips Screws
#10 Lockwashers
[7] #12-24 Serrated
Hex Head Screws
(use 5/16” socket wrench)
FRONT OF
SWITCH
Position Duct Assembly
Top Flange Above Top
Surface of Switch
Exhaust Duct
See Detail View
Duct Assembly
Top Flange
INSTRUCTIONS CM385E
For Technical Support: www.panduit.com/resources/install_maintain.asp
3.5”
INSTALL BOTTOM DUCT MOUNTING
BRACKET AT 1st SET OF PAIRED HOLES
FROM BOTTOM OF CABINET POST
54.25”
INSTALL TOP DUCT MOUNTING
BRACKET AT 16th SET OF PAIRED
HOLES FROM TOP OF CABINET POST
Page 5 of 12
Intake Duct Installation
Assemble lower intake duct to upper intake duct using (3) #10-32 hex nuts with integrated lockwashers and (2)
#10 washers (placed inside the ducting). Adjust intake duct to fit suggested installation location as shown below.
Install (2) universal ducting brackets on the top and bottom surfaces of the intake duct using (6) #10-32 Phillips
screws and (6) #10 lockwashers.
Mount intake duct assembly to cabinet posts using (4) #12-24 serrated hex head screws through ducting brackets
as shown. Install (1) #12-24 serrated hex head screw at back of intake ducting, securing intake ducting to cabinet
equipment rail (see detail view). Ensure that lower intake duct rests on bottom cabinet beam.
FRONT OF CABINET
[1] #12-24 Serrated
Hex Head Screw
(use 5/16” socket wrench)
[4] #12-24 Serrated
Hex Head Screws
(use 5/16” socket wrench)
Universal
Ducting
#10-32 Pan Head
Phillips Screws and
#10 Lockwashers
Bracket
Lower Intake Duct
Upper Intake Duct
(secure to upper
intake duct wit
[3] #10-32 hex nut
and [2] #10 washer)
REAR OF CABINET
INSTRUCTIONS CM385E
For Technical Support: www.panduit.com/resources/install_maintain.asp
Page 6 of 12
Bottom Duct
[2] #10-32 Hex Nuts
(use 3/8” socket wrench)
[2] #12-24 Serrated
Hex Head Screws
REAR OF CABINET
Rear Mounting
Bracket
Attach flap seal to bottom duct as shown below. Mount bottom duct to equipment rails using (4) #12-24 serrated hex head screws as shown.
Attach rear mounting bracket to bottom duct using (2) #10-32 hex nuts with integrated lockwashers (there are (2) pre-installed press studs on
the rear of the bottom duct). Adjust rear mounting bracket so that it rests against bottom of 7018 switch. Secure the bracket to rear equipment
rails using (2) #12-24 serrated hex head screws as shown.
Attach flap seal to intake duct seal bracket as shown. Mount intake duct seal bracket with flap seal to upper universal ducting bracket with
(2) #10-32 hex nuts with integrated lock washers. Positioning of intake duct seal bracket is adjustable to allow for tight seal of intake duct to
7018 switch.
Secure intake duct transition bracket to bottom duct and intake duct with (4) #10-32 hex nuts with integrated lockwashers as shown below.
Intake Duct and Bottom Duct Installation
FRONT OF CABINET
#12-24 Serrated
Hex Head Screws
(use 5/16” socket wrench)
Intake Duct
Flap Seal
Flap Seal
Intake Duct
Seal Bracket
Intake Duct
Transition Bracket
[4] #10-32 Hex Nuts
(use 3/8” socket wrench)
[2] #10-32 Hex Nuts
(use 3/8” socket wrench)
INSTRUCTIONS CM385E
For Technical Support: www.panduit.com/resources/install_maintain.asp
Page 7 of 12
Installation of Top Side Extensions
Top Cap Extension Assembly
Installation of Top Front and Back Extensions
Remove (4) side knock-outs from original top cap. Install (2) top side extensions, using (2) 5/16” serrated flange lock nuts on each extension
(there are pre-installed 5/16” press-studs in side extensions). Do not tighten side extensions until front and rear extensions are mounted and
aligned with original top cap. Top front and back extension installation is shown at the bottom of this page.
Remove Knock-outs
4 places
Side Extensions
5/16” Serrated Flange
Lock Nut
Remove the front and rear center key hole knock-out features from the original top cap. Attach (2) top front and rear extensions, using (4) #10-
32 nuts, (4) #10 lockwashers, (1) 1/4-20 carriage bolt, and (1) 1/4-20 serrated hex nut per extension piece (there are (4) pre-installed #10
press-studs in each extension). Align all top extension parts, leaving a minimal gap between side and front/rear parts. Ensure that all extension
components are flush with top cap. Secure side extensions by tightening (4) 5/16” serrated flange lock nuts.
Assembled
Rear Extension
Front Extension
See Detail View
#10-32 Nut (use 3/8” socket wrench)
#10 Lockwasher
Ensure that these
surfaces are flush
with top cap
See Detail View
1/4-20 Serrated Hex Nut
1/4-20 Carriage
(use 7/16” socket wrench)
(use 1/2” socket wrench)
Remove Center Key Hole
Knock-outs
Bolt
Assembled
INSTRUCTIONS CM385E
For Technical Support: www.panduit.com/resources/install_maintain.asp
Page 8 of 12
Installation of Front and Back Bottom Door Shoe Extensions
Door Shoe Extension Assembly
Installation of Bottom Side Extensions
NOTE: Leveling legs to be installed ONLY if the base cabinet is raised off the ground on its leveling legs.
Install (2) leveling legs in each door shoe extension by threading through bottom of door shoe extender. Adjust leveling legs with 3/8” socket
wrench. Install (2) door shoe extensions to existing cabinet door shoes using (6) #12-24 pan head Phillips screws on each side and (6) #12
lockwashers; (4) screws vertical on front and (2) screws horizontal from behind. Install centering screw first (NOT TIGHT). Install (2) horizontal
screws through rear of door shoe extender as shown. Install and tighten (3) vertical screws and tighten centering screw.
Install (2) bottom side extensions as shown. Secure using (2) #12-24 serrated hex head screws on each extension.
Bottom Side
#12-24 Serrated
Hex Head Screws
Extension
Assembled
Door Shoe
Extension
Existing Cabinet
Door Shoe
#12-24 Pan Head
Phillips Screws and
#12 Lockwashers
Centering Hole
Centering Screw
Leveling Legs
#12-24 Pan Head
Phillips Screw and
#12 Lockwasher
INSTRUCTIONS CM385E
For Technical Support: www.panduit.com/resources/install_maintain.asp
Page 9 of 12
Vertical Side Support Installation
Mount (2) vertical side supports using (4) #10-32 nuts and (4) #10 lockwashers per post; (2) at top and (2) at bottom (there are (4) pre-installed
press studs in each post).
Vertical Side Supports
#10-32 Nuts and #10 Lockwashers
(use 3/8” socket wrench)
Assembled
Installation of Lower Horizontal Supports
Mount (4) lower horizontal supports, using (2) #10-32 flat head screws and (2) #10 lockwashers (at bottom side extension) and (1) 1/4-20 hex
head screw (at door shoe extension) per lower horizontal support as shown.
#10-32 Flat Head Screws
1/4-20 Hex Head Screw
and #10 Lockwashers
and #10 Lockwashers
#10-32 Flat Head Screws
(use 1/8” Allen Key)
(use 7/16” socket wrench)
These surfaces
must be flush with
original top cap
NOTE: In order to install the
vertical side supports, the top
extenders must be flush with the
top cap surface as described on
page 6 of 10.
Vertical Side Supports
Assembled
Lower Horizontal Supports
See Detail View
INSTRUCTIONS CM385E
For Technical Support: www.panduit.com/resources/install_maintain.asp
Page 10 of 12
Split Door and Side Panel Installation
Lift split door and align fixed hinge pin with the bushing in the bottom
door shoe extension. Swing door up and pull down the lever of the
spring loaded hinge pin and align pin with the bushing in top cap
extension. Release lever when aligned. Verify spring loaded hinge pin
is fully engaged into bushing before proceeding.
Reverse steps to remove door.
Split Door Installation
Side Panel Installation
Pull down the lever of the top spring loaded hinge pin and lock into
position. Lift side panel and align bottom pin with the hinge point in the
lower horizontal support. Swing door up and align pin with the hinge
point in top cap extension. Release locked hinge pin lever. Pull
and lock remaining spring loaded hinge pins and move side panel into
position. Release levers when aligned. Reverse steps to remove side
panels.
Spring Loaded
Fixed Hinge Pin
Hinge Pin
Top Spring
Loaded Hinge Pin
Bottom Spring
Loaded Hinge Pin
Hinge Pin
Unlocked Position
Hinge Pin
Locked Position
Adjustment of Side Panel
Reposition
Bottom Side
Extension as
necessary
Adjust side panels by loosening the (2) hex head screws securing
the bottom side extension to the cabinet frame and the (1) hex head
screw securing the extension to the door shoe extender as shown.
Reposition the bottom side extension and horizontal supports as
necessary. Tighten the (3) hex head screws.
Loosen these
screws
Loosen this
screw
Reposition
Horizontal
Support as
necessary
Install four (4) spring clips per side of cabinet by first removing paint
masking from area as shown. Slide spring clip in place until it clips
into pilot hole. The spring clips bond the side panel to the cabinet
frame.
Side Panel Spring Clip Installation
Spring Clip
Locations
Remove masking
from this area
Install spring clip
INSTRUCTIONS CM385E
For Technical Support: www.panduit.com/resources/install_maintain.asp
Page 11 of 12
Ganging with Net-Access Cabinets
Position Net-Access cabinet next to CN7018 cabinet. Install (2) top ganging brackets by passing through the slots in the top cap side extension
and secure each with (1) #10-32 hex nut and (1) #10 lockwasher to the #10-32 press stud in the top cap side extension. Fasten top ganging
brackets to Net-Access cabinet ganging tab using (1) #12-24 serrated hex head screw per each bracket. Install (2) bottom ganging brackets to
CN7018 cabinet with (1) #12-24 serrated hex head screw per bracket as shown. Fasten bottom ganging bracket to the back side of Net-Access
cabinet door shoe using (1) #12-24 serrated hex head screw per bracket.
NOTE: Net-Access cabinet can be positioned so that it is flush with either the front or the rear of the CN7018.
CN7018 GANGED WITH
NET-ACCESS CABINET
Net-Access
cabinet
ganging tab
Pass top ganging bracket
through slot in top cap
side extension
#10-32 hex nut and
#10 lockwasher
(use 3/8” wrench)
Net-Access cabinet
CN7018 cabinet
FRONT OF
CN7018
CABINET
To gang Net-Access cabinet flush with FRONT
of CN7018, install top ganging brackets here
To gang Net-Access cabinet flush with REAR
of CN7018, install top ganging brackets here
Top Mounting Locations
Bottom Mounting Locations
#12-24 serrated
hex head screw
(use 5/16” socket wrench)
Bottom ganging
Bottom ganging
Back side of existing
cabinet door shoe
bracket
FRONT OF
CN7018
CABINET
To gang Net-Access cabinet flush with FRONT
of CN7018, install bottom ganging brackets here
To gang Net-Access cabinet flush with REAR
of CN7018, install bottom ganging brackets here
bracket
#12-24 serrated
hex head screw
(use 5/16” socket wrench)
#12-24 serrated
hex head screw
(use 5/16” socket wrench)
INSTRUCTIONS CM385E
For Instructions in Local Languages
and Technical Support:
www.panduit.com/resources/install_maintain.asp
E-mail:
[email protected]
Fax:
(708)444-6448
www.panduit.com
Page 12 of 12
Ganging of Two CN7018-EXT
NOTE: Cabinets must be aligned and level prior to installation of ganging hardware. See latest revisions of CM317 and CM385.
TOP CAP GANGING: Remove [2] circular knockouts on sides of top cap at front and rear ganging locations (remove knockouts prior to
positioning of cabinet). With cabinet top caps touching, secure cabinet tops together with [1] 5/16” serrated bolt and [1] 5/16” serrated
nut at each ganging location (use 1/2” [13mm] socket).
BASE OF CABINET GANGING: With cabinet bases touching, secure cabinet bases together with [2] 1/4” x 2-1/2” bolts (use 7/16”
[11mm] socket; bolts fasten into 1/4” tapped holes in cabinet base) at the front and rear of cabinet as shown below.
Remove [2]
Knockouts TOP CAP GANGING
BASE OF CABINET GANGING (Front)
BASE OF CABINET
GANGING (Rear)
5/16” Serrated Bolt5/16” Serrated Nut
1/4” Tapped Hole
1/4” x 2-1/2” Bolt 1/4” x 2-1/2” Bolt

Other manuals for NET-ACCESS CN3

1

This manual suits for next models

4

Other Panduit Enclosure manuals

Panduit FRME2 User manual

Panduit

Panduit FRME2 User manual

Panduit FMT1J User manual

Panduit

Panduit FMT1J User manual

Panduit PanZone PN323 User manual

Panduit

Panduit PanZone PN323 User manual

Panduit ZDF48-RA User manual

Panduit

Panduit ZDF48-RA User manual

Panduit PANZONE PZWIFIENA User manual

Panduit

Panduit PANZONE PZWIFIENA User manual

Panduit PANZONE PZRFE4U User manual

Panduit

Panduit PANZONE PZRFE4U User manual

Panduit UICFPR4 Series User manual

Panduit

Panduit UICFPR4 Series User manual

Panduit PanZone Series User manual

Panduit

Panduit PanZone Series User manual

Panduit FLEX-ZRFEG User manual

Panduit

Panduit FLEX-ZRFEG User manual

Panduit PANZONE PZWMC User manual

Panduit

Panduit PANZONE PZWMC User manual

Panduit PANZONE PZBASE3 User manual

Panduit

Panduit PANZONE PZBASE3 User manual

Panduit IAEIP66 User manual

Panduit

Panduit IAEIP66 User manual

Panduit PZWIFIE User manual

Panduit

Panduit PZWIFIE User manual

Panduit Z23U-624 User guide

Panduit

Panduit Z23U-624 User guide

Panduit FCE4U User manual

Panduit

Panduit FCE4U User manual

Panduit FCE1U User manual

Panduit

Panduit FCE1U User manual

Panduit PZWIFIEN User manual

Panduit

Panduit PZWIFIEN User manual

Panduit E6212B1FP User manual

Panduit

Panduit E6212B1FP User manual

Panduit FCE1U User manual

Panduit

Panduit FCE1U User manual

Panduit NET-ACCESS N21SPH User manual

Panduit

Panduit NET-ACCESS N21SPH User manual

Panduit PANZONE PZAEWM6E User manual

Panduit

Panduit PANZONE PZAEWM6E User manual

Panduit N2RCFR User manual

Panduit

Panduit N2RCFR User manual

Panduit PANZONE PZWIFIEW User manual

Panduit

Panduit PANZONE PZWIFIEW User manual

Panduit PZWRKA User manual

Panduit

Panduit PZWRKA User manual

Popular Enclosure manuals by other brands

D-Link DNS-313 user manual

D-Link

D-Link DNS-313 user manual

BE QUIET! BGW20 user manual

BE QUIET!

BE QUIET! BGW20 user manual

CRU Dataport DE100 Ultra320 SCA quick start guide

CRU Dataport

CRU Dataport DE100 Ultra320 SCA quick start guide

ELBOX BlackBOX 1200 Assembly manual

ELBOX

ELBOX BlackBOX 1200 Assembly manual

MVP D3 SERIES Product instructions

MVP

MVP D3 SERIES Product instructions

Clas Ohlson GD25604 quick start guide

Clas Ohlson

Clas Ohlson GD25604 quick start guide

Fleurco NOVARA N006 instruction manual

Fleurco

Fleurco NOVARA N006 instruction manual

Fantec QB-X8US3R manual 

Fantec

Fantec QB-X8US3R manual 

StarTech.com SATBP125VP manual

StarTech.com

StarTech.com SATBP125VP manual

LEGRAND 0 880 00 quick start guide

LEGRAND

LEGRAND 0 880 00 quick start guide

Alphasonik PBAT10E owner's manual

Alphasonik

Alphasonik PBAT10E owner's manual

Tyco Electronics FOSC 450 B6 installation instructions

Tyco Electronics

Tyco Electronics FOSC 450 B6 installation instructions

SMS C5-21U005-2-A Installation and adjustment manual

SMS

SMS C5-21U005-2-A Installation and adjustment manual

Danfoss VLT AutomationDrive FC 302 operating guide

Danfoss

Danfoss VLT AutomationDrive FC 302 operating guide

Tepex MDS Series user manual

Tepex

Tepex MDS Series user manual

Icy Box IB-182MU3 manual

Icy Box

Icy Box IB-182MU3 manual

Leviton 5R4UD-S48 Instructions for use

Leviton

Leviton 5R4UD-S48 Instructions for use

StorCentric Nexsan E48X Removal and Replacement Guide

StorCentric

StorCentric Nexsan E48X Removal and Replacement Guide

manuals.online logo
manuals.online logoBrands
  • About & Mission
  • Contact us
  • Privacy Policy
  • Terms and Conditions

Copyright 2025 Manuals.Online. All Rights Reserved.