manuals.online logo
Brands
  1. Home
  2. •
  3. Brands
  4. •
  5. Panduit
  6. •
  7. Enclosure
  8. •
  9. Panduit PZWIFIE User manual

Panduit PZWIFIE User manual

INSTALLATION INSTRUCTIONS PN355
© Panduit Corp. 2004
For Technical Support: www.panduit.com/resources/install_maintain.asp
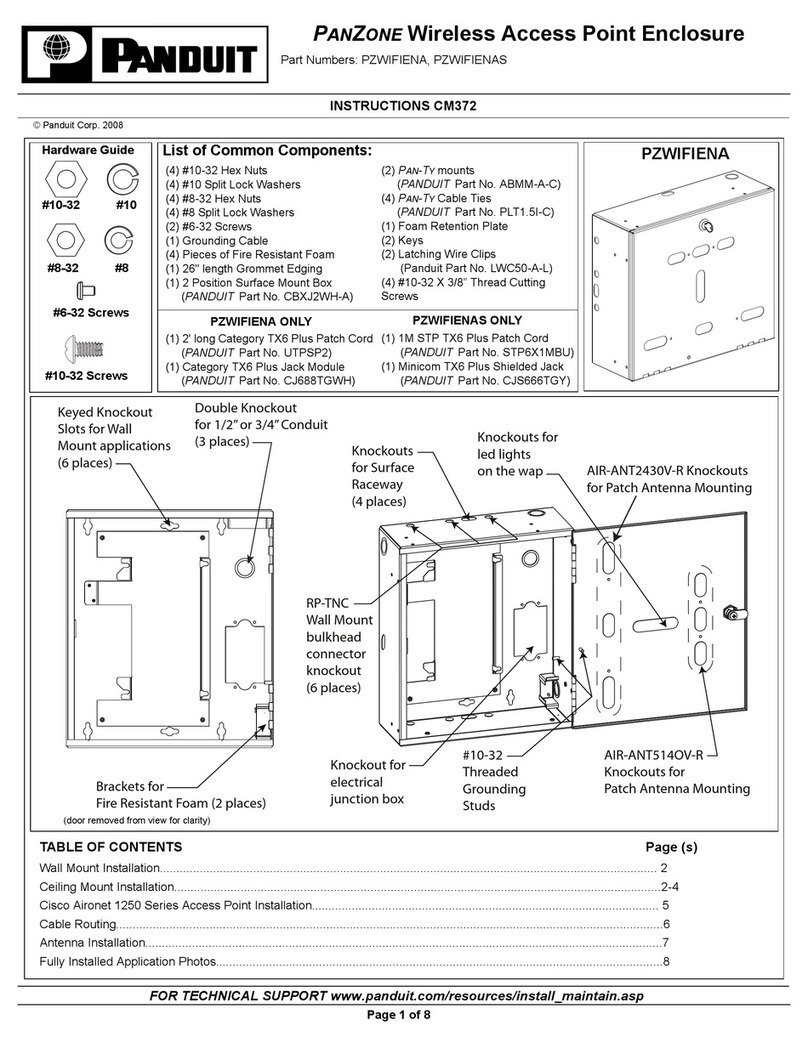
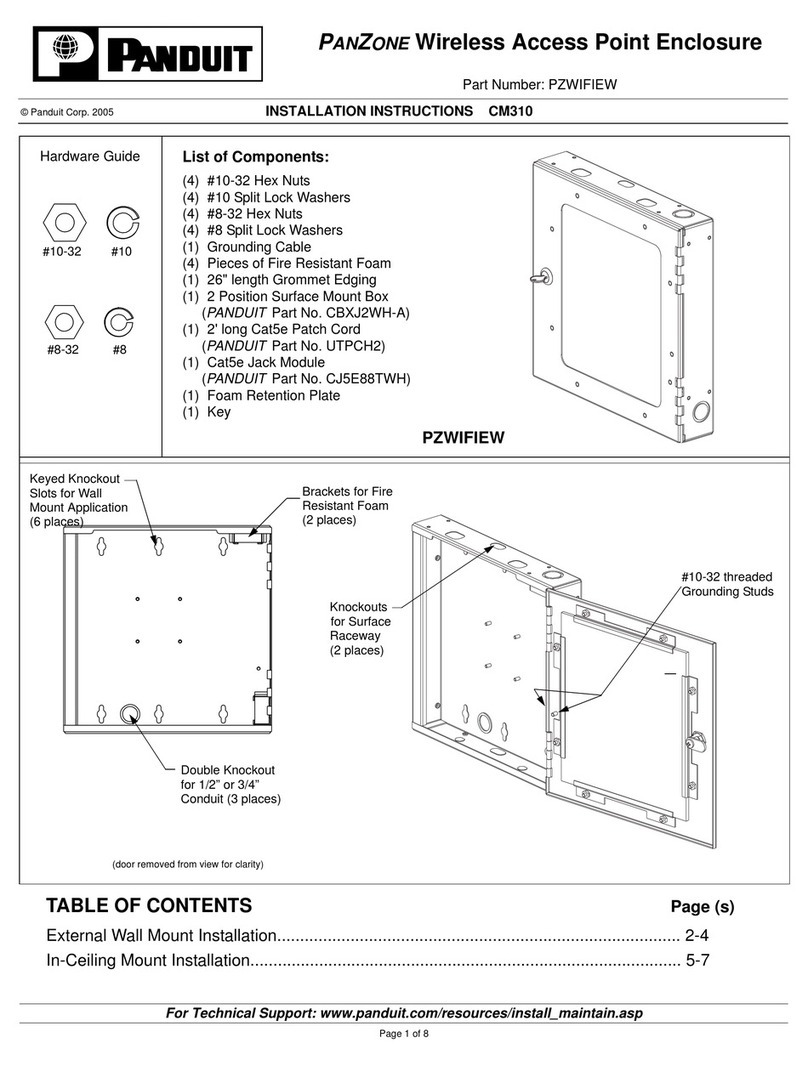
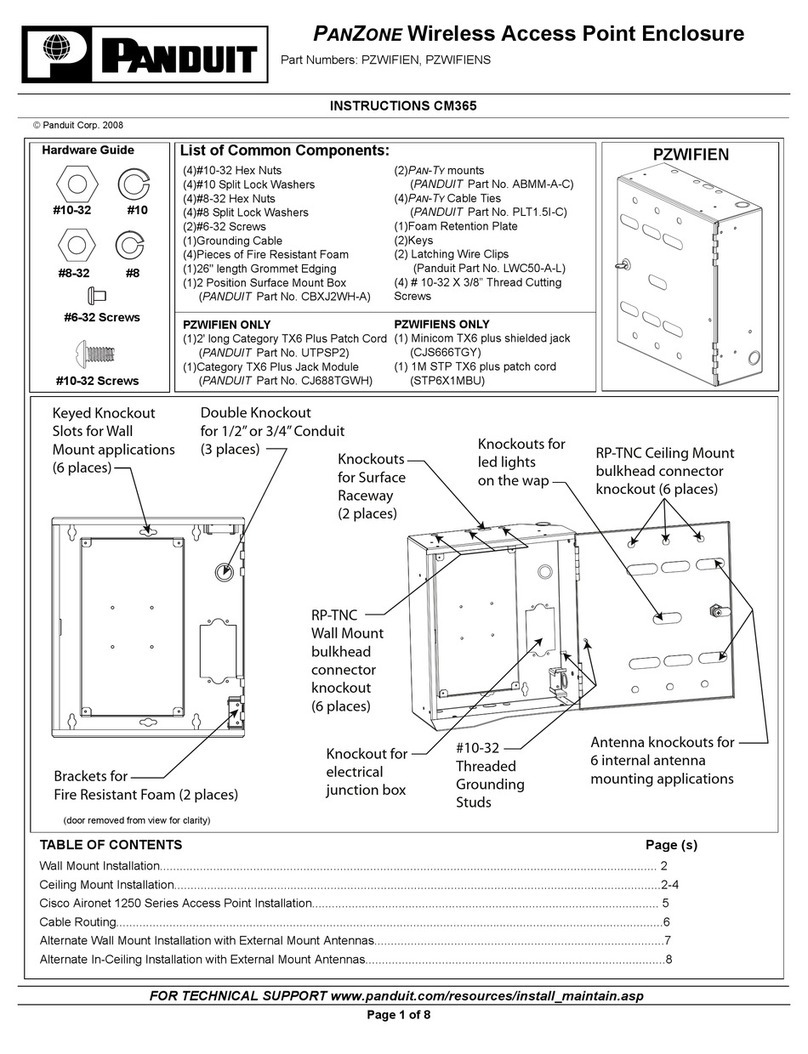
PANZONE Wireless Access Point Enclosure
Part Number: PZWIFIE
Knockout to
allow the LED
Wireless Access
Point to be
visible.
lights on the
List of Components:
(4) #10-32 Hex Nuts
(4) #10 Split Lock Washers
(4) #8-32 Hex Nuts
(4) #8 Split Lock Washers
(1) Grounding Cable
(4) Pieces of Fire Resistant Foam
(1) 26" length Grommet Edging
(1) 2 Position Surface Mount Box
(PANDUIT Part No. CBXJ2WH-A)
(1) 2' long Cat5 Patch Cord
(PANDUIT Part No. UTPCH2)
(1) Cat5e Jack Module
(PANDUIT Part No. CJ5E88TWH)
(1) Foam Retention Plate
(1) Slot Cover
(1) Key PZWIFIE
Keyed Knockout
Slots for Wall
Brackets for Fire
Resistant Foam
Mount Application (2 places)
Double Knockout
for 1/2" or 3/4"
Conduit (3 places)
Knockout Holes for
Externally Mounted
Antennas
Antenna Knockouts
for In-Ceiling Mount
Application
Slot for 802.11a
5GHz Antenna
Knockouts
for Surface
Raceway
(2 places)
Antenna Knockouts
for External Wall
Mount Application
(door removed from view for clarity)
#10-32 threaded
Grounding Studs
(6 places)
#10-32 #10
#8-32 #8
Hardware Guide
Page 1 of 8
TABLE OF CONTENTS Page (s)
External Wall Mount Installation ........................................................................................ 2-4
Optional Flush Wall Mount Installation ..................................................................................... 4
In-Ceiling Mount Installation .............................................................................................. 5-8
INSTALLATION INSTRUCTIONS PN355
For Technical Support: www.panduit.com/resources/install_maintain.asp
Step 1: Knockout Removal
1D
A
F
E
G
B
C
2.1 Locate the wall studs.
2.2 Hold the enclosure against the wall to mark the
location of the mounting holes.
2.3 Mount the enclosure to the wall using mounting screws
and wall anchors (not included). Enclosure designed
for use with #14 screws.
Step 2: Mount Enclosure to Wall
Page 2 of 8
EXTERNAL WALL MOUNT INSTALLATION
3.1 Place the Wireless Access Point Mounting Bracket
(supplied with the Cisco Aironet 1200 Wireless Access
Point) inside the enclosure so the four angled mounting
slots align with the four threaded studs on the back
wall of the enclosure. Install the bracket in the
orientation as shown in the view.
3.2 Secure the mounting bracket with the supplied #8 Split
Lock Washers and #8-32 Hex Nuts.
Step 3: Install Wireless Access Point Bracket
3
Mounting
Bracket
Refer to the installation and configuration guidelines provided by the manufacturer of the wireless
access point to determine the optimum enclosure installation location and antenna configuration.
Please read these instructions in their entirety prior to installing the enclosure.
22 x 4 Stud
1.1 Determine whether the network cable will be routed into
the enclosure through conduit or surface raceway.
Remove the appropriate knockouts.
For Conduit - Remove knockout “A”, “B” or “C”. This
double knockout accommodates either 1/2" or 3/4"
conduit.
For Surface Raceway - Remove knockout “D” or “E”.
This opening accommodates PANDUIT LD10 surface
raceway.
1.2 Determine the antenna type that will be used. Remove
the appropriate knockouts.
If 2.4GHz Standard Dipole Antennas will be used with
the Wireless Access Point (WAP) - Remove knockouts
“F”.
For Externally Mounted Antennas - Remove knockouts
“G”. An antenna patch cord (not included) is required
for this application.
1.3 Locate the wall studs. Position the enclosure on the wall
and identify which keyed knockouts should be removed.
It is recommended that two of the mounting holes be
aligned with the wall stud. Wall anchors (not included)
should be used for each additional mounting hole
chosen by the installer. Remove desired knockouts.
1.4 To view the LED lights on the WAP when the enclosure
door is closed, remove knockout “J”. Refer to figure 1
on page 5 for location of knockout “J”.
Optional: Flexible grommet edging can be used to cover
knockout edges if desired.
INSTALLATION INSTRUCTIONS PN355
For Technical Support: www.panduit.com/resources/install_maintain.asp
4.1 Run cable from the Telecommunications Grounding
Busbar (TGB) to the enclosure and attach to the
grounding stud on the base.
4.2 Using the supplied Grounding Cable, attach one end to
the grounding stud on the base (on top of TGB cable)
and the other end to the grounding stud on the door.
4.3 Secure with the #10 Split Lock Washers and #10-32 Hex
Nuts.
Step 4: Grounding 4
Grounding
Studs
5.1 If 2.4GHz standard dipole antennas will be used, install
the antennas onto the WAP before it is mounted in the
enclosure. Position the antennas so they are parallel
with the front surface of the WAP as shown. When
installing the WAP, these antennas will be inserted
through knockouts “F”.
5.2 If the 802.11a 5GHz paddle type antenna will be used,
install the antenna on the WAP before it is mounted in
the enclosure.
5.3 Insert the three mounting pads, located on the bottom
surface of the WAP, into the large portion of the three
keyed mounting holes on the bracket.
5.4 Pull the WAP downward until an audible “snap” is
heard. Lightly pull the WAP in the opposite direction to
verify that it is properly locked into place.
Step 5: Install Wireless Access Point
5
WAP
6.1 Run the network cable to and into the enclosure.
6.2 Terminate the Cat5e Jack Module to the network cable.
Refer to the PANDUIT website for jack termination
instructions if needed.
6.3 Mount the base of the 2 Position Surface Mount Box to
the back wall of the enclosure using provided double
sided tape.
6.4 Snap the terminated jack into position “1” of the box.
Place the network cable between the two cable
retention tabs on the back of the base.
6.5 Remove the breakout tab on the back of the cover.
6.6 Snap the cover onto the base.
Note: A second Cat5e Jack Module can be installed in
position “2” of the surface mount box to provide
access to the serial port on the WAP.
Step 6: Install Surface Mount Box
6 / 7
Surface
Mount
Box
Page 3 of 8
7.1 Insert one end of the 2' long Cat5 Patch Cord into the
RJ45 port located on the WAP.
7.2 Insert the other end of the patch cord into the Cat5e
jack located in the surface mount box.
Step 7: Install Patch Cord
INSTALLATION INSTRUCTIONS PN355
For Technical Support: www.panduit.com/resources/install_maintain.asp
Page 4 of 8
8.1 If the 802.11a 5GHz paddle type antenna is not used,
the large slot on the door can be covered using the
supplied Slot Cover.
8.2 Place the Slot Cover over the two threaded studs and
secure with the #10 Split Lock Washers and #10-32
Hex Nuts.
Step 8: Install Slot Cover (if needed) 8
Slot Cover
1. Knockout Removal
1.1 Remove knockouts in desired cable entry location:
For Conduit - Remove knockout “A” or “B”. This double
knockout accommodates either 1/2" or 3/4" conduit.
Without Conduit - Remove knockout “A” or “B”.
Remove the 1/2" diameter opening.
1.2 Determine the antenna type that will be used. Remove
appropriate knockouts.
The flush wall mount application is optimized for use
with the 802.11a 5GHz paddle type antenna. It is not
necessary to remove any knockouts if this antenna
type is used.
Note: Please refer to the antenna reference guide
provided by the manufacturer of the wireless access
point to identify the appropriate antenna configuration if
the 802.11b or 802.11g radio modules on the WAP will
be used.
1.3 Each sidewall of the enclosure has four small
knockouts that can be removed to allow 1/4" screws
(not included) to secure the enclosure to a stud inside
the wall. Determine which side of the enclosure will be
secured to the stud and remove the knockouts on that
sidewall.
1.4 To view the LED lights on the WAP when the enclosure
door is closed, remove knockout “J”.
2. Follow “In-Ceiling Mount Installation”
Steps 2-3 (pgs 5-6)
1
A
B
J
OPTIONAL FLUSH WALL MOUNT INSTALLATION
The enclosure can be mounted flush with the surface of a wall when optional PanZone Wireless
Access Point Ceiling Bracket Kit, PANDUIT Part# PZWIFICB (sold separately), is used.
3. Mount Enclosure in Wall
3.1 Locate the 2 x 4 wall stud and cut a square opening in the
wall that is no smaller than 12 1/4" x 12 1/4" and no larger
than 12 3/4" x 12 3/4". Important: One edge of the square
opening must line up with the edge of the wall stud.
3.2 Install the enclosure in the wall and secure to the wall stud
using four 1/4" screws (not included).
4. Complete installation by following “In-Ceiling
Mount Installation” Steps 6-11 (pgs 7-8)
INSTALLATION INSTRUCTIONS PN355
For Technical Support: www.panduit.com/resources/install_maintain.asp
Page 5 of 8
2.1 Place the Wireless Access Point Mounting Bracket
(supplied with the Cisco Aironet 1200 Wireless
Access Point) inside the enclosure so the four angled
mounting slots align with the four threaded studs on
the back wall of the enclosure. Install the bracket in
the orientation as shown in the view.
2.2 Secure the mounting bracket with the supplied #8
Split Lock Washers and #8-32 Hex Nuts.
Step 2: Install Wireless Access Point Bracket
IN-CEILING MOUNT INSTALLATION
2
Mounting
Bracket
1.1 Remove knockouts in desired cable entry location:
For Conduit - Remove knockout “A”, “B” or “C”. This
double knockout accommodates either 1/2" or 3/4"
conduit.
Without Conduit - Remove knockout “A” or “B”.
Remove the 1/2" diameter opening.
1.2 If 2.4GHz standard dipole antennas will be mounted to
the Wireless Access Point (WAP), remove knockouts
“H” on the door.
1.3 To view the LED lights on the WAP when the enclosure
door is closed, remove knockout “J”.
1A
B
C
H
J
Step 1: Knockout Removal
Refer to the installation and configuration guidelines provided by the manufacturer of the wireless
access point to determine the optimum enclosure installation location and antenna configuration.
Please read these instructions in their entirety prior to installing the enclosure.
Note: PANDUIT Part Number PZWIFICB is required for
the in-ceiling mount application.
INSTALLATION INSTRUCTIONS PN355
For Technical Support: www.panduit.com/resources/install_maintain.asp
Page 6 of 8
3.1 Place one of the Ceiling Mount Brackets against any
side wall of the enclosure with the flanged edge facing
away from the enclosure. The top of the flanged edge
should be even with the enclosure door.
3.2 Fasten the bracket to the base of the enclosure using
four of the supplied #6-32 Flat Head Screws.
3.3 Repeat steps for remaining 3 Ceiling Mount Brackets.
Step 3: Install Ceiling Mount Brackets 3
4.1 When the enclosure will be mounted in a suspended
ceiling, a square hole that is approximately 12 1/2" x 12
1/2" must be cut in the ceiling tile.
4.2 It is important that the hole be no smaller than 12 1/4" x
12 1/4" and no larger than 12 3/4" x 12 3/4". This will
ease installation and prevent visible gaps around the
enclosure once installed.
Note: The bottom edges of the assembled enclosure
brackets can be used as a guide to trace the square
hole size onto the ceiling tile.
Step 4: Prepare Ceiling Tile
4
PANDUIT Part #: (sold separately)
PZWIFICB - PanZone Wireless Access Point Ceiling Bracket Kit
(4) Ceiling Mount Brackets (16) #6-32 Flat Head Screws
5
3/8" dia hanger wire
mounting holes
(8 places)
Step 5: Install Enclosure to Ceiling
5.1 Hanger wire should be used to hang the enclosure
within a suspended ceiling. Important: Verify hanger
wire meets local building code. Weight of enclosure
and WAP does not exceed 8 lbs.
5.2 Observe how the hanger wire used to hold the ceiling
support grid is secured to the building structure.
5.3 Remove one tile adjacent to the tile the enclosure will
be mounted in.
5.4 Secure four pieces of hanger wire (not included) to the
building structure. The hanger wire length will be
determined by the installer based on the building
structure dimensions above the suspended ceiling.
Extend the length of the hanger wire beyond the
surface of the ceiling by at least 6".
5.5 Add the cut ceiling tile back to the ceiling support grid.
5.6 Pull one of the four pieces of hanger wire to one corner
of the square opening in the ceiling tile. Pre-bend the
hanger wire at a 90° angle approximately 2 1/2" above
the surface of the ceiling tile. Repeat this step for the
remaining 3 hanger wires measuring to the three
remaining corners of the square opening.
5.7 Insert the enclosure into the cut ceiling tile opening.
5.8 While holding the enclosure flush with the surface of
the ceiling tile, route the hanger wire through one of the
eight 3/8" dia hanger wire mounting holes and bend up.
Pull the wire upward until the enclosure is flush with the
ceiling tile. Repeat this step using the three remaining
hanger wires to secure the three remaining corners of
the enclosure.
5.9 Visually inspect the edges of the enclosure to verify no
gaps exist between the mounting brackets and surface of
the ceiling tile. If gaps exist, pull the hanger wire upward
until the enclosure is tight against the ceiling tile.
5.10 To secure the enclosure, wrap each hanger wire tightly
around itself a minimum of three times.
5.11 Replace the adjacent ceiling tile.
INSTALLATION INSTRUCTIONS PN355
For Technical Support: www.panduit.com/resources/install_maintain.asp
8.1 Route the network cable to and into the enclosure.
Important: When mounting the enclosure in the ceiling,
it is recommended that an excess length of network
cable be stored outside of the enclosure when conduit
is not used. The length of cable placed outside the
enclosure above the ceiling should be long enough to
allow the enclosure to be removed from the ceiling for
maintenance without cutting the network cable from the
Cat5e jack that will be installed in the next step. This is
necessary because the Cat5e jack cannot be removed
through a 1/2" conduit knockout.
8.2 Terminate the Cat5e Jack Module to the network cable.
Refer to the PANDUIT website for jack termination
instructions if needed.
8.3 Mount the base of the 2 Position Surface Mount Box to
the back wall of the enclosure using provided double
sided tape.
8.4 Snap the terminated jack into position “1” of the box.
Place the network cable between the two cable
retention tabs on the back of the base.
8.5 Remove the breakout tab on the back of the cover.
8.6 Snap the cover onto the base.
Note: A second Cat5e Jack Module can be installed in
position “2” of the surface mount box to provide
access to the serial port on the WAP.
6.1 Run cable from the Telecommunications Grounding
Busbar (TGB) to the enclosure and attach to the
grounding stud on the base.
6.2 Using supplied Grounding Cable, attach one end to the
grounding stud on the base (on top of the TGB cable)
and the other end to the grounding stud on the door.
6.3 Secure with the #10 Split Lock Washers and #10-32
Hex Nuts.
Page 7 of 8
6
Grounding
Studs
Step 6: Grounding
7.1 If 2.4GHz standard dipole antennas will be used, install
the antennas on the WAP before it is mounted in the
enclosure. Bend the antennas at the pivot point so they
are perpendicular to the front surface of the WAP as
shown.
7.2 If the 802.11a 5GHz paddle type antenna will be used,
install the antenna on the WAP before it is mounted in
the enclosure.
7.3 Insert the three mounting pads, located on the bottom
surface of the WAP, into the large portion of the three
keyed mounting holes on the bracket.
7.4 Pull the WAP downward until an audible “snap” is
heard. Lightly pull the WAP in the opposite direction to
verify that it is properly locked into place.
Step 7: Install Wireless Access Point
7
Step 8: Install Surface Mount Box
8
INSTALLATION INSTRUCTIONS PN355
E-mail:
cs@panduit.com
Fax:
(708) 444-6993
For Instructions in Local Languages
and Technical Support:
www.panduit.com/resources/install_maintain.asp www.panduit.com
Page 8 of 8
11.1 If the 802.11a 5GHz paddle type antenna is not
used, the large slot on the door can be covered using
the supplied Slot Cover.
11.2 Place the Slot Cover over the two threaded studs
and secure with the #10 Split Lock Washers and
#10-32 Hex Nuts.
Step 11: Install Slot Cover (if needed) 11
Slot Cover
1
92
34
5 6
Note: Fire Resistant Foam used when network cable is
routed into the enclosure without the use of conduit in
flush wall mount and in-ceiling mount applications.
9.1 Place two pieces of fire resistant foam into the foam
retention bracket. Both pieces should be underneath
the network cable and the ground cable.
9.2 Place the remaining two pieces of fire resistant foam on
top of the cables.
9.3 Press down on the foam and slide the foam retention
plate into place. The expanding foam holds the
retention plate in place.
Step 9: Install Fire Resistant Foam (if needed)
Step 10: Install Patch Cord
10.1 Insert one end of the 2' long Cat5 Patch Cord into the
RJ45 port located on the WAP.
10.2 Insert the other end of the patch cord into the Cat5e
jack located in the surface mount box.
10

Other Panduit Enclosure manuals

Panduit ZDF48-RA User manual

Panduit

Panduit ZDF48-RA User manual

Panduit UICFPR4 Series User manual

Panduit

Panduit UICFPR4 Series User manual

Panduit FLEX-ZRFEG User manual

Panduit

Panduit FLEX-ZRFEG User manual

Panduit PANZONE PZRFE4U User manual

Panduit

Panduit PANZONE PZRFE4U User manual

Panduit PZWIFIEN User manual

Panduit

Panduit PZWIFIEN User manual

Panduit FRME1 User manual

Panduit

Panduit FRME1 User manual

Panduit IAEIP66 User manual

Panduit

Panduit IAEIP66 User manual

Panduit NET-ACCESS CN3 User manual

Panduit

Panduit NET-ACCESS CN3 User manual

Panduit PANZONE PZC12S User manual

Panduit

Panduit PANZONE PZC12S User manual

Panduit PANZONE PZWIFIEW User manual

Panduit

Panduit PANZONE PZWIFIEW User manual

Panduit Z23U-624 User guide

Panduit

Panduit Z23U-624 User guide

Panduit FRME2 User manual

Panduit

Panduit FRME2 User manual

Panduit N2RCFR User manual

Panduit

Panduit N2RCFR User manual

Panduit FCE4U User manual

Panduit

Panduit FCE4U User manual

Panduit PANZONE PZBASE3 User manual

Panduit

Panduit PANZONE PZBASE3 User manual

Panduit PanZone PN323 User manual

Panduit

Panduit PanZone PN323 User manual

Panduit PANZONE PZAEWM6E User manual

Panduit

Panduit PANZONE PZAEWM6E User manual

Panduit Panzone PZWMC12P User manual

Panduit

Panduit Panzone PZWMC12P User manual

Panduit NET-ACCESS N21SPH User manual

Panduit

Panduit NET-ACCESS N21SPH User manual

Panduit PANZONE PZC12S User manual

Panduit

Panduit PANZONE PZC12S User manual

Panduit PZWRKA User manual

Panduit

Panduit PZWRKA User manual

Panduit PANZONE PZWC35 User manual

Panduit

Panduit PANZONE PZWC35 User manual

Panduit E6212B1FP User manual

Panduit

Panduit E6212B1FP User manual

Panduit FCE1U User manual

Panduit

Panduit FCE1U User manual

Popular Enclosure manuals by other brands

Rittal 9666.901 Assembly and operating instructions

Rittal

Rittal 9666.901 Assembly and operating instructions

Focal Polyglass SB 27 V1 brochure

Focal

Focal Polyglass SB 27 V1 brochure

EcoxGear ECOEXTREME quick guide

EcoxGear

EcoxGear ECOEXTREME quick guide

CTA PAD-SWE instruction manual

CTA

CTA PAD-SWE instruction manual

Icy Box IB-1822MF-C31 manual

Icy Box

Icy Box IB-1822MF-C31 manual

Geeek N500 LITE installation guide

Geeek

Geeek N500 LITE installation guide

Diablotek CP2036-BK Specifications

Diablotek

Diablotek CP2036-BK Specifications

MTX RZR-14-SW owner's manual

MTX

MTX RZR-14-SW owner's manual

Cooper Crouse-Hinds CEAF GHG 6 Series operating instructions

Cooper Crouse-Hinds

Cooper Crouse-Hinds CEAF GHG 6 Series operating instructions

Sharkoon ELITE SHARK CA700 manual

Sharkoon

Sharkoon ELITE SHARK CA700 manual

Antec SX1240 user manual

Antec

Antec SX1240 user manual

TOOQ TQE-2510B user manual

TOOQ

TOOQ TQE-2510B user manual

Zonet ZNS8023 Software manual

Zonet

Zonet ZNS8023 Software manual

Supermicro SC847 JBOD user manual

Supermicro

Supermicro SC847 JBOD user manual

Open House ChannelPlus H218 user manual

Open House

Open House ChannelPlus H218 user manual

NEC N8141-62F Installation and Handling Guide

NEC

NEC N8141-62F Installation and Handling Guide

VIPowER Portable 3.5 in. External Enclosure VP-9258V installation guide

VIPowER

VIPowER Portable 3.5 in. External Enclosure VP-9258V installation guide

Rosslare ME-0515M installation manual

Rosslare

Rosslare ME-0515M installation manual

manuals.online logo
manuals.online logoBrands
  • About & Mission
  • Contact us
  • Privacy Policy
  • Terms and Conditions

Copyright 2025 Manuals.Online. All Rights Reserved.