Panio CH8800K User manual

1
PANIO
CH8800K User manual

2
Contents
1. Packing ..................................................................................................................3
2. Panel description .................................................................................................. 3
3. Matrix Switcher control ........................................................................................ 4
Remote Control ..................................................................................................... 4
WEB GUI Browser control ..................................................................................... 5
COM Control Commands .......................................................................................7

3
1. Packing
2. Panel description
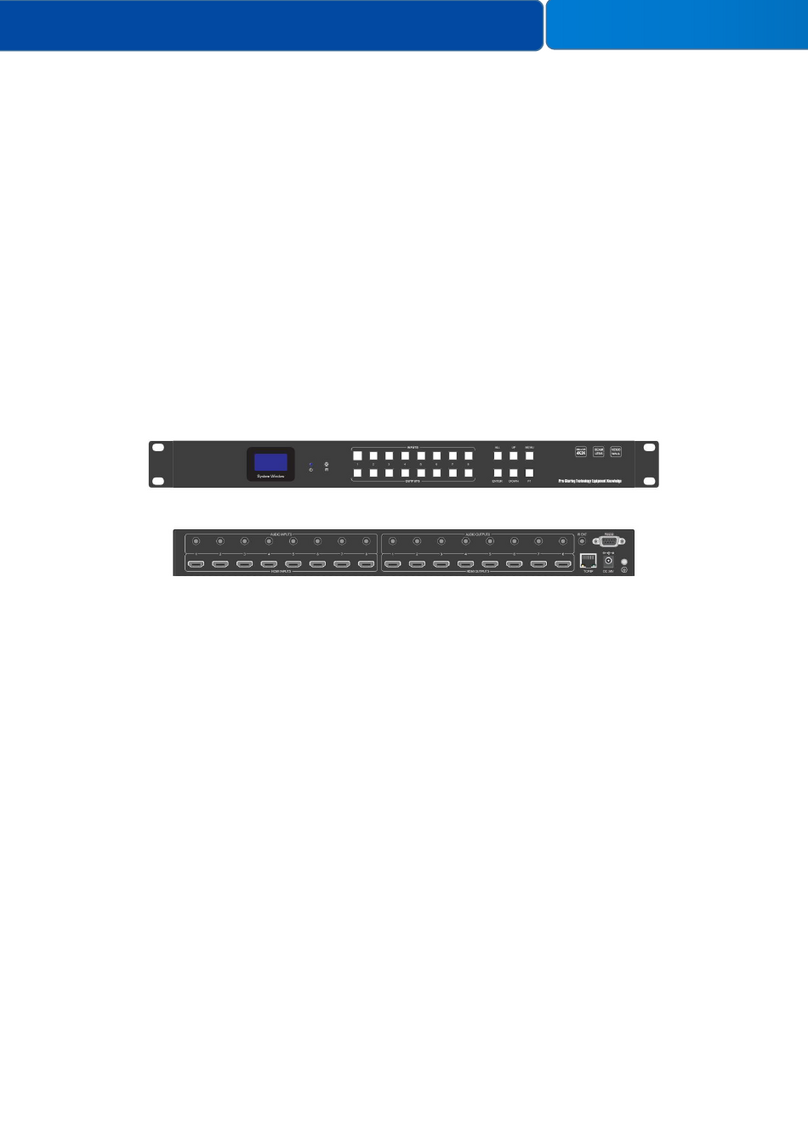
Front panel
1OLED screen:Display matrix switching status, input / output port, EDID, Baud rate, IP Address.
2POWER LED: Red LED indicates that the unit is powered.
3IN / OUT Button: You need to press an output button (1~8) firstly and then press an input button
(1~8) to select the corresponding
4MENU/ENTER/UP/DOWN: EDID Check On the initial OLED display screen, press“MENU”button to
enter the Matrix switching state interface, then press“UP/DOWN”button to check the current
EDID information of each HDMI input port. EDID setting On the initial OLED display screen, press
“MENU”button to enter the EDID setting interface, press“UP/DOWN”button to select the
required EDID, and press the“ENTER”button. A prompt“copy to input :”will appear.
Then press
“UP/DOWN”
button to select the input port you need to set, and press
“ENTER”button
again to confirm. Baud rate setting On the initial OLED display screen, press“MENU”button to
enter the Baud rate interface, and press“UP/DOWN”button to select the required Baud rate,
finally press the“ENTER”button to confirm the setting. IP Address Check On the initial OLED
display screen, press“MENU”button to enter the IP interface, then press“UP/DOWN”button to
check the current IP address. Pressing the“MENU”button again will return to the initial OLED
display status.
5POWER button
6IR Window
7LOCK button: Short press the LOCK button to lock front panel buttons (Except the power button);
Press it again to unlock.
No.
Name
Qty
Unit
No.
Name
Qty
Unit
1
CH8800K
1
Pcs
5
IR extension cable
1
Pcs
2
DC 12V 5A
1
Pcs
6
Rack accessories
1
Kit
3
Remote Control Battery not provided
1
Pcs
7
User manual
1
Pcs
4
RS-232 cables
1
Pcs

4
Back panel
1IR EXT: IR eye input for IR control of the Switcher.
2L/R OUT(1-8)
3COAX OUT(1-8)
4TCP/IP port
5RS-232 port
6Connect the housing to the ground.
7HDMI Input 1 to 8
8HDMI Output 1 to 8
9Connect to 12V/5A power adapter.
3. Matrix Switcher control
This Matrix switcher can support IR remote,RS232/ WEB GUI browser or the front push-buttons control.
Remote Control
1
Power on the Switcher or set it to standby mode.
2
Select input source button.
3
Select output source button.
All: Select all output source simultaneously.
Select the last or next the input source.
Operation instruction: You need to press the output button firstly and then
press input button to select the corresponding input source. For example,
Press Output-X (X means output button from 1 to 8 , including “All” button)
Then press Input-Y (Y means input button from 1 to 8 )

5
WEB GUI browser Control
The default IP address are 192.168.1.100.
After opening the browser, users can type the matrix switcher IP address and press enter:
The default user name is Admin and the password is admin.
Status page:
The buttons at the top right of the web interface are always available and provide the following
function:
•The Log out button will disconnect the current user from display the log in screen.
•The Power on button changes the power status of the Switcher between On and Stand-by mode.
Video page:
The Video page allows selection of the inputs source and set the Scene.
To this preset setting, first you need to select the desired input source to four output ports. Then click
the Save button to save the setting.
When you click the line Set button, this preset you have saved will be used.
The Clear button will clear the preset. There are four presets setting available.
Input page:
The Input page provides information about which inputs are connected and have a signal present.
The inputs can be giving more meaningful names, if desired.
The EDID column provides a list of EDID options for each individual input.
This page also provides a means of sending a binary EDID file to either User 1 or User 2 EDID
memories:

6
1.Select the binary EDID file on your PC by click on the Browse button.
2.Select either User 1 or User 2 from the drop-down list.
3.Click the Upload button.
The EDID data from any input or from the User 1 and User 2 locations can be read and stored on your
PC.
Output page:
The outputs can also be assigned meaningful names, if desired.
The Output page provides information about the signal status of the outputs.
The Scaler mode menu provides the following options:
Bypass: Follow the input source. (Pass-through)
4K→1080P: Downscale to 1080p, if needed.
AUTO: Scaler to match the display requirements.
The ARC buttons enable or disable the display device audio to the coaxial audio outputs. If the ARC
function enables, the L/R audio port will have no voice output simultaneously.
The Stream buttons enable or disable the output signal for the respective output.
Network page:
The Network page allows the configuration of the network settings.
Note that the IP address boxes are only accessible when the Mode button is set to Static.
The log in passwords can be changed on this page.
Note that any changes to this page will require the new details into the web browser and/or the log in
screen.
System page:

7
The system page allows setting of the panel lock and beep on/off, control RS-232 port baud rate.
This page is also used to install new firmware update, restore the factory default settings and reboot
the Switcher.
COM Control Commands
RS232 cable with straight-through connection(USB-RS232 can be used directly to control)
Communication protocol:
Baud rate: 115200
Data bit: 8
Stop bit: 1
Check bit: None
Command
Explanation
Feedback
Power
s power z!
power on/off the device,z=0~1
(z=0 power off, z=1 power on)
power on
System Initializing...
Initialization Finished!
power off
r power!
get current power state
power on /power off
s reboot!
reboot the device
Reboot…
System Initializing...
Initialization Finished!
SYSTEM
Setup
r status!
Get device current status
Get the unit all status:
power, beep, lock, in/out
connection, video/audio
crosspoint, edid,
scaler,hdcp, network status
r link in x!
Get the connection status of the x input
port
,
x=0~8(0=all)
HDMI IN1: connect

8
r link out y!
Get the connection status of the y output
port
,
y=0~8(0=all)
HDMI OUT1: connect
s beep z!
Enable/Disable buzzer function,z=0~1(z=0 beep
off, z=1 beep on)
beep on / beep off
r beep!
Get buzzer state
beep on / beep off
s lock z!
Lock/Unlock front panel button,z=0~1(z=0 lock
off,z=1 lock on)
panel button lock on
panel button lock off
r lock!
Get panel button lock state
panel button lock on/off
s save preset z!
Save switch state between all output port and
the input port to preset z
,
z=1~8
save to preset 1
s recall preset z!
Call saved preset z scenarios
,
z=1~8
recall from preset 1
s clear preset z!
Clear stored preset z scenarios,z=1~8
clear preset 1
r preset z!
Get preset z infomation, z=1~8
video/audio
crosspoint
s baud rate xxx!
Set the serial port baud rate of RS02 module,
z=(115200,57600,38400,19200,9600,4800)
Baudrate:115200
r baud rate!
Get the serial port baud rate of RS02 module
Baudrate:115200
s id z!
Set the control ID of the product, z=000~999
id
888
Output
Setting
s in x av out y!
Set input x to output y
,
x=1~8
,
y=0~8(0=all)
input 1 -> output 2
r av out y!
Get output y signal status y=0~8(0=all)
input 1 -> output 1
input 2 -> output 2
……
input 4 -> output 4
s out y stream z!
Set output y stream on/off, y=0~8(0=all) z=0~1
(0:disable,1:enable)
Enable out 1 stream
Disable out 1 stream
r out y stream!
Get output y stream status, y=0~8(0=all)
Enable out 1 stream
s hdmi y scaler z!
Set hdmi output y port output scaler
mode
,
y=0~8 (0=all),
z=1~3(1=bypass,2=4k->1080p,3=Auto)
hdmi 1 set to bypass mode
r hdmi y scaler !
Get hdmi output y port output mode y=0~8(0=all)
hdmi 1 set to bypass mode
s hdmi y hdcp z!
Set hdmi output y port hdcp status y=0~8(0=all)
z=0~1(1=active,0=off)
hdmi 1 hdcp active
r hdmi y hdcp!
Get HDCP status of HDMI out y, y=0~8(0=all)
hdmi 1 hdcp active
Audio Setting
s hdmi y arc z!
Turn on/off arc of HDMI output y
,
y=0~8(0=all)
z=0~1(z=0,off,z=1 on)
hdmi output 1 arc on
hdmi output 1 arc off
r hdmi y arc!
Get the arc state of HDMI output
y
,
y=0~8(0=all)
hdmi out1 arc on
Table of contents
Other Panio Matrix Switcher manuals

Panio
Panio CH8810K User manual

Panio
Panio HD1400K User manual

Panio
Panio HW2250K User manual

Panio
Panio CH8810K User manual

Panio
Panio HD8820K User manual

Panio
Panio HD1800K User manual

Panio
Panio HD4420K User manual

Panio
Panio CH4400K User manual

Panio
Panio CH8830K B User manual

Panio
Panio CH8820K User manual