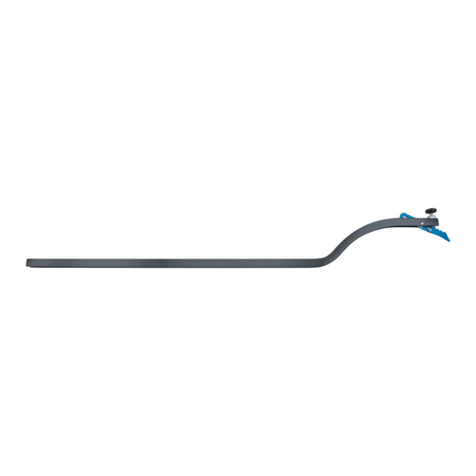
BDT-2 Spann- und Richtwerkzeug
für Riemenatrieb
Mit dem BDT -2 Messgerät kann man
die Riemenspannung der meisten
Riemenantriebssysteme und Größen prüfen. Es
misst auch die Parallelität des Zahnkranzes.
MESSUNG DER SPANNUNG:
1. Das BDT-2 auf den Riemen legen, darauf
achten, dass die gesamte Länge des BDT-
2 aufliegt. Um eine genaue Messung zu
garantieren ist es wichtig, dass das Gerät nur
Kontakt mit dem Riemen hat!
2. Das BDT-2 auf den Riemen drücken, bis
Vorder- und Rückteil des Werkzeuges mit
vollem Kontakt auf dem Riemen liegen.
3. Die Anzeige ablesen. Die Spannung des
Riemens kann durch Vergleich der Mittellinie
des Indikators bestimmt werden.
4. Wenn die Anzeige nicht auf null zurück geht,
manuell die Feder zentrieren und die Schritte
1-3 wiederholen.
EMPFOHLENER BEREICH DER SPANNUNG:
Continental:6–9
Gates:Für Single Speed Urban- und
Mountainbikes, die Spannung sollte zwischen 8
und 10 eingestellt werden, wobei 8 die geringere
Spannung widerspiegelt. Für Fahrräder mit
Nabenschaltung, bitte Gates kontaktieren.
(www.gatescarbondrive.com/tech/overview)
Im Zweifelsfall an den Hersteller wenden.
MESSUNG DER PARALLELITÄT:
1. Das Werkzeug mit der flachen Seite –
Spannungsmesser nach oben zeigend -
auflegen.
2. An die Ober- und Außenkante des hinteren
Ritzels mit konstantem und festem Druck
anlegen.
3. Die Außenkante des vorderen
Zahnrades sollte innerhalb der Breite der
Ausrichtungsanzeige fallen. Ist dies nicht der
Fall, sind vorderes und hinteres Zahnrad nicht
innerhalb der Spezifikationen und müssen
angepasst werden.
BDT-2 Alignement et Tension
pour Entrainement à Courroie
Le BDT-2 est une gauge permettant de régler
correctement la tension sur la plupart des
courroies de vélos équipés de ce système. Le
BDT-2 permet aussi de mesurer le parallélisme et
l’angle du pignon arrière.
MESURE DE LA TENSION:
1. Placer le BDT-2 sur la courroie en faisant bien
attention à ce que toute la longueur du BDT-2
soit en contact avec la celle-ci. Afin d’obtenir
une lecture précise de la tension, il est
critique que l’outil ne soit en contact qu’avec
la courroie et pas avec un pignon ou le carter,
ce qui fausserait la mesure!
2. Appuyer sur le BDT-2 jusqu’à ce que les deux
extrémités soient entièrement en contact
avec la courroie.
3. Lire l’indication sur la gauge. La tension de la
courroie peut être déterminée en comparant
le centre du curseur à l’échelle.
4. Si le curseur se bloque et ne revient pas à
zéro, recentrer le ressort manuellement et
répéter les étapes 1-3.
PLAGE DE TENSION CONSEILLÉE:
Continental:6–9
Gates:Pour les single speed urbains et VTT,
la tension devrait être située entre 8 et 10, 8
représentant la tension typique minimale. Pour les
vélos à vitesses intégrées au moyeux, contacter
Gates. (www.gatescarbondrive.com/tech/overview)
En cas de doute, consulter le fabriquant du vélo/
courroie afin d’obtenir les préconisations de tension.
MESURE DU PARALLÉLISME ET DE
L’ALIGNEMENT ANGULAIRE:
1. Retourner l’outil avec la gauge de tension vers
le haut et à l’opposé de la courroie.
2. Placer l’encoche de placement contre le haut
et la face extérieur du pignon arrière tout en
appliquant une pression constante et ferme.
3. Le bord extérieur du pignon avant devrait
se situer dans la largeur de l’indicateur
d’alignement. Si le côté extérieur ne se
situe PAS dans la largeur de l’indicateur
d’alignement, alors les pignons avant
et arrière ne sont pas alignés selon les
spécifications et doivent être ajustés.
BDT-2 Checador y
Alineador de Banda
El BDT-2 es un medidor y alineador diseñado para
ayudar a establecer una tension adecuada en la
mayoria de los sistemas de banda y diferentes
medidas. El BDT-2 tambien mide el paralelo y el
ángulo del engranaje.
MEDICIÓN DE LA TENSIÓN:
1. Coloque el BDT-2 en la banda asegurandose
que toda la longitud de la herramienta haga
contacto con la banda. Con el fin de obtener
una lectura precisa de la tensión es muy
importante que la herramienta haga contacto
unicamente con la banda y no haga contacto
con algo más como el engranaje, ya que esto
haría que la medición de la tensión no fuera
la adecuada.
2. Empuie hacia abajo el BDT-2 hasta que la
parte delantera y trasera de la herramienta
hagan contacto complete con la banda.
3. Lea el medidor, la tensión de la banda se
puede determinar mediante la comparación de
la linea central de la escala del indicador.
4. Si el indicador se traba y no regresa a la
escala cero, centrelo manualmente y repita
los pasos 1-3.
RANGO DE TENSIÓN SUGERIDO:
Continental:6–9
Gates:Para las bicicletas urbanas y montaña de 1
velocidad, la tensión debe ser de entre 8 y 10, con el de
8 se representa la típica tensión baja. Para bicicletas
con maza de cambios internos, favor de consultar
Gates. (www.gatescarbondrive.com/tech/overview)
En caso de dudas consulte con el fabricante de la
bicicleta o el fabricante de la banda para conocer
las especificaciones precisas de la tensión.
MEDICIÓN DEL PARALELO Y LA ALINEACION
DEL ÁNGULO:
1. Coloque la herramienta con el medidor de
tensión hacia arriba y lejos de la banda.
2. Coloque la herramienta en el borde superior
y exterior del engranaje trasero aplicando
presion firme y constante.
3. Para alinear y tener la tensión adecuada
asegurese de que la herramienta encaje
perfectamente en el engranaje delantero,
asegurese que la banda encaje perfectamente
en el indicador de la herramienta, de no ser asi
debe ser ajustada.
1
2
3
4
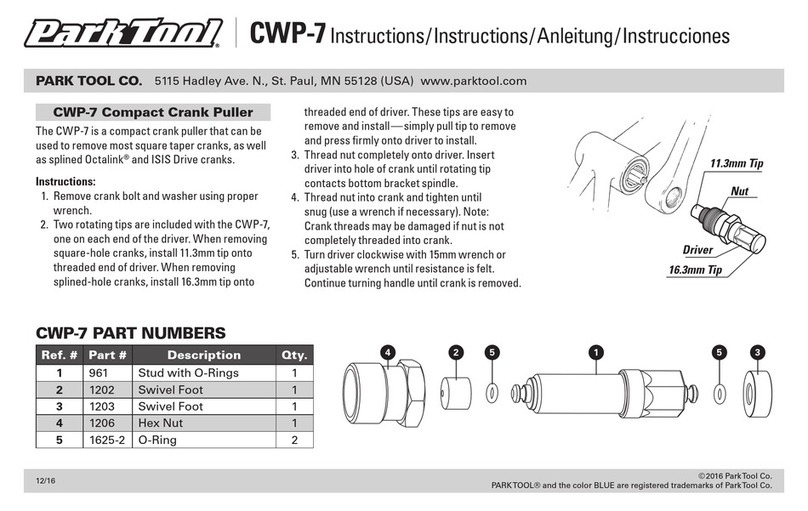
BDT-2 PART NUMBERS
Ref. # Part # Description Qty.
12234 Body 1
22235 Bow Spring 1
32237 Spring Retainer 1
42236 Spring Retaining Screw 1
