manuals.online logo
Brands
  1. Home
  2. •
  3. Brands
  4. •
  5. parktool
  6. •
  7. Bicycle Accessories
  8. •
  9. parktool FFS-2 User manual

parktool FFS-2 User manual

5115 Hadley Ave. N., St. Paul, MN 55128 (USA) www.parktool.com
PARK TOOL CO.
FFS-2 Frame, Fork, and Tube Straightener
• Long handle for maximum leverage and comfort
• Cushioned grip for comfort
• Adjustable pulling hook fits tubes to 1-3/4” (44mm)
• Padding on hook and pressure pad protects painted finish
• Durable chrome plated finish
Instructions
1. Mount frame or fork in a stable fixture.
2. Place the pressure pad (ref. #6) over a rigid point on the tube (e.g. the brake
bridge) or at the start of the bend in the tube.
3. Adjust the pulling hook (ref. #4) so it is at the apex of the bend.
4. Pull on the handle (ref. #2) to straighten bend.
CAUTION!
Safety should always come first. Consult with the frame or fork manufacturer for
specific recommendations regarding straightening, as not all materials or designs
can or should be straightened. After straightening, all frame and fork tubes should
be carefully inspected for cracks, kinks, and other damage. A customer should be
advised when conditions render a bicycle unsafe to ride.
FFS-2 Richtwerkzeug
• Langer Hebel für maximale Kraftwirkung
• Gepolsterter Handgriff
• Einstellbarer Richthaken für Rohrdurchmesser bis 1-3/4” (44 mm)
• Lackschützender Kunststoffüberzug an Haken und Druckplatte
• Robuste Verchromung
Anleitung
1. Fixieren Sie den Rahmen bzw. die Gabel sicher.
2. Platzieren Sie die Druckplatte (ref. #6) über einem stabilen Bereich des Rohres
(z.B. der Bremsstrebe) oder am Anfang des verbogenen Bereichs.
3. Justieren Sie den Richthaken (ref. #4) so, dass er sich direkt am Scheitelpunkt der
Verbiegung befindet.
4. Ziehen Sie den Richthebel am Handgriff (ref. #2) zum Richten des betroffenen
Rohrbereichs.
VORSICHT!
Sicherheit hat auf jeden Fall Vorrang. Beraten Sie sich mit dem Hersteller des
Rahmens / der Gabel zu den Möglichkeiten das betroffene Produkt zu richten. Nicht
alle Materialien oder Bauteile dürfen gerichtet werden. Nach dem Richten müssen
alle Rahmen- und Gabelrohre sorgfältig auf Risse, Abplatzungen oder andere
Unregelmäßigkeiten überprüft werden. Der Kunde muss nachweisbar informiert
werden, wenn ein Fahrrad nicht mehr betriebssicher ist.
FFS-2 Outil pour Redresser Cadre et Fourche
• Une poignée très longue pour plus de levier et de confort
• Un grip souple pour plus de confort
• Le crochet mobile s’adapte au aux tubes 1-3/4’’ (44mm)
• Le revêtement du crochet et de la cale de pression évite de rayer la peinture
• Finition chromé robuste
Mode d'emploi
1. Placer le cadre ou la fourche de façon fixe.
2. Placer la cale de pression (ref. #6) sur un point rigide du cadre ou au départ de la
courbure du tube.
3. Ajuster le crochet mobile (ref. #4) de façon à le placer sur le sommet de la courbe.
4. Tirer sur la poignée (ref. #2) pour redresser le tube.
ATTENTION!
La sécurité doit toujours prévaloir. Consulter le fabriquant de la fourche ou du cadre
pour des recommandations spécifiques, dans la mesure où tous les matériaux ou
géométries ne peuvent pas ou ne doivent pas être redressé. Après redressage, tout
tube de cadre ou fourche doit être soigneusement inspecté pour vérifier qu’il n’y
ait ni fissures ou défauts. Le client doit être prévenu lorsque les conditions rendent
l’utilisation du vélo dangereuse à l’usage et donc inutilisable.
FFS-2 Instructions/Instructions/Anleitung/Instrucciones
5115 Hadley Ave. N., St. Paul, MN 55128 (USA) www.parktool.com
PARK TOOL CO. 5115 Hadley Ave. N., St. Paul, MN 55128 (USA) www.parktool.com
PARK TOOL CO.
FFS-2 Palanca para Enderezar Cuadros,
Tijeras y Manubrios
• Mango mas largo para un máximo palanqueo y confort
• Cuenta con puño confortable en el mango
• Gancho ajustable para tubos de 1-3/4” (44mm)
• Cubiertas en el gancho para proteger la pintura al hacer presión
• Acabado en cromo para una mayor durabilidad
Instrucciones
1. Coloque el cuadro o tijera en un lugar estable.
2. Ponga la placa de presión (vea #6) sobre un punto rígido en el tubo (Ejem.El puente
de freno) o al inicio de la curva del tubo.
3. Ajuste el gancho (vea #4) en el ápice de la curvatura.
4. Tire de la palanca (ver #2) y enderece.
PRECAUCION¡
Tome primero las precauciones debidas. Consulte con el fabricante del cuadro o
tijera para recomendaciones especificas con respecto a su enderezado. Después
del enderezado, todos los tubos de cuadros y tijeras deberán ser cuidadosamente
inspeccionados por fracturas, rupturas u otros daños. En este caso el cliente debe ser
informado de las condiciones inseguras de la bicicleta para ser utilizada.
FFS-2 PART NUMBERS
Ref. # Part # Description Qty.
1428 Handle Grip 1
2423 Handle Weldment 1
3427 Split Pin 3/16 x 5/8 1
4424 Pulling Hook 1
5426 Split Pin 3/8 x 7/8 1
6418 Pressure Pad 1
7421 Spacer 1
81759* Button Head Socket Cap Screw M6x25 1
9290* Nylon Lock Nut M6 1
*NOTE: #1759 and #290 must be replaced
together
*HINWEIS: Die Teile #1759 und #290 müssen
zusammen ersetzt werden
*Note : #1759 et #290 doivent être changés en
même temps
*Nota: Las partes #1759 y #290 deben ser
reemplazadas juntas
Made in the USA
Warranty Info: parktool.com/warranty
© 2018 ParkTool Co. / PARK TOOL®
and the color BLUE are registered
trademarks of ParkTool Co.
WARNING: Cancer and
Reproductive Harm
www.P65Warnings.ca.gov
1
2
3
5
4
6
9
7
8
© 2018 ParkTool Co.
PARKTOOL® and the color BLUE are registered trademarks of Park Tool Co.
10/18
FFS-2 Parts/Pièces/Teile/Partes

Other parktool Bicycle Accessories manuals

parktool WAG-4 User manual

parktool

parktool WAG-4 User manual

parktool TNS-4 User manual

parktool

parktool TNS-4 User manual

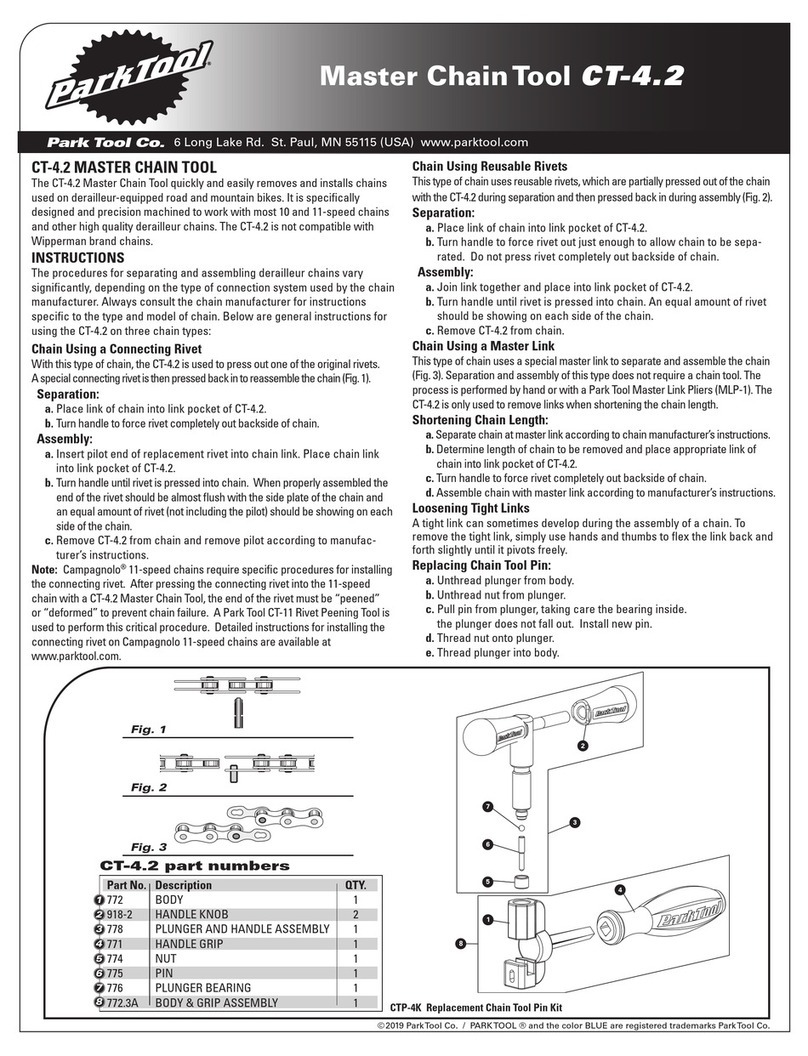
parktool CT-4.2 User manual

parktool

parktool CT-4.2 User manual

parktool PCS-4 User manual

parktool

parktool PCS-4 User manual

parktool DAG-2.2 User manual

parktool

parktool DAG-2.2 User manual

parktool ISC-4 User manual

parktool

parktool ISC-4 User manual

parktool CWP-7 User manual

parktool

parktool CWP-7 User manual

parktool FAG-2 User manual

parktool

parktool FAG-2 User manual

parktool INF-2 User manual

parktool

parktool INF-2 User manual

parktool PCS-4-1 User manual

parktool

parktool PCS-4-1 User manual

parktool FAG-2 User manual

parktool

parktool FAG-2 User manual

parktool PCS-12 User manual

parktool

parktool PCS-12 User manual

parktool TS-TA User manual

parktool

parktool TS-TA User manual

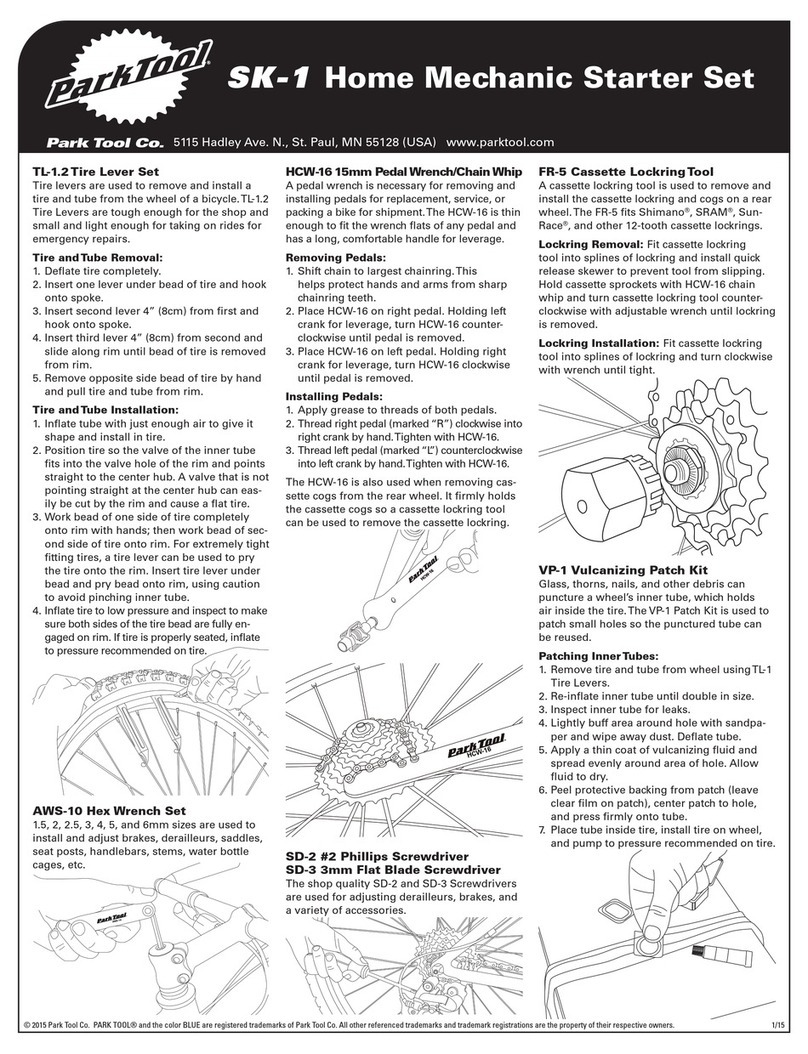
parktool SK-1 User manual

parktool

parktool SK-1 User manual

parktool BDT-2 User manual

parktool

parktool BDT-2 User manual

Popular Bicycle Accessories manuals by other brands

Garmin EDGE 540 owner's manual

Garmin

Garmin EDGE 540 owner's manual

blackburn 7074411 quick start guide

blackburn

blackburn 7074411 quick start guide

Look 987 manual

Look

Look 987 manual

Thule RideAlong manual

Thule

Thule RideAlong manual

CAMPAGNOLO Ekar RD21 manual

CAMPAGNOLO

CAMPAGNOLO Ekar RD21 manual

Accolmile 700C owner's manual

Accolmile

Accolmile 700C owner's manual

Sigma BC 1606L DTS cadence installation instructions

Sigma

Sigma BC 1606L DTS cadence installation instructions

Yolin YL70E user manual

Yolin

Yolin YL70E user manual

KaZAM iBert Assembly instructions

KaZAM

KaZAM iBert Assembly instructions

BAFANG DP C07.UART manual

BAFANG

BAFANG DP C07.UART manual

Thule RideAlong Product overview

Thule

Thule RideAlong Product overview

Fusion Velvet RL Setup guide

Fusion

Fusion Velvet RL Setup guide

KUNTENG KT-LCD11 user manual

KUNTENG

KUNTENG KT-LCD11 user manual

Nitecore Br35 user manual

Nitecore

Nitecore Br35 user manual

Crivit FT-2882 Instructions for use

Crivit

Crivit FT-2882 Instructions for use

FOBO Bike user manual

FOBO

FOBO Bike user manual

Garmin Edge 810 owner's manual

Garmin

Garmin Edge 810 owner's manual

YOSE POWER C500-LCD instructions

YOSE POWER

YOSE POWER C500-LCD instructions

manuals.online logo
manuals.online logoBrands
  • About & Mission
  • Contact us
  • Privacy Policy
  • Terms and Conditions

Copyright 2025 Manuals.Online. All Rights Reserved.