PASCO PASPORT PS-2108 User manual

®
PS-2108
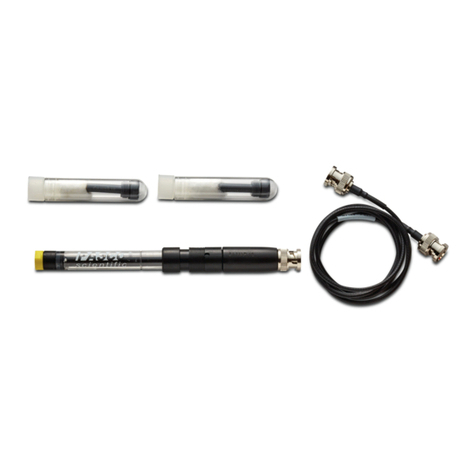
The PS-2108 Dissolved Oxygen Sensor measures the amount of
dissolved oxygen in a solution in milligrams per liter.
Dissolved Oxygen Quick Start
Additional Equipment Needed
• PASPORT Link Device (USB Link, Xplorer, etc.)
• EZscreen or DataStudioTM software (version 1.6 or later)
Equipment Setup
1. Connect the PASPORT Link Device to a USB port on your computer or USB hub.
2. Connect the Dissolved Oxygen probe to the sensor.
3. Connect the sensor to the PASPORT Link Device.
4. The software launches when it detects a PASPORT sensor. From the
PASPORTAL screen, select a point of entry:
•an activity in the Workbook window,
•EZscreen, or
•DataStudio.
Sensor Specifications
Sensor Range: 0–20 mg/L
Accuracy: ±10% of full scale
Resolution: 0.01 mg/L
Max Sample Rate: 20 sps
Default Sample Rate: 2 sps
Response: 98% in 60 seconds
Temperature Range: 0–50°C
Temperature Compensation: 10–40°C
Cathode: Platinum
Anode: Ag/AgCl
Membrane: 1 ml silicon
12
3
Dissolved Oxygen
Sensor
Note: Prior to first use, fill the
electrode membrane cartridge and
housing with a filling solution. Refer
to the Maintenance card included
with the sensor.

Dissolved Oxygen EZscreen
EZscreen Activity - Cellular Respriation
Materials Required
•600 ml beaker
•400 ml deionized water
•1 package rapid active yeast
•sugar
•hot plate/stir plate with stir bar (optional)
1. Follow the directions on the yeast package to activate the
yeast in a beaker using tap water and sugar.
2. Fill beaker one-third full of deionized water and shake
vigorously for 10 seconds.
3. Stir 1 teaspoon sugar into the deionized water.
4. Begin recording data for 10 minutes.
5. After 30 seconds, drop 1 teaspoon of the activated yeast
solution into the water.
6. Continue stirring the solution with the probe until the oxygen
level stabilizes (or data recording stops).
7. Stop recording and save the data.
EZscreen Specifications
EZscreen Range: 0–20 mg/L
Recording Time: up to 2 hours
Scale-to-Fit: Double-click the Graph to scale data
Information Tool: Displays X,Y coordinate and slope for a point on graph
Export to DataStudio: Click Exit to DataStudio button
Toggle
Data
Runs
Save
Data
Open
Data
Print
Graph
Quit
EZscreen
Exit to
DataStudio
Click the Start
Button to
Record Data
Dissolved Oxygen
Reading

DataStudio Calibration
Setup and Calibration
Calibration Procedure:
PS-2108 Dissolved Oxygen Sensor
Equipment required: • Soaker bottle (included with sensor)
• Calibration Table (on reverse side)
• Barometric pressure reading for your location
• DataStudio software, version 1.5.3, or a PASPORT datalogger
Equilibrate the Probe in 100% Humidified Air
1. Before performing any calibration, place 5 mL of deionized water into a clean
soaker bottle.
2. Insert the probe into the soaker bottle and screw on the lid.
Place the end of the probe about 2 cm above the water (see Figure 1).
3. Shake the soaker bottle vigorously for a few seconds. Shake off any large water
drops from the membrane.
If using a computer, perform a single-point calibration using the
DataStudio software. Select a measurement unit, either mg/L or Per-
cent (%) Saturation, before performing the calibration:
Perform a mg/L calibration:
1. Make sure the mg/L checkbox is checked in the PASPORT setup window.
2. Click the Calibrate button next to mg/L.
3. Refer to the calibration table (on the reverse side of this card) and enter the
appropriate dissolved oxygen value for the temperature and barometric
pressure at your location. You can use a PASPORT Temperature and
Barometer to take the necessary measurements. NOTE: If you call the
weather service, the barometric pressure they provide must be altitude
adjusted!
4. Click the Set button.
If using a PASPORT datalogger, then:
1. Turn on the datalogger.
2. Plug the sensor into the datalogger.
3. Press the Display button until ‘Calibrate’appears on the screen.
4. Press the +button to select either mg/L or % as the measurement unit.
5. Press the Check button.
For a mg/L calibration:
•Refer to the calibration table, enter the appropriate dissolved oxygen value for
the temperature and barometric pressure at your location (see above for
detail). Note, you must have this value to proceed.
•Press the Tab button to move through the digits.
•Use the -and +buttons to set the desired value for each digit.
•Press the Check button.
•Press the Display button.
For a % saturation calibration:
•Wait for the reading to stabilize. Click the Check button for 100% saturation.
PASPORT Datalogger Calibration
DataStudio Calibration
Setup and Calibration
Calibration Procedure:
PS-2108 Dissolved Oxygen Sensor
Equipment required: •Soaker bottle (included with sensor)
•Calibration Table (on reverse side)
•Barometric pressure reading for your location
•DataStudio software, version 1.5.3, or a PASPORT datalogger
Equilibrate the Probe in 100% Humidified Air
1. Before performing any calibration, place 5 mL of deionized water into a clean
soaker bottle.
2. Insert the probe into the soaker bottle and screw on the lid.
Place the end of the probe about 2 cm above the water (see Figure 1).
3. Shake the soaker bottle vigorously for a few seconds. Shake off any large water
drops from the membrane.
If using a computer, perform a single-point calibration using the
DataStudio software. Select a measurement unit, either mg/L or Per-
cent (%) Saturation, before performing the calibration:
Perform a mg/L calibration:
1. Make sure the mg/L checkbox is checked in the PASPORT setup window.
2. Click the Calibrate button next to mg/L.
3. Refer to the calibration table (on the reverse side of this card) and enter the
appropriate dissolved oxygen value for the temperature and barometric
pressure at your location. You can use a PASPORT Temperature and
Barometer to take the necessary measurements. NOTE: If you call the
weather service, the barometric pressure they provide must be altitude
adjusted!
4. Click the Set button.
If using a PASPORT datalogger, then:
1. Turn on the datalogger.
2. Plug the sensor into the datalogger.
3. Press the Display button until ‘Calibrate’appears on the screen.
4. Press the +button to select either mg/L or % as the measurement unit.
5. Press the Check button.
For a mg/L calibration:
•Refer to the calibration table, enter the appropriate dissolved oxygen
value for the temperature and barometric pressure at your location (see
above for detail). Note, you must have this value to proceed.
•Press the Tab button to move through the digits.
•Use the -and +buttons to set the desired value for each digit.
•Press the Check button.
•Press the Display button.
For a % saturation calibration:
•Wait for the reading to stabilize. Click the Check button for 100%
saturation.
PASPORT Datalogger Calibration
012-07688B
012-07688B

Calibration Table
PRESSURE (Inches Hg.)
TEMP( c) 29.5 29.7 29.9 30.1 30.3 30.5 30.7 30.9 31.1 31.3
014.37 14.47 14.57 14.66 14.76 14.86 14.95 15.05 15.15 15.24
113.98 14.08 14.17 14.27 14.36 14.45 14.55 14.64 14.73 14.83
213.61 13.70 13.79 13.88 13.97 14.07 14.16 14.25 14.34 14.43
313.25 13.34 13.43 13.52 13.61 13.69 13.78 13.87 13.96 14.05
412.90 12.99 13.08 13.16 13.25 13.34 13.42 13.51 13.60 13.68
512.57 12.66 12.74 12.83 12.91 13.00 13.08 13.16 13.25 13.33
612.25 12.34 12.42 12.50 12.58 12.67 12.75 12.83 12.91 13.00
711.95 12.03 12.11 12.19 12.27 12.35 12.43 12.51 12.59 12.67
811.66 11.74 11.81 11.89 11.97 12.05 12.13 12.21 12.29 12.36
911.38 11.45 11.53 11.61 11.68 11.76 11.84 11.91 11.99 12.07
10 11.11 11.18 11.26 11.33 11.41 11.48 11.56 11.63 11.71 11.78
11 10.85 10.92 10.99 11.07 11.14 11.21 11.29 11.36 11.43 11.51
12 10.60 10.67 10.74 10.81 10.89 10.96 11.03 11.10 11.17 11.24
13 10.36 10.43 10.50 10.57 10.64 10.71 10.78 10.85 10.92 10.99
14 10.13 10.20 10.27 10.34 10.41 10.48 10.54 10.61 10.68 10.75
15 9.91 9.98 10.05 10.11 10.18 10.25 10.32 10.38 10.45 10.52
16 9.70 9.77 9.83 9.90 9.96 10.03 10.10 10.16 10.23 10.29
17 9.50 9.56 9.63 9.69 9.76 9.82 9.89 9.95 10.01 10.08
18 9.30 9.37 9.43 9.49 9.56 9.62 9.68 9.75 9.81 9.87
19 9.12 9.18 9.24 9.30 9.36 9.43 9.49 9.55 9.61 9.67
20 8.93 9.00 9.06 9.12 9.18 9.24 9.30 9.36 9.42 9.48
21 8.76 8.82 8.88 8.94 9.00 9.06 9.12 9.18 9.24 9.30
22 8.59 8.65 8.71 8.77 8.83 8.89 8.95 9.01 9.06 9.12
23 8.43 8.49 8.55 8.61 8.66 8.72 8.78 8.84 8.90 8.95
24 8.28 8.33 8.39 8.45 8.50 8.56 8.62 8.67 8.73 8.79
25 8.13 8.18 8.24 8.29 8.35 8.41 8.46 8.52 8.57 8.63
26 7.98 8.04 8.09 8.15 8.20 8.26 8.31 8.37 8.42 8.48
27 7.84 7.89 7.95 8.00 8.06 8.11 8.17 8.22 8.27 8.33
28 7.70 7.76 7.81 7.86 7.92 7.97 8.02 8.08 8.13 8.18
29 7.57 7.63 7.68 7.73 7.78 7.84 7.89 7.94 7.99 8.05
30 7.44 7.50 7.55 7.60 7.65 7.70 7.76 7.81 7.86 7.91
31 7.32 7.37 7.42 7.47 7.52 7.58 7.63 7.68 7.73 7.78
32 7.20 7.25 7.30 7.35 7.40 7.45 7.50 7.55 7.60 7.65
33 7.08 7.13 7.18 7.23 7.28 7.33 7.38 7.43 7.48 7.53
34 6.97 7.02 7.07 7.11 7.16 7.21 7.26 7.31 7.36 7.41
35 6.86 6.90 6.95 7.00 7.05 7.10 7.15 7.19 7.24 7.29
36 6.75 6.79 6.84 6.89 6.94 6.98 7.03 7.08 7.13 7.18
37 6.64 6.69 6.73 6.78 6.83 6.88 6.92 6.97 7.02 7.06
38 6.53 6.58 6.63 6.67 6.72 6.77 6.81 6.86 6.91 6.95
39 6.43 6.48 6.52 6.57 6.62 6.66 6.71 6.75 6.80 6.85
40 6.33 6.38 6.42 6.47 6.51 6.56 6.60 6.65 6.70 6.74
41 6.23 6.28 6.32 6.37 6.41 6.46 6.50 6.55 6.59 6.64
42 6.13 6.18 6.22 6.27 6.31 6.36 6.40 6.45 6.49 6.53
43 6.04 6.08 6.13 6.17 6.21 6.26 6.30 6.35 6.39 6.43
44 5.94 5.99 6.03 6.07 6.12 6.16 6.20 6.25 6.29 6.33
45 5.85 5.89 5.94 5.98 6.02 6.06 6.11 6.15 6.19 6.24
46 5.76 5.80 5.84 5.88 5.93 5.97 6.01 6.06 6.10 6.14
47 5.67 5.71 5.75 5.79 5.83 5.88 5.92 5.96 6.00 6.05
48 5.57 5.62 5.66 5.70 5.74 5.78 5.83 5.87 5.91 5.95
49 5.49 5.53 5.57 5.61 5.65 5.69 5.73 5.78 5.82 5.86
50 5.40 5.44 5.48 5.52 5.56 5.60 5.64 5.68 5.72 5.77
1To convert pressure (inches of Hg) to pressure (mm of Hg (torr)), multiply by 25.4.
Concentration (mg/L) of Dissolved O2at Saturation
by Temperature and Barometric Pressure1
Calibration Table
Concentration (mg/L) of Dissolved O2at Saturation
by Temperature and Barometric Pressure1
PRESSURE (Inches Hg.)
TEMP( c) 29.5 29.7 29.9 30.1 30.3 30.5 30.7 30.9 31.1 31.3
014.37 14.47 14.57 14.66 14.76 14.86 14.95 15.05 15.15 15.24
113.98 14.08 14.17 14.27 14.36 14.45 14.55 14.64 14.73 14.83
213.61 13.70 13.79 13.88 13.97 14.07 14.16 14.25 14.34 14.43
313.25 13.34 13.43 13.52 13.61 13.69 13.78 13.87 13.96 14.05
412.90 12.99 13.08 13.16 13.25 13.34 13.42 13.51 13.60 13.68
512.57 12.66 12.74 12.83 12.91 13.00 13.08 13.16 13.25 13.33
612.25 12.34 12.42 12.50 12.58 12.67 12.75 12.83 12.91 13.00
711.95 12.03 12.11 12.19 12.27 12.35 12.43 12.51 12.59 12.67
811.66 11.74 11.81 11.89 11.97 12.05 12.13 12.21 12.29 12.36
911.38 11.45 11.53 11.61 11.68 11.76 11.84 11.91 11.99 12.07
10 11.11 11.18 11.26 11.33 11.41 11.48 11.56 11.63 11.71 11.78
11 10.85 10.92 10.99 11.07 11.14 11.21 11.29 11.36 11.43 11.51
12 10.60 10.67 10.74 10.81 10.89 10.96 11.03 11.10 11.17 11.24
13 10.36 10.43 10.50 10.57 10.64 10.71 10.78 10.85 10.92 10.99
14 10.13 10.20 10.27 10.34 10.41 10.48 10.54 10.61 10.68 10.75
15 9.91 9.98 10.05 10.11 10.18 10.25 10.32 10.38 10.45 10.52
16 9.70 9.77 9.83 9.90 9.96 10.03 10.10 10.16 10.23 10.29
17 9.50 9.56 9.63 9.69 9.76 9.82 9.89 9.95 10.01 10.08
18 9.30 9.37 9.43 9.49 9.56 9.62 9.68 9.75 9.81 9.87
19 9.12 9.18 9.24 9.30 9.36 9.43 9.49 9.55 9.61 9.67
20 8.93 9.00 9.06 9.12 9.18 9.24 9.30 9.36 9.42 9.48
21 8.76 8.82 8.88 8.94 9.00 9.06 9.12 9.18 9.24 9.30
22 8.59 8.65 8.71 8.77 8.83 8.89 8.95 9.01 9.06 9.12
23 8.43 8.49 8.55 8.61 8.66 8.72 8.78 8.84 8.90 8.95
24 8.28 8.33 8.39 8.45 8.50 8.56 8.62 8.67 8.73 8.79
25 8.13 8.18 8.24 8.29 8.35 8.41 8.46 8.52 8.57 8.63
26 7.98 8.04 8.09 8.15 8.20 8.26 8.31 8.37 8.42 8.48
27 7.84 7.89 7.95 8.00 8.06 8.11 8.17 8.22 8.27 8.33
28 7.70 7.76 7.81 7.86 7.92 7.97 8.02 8.08 8.13 8.18
29 7.57 7.63 7.68 7.73 7.78 7.84 7.89 7.94 7.99 8.05
30 7.44 7.50 7.55 7.60 7.65 7.70 7.76 7.81 7.86 7.91
31 7.32 7.37 7.42 7.47 7.52 7.58 7.63 7.68 7.73 7.78
32 7.20 7.25 7.30 7.35 7.40 7.45 7.50 7.55 7.60 7.65
33 7.08 7.13 7.18 7.23 7.28 7.33 7.38 7.43 7.48 7.53
34 6.97 7.02 7.07 7.11 7.16 7.21 7.26 7.31 7.36 7.41
35 6.86 6.90 6.95 7.00 7.05 7.10 7.15 7.19 7.24 7.29
36 6.75 6.79 6.84 6.89 6.94 6.98 7.03 7.08 7.13 7.18
37 6.64 6.69 6.73 6.78 6.83 6.88 6.92 6.97 7.02 7.06
38 6.53 6.58 6.63 6.67 6.72 6.77 6.81 6.86 6.91 6.95
39 6.43 6.48 6.52 6.57 6.62 6.66 6.71 6.75 6.80 6.85
40 6.33 6.38 6.42 6.47 6.51 6.56 6.60 6.65 6.70 6.74
41 6.23 6.28 6.32 6.37 6.41 6.46 6.50 6.55 6.59 6.64
42 6.13 6.18 6.22 6.27 6.31 6.36 6.40 6.45 6.49 6.53
43 6.04 6.08 6.13 6.17 6.21 6.26 6.30 6.35 6.39 6.43
44 5.94 5.99 6.03 6.07 6.12 6.16 6.20 6.25 6.29 6.33
45 5.85 5.89 5.94 5.98 6.02 6.06 6.11 6.15 6.19 6.24
46 5.76 5.80 5.84 5.88 5.93 5.97 6.01 6.06 6.10 6.14
47 5.67 5.71 5.75 5.79 5.83 5.88 5.92 5.96 6.00 6.05
48 5.57 5.62 5.66 5.70 5.74 5.78 5.83 5.87 5.91 5.95
49 5.49 5.53 5.57 5.61 5.65 5.69 5.73 5.78 5.82 5.86
50 5.40 5.44 5.48 5.52 5.56 5.60 5.64 5.68 5.72 5.77
1To convert pressure (inches of Hg) to pressure (mm of Hg (torr)), multiply by 25.4.

Dissolved Oxygen Maintenance
Replacing the Membrane
If the membrane is damaged, replace it as follows:
1. Follow steps 1–3 under “Changing the Electrolyte
Solution.”
2. Use the plunger to push the steel cylinder and membrane
cartridge out of the cartridge housing (Figure 1).
3. Examine the O-ring (Figure 3) and replace it if it is dam-
aged (See “Replacing the O-ring”).
4. Use the plunger to insert a replacement membrane
cartridge and push it down until it is seated at the end of the
housing that has the O-ring (Figure 2).
5. Follow steps 4–6 of “Changing the Electrolyte
Solution.”
Changing the Electrolyte Solution
The electrolyte solution should be replaced and the silver
electrode periodically cleaned to maintain optimal
performance of the probe. Replace the electrolyte solution as
follows:
1. Always hold the probe below the stainless steel band when
unscrewing the cartridge housing or applying torque to the probe.
2. Unscrew the end of the probe and remove the cartridge
housing. Rinse and air dry the cartridge housing.
3. Rinse the electrode with tap water (or deionized water in areas
with hard tap water) and rub it dry with a paper towel. This
removes loose silver oxide (AgO) from the anode.
4. Fill the syringe with 10 ml of probe-filling solution. Avoid air bubbles.
5. Place the tip of the syringe very close to, but not touching the
membrane, and slowly fill the membrane cartridge and cartridge
housing to approximately 5 mm from the top of the housing.
Note: There must be no air bubbles in the housing or cartridge.
Agitate the cartridge housing after filling to dislodge air bubbles.
6. Replace the cartridge housing and dry with a paper towel.
012-07688B
012-07688B

Troubleshooting
If the Dissolved Oxygen Sensor does not give the
expected output, perform the three maintenance
procedures described on this card, checking sensor
operation after each procedure:
1. “Changing the Electrolyte Solution”
2. “Replacing the Membrane”
3. “Replacing the O-ring”
If the Dissolved Oxygen Sensor still does not function
properly, contact PASCO Technical Support.
Storage
Short-Term Storage (two weeks or less)
1. Store the probe in the plastic zip-lock bag with the tip inserted
in the soaker bottle containing about 10 ml of deionized water.
Long-Term Storage (more than two weeks)
1. Repeat steps 1–3 under “Changing the Electrolyte Solution.”
2. Rinse the soaker bottle with tap water and shake dry.
3. Replace the cartridge housing, and store the probe dry in the
zip-lock bag with the end of the probe in the soaker bottle to
protect the membrane from trauma.
Replacing the O-ring
The O-ring rarely requires replacing. However, if it develops
nicks and splits or leaks electrolyte solution from the probe,
replace it as follows:
1. Follow steps 1–2 under “Replacing the Membrane.”
2. After removing the membrane cartridge, remove the O-ring
with a pair of fine-tipped tweezers and insert a new O-ring.
3. Reassemble the unit as directed in steps 4–7 of
“
Changing
the Electrolyte Solution.”
Table of contents
Other PASCO Measuring Instrument manuals

PASCO
PASCO TD-8513 User manual

PASCO
PASCO ME-9837 User manual

PASCO
PASCO PASPort PS-2128 User manual

PASCO
PASCO OS-7053 User manual

PASCO
PASCO EM-3556 User manual

PASCO
PASCO PASPORT PS-2131 User manual

PASCO
PASCO PS-3211 Use and care manual

PASCO
PASCO SP-9285 User manual

PASCO
PASCO Pasport PS-2152 User manual

PASCO
PASCO PS-3237 User manual

PASCO
PASCO PS-3217 User manual

PASCO
PASCO ES-9078A User manual

PASCO
PASCO Xplorer GLX Programming manual

PASCO
PASCO PS-2600 Use and care manual

PASCO
PASCO PS-3515 User manual

PASCO
PASCO PS-3223 User manual

PASCO
PASCO ES-9078 User manual

PASCO
PASCO PS-3518 User manual

PASCO
PASCO TD-8564 User manual

PASCO
PASCO OS-8458 User manual