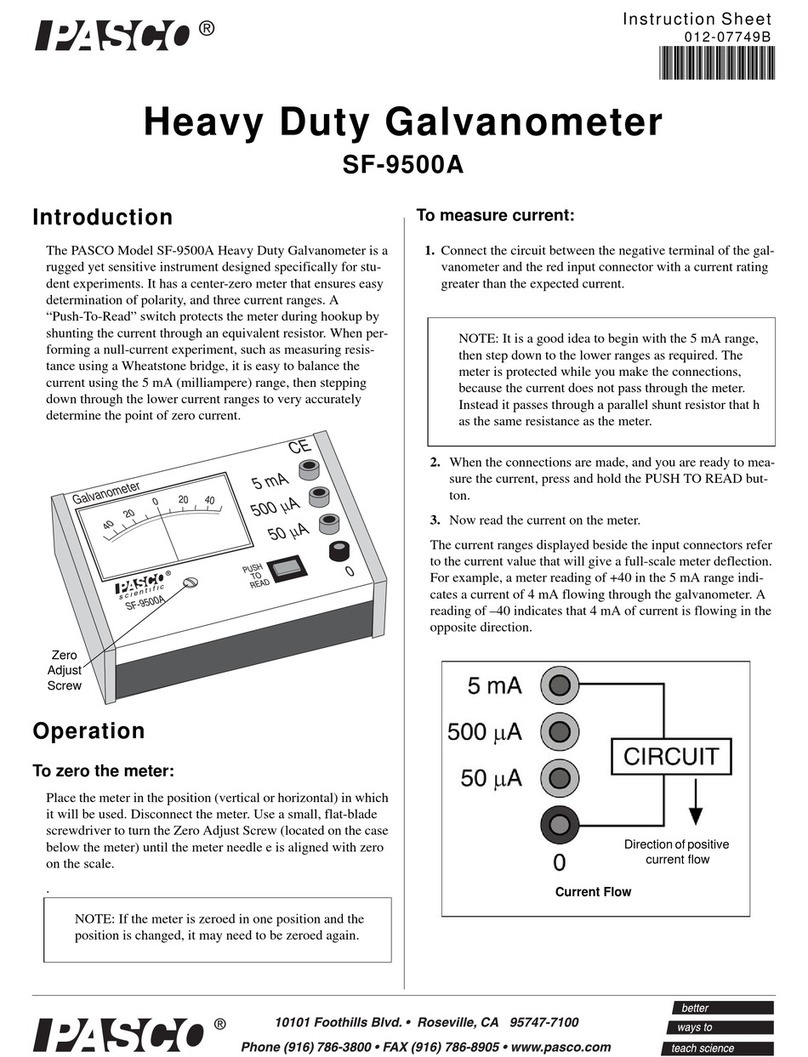
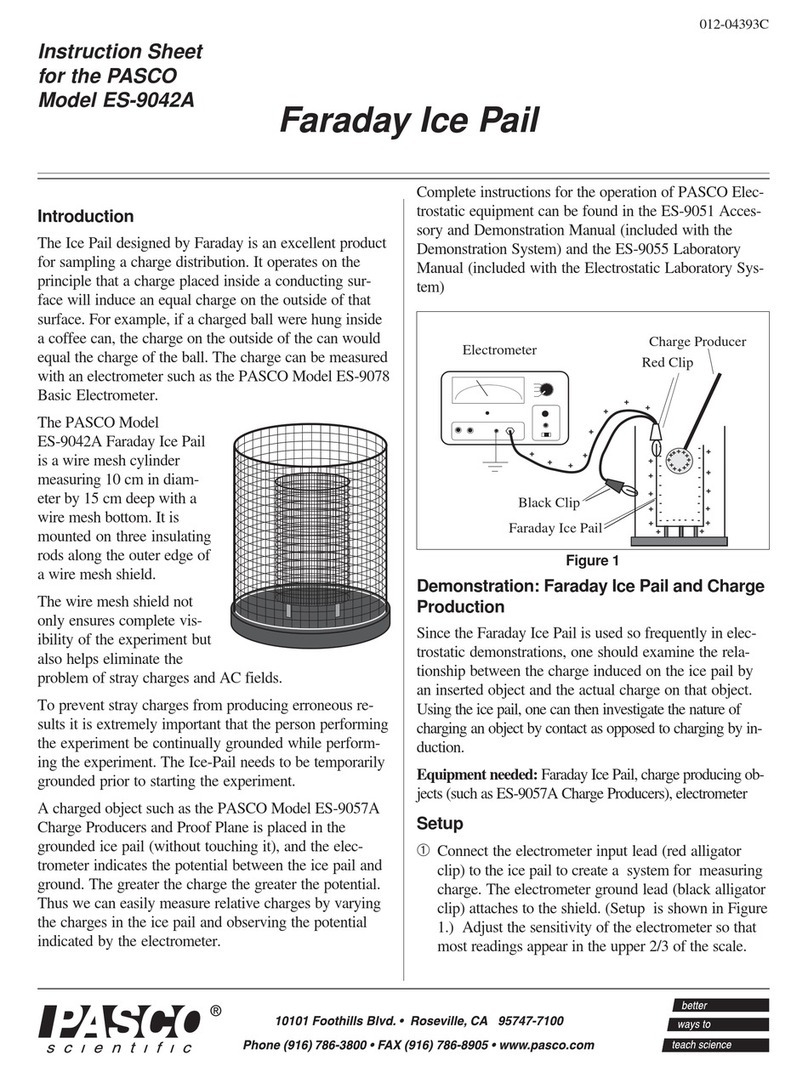
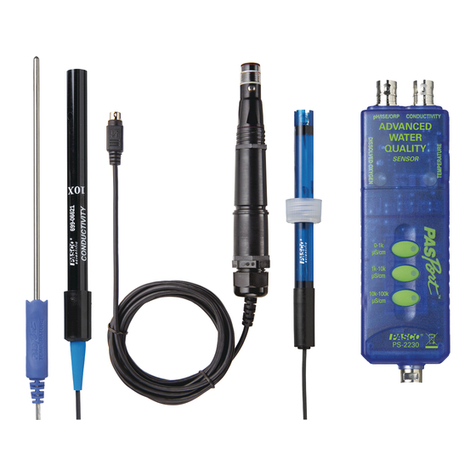
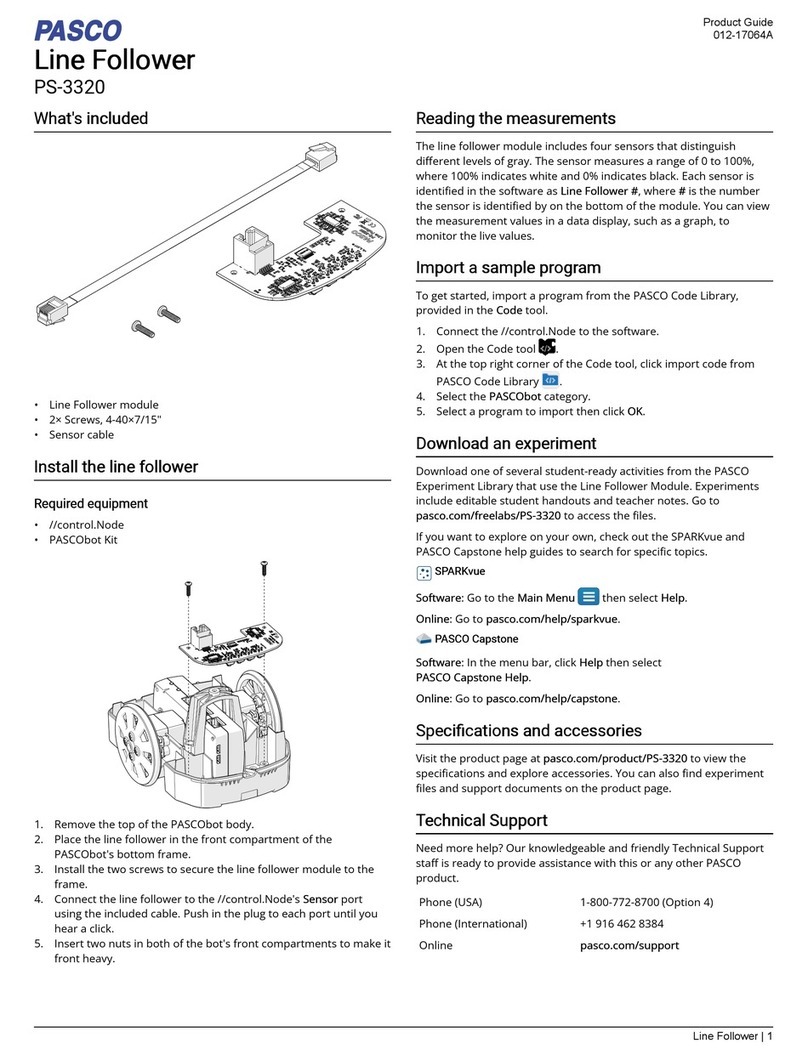
manuals.online logo
Brands
  1. Home
  2. •
  3. Brands
  4. •
  5. PASCO
  6. •
  7. Measuring Instrument
  8. •
  9. PASCO Pasport PS-2600 User manual

PASCO Pasport PS-2600 User manual

®
Reference Guide
013-14074A
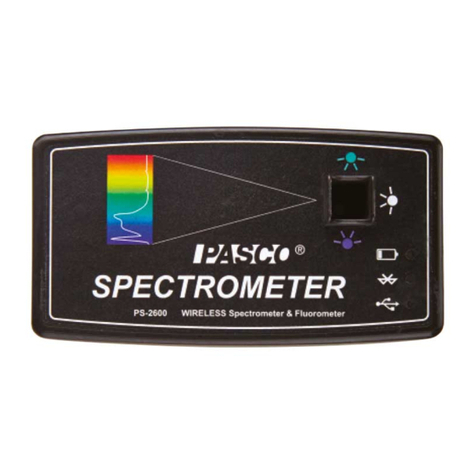
Spectrometer
PS-2600
+1 916 786 3800
[email protected]
Also Required
Software for Computer or Tablet
PASCO Spectrometry
Available free for Mac, PC, iOS, and Android* devices at
the PASCO web site: www.pasco.com/spectrometer
*NOTE: The Android tablet needs Bluetooth capability.
Software: Other Sources
The PASCO Spectrometry software is also available from the
Apple App Store and from Google play.
Initial Step: Charge the Battery
The PASCO Spectrometer is partially charged at the factory. The
PASCO Spectrometer battery is charged using the USB cable
connected to a USB port or USB charger. Let the Spectrometer be
connected for at least four hours before use. Leave the
Spectrometer off while charging. As the battery is charging, the
Battery Status LED (light-emitting diode) will blink red. When
the battery is fully charged, the Battery Status LED shines green.
The charger circuit inside the unit turns itself off when the unit is
fully charged, so it can’t be overcharged.
Cuvette and Lid (10)
Left End
Reset Button Access
Right End
USB
Port
ON/OFF
Button
Battery Status LED
Bluetooth Status LED
USB Status LED
Bottom
Bluetooth
ID# Label
Drain
Ports
Cuvette Holder
Light Path
Top
Included Equipment Part Number
Spectrometer PS-2600
Cuvette and Lid (10)
USB Cable PS-2538
Optional Equipment
Fiber Optic Probe PS-2601
®
Spectrometer PS-2600
2
Introduction
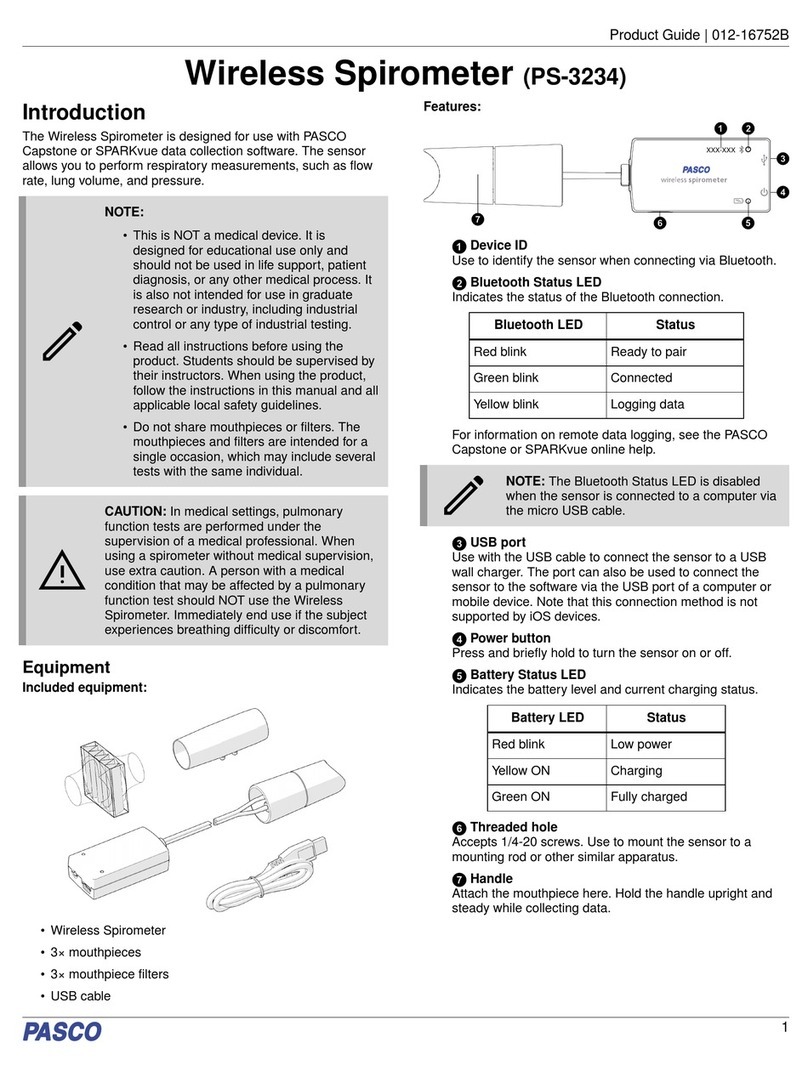
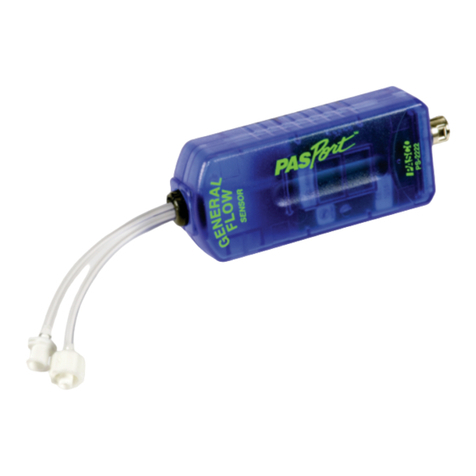
The PASCO spectrometer is specifically designed for
introductory spectroscopy experiments. The Bluetooth and USB
connectivity enable its use with tablets and computers. With this
one apparatus, you can measure intensity, absorbance,
transmittance, and fluorescence, making this a powerful and
intuitive tool for your spectroscopy needs.
Specifications
Connecting PASCO Spectrometer to a Tablet
or Computer via Bluetooth
1. Turn on the PASCO spectrometer, and briefly hold the
ON/OFF button on the back. After all three status LEDs
blink in sequence, release the ON/OFF button. The
Bluetooth Status LED will blink blue.
2. Pair /connect to through Bluetooth to your computing
device. This step will depend on your computing device and
operating system. The Bluetooth Status LED will shine blue.
3. Open the PASCO Spectrometry software.
4. If the Spectrometer is not found, select “Choose Wireless
Device”.
5. In the Menu, select the PASCO Spectrometer with the ID #
that matches the ID # on the bottom of the device.
Connecting PASCO Spectrometer to a
Computer with a USB Cable
1. Connect the small end of the included USB into the USB
port on the back of the Spectrometer
2. Connect the other end of the USB cable to a USB port on the
computer, or into a USB hub connected to the computer.
3. Turn on the PASCO Spectrometer, and briefly press and hold
the ON/OFF button on the side. After all three status LEDs
blink in sequence, release the ON/OFF button.
4. The USB Status LED will shine green. (NOTE: The
Bluetooth Status LED will slowly blink blue. The Battery
Status LED may also blink to indicate that the battery is
charging through the USB cable.)
Usage
Place the sample to be examined in a cuvette. Fill the cuvette to
the point where the top of the sample is at least 3.0 centimeters
(cm) or 1.2 inches above the bottom. Put the lid on the cuvette
and put the cuvette in the cuvette holder of the Sprectrometer.
NOTE: The cuvette has two smooth sides and two ribbed sides.
When putting the cuvette into the Spectrometer, the smooth sides
need to be along the light path (perpendicular to the light path).
There are two drain ports in the bottom of the cuvette holder to
allow for drainage if something spills into the holder, Moisten a
small cotton swab with deionized water and gently wipe the
interior.
Battery
Life
The Spectrometer battery will charge with the USB cable
connected to a USB port on a computer or a USB charger within
six to eight hours. On a full charge, the Spectrometer will run in
Analyze Light mode for eight to nine hours. The battery is
replaceable.
Removal/Replacement
If the PASCO Spectrometer fails to recharge, the battery may
need to be replaced. The battery is field replaceable using the
replacement part PS-2569. Removing the battery requires a Torx
T8 screwdriver and a small Phillips head screwdriver.
CAUTION: Make the area as dust-free and static-free as possible
before opening the Sprectrometer. Do not touch the optical
components inside the Spectrometer.
•Use the Torx screwdriver to remove the four screws from the
bottom of the Sprectrometer case.
•Lift the top half of the case off the Spectrometer and set it
aside.
•Disconnect the battery leads from the connector on the
bottom edge of the printed circuit board.
•Use a small Phillips head screwdriver to remove the one
small screw that is near the middle of the top edge of the
printed circuit board.
•Lift the printed circuit board aside, and replace the square
shaped battery pack. Reconnect the battery leads to the
connector on the bottom edge of the printed circuit board.
•Check that the printed circuit board and its components are
free of dust.
•Reverse the other steps to close the Spectrometer.
Contact PASCO Technical Support for more information.
Item Value
Resolution: 2 to 3 nanometers (nm)
Range: 380 to 950 nm
Fluorescence Excitation
Wavelengths:
405 nm and 500 nm
Light Source: LED boosted tungsten
®
Technical Support PS-2600
3
Light Source Replacement
The small printed circuit board that holds the incandescent bulb
and the three light-emitting diodes can be removed and replaced.
Order PASCO part number 004-14026. Replacing the light
source requires a Torx T8 screwdriver and a small Phillips head
screwdriver.
CAUTION: Make the area as dust-free and static-free as possible
before opening the Sprectrometer. Do not touch the optical
components inside the Sprectrometer.
•Use the Torx screwdriver to remove the four screws from the
bottom of the Sprectrometer case.
•Lift the top half of the case off the Spectrometer and set it
aside. The light source is on the right side of the main printed
circuit board (PCB).
•Disconnect the battery leads from the connector on the
bottom edge of the printed circuit board.
•Use a small Phillips head screwdriver to remove the one
small screw that is near the middle of the top edge of the
maon PCB.
•Lift the printed circuit board up so that both screws on the
light source PCB can be reached. Use the small Phillips head
screwdriver to remove the two small screws that hold the
light source PCB in place.
•Grasp the middle of the edges of the light source PCB and
gently pull it away from the connector.
•When replacing the light source PCB, be careful to align the
slot on the light source PCB with the pins on the connector.
Gently push the light source PCB onto its connector, and
replace the two small screws to hold the PCB in place.
•Reconnect the battery leads. Make sure that the components
are dust-free. Reverse the other steps to close the
Spectrometer.
Contact PASCO Technical Support for more information.
Troubleshooting the PASCO Spectrometer
•If the PASCO Spectrometer loses Bluetooth connection and
will not reconnect, try cycling the ON/OFF button. Press and
briefly hold the button until the status LEDs blink in
sequence, and then release the ON/OFF button to turn on the
Spectrometer.
•If the PASCO Spectrometer stops communicating with the
computer software or tablet application, try restarting the
software or application. If the problem remains, try cycling
the ON/OFF button.
•As a last resort, push a pin into the Reset port on the left end
of the Spectrometer.
Technical Support
For assistance with any PASCO product, contact PASCO at:
For more information about the product and the latest revision of
this Reference Guide, visit the PASCO web site at
www.pasco.com and enter “PASCO Spectrometer” or the product
number (PS-2600) in the Search window.
Limited Warranty
The Spectrometer has a five year warranty. For a more thorough
description of the product warranty, see the PASCO catalog.
Copyright
The PASCO scientific 013-14074A Spectrometer Reference Guide is
copyrighted with all rights reserved. Permission is granted to non-profit
educational institutions for reproduction of any part of this manual,
providing the reproductions are used only in their laboratories and
classrooms, and are not sold for profit. Reproduction under any other
circumstances, without the written consent of PASCO scientific, is
prohibited.
Trademarks
PASCO, PASCO scientific, PASCO Capstone, PASPORT, SPARKvue,
and SPARKvue HD are trademarks or registered trademarks of PASCO
scientific, in the United States and/or in other countries. All other brands,
products, or service names are or may be trademarks or service marks of,
and are used to identify, products or services of their respective owners.
For more information visit www.pasco.com/legal.
“Made for iPad” means that an electronic accessory has been designed to
connect specifically to iPad, respectively, and has been certified by the
developer to meet Apple performance standards. Apple is not responsible
for the operation of this device or its compliance with safety and regulatory
standards. Please note that the use of this accessory with iPad may affect
wireless performance.
iPad, iPad Air, and iPad mini are trademarks of Apple, Inc, registered in
the U.S. and other countries.
Address: PASCO scientific
10101 Foothills Blvd.
Roseville, CA 95747-7100
Phone: +1 916 462 83800 (worldwide)
877-373-0300 (U.S.)
Web: www.pasco.com
Email: [email protected]
®
Spectrometer PS-2600
4
Product End of Life Disposal Instructions:
This electronic product is subject to disposal and recycling regulations that
vary by country and region. It is your responsibility to recycle your
electronic equipment per your local environmental laws and regulations to
ensure that it will be recycled in a manner that protects human health and
the environment. To find out where you can drop off your waste equipment
for recycling, please contact your local waste recycle/disposal service, or
the place where you purchased the product.
The European Union WEEE (Waste Electronic and
Electrical Equipment) symbol (to the right) and on the
product or its packaging indicates that this product
must not be disposed of in a standard waste
container.

Other PASCO Measuring Instrument manuals

PASCO PS-3217 User manual

PASCO

PASCO PS-3217 User manual

PASCO Pasport PS-2152 User manual

PASCO

PASCO Pasport PS-2152 User manual

PASCO PASPORT PS-2204 User manual

PASCO

PASCO PASPORT PS-2204 User manual

PASCO SF-9568A User manual

PASCO

PASCO SF-9568A User manual

PASCO PS-3237 User manual

PASCO

PASCO PS-3237 User manual

PASCO TD-8513 User manual

PASCO

PASCO TD-8513 User manual

PASCO WA-7428 User manual

PASCO

PASCO WA-7428 User manual

PASCO PS-2600 User manual

PASCO

PASCO PS-2600 User manual

PASCO Xplorer GLX Programming manual

PASCO

PASCO Xplorer GLX Programming manual

PASCO OS-8458B User manual

PASCO

PASCO OS-8458B User manual

PASCO ES-9042A User manual

PASCO

PASCO ES-9042A User manual

PASCO OS-7053 User manual

PASCO

PASCO OS-7053 User manual

PASCO PASPORT PS-2108 User manual

PASCO

PASCO PASPORT PS-2108 User manual

PASCO SF-9568A User manual

PASCO

PASCO SF-9568A User manual

PASCO PS-3238 User manual

PASCO

PASCO PS-3238 User manual

PASCO Brolight SE-9629 User manual

PASCO

PASCO Brolight SE-9629 User manual

PASCO ME-8598 User manual

PASCO

PASCO ME-8598 User manual

PASCO PS-3518 User manual

PASCO

PASCO PS-3518 User manual

PASCO PASPORT PS-2174 User manual

PASCO

PASCO PASPORT PS-2174 User manual

PASCO ES-9077 User manual

PASCO

PASCO ES-9077 User manual

PASCO OS-8526A User manual

PASCO

PASCO OS-8526A User manual

PASCO PASPort PS-2128 User manual

PASCO

PASCO PASPort PS-2128 User manual

PASCO OS-8527A User manual

PASCO

PASCO OS-8527A User manual

PASCO Pasport PS-2132 User manual

PASCO

PASCO Pasport PS-2132 User manual

Popular Measuring Instrument manuals by other brands

gefran 650 L Installation and instruction manual

gefran

gefran 650 L Installation and instruction manual

ATI Technologies Q46H/79PR O & M Manual

ATI Technologies

ATI Technologies Q46H/79PR O & M Manual

Sonel MZC-304F user manual

Sonel

Sonel MZC-304F user manual

IDS IDS-iSYS user manual

IDS

IDS IDS-iSYS user manual

Endress+Hauser Levelflex FMP50 operating instructions

Endress+Hauser

Endress+Hauser Levelflex FMP50 operating instructions

Sylvac SCAN F60 quick start

Sylvac

Sylvac SCAN F60 quick start

KRAL OMG Series operating instructions

KRAL

KRAL OMG Series operating instructions

KROHNE OPTISONIC 6300 Handbook

KROHNE

KROHNE OPTISONIC 6300 Handbook

Midtronics Celltron ULTRA instruction manual

Midtronics

Midtronics Celltron ULTRA instruction manual

GREISINGER GMH 5630 operating manual

GREISINGER

GREISINGER GMH 5630 operating manual

Vivax Metrotech A-frame user guide

Vivax Metrotech

Vivax Metrotech A-frame user guide

DeWalt DW0822 instruction manual

DeWalt

DeWalt DW0822 instruction manual

Keysight E4990A troubleshooting guide

Keysight

Keysight E4990A troubleshooting guide

Sekonic Flashmate L-308S operating manual

Sekonic

Sekonic Flashmate L-308S operating manual

Honeywell AD1200 product manual

Honeywell

Honeywell AD1200 product manual

DATREND Systems vPad-Rugged 2 quick start guide

DATREND Systems

DATREND Systems vPad-Rugged 2 quick start guide

TEXA GAS MOBILE user manual

TEXA

TEXA GAS MOBILE user manual

TSI Instruments 9565 Series Operation and service manual

TSI Instruments

TSI Instruments 9565 Series Operation and service manual

manuals.online logo
manuals.online logoBrands
  • About & Mission
  • Contact us
  • Privacy Policy
  • Terms and Conditions

Copyright 2025 Manuals.Online. All Rights Reserved.