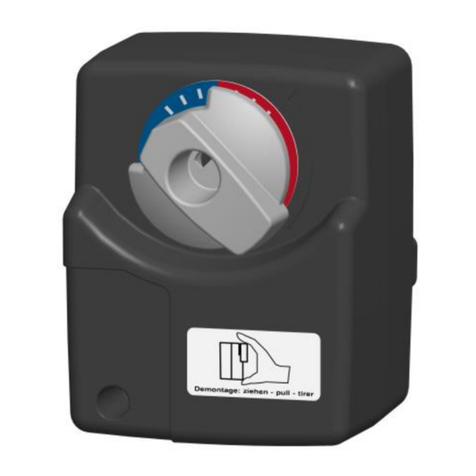
PAW SR5 User manual

PAW GmbH & Co. KG
Böcklerstr. 11, D-31789 Hameln
Tel.: +49-5151-9856-0, Fax: +49-5151-9856-98
E-mail: info@paw.eu, Web: www.paw.eu
2017/11 99705xx-inf-ml –V01 1
Montageblatt zum Stellmotor
SR5 und SR10
Mounting instruction sheet for
the actuators SR5 and SR10
Instructions de montage pour
les servomoteurs SR5 et SR10

1 Montage und Installation [Fachmann]
2 99705xx-inf-ml –V01 2017/11
1Montage und Installation [Fachmann]
Der PAW-Stellmotor für witterungsgeführte Regelungen ist entweder als Zubehör oder im
Lieferumfang der PAW-Heizkreise erhältlich.
Die Montageart des Stellmotors unterscheidet sich, je nachdem, ob Sie den Stellmotor als
Zubehör oder inkl. Heizkreis gekauft haben.
1.1 PAW-Heizkreis inkl. Stellmotor
Montage des Stellmotors für Mischer mit
Vorlauf rechts:
Wenn der PAW-Stellmotor im Lieferumfang
enthalten ist, enthält der Mischer eine schwarze
Kunststoff-Platte mit Rastbolzen.
Um den PAW-Stellmotor auf den Mischer zu
rasten, gehen Sie wie folgt vor.
1. Drehen Sie den Stellknopf des Mischers
in die Position 0(Abb. 3).
2. Stellen Sie den Wahlschalter am Stellmotor
auf Handbetrieb (Abb. 1).
3. Drehen Sie den Drehknopf des Stellmotors
nach links in die nebenstehend gezeigte
Position (Abb. 2).
4. Stecken Sie den PAW-Stellmotor auf den
Stellknopf des Mischers und rasten Sie ihn
auf die Rastbolzen auf (Abb. 3).
5. Der PAW-Stellmotor muss wie in
Abbildung 4 liegend montiert werden.
6. Stellen Sie am Stellmotor den
Automatikbetrieb ein.
blau
Abb. 2
Abb. 3
Abb. 1
Rastbolzen
Wahlschalter
Abb. 4

1Montage und Installation [Fachmann]
2017/11 99705xx-inf-ml –V01 3
1.2 Stellmotor als Zubehör
Montage des Stellmotors für Mischer mit
Vorlauf rechts:
Wenn der PAW-Stellmotor optional als
Zubehörteil erworben wurde, enthält der
Mischer eine Metall-Platte. Um den PAW-
Stellmotor auf den Mischer zu rasten, gehen
Sie wie folgt vor.
1. Drehen Sie den Stellknopf des Mischers
in die Position 0(Abb. 3).
2. Stellen Sie den Wahlschalter am Stellmotor
auf Handbetrieb (Abb. 1).
3. Drehen Sie den Drehknopf des Stellmotors
nach links in die nebenstehend gezeigte
Position (Abb. 2).
4. Montieren Sie die Verdrehsicherung /
den Rastbolzen in die linke Öffnung der
Metall-Platte (Abb. 3). Der Stellmotor wird
auf einem Rastbolzen befestigt.
5. Stecken Sie den PAW-Stellmotor auf den
Stellknopf des Mischers und rasten Sie ihn
auf den Rastbolzen auf.
6. Der PAW-Stellmotor muss wie in
Abbildung 4 liegend montiert werden.
7. Stellen Sie am Stellmotor den
Automatikbetrieb ein.
Wahlschalter
blau
Abb. 1
Abb. 2
Abb. 3
Rastbolzen
Abb. 4

2 Assembly and installation [specialist]
4 99705xx-inf-ml –V01 2017/11
2Assembly and installation [specialist]
The PAW actuator for weather-compensated control is available as an accessory or
in the scope of delivery of the PAW heating circuits.
The mounting method of the actuator differs depending on whether the actuator has been
purchased as an accessory or as a component integrated in the heating circuit.
2.1 PAW heating circuit with actuator
Assembly of the actuator for mixing valve
with flow on the right:
If the PAW actuator is included in the scope
of delivery, the mixing valve contains a
black plastic plate with stop bolts.
To mount the PAW actuator on the
mixing valve, proceed as follows:
1. Turn the rotary knob of the mixing valve
into position 0(fig. 3).
2. Set the actuator to manual mode
by turning the selector switch (fig. 1).
3. Turn the rotary knob of the actuator to
the left to the position shown on the
adjacent figure (fig. 2).
4. Put the PAW actuator on the rotary knob
of the mixing valve and mount the actuator
on the stop bolts (fig. 3).
5. The PAW actuator must be mounted in a
horizontal position as shown in figure 4.
6. Set the actuator to automatic mode.
blue
Fig. 2
Fig. 3
Fig. 1
Stop bolts
Selector
switch
Fig. 4

2Assembly and installation [specialist]
2017/11 99705xx-inf-ml –V01 5
2.2 Actuator as an accessory
Assembly of the actuator for mixing valve
with flow on the right:
If the PAW actuator has been purchased as an
optional accessory, the mixing valve contains a
metal plate. To mount the PAW actuator on the
mixing valve, proceed as follows:
1. Turn the rotary knob of the mixing valve
into position 0(fig. 3).
2. Set the actuator to manual mode
by turning the selector switch (fig. 1).
3. Turn the rotary knob of the actuator to
the left to the position shown on the
adjacent figure (fig. 2).
4. Mount the rotation lock / the stop bolt in
the left opening of the metal plate (fig. 3).
The actuator is fixed on a stop bolt.
5. Put the PAW actuator on the rotary knob
of the mixing valve and mount the actuator
on the stop bolt.
6. The PAW actuator must be mounted in a
horizontal position as shown in figure 4.
7. Set the actuator to automatic mode.
Selector
switch
Stop bolt
Fig. 1
Fig. 2
Fig. 3
Fig. 4
blue

3 Montage et installation [Expert]
6 99705xx-inf-ml –V01 2017/11
3Montage et installation [Expert]
Le servomoteur PAW pour une régulation en fonction de la température extérieure est
disponible comme accessoire ou inclus dans le volume de livraison des circuits de chauffage
PAW. Le mode de montage du servomoteur diffère selon qu'il a été acquis comme accessoire
ou comme composant intégré dans le circuit de chauffage.
3.1 Circuit de chauffage PAW avec servomoteur
Montage du servomoteur pour vanne
mélangeuse avec départ à droite :
Si le servomoteur PAW est compris dans le
volume de livraison, la vanne mélangeuse
contient une plaque noire en matière plastique
avec des boulons d'arrêt. Pour monter le
servomoteur PAW sur la vanne mélangeuse,
procédez de la manière suivante :
1. Tournez le bouton de réglage de la vanne
mélangeuse sur la position 0(fig. 3).
2. Mettez le sélecteur du servomoteur en
mode manuel (fig. 1).
3. Tournez le bouton rotatif du servomoteur
à gauche sur la position indiquée ci-contre
(fig. 2).
4. Mettez le servomoteur PAW sur le bouton
de réglage de la vanne mélangeuse et
montez le servomoteur sur les boulons
d'arrêt (fig. 3).
5. Le servomoteur PAW doit être monté en
position horizontale, comme indiqué dans
la figure 4.
6. Mettez le servomoteur en mode de service
automatique.
bleu
Fig. 2
Fig. 3
Fig. 1
Boulons d'arrêt
Sélecteur
Fig. 4

3Montage et installation [Expert]
2017/11 99705xx-inf-ml –V01 7
3.2 Servomoteur comme accessoire
Montage du servomoteur pour vanne
mélangeuse avec départ à droite :
Si le servomoteur PAW a été acquis comme
accessoire optionnel, la vanne mélangeuse
contient une plaque métallique. Pour monter
le servomoteur PAW sur la vanne mélangeuse,
procédez de la manière suivante :
1. Tournez le bouton de réglage de la vanne
mélangeuse sur la position 0(fig. 3).
2. Mettez le sélecteur du servomoteur en
mode manuel (fig. 1).
3. Tournez le bouton rotatif du servomoteur
à gauche sur la position indiquée ci-contre
(fig. 2).
4. Montez le dispositif anti-rotation / le boulon
d'arrêt dans l'ouverture gauche de la plaque
métallique (fig. 3). Le servomoteur est fixé
sur un boulon d'arrêt.
5. Mettez le servomoteur PAW sur le bouton de
réglage de la vanne mélangeuse et montez
le servomoteur sur le boulon d'arrêt.
6. Le servomoteur PAW doit être monté en
position horizontale, comme indiqué dans
la figure 4.
7. Mettez le servomoteur en mode de service
automatique.
Boulon d'arrêt
bleu
Sélecteur
Fig. 1
Fig. 2
Fig. 3
Fig. 4

99705xx-inf-ml –V01 2017/11
PAW GmbH & Co. KG
Böcklerstraße 11
D-31789 Hameln
www.paw.eu
Telefon: +49 (0) 5151 9856 - 0
Telefax: +49 (0) 5151 9856 - 98
Art. Nr. / Item no / N° d'art. 99705xx-inf-ml –Version V01 –Stand / Issued / Date 2017/11
Original-Anleitung / Translation of the original instructions / Traduction de la notice originelle
Technische Änderungen vorbehalten! / We reserve the right to make technical changes without
notice! Sous réserve de modifications techniques !
Printed in Germany –Copyright by PAW GmbH & Co. KG
This manual suits for next models
1
Table of contents
Languages:
Other PAW Controllers manuals
Popular Controllers manuals by other brands

Garmin
Garmin GSA 81 Replacing

BIFFI
BIFFI ALGA Series Installation, operation and maintenance manual

ECKELMANN
ECKELMANN VS 3010 BS Operating instruction

SMC Corporation
SMC Corporation LEF Series Operation manual

Xylem
Xylem Goulds ResiBoost RB111512 instruction manual

Redarc
Redarc Tow-Pro EBRH-ACCNA manual