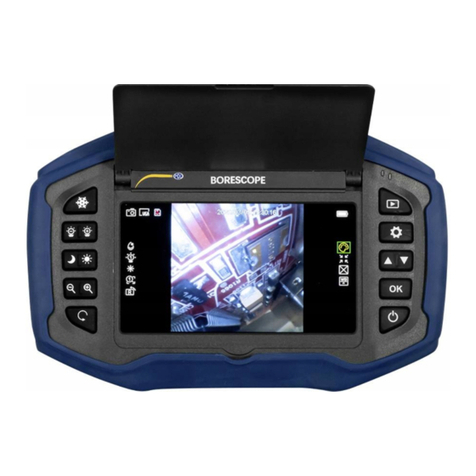
PCE Instruments PCE-VE 650 User manual

PCE Americas Inc.
711 Commerce Way
Suite 8
Jupiter
FL-33458
USA
From outside US: +1
Tel: (561) 320-9162
Fax: (561) 320-9176
info@pce-americas.com
PCE Instruments UK Ltd.
Units 12/13
Southpoint Business Park
Ensign way
Hampshire / Southampton
United Kingdom, SO31 4RF
From outside UK: +44
Tel: (0) 2380 98703 0
Fax: (0) 2380 98703 9
info@pce-instruments.com
www.pce-instruments.com/english
www.pce-instruments.com
Manual
LCD Borescope PCE-VE 650
Version 1.2
Date of creation: 10.04.2015
Date of last change: 24.05.2016

Contents
1Safety notes.............................................................................................................3
2Specifications..........................................................................................................4
2.1 Technical Specifications............................................................................................................. 4
2.2 Delivery Contents ....................................................................................................................... 4
3System description.................................................................................................5
4Getting started.........................................................................................................7
4.1 Connect the display to the camera unit...................................................................................... 7
4.2 Insert the SD card....................................................................................................................... 7
4.3 Turn the device on/off................................................................................................................. 7
4.4 Charge the battery...................................................................................................................... 7
5Operation.................................................................................................................8
5.1 Meaning of display indications.................................................................................................... 8
5.2 Image display ............................................................................................................................. 8
5.3 Taking pictures ........................................................................................................................... 8
5.4 Recording videos........................................................................................................................ 8
5.5 Adjust the display parameters.................................................................................................... 9
5.6 Operate the articulating camera head........................................................................................ 9
5.7 Turn the camera head lighting on/off.......................................................................................... 9
5.8 AV output.................................................................................................................................... 9
5.9 Connect the device to a computer.............................................................................................. 9
6Settings..................................................................................................................10
6.1 Main menu................................................................................................................................ 10
6.2 My Files .................................................................................................................................... 10
6.2.1 Naming......................................................................................................................................... 10
6.2.2 Delete files ................................................................................................................................... 10
6.3 Setup ........................................................................................................................................ 10
6.3.1 Video Time................................................................................................................................... 11
6.3.2 Storage......................................................................................................................................... 11
6.3.3 Date Time..................................................................................................................................... 11
6.3.4 Memory info ................................................................................................................................. 11
6.3.5 LCD Brightness............................................................................................................................ 12
6.3.6 Language ..................................................................................................................................... 12
7Troubleshooting....................................................................................................12
8Disposal.................................................................................................................13
9Contact...................................................................................................................13
9.1 PCE Instruments UK ................................................................................................................ 13
9.2 PCE Americas .......................................................................................................................... 13

Manual
3
Thank you for purchasing a PCE-VE650 from PCE Instruments.
1 Safety notes
Please read this manual carefully and completely before you use the device for the first time. The device
may only be used by qualified personnel and repaired by PCE Instruments personnel. There is no
warranty of damages or injuries caused by non-observance of the manual.
This device may only be used in the way specified in this manual. If used otherwise, this may
cause dangerous situations.
The device may only be used in the approved temperature and humidity range. Do not expose
the device to extreme temperatures, direct sunlight, extreme air humidity or moisture.
Do not touch the instrument with wet hands.
Do not put the instrument close to a heater or other heat sources.
Do not expose the device to shocks or strong vibrations.
Make sure not to expose the device to chemical materials or explosive gases.
The case should only be opened by qualified personnel of PCE Instruments.
The instrument should never be placed with the user interface facing an object (e.g. keyboard
side on a table).
You must not make any technical changes to the device.
The appliance should only be cleaned with a damp cloth / use only pH-neutral cleaner without
solvents or abrasives. However, some parts such as the AV out, USB and DC connectors cannot
be cleaned with a damp cloth.
Clean the display after each use to sustain its readability and functionality. Before cleaning, turn
the device off. Make sure that the display is dry before putting it back in the carrying case.
If you do not use the device for a longer period of time, switch it off, charge it completely and
store it properly. Recharge the instrument every three months.
Prevent dust and metallic particles from getting in the housing.
Before each use, please inspect the case for damage. In case of any visible damage, please do
not use the device. If the product emits smoke, sparks, strange noises or odours, switch it off
immediately and unplug it.
Do not remove the SD card during operation.
The device may only be used with PCE accessories or equivalent.
Do not adjust the position of the articulating camera head by hand. Only use the lever to do so.
This product has been produced for industrial use only. Do not use it for medical or any other
biological purposes.
NOTE
“Note” introduces information regarding the installation, operation or maintenance of the device which is
important but does not present a hazard if ignored.
This manual is published by PCE Instruments without any guarantee.
We expressly refer to our general guarantee terms which can be found in our general terms of business.
If you have any questions please contact PCE Instruments.

Manual
4
2 Specifications
2.1 Technical Specifications
Camera cable
Camera
1/18” CCD sensor
Depth of field
10 … 100 mm
Illumination
LED, ≥1000 lx (15 mm distance)
Diameter
Ø 4.5 mm
Length
1500 mm
Bending angle
≥90 °
Video signal
NTSC
Operating conditions
-20 … +60 °C
≤80 % RH
Display
Display resolution
960 x 240 pixels
Picture and video resolution
720 x 576 pixels / 720 x 480 pixels
Rotating angle
0 … 90 °
SD card
16 GB (max. 32 GB supported)
Interfaces
USB 2.0
AV out: 3 pins, Ø 3.5 mm
Video signal
NTSC / PAL
Power supply
3600 mAh battery (rechargeable)
Mains adaptor: 5 VDC, 2 A
Menu languages
English, Spanish, German, French, Italian,
Chinese
Operating conditions
-10 … + 40 °C
≤75 % RH
Storage conditions
-25 … +55 °C
≤90 % RH
500 … 1060 hPa air pressure
Dimensions
100 x 89 x 28 mm
2.2 Delivery Contents
1 x borescope PCE-VE 650 (display unit and camera unit)
1 x 3600 mAh battery (built in the display unit)
1 x mains adaptor for charging the display unit
1 x USB cable
1 x 16 GB SD card
1 x carrying case with key
1 x instruction manual

Manual
5
3 System description
Display unit
1Housing
5Connector
9 SD card slot
13 MENU button
2On / Off switch
6AV output
10 Decrease button
14 Video button
3Display
7Connection for
power supply
11 Increase button
15 Image/enter button
4Screw connection to
camera unit
8USB interface
12 Back / switch button

Manual
6
Camera cable
1. Lever for operating the articulating
camera head
2. Protecting cover
3. Camera cable
4. Articulating camera head
5. Connector for the display unit
1. Light button for camera head lighting
2. Lever for operating the articulating camera head
1
2
1
2
3
4
5

Manual
7
4 Getting started
4.1 Connect the display to the camera unit
To connect the display unit to the camera unit, connect the plug of
the display unit to the connector at the side of the camera unit.
There are markings on both the plug and the connector. Next, turn
the screw coupling clockwise to fasten the display unit.
4.2 Insert the SD card
Insert the SD card into the slot, with its face up. Push it in until it
clicks into space.
When you turn on the LCD, an icon appears in the lower left
corner of the display. The video time and memory capacity will be
shown in the lower right corner of the display. If there is no SD card
inserted, the icon does not appear and you cannot take any
pictures or videos.
To remove the SD card, push it in until the snap mechanism
unlocks and the card is ejected. You may now remove it..
NOTE
The SD card must be inserted before turning on the device. Otherwise, no picture
or video can be taken.
Do not remove the SD card while the device is turned on. This might cause data
loss or damage the SD card.
If the SD card is inserted properly, an icon will appear on the display.
The number of photos and videos you can take depends on the SD card’s
capacity and the video recording time. You can adjust the recording time in the
settings (see chapter 6.3). If a “Disk Full” indication appears on the display when
taking a picture or video, this means that the memory is full and files cannot be
saved anymore.
4.3 Turn the device on/off
To turn on the device, use the On/Off switch on top of the display unit.
After use, turn off the device. Unplug the AV cable and the USB cable, if connected. Remove the SD card
and close the SD card slot with the protective rubber cover.
4.4 Charge the battery
To charge the built-in battery of the display unit, use the provided mains adaptor (5.0 VDC / 2.0 A).

Manual
8
5 Operation
5.1 Meaning of display indications
Icon
Meaning
SD card inserted properly
battery status indicator
picture taken
flashes while video is recording
Video playback paused
Video playback running
5.2 Image display
Turn on the device. After a few seconds, you get to the preview
mode where you can view the current image. When appears
on the bottom left side of the display, you can take pictures and
videos. Date and time will be displayed on the top right side
whereas video time and memory capacity are displayed on the
bottom right side. The remaining battery voltage as well as the
icon are shown on the bottom left side.
5.3 Taking pictures
Press to take a picture. A indication appears on the top
left side of the display. After approx. 2 seconds, the indication
disappears and the picture is saved in JPG format.
5.4 Recording videos
Press to record a video. A flashing indication
appears on the top left side of the display. Press again to
stop recording. The video files are saved in AVI format
automatically.
NOTE
You can take videos of 10, 20 or 30 minutes. Once this period is reached, the
recording stops and a new recording starts automatically until you press the
video button to stop the recording.

Manual
9
5.5 Adjust the display parameters
Press the key when in preview mode. There are 3 settings that can be adjusted: saturation,
chromo and brightness. Press and to increase and decrease the value. Press to switch
between the settings.
5.6 Operate the articulating camera head
To operate the articulating camera head, use the lever on the camera unit (see chapter 3). You can pivot
the camera head in two directions up to an angle of 90°.
5.7 Turn the camera head lighting on/off
Press the light button on the camera unit (see chapter 3) to switch between the 5 different illumination
levels.
5.8 AV output
Connect an AV cable to the AV out connector of the display unit. Connect the other end to an external
TV or monitor. The image will now be displayed on the connected monitor while the display of the
borescope turns black.
5.9 Connect the device to a computer
The display unit comes with a USB interface which can be connected to a computer. To do so, follow
these steps:
1) Connect the small plug of the USB cable to the display unit.
2) Connect the big plug of the USB cable to a computer.
3) Turn on the device. “Computer connecting” will be displayed.
4) Once you finished data transfer, use the “Safely Remove Hardware” function in windows and remove
the USB cable. After that, you can turn off the display unit.

Manual
10
6 Settings
6.1 Main menu
Press the menu key to enter the main menu when in preview mode.
There are 3 options: “My Files”, “Setup”and “Exit”. Use and
to select the desired option and press to confirm and enter the
selected sub-menu. Press the button to return to the main
menu / preview mode.
6.2 My Files
After entering the “My Files”sub-menu, you can see the folders
with the recorded pictures and videos. To enter a folder or to open
a file, use and for selection and press to open. In the
folders, the file names and storage numbers of each file are
displayed. The Press the key to return.
6.2.1 Naming
When recording a video, a new folder is created and named after the current date (YYYYMMDD). The
recorded video is stored in this folder and is named after the time of the recording (hhmmss.avi).
When you take a picture, no new folder is created. All pictures are stored in the “Photo” folder. They are
named after date and time of recording (PICT-YYYYMMDDhhmmss.jpg).
Legend: Y –year, M –month, D –day, h –hour, m –minute, s –second
6.2.2 Delete files
To delete files, go to the “my Files” menu (see chapter 6.2). Now, go to the desired subfolder, depending
on if you plan to delete pictures or videos.
If you plan to delete videos, you have to enter the appropriate folder where the video is stored first.
Now use and to select the file and press the menu button. A confirmation window appears where
you can cancel the deletion or select if all files in the folder or only the selected file shall be deleted.
To delete a folder, you have to delete all files in it first.
Note
To delete a video subfolder, you first have to delete all videos in it. After that, you
can delete the folder as well.
6.3 Setup
There are 6 options available in the “Setup” sub-menu: “Video
Time”, “Storage”, “Date Time”, “Memory Info”, “LCD Brightness”
and “Language”. Use and to select an option and press
to confirm.

6.3.1 Video Time
Here you can select the maximal recording length of the videos.
You can choose between 10, 20 and 30 minutes.
6.3.2 Storage
Here you can chose where the data shall be stored. You can
choose between the internal memory and SD card storage. Using
the SD card for data storage is recommended.
6.3.3 Date / Time
Here you can select if a date and time stamp is shown on the recorded pictures and videos.
You can also adjust the internal date and time of the device. To do so, choose “Date Time Setup”.
Now, the date and time are shown in the following format: YYYY/MM/DD hh:mm.
By using and , you can adjust the selected value. Use to switch between the different
parameters.
6.3.4 Memory info
Here you can take a look at the remaining storage capacities of the
SD card and the internal memory.

Manual
12
6.3.5 LCD Brightness
Here you can adjust the brightness of the display. Use and to
select the desired illumination level.
6.3.6 Language
Here you can choose between the following languages: English,
Chinese, Spanish, German, French and Italian.
7 Troubleshooting
No image is displayed.
1) Check if the device is turned on.
2) Check if the battery is charged..
Images are shown on the LCD but no
pictures/videos can be recorded.
1) Check if the SD card is inserted properly.
If needed, turn the device off, remove the SD
card and put it back in.
2) Check if the SD card is full or damaged.
3) Check if the SD card is locked.
4) Check if the key are working. If they do not
work, please contact our customer support.
No USB connection possible
1) Check if the USB cable is connected. Unplug it
and plug it in again, if necessary.
2) Check the power supply / the battery.
3) Check if the display unit is turned on.
System is halted.
Turn the device off, reset it and restart it.
The reset button is located in the hole next to the
SD card slot.

Manual
13
8 Disposal
For the disposal of batteries, the 2006/66/EC directive of the European Parliament applies. Due to the
contained pollutants, batteries must not be disposed of as household waste. They must be given to
collection points designed for that purpose.
In order to comply with the EU directive 2012/19/EU we take our devices back. We either re-use them or
give them to a recycling company which disposes of the devices in line with law.
If you have any questions, please contact PCE Instruments.
9 Contact
If you have any questions about our range of products or measuring instruments please contact PCE
Instruments.
9.1 PCE Instruments UK
By post:
PCE Instruments UK Ltd.
Units 12/13 Southpoint Business Park
Ensign Way, Southampton
Hampshire
United Kingdom, SO31 4RF
By phone:
02380 987 035
9.2 PCE Americas
By post:
PCE Americas Inc.
711 Commerce Way
Suite 8
Jupiter
33458 FL
USA
By phone:
561 3209162

PCE Deutschland GmbH
Im Langel 4
D-59872 Meschede
Deutschland
Tel: 02903 976 99 0
Fax: 02903 976 99 29
info@pce-instruments.com
www.pce-instruments.com/deutsch
Bedienungsanleitung
Boroskop PCE-VE 650
Version 1.2
Erstelldatum 16.04.2015
Letzte Änderung 24.05.2016

BETRIEBSANLEITUNG
2
Inhaltsverzeichnis
1Sicherheitsinformationen.......................................................................................3
2Spezifikationen........................................................................................................4
2.1 Technische Spezifikationen ................................................................................................... 4
2.2 Lieferumfang ......................................................................................................................... 4
3Systembeschreibung..............................................................................................5
4Inbetriebnahme........................................................................................................7
4.1 Anschließen der Komponenten an die Kamera-Einheit........................................................... 7
4.2 Einsetzen der SD-Karte......................................................................................................... 7
4.3 Gerät ein- bzw. ausschalten................................................................................................... 8
4.4 Laden der Akkus.................................................................................................................... 8
5Bedienung................................................................................................................8
5.1 Bedeutung der Display-Symbole............................................................................................ 8
5.2 Anzeige des Kamerabildes .................................................................................................... 8
5.3 Fotos aufnehmen................................................................................................................... 8
5.4 Videos aufnehmen................................................................................................................. 9
5.5 Einstellung der Display-Parameter......................................................................................... 9
5.6 Bedienung des schwenkbaren Kamerakopfes........................................................................ 9
5.7 Ein-/Ausschalten der Kamera-Beleuchtung............................................................................ 9
5.8 TV Ausgang........................................................................................................................... 9
5.9 Verbindung zu einem PC herstellen......................................................................................10
6Einstellungen.........................................................................................................10
6.1 Hauptmenü...........................................................................................................................10
6.2 Meine Dateien......................................................................................................................10
6.2.1 Benennung ..............................................................................................................................10
6.2.2 Dateien löschen.......................................................................................................................11
6.3 Einstellungen........................................................................................................................11
6.3.1 Video-Dauer.............................................................................................................................11
6.3.2 Speicher ..................................................................................................................................11
6.3.3 Datum/Zeit...............................................................................................................................12
6.3.4 Speicher-Informationen............................................................................................................12
6.3.5 LCD-Helligkeit..........................................................................................................................12
6.3.6 Sprache...................................................................................................................................12
7Fehlerbehebung ....................................................................................................13
8Garantie..................................................................................................................13
9Entsorgung............................................................................................................14
10 Kontakt...................................................................................................................14

BETRIEBSANLEITUNG
3
Vielen Dank, dass Sie sich für den Kauf eines Boroskopes von PCE Instruments entschieden haben.
1 Sicherheitsinformationen
Bitte lesen Sie dieses Benutzer-Handbuch sorgfältig und vollständig, bevor Sie das Gerät zum ersten Mal
in Betrieb nehmen. Die Benutzung des Gerätes darf nur durch sorgfältig geschultes Personal erfolgen.
Dieses Messgerät darf nur in der in dieser Bedienungsanleitung beschriebenen Art und Weise
verwendet werden. Wird das Messgerät anderweitig eingesetzt, kann es zu gefährlichen
Situationen kommen.
Verwenden Sie das Messgerät nur, wenn die Umgebungsbedingungen (Temperatur, Luftfeuchte,
…) innerhalb der in den Spezifikationen angegebenen Grenzwerte liegen. Setzen Sie das Gerät
keinen extremen Temperaturen, direkter Sonneneinstrahlung, extremer Luftfeuchtigkeit oder
Nässe aus.
Setzen Sie das Gerät keinen Stößen oder starken Vibrationen aus.
Benutzen Sie das Messgerät nie mit nassen Händen.
Achten Sie darauf, dass das Gerät nicht in direkter Nähe von Heizkörpern oder anderen
Wärmequellen gelagert wird.
Das Messgerät darf nicht in einer explosionsfähigen Atmosphäre eingesetzt werden.
Setzen Sie das Gerät keinen Chemikalien aus.
Das Gehäuse des Messgerätes darf nur von qualifiziertem Personal von PCE Deutschland
geöffnet werden.
Das Gerät sollte nicht mit der Displayseite nach unten abgelegt werden.
Es dürfen keine technischen Veränderungen am Gerät vorgenommen werden.
Das Gerät sollte nur mit einem feuchten Tuch gereinigt werden. Verwenden Sie keine
Scheuermittel oder lösungsmittelhaltige Reinigungsmittel. Einige Teile, wie
Schnittstellenanschlüsse, sollten nicht mit einem feuchten Tuch gereinigt werden.
Reinigen Sie das Display nach jeder Benutzung des Gerätes, um eine Verschmutzung und damit
einhergehende Beeinträchtigung der Lesbarkeit zu vermeiden. Zum Reinigen des Displays sollte
das Gerät ausgeschaltet sein. Achten Sie nach dem Reinigen darauf, dass das Display
vollkommen trocken ist und legen Sie es anschließend zurück in die Verpackung.
Wenn Sie das Gerät für längere Zeit nicht benutzen, schalten Sie es aus, laden Sie es vollständig
auf und lagern Sie es unter den angegebenen Umgebungsbedingungen. Laden Sie das Gerät
alle drei Monate erneut.
Vermeiden Sie, dass Staub- oder metallische Partikel in das Gehäuse eindringen.
Überprüfen Sie das Gehäuse des Messgerätes vor jedem Einsatz auf sichtbare Beschädigungen.
Sollte eine sichtbare Beschädigung auftreten, darf das Gerät nicht eingesetzt werden. Sollte das
Gerät anfangen Rauch, merkwürdige Gerüche, Geräusche oder Funken zu entwickeln, schalten
Sie es sofort ab und trennen Sie die Verbindung zwischen Display- und Kameraeinheit.
Entnehmen Sie während des Betriebs niemals die SD-Karte.
Das Gerät darf nur mit dem von PCE Deutschland angebotenen Zubehör oder gleichwertigem
Ersatz verwendet werden.
Biegen Sie den schwenkbaren Kamerakopf niemals per Hand. Benutzen Sie ausschließlich den
Hebel zum Schwenken.
Das Endoskop wurde für den industriellen Einsatz entwickelt und darf nicht für medizinische
Zwecke verwendet werden.
HINWEIS
Wichtige Informationen bezüglich der Einrichtung, der Benutzung oder Wartung des Gerätes, sind mit
„Hinweis“ gekennzeichnet.
Dieses Benutzer-Handbuch wird von der PCE Deutschland ohne jegliche Gewährleistung veröffentlicht.
Wir weisen ausdrücklich auf unsere allgemeinen Gewährleistungsbedingungen hin, welche Sie in
unseren allgemeinen Geschäftsbedingungen finden können.
Bei Fragen kontaktieren Sie bitte die PCE Deutschland GmbH.

BETRIEBSANLEITUNG
4
2 Spezifikationen
2.1 Technische Spezifikationen
Kameraschlauch
Kamera
1/18“ CCD Sensor
Tiefenschärfe
10 … 100 mm
Beleuchtung
LED, ≥1000 lx (15 mm Abstand)
Durchmesser
Ø 4,5 mm
Länge
1500 mm
Biegewinkel
≥90 °
Video-Signal
NTSC
Betriebsbedingungen
-20 … +60 °C
≤80 % r.F.
Display
Display Auflösung
960 x 240 Pixel
Foto- und Videoauflösung
720 x 576 Pixel / 720 x 480 Pixel
Drehbereich
0 … 90 °
SD Karte
16 GB (max. 32 GB unterstützt)
Schnittstellen
USB 2.0
AV out: 3 Pin, ø 3,5 mm
Video-Signal
NTSC / PAL
Stromversorgung
3600 mAh Akku
Netzteil 5,0 V DC, 2,0 A
Menüsprachen
Englisch, Spanisch, Deutsch, Französisch,
Italienisch, Chinesisch
Betriebsbedingungen
-10 … +40 °C
≤75 % r.F.
Lagerbedingungen
-25 … +55 °C
≤90 % r.F.
500 … 1060 hPa
Abmessungen
100 x 89 x 28 mm
2.2 Lieferumfang
1 x Boroskop PCE-VE 650 (bestehend aus Display und Kameraschlauch)
1 x 3600 mAh Akku (in Display integriert)
1 x Netzteil zum Laden des Displays
1 x USB Kabel
1 x SD-Karte 16 GB
1 x Koffer mit Schlüssel
1 x Bedienungsanleitung

BETRIEBSANLEITUNG
5
3 Systembeschreibung
Display
1 Gehäuse
5Stecker
9 SD-Kartenslot
13 Menü Taste
2 Ein/Aus Schalter
6 AV Ausgang
10 Verringern Taste
14 Video Taste
3 Display
7Stromanschluss
11 Erhöhen Taste
15 Foto/Enter Taste
4Schraubverbindung
zur Kamera-Einheit
8USB Schnittstelle
12 Zurück / Wechseln

BETRIEBSANLEITUNG
6
Kameraschlauch
1. Hebel zur Steuerung des
Schwenkmechanismus
2. Schutzabdeckung
3. Kameraschlauch
4. Schwenkbarer Kamerakopf
5. Anschluss für Display-Einheit
1. Licht-Taste zum Ein-/Ausschalten der Kamerabeleuchtung
2. Hebel zur Steuerung des schwenkbaren Kamerakopfes
1
2
1
2
3
4
5

BETRIEBSANLEITUNG
7
4 Inbetriebnahme
4.1 Anschließen des Displays an die Kamera-Einheit
Um die das Display mit der Kameraeinheit zu
verbinden, Stecken Sie den Stecker des
Displays in den passenden Anschluss an der
Seite der Kameraeinheit. Der Stecker und der
Anschluss an der Kameraeinheit haben jeweils
eine Markierung, um das Anschließen zu
erleichtern. Drehen Sie anschließend die
Schraubverbindung im Uhrzeigersinn, um das
Display zu befestigen.
4.2 Einsetzen der SD-Karte
Setzen Sie die SD-Karte, wie auf dem Bild zu
sehen, in die Display-Einheit ein. Drücken Sie
sie so weit hinein, bis sie eingerastet ist.
Wenn Sie nun das Gerät einschalten, ist ein
Symbol links-unten auf dem Display zu sehen.
Rechts-unten wird die verbleibende
Speicherkapazität und die verfügbare Video-
Dauer angezeigt. Falls keine SD-Karte
eingesetzt wurde, ist kein Symbol angezeigt.
In diesem Fall können Sie keine Fotos oder
Videos aufnehmen.
Um die SD-Karte zu entnehmen, schalten Sie
das Gerät zunächst aus. Drücken Sie nun die
SD-Karte hinein, damit sich der
Einrastmechanismus löst. Die Karte bewegt sich
nun aus dem Slot heraus und kann entnommen
werden.
HINWEIS
Die SD-Karte muss eingesetzt sein, bevor Sie das Gerät einschalten.
Anderenfalls können Sie keine Fotos oder Videos aufnehmen.
Entnehmen Sie die SD-Karte nicht, während das Gerät eingeschaltet ist. Dies
kann zu Datenverlust oder im schlimmsten Fall zu Schäden an der SD-Karte
führen.
Wenn die SD-Karte korrekt eingesetzt ist, erscheint ein Symbol auf dem
Display.
Die Anzahl der Fotos und Videos, die Sie aufnehmen können, hängt von der
Kapazität der SD-Karte und der Aufnahmedauer der Videos ab. Letztere kann in
den Einstellungen geändert werden (siehe Kapitel 6.3). Falls „Speicher voll“ auf
dem Display erscheint, wenn Sie ein Foto oder Video aufnehmen wollen,
bedeutet dies, dass der Speicher voll ist und keine weiteren Aufnahmen
gespeichert werden können.
Table of contents
Languages:
Other PCE Instruments Analytical Instrument manuals

PCE Instruments
PCE Instruments PCE-TLM300 User manual

PCE Instruments
PCE Instruments PCE-VE 800 User manual

PCE Instruments
PCE Instruments PCE-VE 355N User manual

PCE Instruments
PCE Instruments PCE-VE 320N User manual

PCE Instruments
PCE Instruments PCE-VE 200 User manual

PCE Instruments
PCE Instruments PCE-VE 3 N Series User manual

PCE Instruments
PCE Instruments PCE-IVE 320N User manual

PCE Instruments
PCE Instruments PCE-VE 270 Series User manual

PCE Instruments
PCE Instruments PCE-MM 800 User manual

PCE Instruments
PCE Instruments C2 Camera User manual