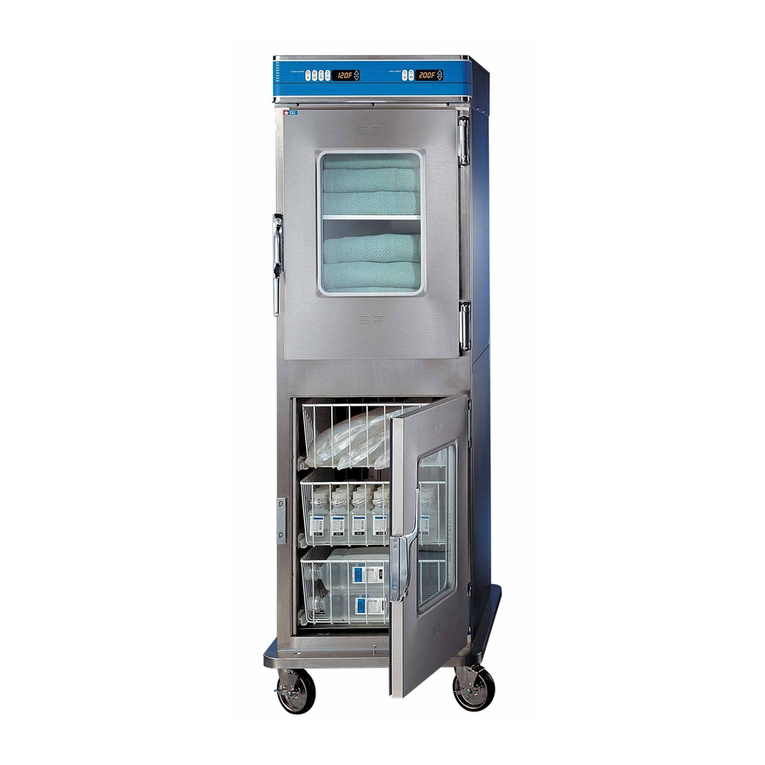
Pedigo ivNow Series User manual

manual
operation & care
ivNow-1
ivNow-2
ivNow-3
120V / 220v / 230v
MM-1072 (MN-38645) • Rev 1 • 04/18Printed in the U.S.A.
individual warming pods

2
Table of Contents
Delivery ................................................................................................................................................. 1
Transportation and Damage Claims...................................................................................................... 2
Unpacking............................................................................................................................................. 2
Safety Procedures ................................................................................................................................. 3
Installation ............................................................................................................................................. 4
Dimensions............................................................................................................................................ 5
Electrical Connection ............................................................................................................................ 6
Operation............................................................................................................................................... 7
Cleaning and Preventative Maintenance ............................................................................................ 10
Troubleshooting................................................................................................................................... 11

3
Transportation and Damage Claims
Environmental Conditions
Transport and storage environmental conditions (not to exceed 15 days)
Ambient temperature range of -40°C to +70°C (-40°F to +159°F)
Relative humidity range of 10% to 95%, non-condensing
Atmospheric pressure range of 50kPa to 106kPa
Operational environmental conditions
The appliance must acclimate to the room temperature in the environment it will be placed—24 hours is recommended
The recommended environmental temperature range is 15°C to 32°C (60°F to 90°F)
The recommended relative humidity is above 20%, non-condensing.
Receipt of Appliance
The appliance has been thoroughly tested and inspected to ensure only the highest quality appliance is provided. Upon
receipt, inspect for any possible shipping damage and report it at once to the delivering carrier. See Transportation
Damage and Claims section.
This appliance, complete with unattached items and accessories, may be delivered in one or more packages. Confirm
that all standard items and options have been received with each appliance as ordered Save all the information packed
with the appliance.
Indicates that the package contents
should not be used if the package has
been damaged or opened.

4
1. Carefully remove the appliance from the carton.
NOTE: Do not discard the carton and other packaging material until you have
inspected the unit for hidden damage and tested it for proper operation.
Should damage occur in shipment, do not put the warmer into service until the
damage has been inspected by an authorized service provider
Promptly contact Pedigo customer service to report damage.
2. Read all instructions in this manual carefully before initiating the installation of this
appliance.
Do not discard this manual. This manual is considered to be part of the
appliance and is to be provided to the owner or manager of the business or to the
person responsible for training operators Additional manuals are available from
the Pedigo service department or online at www.pedigo-usa.com.
3. Remove all protective plastic film, packaging materials, and accessories from the
appliance before connecting electrical power
Unpacking

5
Safety Procedures
Knowledge of proper procedues is essential to the
safe operation of electrically energized appliances The
following hazard signal words and symbols may be used
throughout this manual.
• Fluid warmers are only intended for warming medical
solutions for irrigation and injection prior to use Refer
to the labeling of the manufacturer of the products to
be warmed regarding the recommended temperature
and the duration of warming No other use for this
appliance is authorized or recommended.
• If the equipment is used in a manner not specified
by the manufacturer, the protection provided by the
equipment may be impaired.
• Appliance must be accessible Do not place the
appliance in a location where it is difficult to unplug.
• This warmer is intended for use in commercial
establishments where all operators are familiar with
the purpose, limitations, and associated hazards of
this appliance The warmer can be used wherever
there is appropriate space and electrical source
including patient support areas, ER, ICU, PACU,
surgical suites, patient rooms, and nursing stations
Do not use the warmer in the presence of flammable
anesthetic mixtures (with air, oxygen, or nitrous
oxide).
• Operating instructions and warnings must be read
and understood by all operators and users.
• Any troubleshooting guides, component views, and
parts lists included in this manual are for general
reference only and are intended for use by qualified
and trained technicians.
• This manual should be considered a permanent
part of this appliance This manual and all supplied
instructions, diagrams, schematics, parts lists,
notices, and labels must remain with the appliance if
the item is sold or moved to another location.

6
Installation
How to Install/Mount the ivNow
ivNow modular units can be installed in a variety of ways.
Up to 3 units can be linked together with a jumper cord
and connected via a mounting plate. Configurations can
be placed on counter top, mounted to wall or pole.
The rear bracket provided with the ivNow can be used to
mount the pod(s) to the wall. See mounting instructions
on page 5.
Note: Rear bracket provided with the ivNow is not re-
quired for countertop single pod configuration. For
other mounting options (i.e. Horizontal Rails or roll
stands) refer to the instructions included with the
mounting kit.

7
Installation
Mounting Instructions

8
Electrical Connection
Grounding reliability can only be achieved when
equipment is connected to an equivalent receptacle
marked “Hospital Grade.”
Applicable only on units with an equipotential-bonding
terminal:
To prevent an electrical shock hazard between the appliance and
other appliances or metal parts in close vicinity, an equipotential-
bonding terminal is provided. An equalization bonding lead must
be connected to this stud and the other appliances / metal parts
to provide sufficient protection against potential difference. The
terminal is marked with the following symbol.
Electrical Information
The power specifications are located on the
unit identifi cation nameplate This nameplate is
permanently attached to the unit and must be
located to verify power requirements.
ivNow Power Requirements
120/220/230 V A C — 50/60 Hz, 1 ph
100W per pod (maximum of 400W
with 4 connected pods)
Safety Class I Equipment
No Applied Parts
Mode of Operation: Continuous
NEMA 5-15P
15A - 125V Plug
Hospital Grade

9
Operation
General Information
The ivNow fluid warmer quickly warms and maintains the
temperature of injection/intravenous solutions prior to their
use. The specially contoured warming module cradles
solution bags in 0.5-, 1-, 2- & 3-liter sizes. The control
can easily be set to display temperatures in Celsius or
Fahrenheit. A sensor in the heating plate detects the
presence of a bag and engages the heating mechanism
to quickly begin warming the fluid. Two (2) temperature
sensors work in unison to precisely and continuously
read the temperature of the bag and another sensor
monitors the plate temperature. The heater will reengage
as necessary to maintain the temperature within +0/-2°C
(+0/-3ºF) of the setpoint. The electronic control monitors
the length of time the bag has been held at temperature,
beginning when the bag reaches setpoint temperature.
The display shows the time the fluid has been held at
temperature.
NOTE: In the event that fluid should spill inside the
cavity, unplug the unit to prevent an electrical
shock hazard. Wipe excess fluid from module
immediately. Refer to qualified service
personnel. Qualified service personnel should
remove the module control and remove any
remaining liquid. Perform necessary hospital
electrical safety checks before returning the unit
to operation.
ivNow Capacity Information
The ivNow warming module accommodates fluids
packaged in bags. Each warming module cradles
solution bags in 0.5-, 1-, 2- and 3-liter sizes.
Safety Feature
• The control of the ivNow is designed to display an error
message (E-31) and stop heating if the temperature of
the fluid bag (as monitored by the dual sensor switch)
is ever above 40°C (104°F).
• The control also monitors the temperature of the
aluminum and limits the temperature to a maximum of
60°C (140°F).
• There are two protective devices wired in series
with the heating element; an automatic thermostat
and a thermal fuse that disconnect the power to the
heating element if the plate exceeds 65°C (149°F) and
84ºC (183ºF) respectively, in the event of a run away
condition.

10
status button
display
power status indicator
light
Operation
Operating Instructions
1. Before operating the module(s), clean the exterior
of the unit with a damp cloth and general hospital
cleaner (isopropyl alcohol).
2. Plug the appliance into an appropriate hospital-grade
receptacle. See the appliance data tag for voltage
requirements.
3. Turn ON by pressing the power button located on
the front of the warmer. When on, the control display
will be powered. The plate will not heat until a bag is
placed in module.
4. Activate control by placing bag of fluid in module. See
Figure 1. For optimum performance, the bag should
be centered over the sensor.
NOTE: The warm-up stabilization time will vary slightly
depending on the bag temperature and ambient
room temperature.
5. The display will continue to show the current bag
temperature as the fluid is heated.
6. The green status indicator will illuminate when the fluid
is within +0/-2°C (+0/-3°F) of the setpoint temperature.

11
ivNow Status Indicators
Fluid bag is not present
The DISPLAY will show 4 dashes.
Fluid bag detected, measureing initial bag
temperature
The DISPLAY will show a chasing dash.
Warming the fluid bag
The DISPLAY will show the current bag temperature.
Fluid bag temperature is within tolerance
The STATUS INDICATOR LIGHT will be illuminated and
DISPLAY will show the current bag temperature.
Fluid bag temperature is over set point
The DISPLAY will flash current bag temperature. The
display will continue flashing until the temperature
falls below the set point. Do not use fluid bag until the
display stops flashing.
Fluid bag heated residence time is in excess of limit
The DISPLAY will flash the word “DATE”. ivNow will
monitor the time spent continuously heating a fluid
bag and notify the user that the time limit has been
exceeded. Remove the fluid bag from the warmer and
check the expiration date. Discard fluid if expired.
Internal error is detected
The DISPLAY will show an error code starting with “E-”
followed by a number. Refer to the Troubleshooting
Guide for the error code description.
Display the set temperature
Press the STATUS button to show the set temperature.
Display the time spent at the set temperature
Press and hold the STATUS button for 2 seconds to see
how long a bag has been at the set temperature. The
first hour is indicated in minutes and seconds “MM:SS”
and subsequent time is indicated in hours and minutes
“HH:MM” for the first 24 hours. After 24 hours the time is
displayed in days and fractions of a day “DD.DD”. The
timer stops after 30.00 days. The time a bag is held at
the set temperature will remain in memory until a new
bag is placed in the ivNow.
ivNow Adjustment
Display the firmware version
Press and hold the POWER button for 10 seconds.
Press the POWER button to return to operation.
Temperature unit selection
Press and hold the POWER button for 20 seconds
or until the current unit (default of °C) is displayed.
When displayed, press the STATUS button to toggle the
temperature unit between °C and °F. Press POWER to
accept the change.
Heated residence time limit
Press and hold the POWER button for 30 seconds or
until the current limit (default of 15) is displayed. When
displayed, press the STATUS button to select a date
range between 7 and 60 days in 1 day increments.
Press the POWER button to accept the change.
Temperature set point
Press and hold the POWER button for 40 seconds or
until the current set point (default of 40 °C or 104°F) is
displayed. When displayed, press the STATUS button to
select desired temperature set point between 35°C and
40°C (95°F and 104°F) in 1 degree increments. Press
the POWER button to accept the change.
status button
display
power status indicator
light
Operation

12
Cleaning and Preventative Maintenance
The cleanliness and appearance of this equipment will contribute considerably to its operating efficiency. Make certain
the module is kept free of any debris that may accumulate. Good equipment that is kept clean works better and lasts
longer.
Clean the Unit Regularly:
1. Turn the unit off.
2. Disconnect the module from the power source.
3. Wipe the metal, plastic, control surfaces, and sensor switch of the module with
a cloth dampened with isopropyl alcohol or 10% bleach solution to clean and
disinfect the unit Avoid the use of abrasive or corrosive cleaning compounds
Avoid contact with the electrical connections and electrical components.
4. Wipe surfaces with a cloth dampened with clean, warm water.
5. Wipe dry with a clean cloth Always follow appropriate state or local health
(hygiene) regulations regarding all applicable cleaning and sanitation
requirements.
NOTE: In the event that fluid should spill inside the module, unplug the unit to prevent
an electrical shock hazard. Wipe excess fluid from module immediately. Refer to
qualified service personnel. Qualified service personnel should remove the module
control and remove any remaining liquid Perform necessary hospital electrical safety
checks before returning the unit to operation.
Annual Preventative Maintenance
1. Ensure that the correct Operation and Care Manual is available to all users.
2. Ensure that all users have been properly trained in unit’s operation.
3. Inspect condition of plug and cord. Replace if damaged.
4. Clean dust from the unit.
5. Check condition of wall mounting hardware. Ensure mounting screws and assembly are secure.
6. Check control panel overlay condition. Are there any tears or excessive wear on the graphic? Does the control
work properly when buttons are pushed?
7. Check that all display LEDs light up. Test by turning the unit off and then on All LEDs illuminate for one second
at start-up.
8. Contact the Pedigo Service department for immediate repair if any problems exist.

13
Troubleshooting
If your unit is not operating properly, check the following before calling your authorized service agent. Check the
power applied to the unit. Is the plug in the outlet? Check to make sure the power is on by pressing the power
button on the front of the unit. If it is a multi-pod unit, are the jumper cords between each pod fully inserted?
Do not attempt to repair or service beyond this point. Repairs made without prior authorization by manufacturer
will void the warranty on the unit.
This chart is provided for the assistance of qualified technicians only and is not intended for use by untrained or
unauthorized service personnel.
CA
UTION
Troubleshooting Guide

800.822.3501 • FAX 360.696.1700 • www.pedigo-usa.com
4000 SE Columbia Way • Vancouver, Washington 98661
Proudly
Made
in the
USA
Specifications are subject to change without notice.
This manual suits for next models
3
Table of contents
Other Pedigo Medical Equipment manuals
Popular Medical Equipment manuals by other brands

SynCardia
SynCardia Companion 2 Driver System Operator's manual

OAKWORKS
OAKWORKS Powerline Series user manual

inhealth
inhealth Blom-Singer Instructions for use

RoMedic
RoMedic Eva400 Instructions for use

Stryker
Stryker 1288 user guide

Atos Medical
Atos Medical TheraBite JAW MOTION REHABILITATION SYSTEM Instructions for use