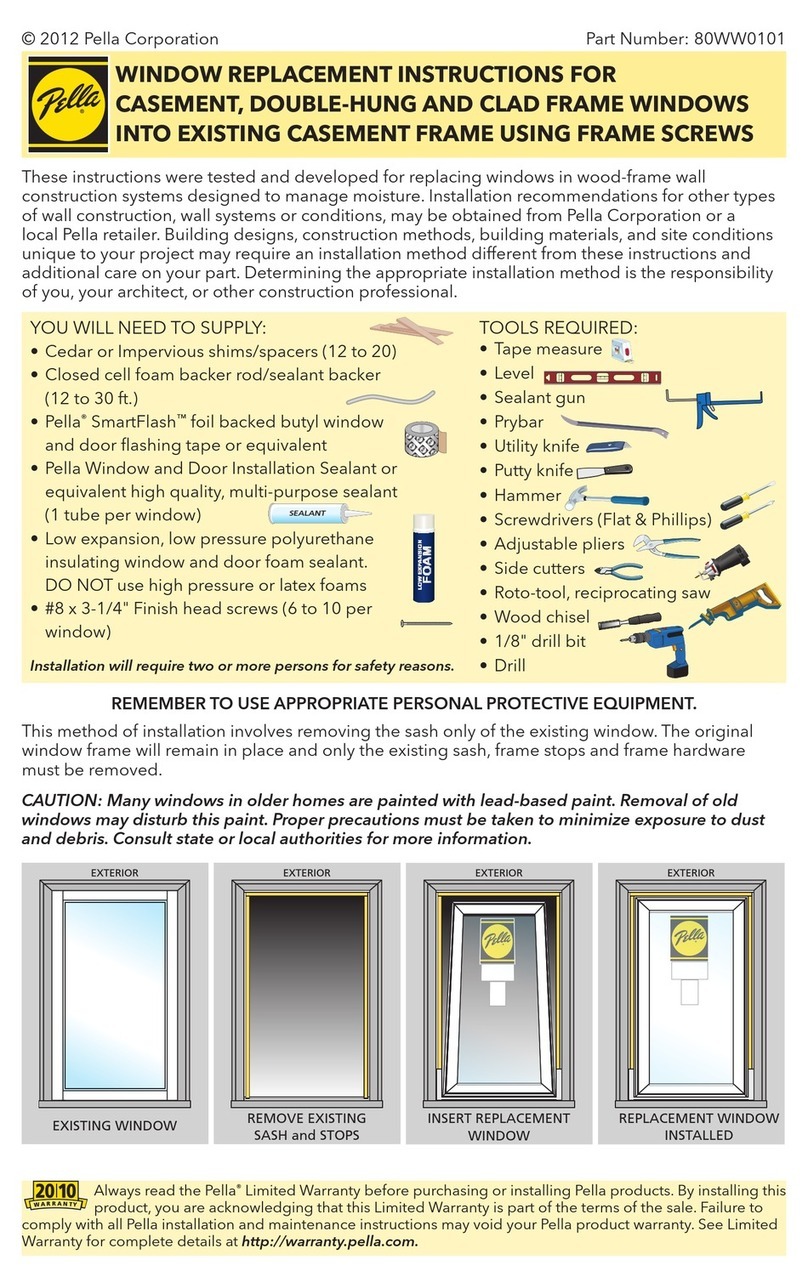
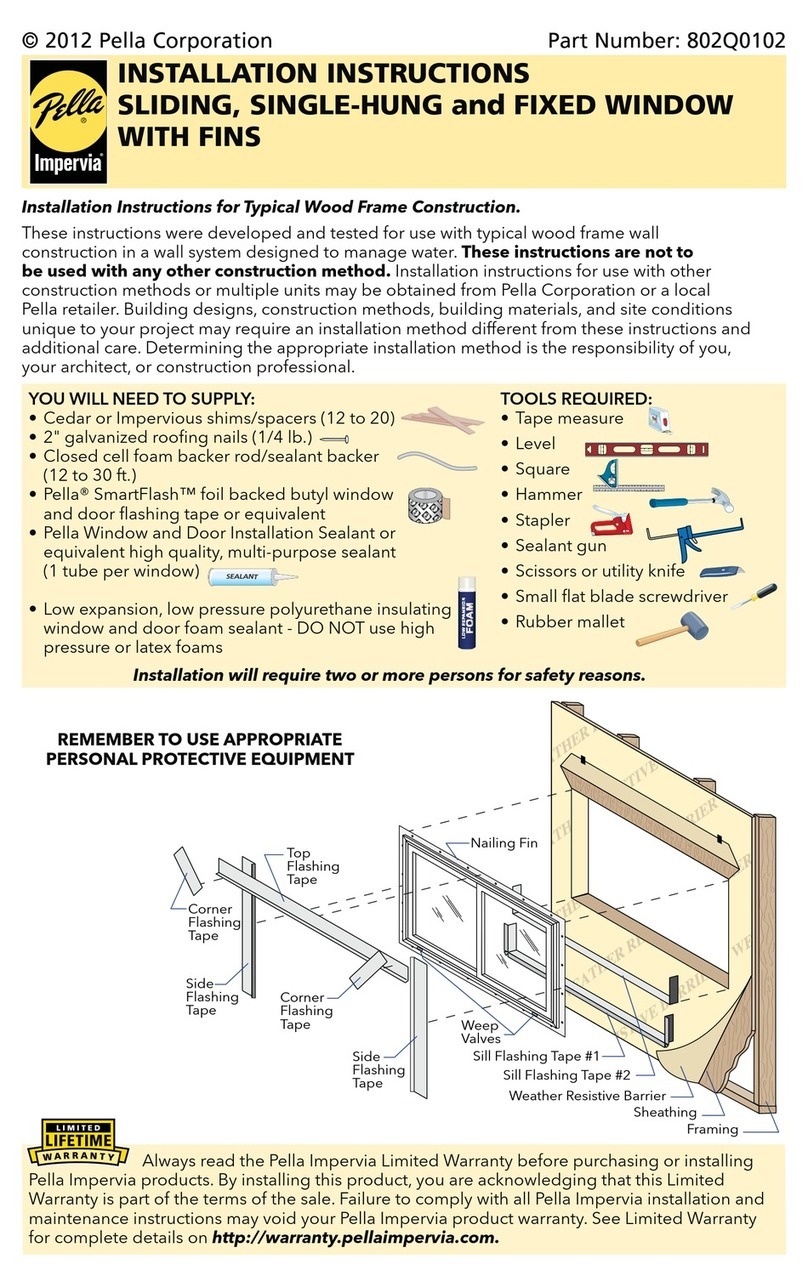
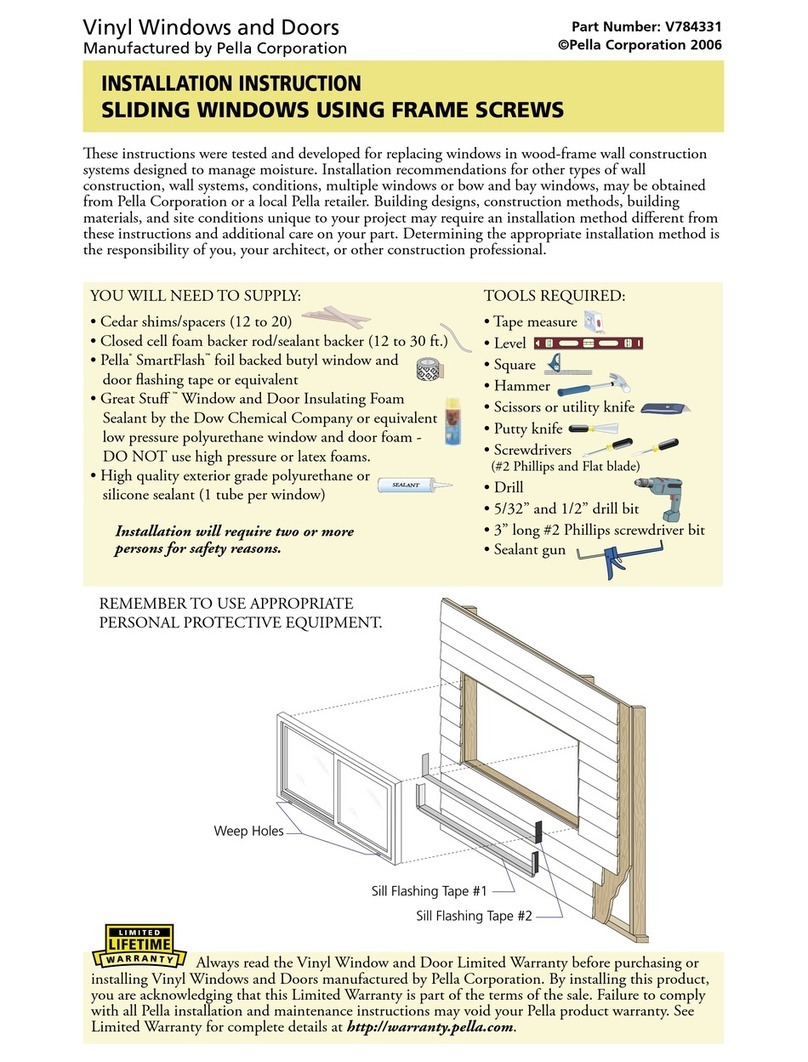
Pella 80AT0102 User manual

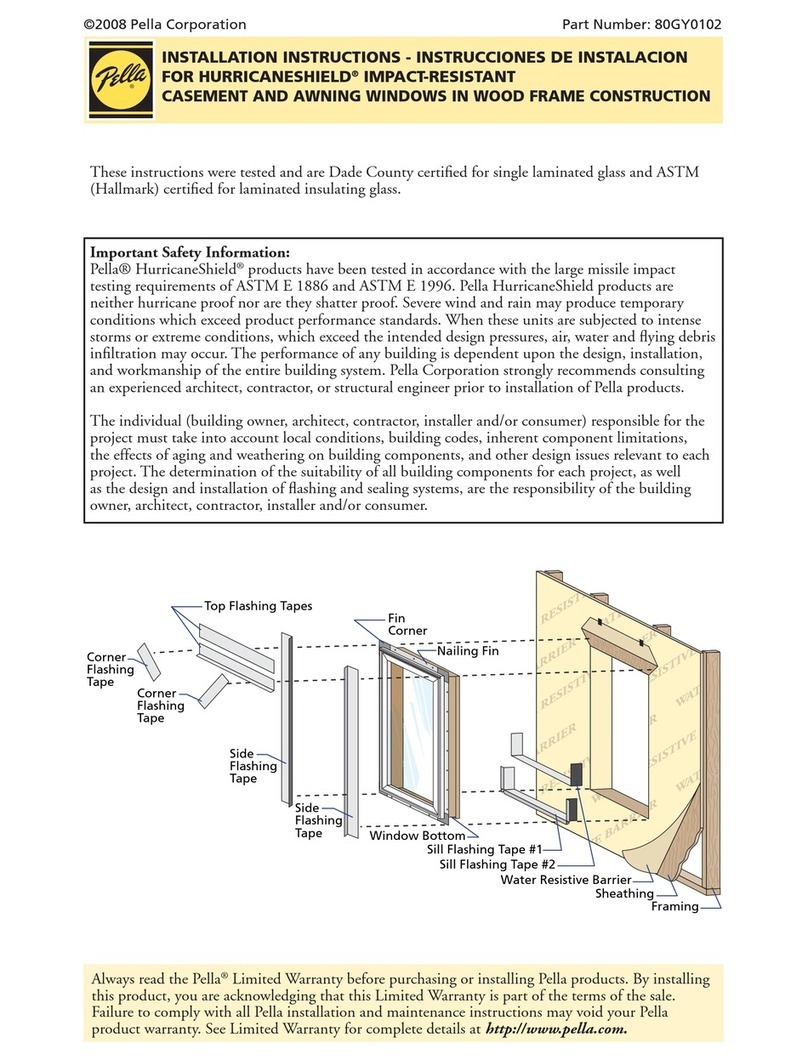
INSTALLATION INSTRUCTION
INSTRUCCIONES DE INSTALACION
FOR BAY AND BOW WINDOW WITH SEAT BOARD
VENTANAS DE MIRADOR CON TABLA DE ASIENTO
Note: These instructions may be used for all Pella Bay and Bow windows that have a
head and seat board. Support cables are installed in factory assembled bay and bow
combinations.
Caution: e factory-installed support cables must be attached to members capable of
supporting 1,300 lbs. If the members are not capable of supporting 1,300 lbs., knee braces
must be used in addition to the cables. Bay and bow units are not intended to support any
roof structure. Consult an architect, engineer or construction professional if the ability of the
members to support the bay or bow is not known.
Installation Instructions for Typical Wood Frame Construction.
These instructions were developed and tested for use with typical wood frame wall construction
in a wall system designed to manage water. ese instructions are not to be used with any
other construction method. Installation instructions for use with other construction methods,
multiple units or bow and bay windows, may be obtained from Pella Corporation, a local Pella
retailer, or by visiting http://www.pella.com. Building designs, construction methods, building
materials, and site conditions unique to your project may require an installation method
different from these instructions and additional care. Determining the appropriate installation
method is the responsibility of you, your architect, or construction professional.
Cable clamp
Jamb extensions
Cross bracing
Rafter tail
Jamb covers
Flashing tape
Knee braces
Bottom frame
expander
Head frame
expander
Always read the Pella®Limited Warranty before purchasing or installing Pella products.
By installing this product, you are acknowledging that this Limited Warranty is part of the terms of
the sale. Failure to comply with all Pella installation and maintenance instructions may void your Pella
product warranty. See Limited Warranty for complete details at http://warranty.pella.com.
Part Number: 80AT0102
©2008 Pella Corporation
Lea las instrucciones en español en el reverso.
C.
,

Interior
1A
Interior
1B
C. Cut the water resistive barrier. Fold side flaps into the
opening and staple to inside wall.
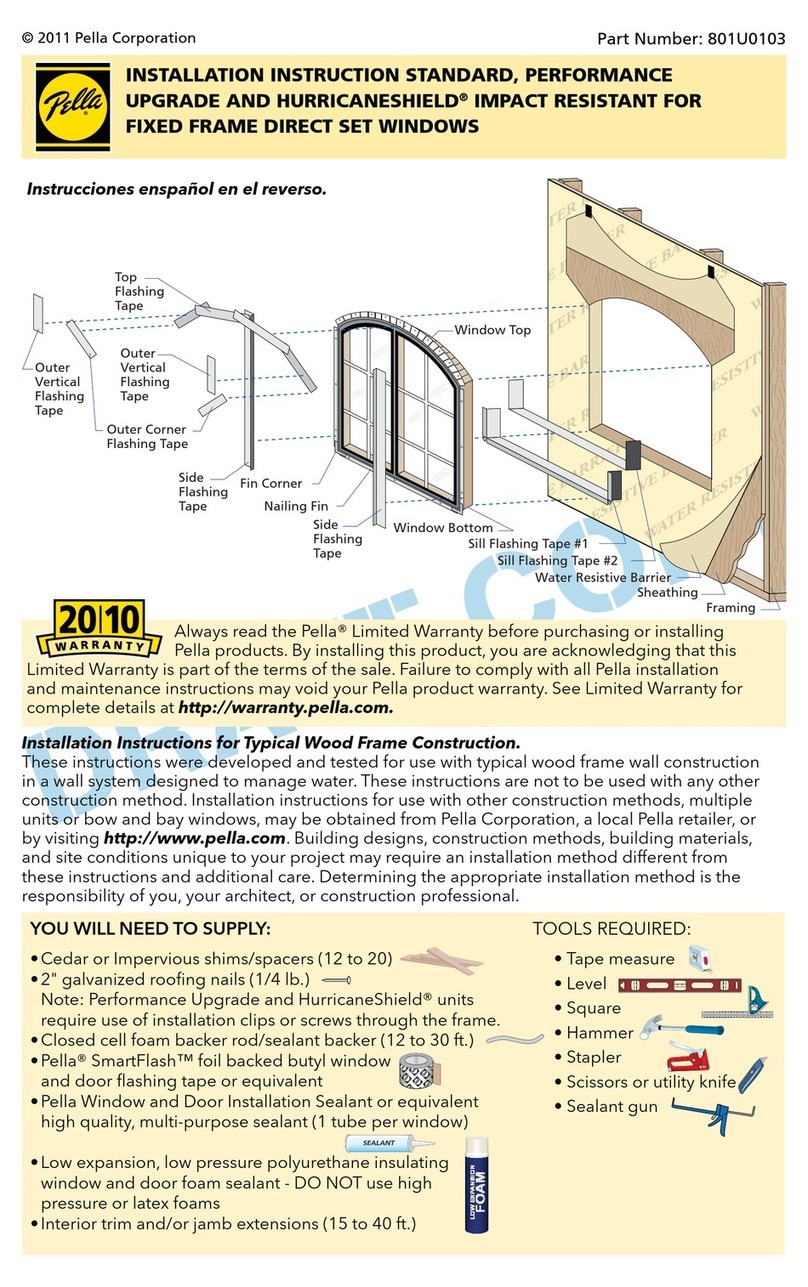
YOU WILL NEED TO SUPPLY: TOOLS REQUIRED:
• Cedar or Impervious shims/spacers (12 to 20)
• 10d galvanized nish nails or #8 x 2 1/2" at head corrosion-
resistant screws (4 to 6)
• Closed cell foam backer rod/sealant backer (20 to 35 ft.)
• Pella®SmartFlash™foil backed butyl window and door
flashing tape or equivalent
• High quality exterior grade polyurethane or silicone sealant
(1 tube per window)
• Great Stuff ™Window and Door Insulating Foam Sealant
by the Dow Chemical Company or equivalent low pressure
polyurethane window and door foam - DO NOT use high
pressure or latex foams
• Interior trim and/or jamb extensions (25 to 40 ft.)
• Knee braces (2)
• Tape measure
• Level
• Square
• Hammer
• Stapler
• Scissors or utility knife
• Sealant gun
• Drill with a #2 Phillips
and a #3 square drive bit
• 3/16" wrench or socket
• 1/2" open end wrench
SEALANT
SEALANT
REMEMBER TO USE APPROPRIATE PERSONAL PROTECTIVE EQUIPMENT.
A. Verify the opening is plumb and level.
Note: It is critical that the bottom is level.
1st cut
2nd
cut
3rd cut
Water Resistive Barrier 1C
B. Verify the window will fit the opening. Measure all four sides
of the opening to make sure it is 3/4" larger than the window
in both width and height. On larger openings measure the
width and height in several places to ensure the header or studs
are not bowed.
Note: 1-1/2" or more of solid wood blocking is required
around the perimeter of the opening. Fix any problems with
the rough opening before proceeding.
1E
1"
1/2"
1/2"
6"
1D
1
ROUGH OPENING PREPARATION
D. Apply sill flashing tape #1. Cut a piece of ashing tape 12" longer
than the opening width. Apply at the bottom of the opening as
shown (1D) so it overhangs 1" to the exterior.
Note: e tape is cut 12" longer than the width so that it will
extend 6" up each side of the opening.
E. Tab the sill flashing tape and fold. Cut 1" wide tabs at each
corner (1/2" from each side of corner) (1E). Fold tape to the
exterior and press rmly to adhere it to the water resistive barrier.

TWO OR MORE PEOPLE WILL BE REQUIRED FOR THE FOLLOWING STEPS.
1"
1F
2B
Interior
2C
Interior
2F
2D
1G
2SETTING THE WINDOW
F. Apply sill flashing tape #2. Cut a piece of ashing tape 12" longer
than the opening width. Apply at the bottom, overlapping tape #1 by
at least 1". DO NOT allow the tape to extend past the interior face
of the framing (1F).
Note: e flashing tape may not fully cover the framing members.
G. Install and level sill spacers. Place 1" wide
by 3/8" thick spacers on the bottom of the
opening 1/2" from each side. Add shims
to ensure the spacers are level. Once level,
attach spacers and shims to the opening to
prevent movement.
Note: In some installations, the cable clamps will not be
accessible for cable attachment and adjustment after the
window is installed. For this type of installation proceed to
Cross Bracing Mount - Non Accessible Cable Attachment. e
cable and clamp will have to be measured and installed before
the window is installed.
A. Insert the window from the exterior of the building. Place
the seat of the window at the bottom of the opening and slide
the top into position. Center the window between the sides of
the opening to allow clearance for shimming.
B. Place temporary bracing under the seat of the
window and raise the unit until level as shown (2B).
C. Plumb and square window. Place shims 1" from the
bottom and top of the window between the window and
the sides of the opening. Adjust the shims as required
to plumb and square the window in the opening. Place
shims at the midpoint of the window sides.
D. Nail one 10d finishing nail or drive a #8 x 2-1/2"
long screw on each end, through the seat board into
the rough opening.
E. Continue placing shims/spacers between the seat
board and the rough opening at not more than 16"
on center. Ensure the seat board is flat.
F. Nail one 10d finishing nail or drive a #8 x 2-1/2"
long screw on each end, through the head board into
the rough opening.
G. Place shims between the head board and the rough
opening at not more than 16" on center. Ensure the
head board is straight and level.

Install Cable Clamps based on type of installation needed.
Cross Bracing Installation consists of attaching 2 x 6
cross bracing between the rafter tails. Header Mount
Installation consists of attaching to a solid structural
member - header, sill plates or wall stud.
Cross bracing mount
Header
mount
T-nut
CROSS BRACING MOUNT OF CABLE CLAMPS
3B
3C
A. Install 2 x 6 cross braces between the rafter tails, directly
above the cable holes in the bay/bow head board.
B. Install the cable clamps directly above the T-nuts where
adequate support is available. Holding the clamp parallel to the
up-running cable, drive the #12 x 3-1/4" square screws partway
into the mounting surface using a #3 square drive bit.
C. Run the cable up through the bottom of the cable clamp.
Hold the cable up tight above the clamp and drive the two
center clamp screws all the way in to lock the cable in place.
Drive in the remaining #12 x 3-1/4" square screws all the way.
Note: Make sure all 4 screws are driven in at maximum
torque. Additional tensioning may be done with the nuts
on the opposite end of the cable at the bottom of the bay/
bow unit.
3CABLE CLAMP INSTALLATION
CROSS BRACING MOUNT - NON ACCESSIBLE CABLE ATTACHMENT
Note: Install the cable clamp and cable prior to installing the bay/bow unit.
HEAD BOARD
SEAT BOARD
1"
A
B
A. Install 2 x 6 cross braces between the rafter tails, directly
above the cable holes in the bay/bow head board.
B. Remove the cable from the bay/bow unit.
Measure the distance from the bottom of
the cable clamp to the bottom of the header
plus 3/8" head clearance (A dimension).
Measure the height of the unit from the top
of the head board to the bottom of the seat
board (B dimension). Add "A" to "B" to get
the correct length of cable hanging from the
bottom of the cable clamp. Insert the cable
end through the round hole of the cable
clamp. Ensure the correct length of cable
is hanging below the bottom of the cable
clamp. Tighten the two cable clamp corner
screws. Insert one screw into each of the
center holes in the cable clamp, and tighten
to fully clamp the cable in position.
Note: Support cables are installed in factory assembled
bay and bow combinations.

HEAD BOARD
SEAT BOARD
18" PROJECTION
MAXIMUM
DASHED LINES INDICATE
POSSIBLE CONSTRUCTION
FOR GABLE ROOF
MINIMUM
10-1/2”
A. Tighten the top hex nut on both cable ends. Using a 3/16" wrench or socket, hold the
cable end in position while tightening the top hex nut with a 1/2" wrench or socket. This
will keep the cable from twisting as the hex nuts are tightened with a wrench.
4E
4FASTENING THE WINDOW
3
CABLE CLAMP INSTALLATION (continued)
C. When the bay/bow unit is being installed, thread the threaded end of the cable through
the "T" nut, down the length of the bay/bow unit, and out the drilled hole in the seat
board. Place a washer and two hex nuts on each cable end.
Note: e interior mullion cover can easily be removed for this purpose and must be
reinstalled when installation is complete.
HEADER MOUNT OF CABLE CLAMPS
is method may only be used if the projection of the bay/bow is 18" or less.
Use the Cross Bracing method if the projection of the bay/bow is more than 18".
Note: Be sure that the cable clamps are secured to a
solid structural member - header, sill plates or wall
stud. If the structural member or cable clamps are
not securely attached, they may loosen during or
after installation causing the bay/bow unit to sag.
A. Install the cable clamps. Drive the #12 x 3-1/4"
square screws part way into the mounting surface
using a #3 square drive bit.
B. Secure the seat board and head board by using 10d nishing nails or 2-1/2" long
screws on 16" centers; nail or screw through the head board, seat board and shims
into the rough opening.
C. Remove the temporary bracing. Check the window for level, plumb, sash reveal
and operation. Readjust, if needed.
Note: Be sure to use the temporary support when readjusting
the nuts.
D. Tighten the locking (bottom) nut on both cable ends and
remove the temporary support once the nal position is found.
DO NOT cut the threaded end off the cable as this will prevent
future adjustment should it be needed.
E. Installation of knee braces is recommended to help support
the weight of the bay/bow unit. Weight calculations must take
into account the weight of the items that may be placed on the
seat board of the bay/bow unit. Knee braces are required if the
upper roof/framing members cannot support 1,300 lbs. or more.
B. Run the cable up through the bottom of the cable
clamp. Hold the cable up tight above the clamp and
drive the two center clamp screws all the way in to
lock the cable in place. Drive in the remaining #12
x 3-1/4" square screws all the way.
Note: Make sure all 4 screws are driven in at
maximum torque. Additional tensioning may be
done with the nuts on the opposite end of the cable
at the bottom of the window.

Caution: Ensure use of low pressure polyurethane window and door insulating foams
and strictly follow the foam manufacturer’s recommendations for application. Use of high
pressure foams or improper application of the foam may cause the window frame to bow and
hinder operation.
A. Apply insulating foam sealant (see Caution above).
From the exterior, insert the nozzle of the applicator
approximately 1" deep into the space between the
window and the rough opening and apply a 1" deep
bead of foam. This will allow room for expansion
of the foam and will minimize squeeze out. If using
insulating foam other than Great Stuff™Window
and Door Insulation Foam by the Dow chemical
Company, allow the foam to cure completely (usually
8 to 24 hours) before proceeding to the next step.
Note: It may be necessary to squeeze the end of the
tube with pliers to be able to insert into the space
between the jamb boards and the rough opening,
and between the head and seat board and the
rough opening.
Exterior
5A
When applying siding, brick veneer or other exterior finish material, leave adequate space
between the jamb cover and the exterior finish material for sealant.
A. Install the exterior jamb covers onto the outer two
windows. Apply a bead of sealant to the edge of the
leg that will be driven into the accessory groove. Drive
the short leg into the accessory groove using a block of
wood with rounded edges and a hammer.
B. Nail the jamb covers to the wall using one nail on
each end, and one in the center.
C. Cut two pieces of flashing tape 6" longer than the
frame height of the window. Apply the flashing tape
3" above the top of the jamb cover, overlapping it onto
the water resistive barrier.
5INSULATING FOAM APPLICATION
6SEALING THE BAY/BOW UNIT TO THE EXTERIOR
WALL CLADDING
6A
Double-hung bay window
Accessory groove
Exterior jamb cover
Sealant
Exterior
6B
6C

Frame
expander
Mark frame expander at
the center of the wedge
Center frame expander
6E
Notch out
1/4”
D. Install wood blocking between the top of the window and the soffit as shown. The
blocking should be ush with the exterior of the window frame.
6F
6I
6D
6G
E. Notch the retainer leg of the top and bottom frame expanders. Hold the frame expander
so it is centered on the center window, and mark the frame expander at the center of the
wedge that is between the windows. Cut a 1/4" wide notch out of the retainer leg to allow
the frame expander to bend and attach to the anker windows.
Backer rod
and sealant
6H
Double-hung bay window
Accessory groove
Exterior jamb cover
Sealant
6I
6J
F. Apply a bead of sealant on the leg of the head frame
expander and install by tapping on using a block of
wood with rounded edges and a hammer.
G. Install the bottom frame expander by tapping on with
a block of wood with rounded edges and a hammer.
H. Insert backer rod into the space between the jamb cover
and the exterior nish material as deep as it will go. Apply
a bead of high quality exterior grade sealant on top of the
backer rod. Shape, tool and clean excess sealant. When
nished, the sealant should be the shape of an hourglass.
Note: Backer rod adds shape and depth for the sealant
line. is method creates a more flexible sealant line
capable of expanding and contracting.
I. Apply a corner bead of sealant across the top of the head
frame expander. Shape, tool and clean excess sealant.
J. Install the interior jamb extensions (provided).
K. Install roofing material per the manufacturer’s instructions.

INTERIOR FINISHING
If products cannot be nished immediately, cover with clear plastic to protect from dirt, damage and
moisture. Remove any construction residue before nishing. Sand all wood surfaces lightly with 180
grit or ner sandpaper. DO NOT use steel wool. BE CAREFUL NOT TO SCRATCH THE GLASS.
Remove sanding dust.
Pella products must be nished per the below instructions; failure to follow these instructions voids the
Limited Warranty.
• On casement and awnings, it is optional to paint, stain or nish the vertical and horizontal sash edges.
• On single-hung and double-hung, do not paint, stain or nish the vertical sash edges, any nish on
the vertical sash edges may cause the sash to stick; it is optional to paint, stain or nish the horizontal
sash edges.
• On patio doors, it is optional to paint, stain or nish the vertical and horizontal panel edges.
Note: To maintain proper performance do not paint, finish or remove the weather-stripping,
mohair dust pads, gaskets or vinyl parts. Air and water leakage will result if these parts are
removed. After finishing, allow venting windows and doors to dry completely before closing them.
Pella Corporation is not responsible for interior paint and stain nish imperfections for any product
that is not factory-applied by Pella Corporation. Use of inappropriate nishes, solvents, brickwash, or
cleaning chemicals will cause adverse reactions with window and door materials and voids the
Limited Warranty.
For additional information on nishing see the Pella Owner's Manual or go to www.pella.com.
IMPORTANT NOTICE
Because all construction must anticipate some water inltration, it is important that the wall system
be designed and constructed to properly manage moisture. Pella Corporation is not responsible for
claims or damages caused by anticipated and unanticipated water inltration; deciencies in building
design, construction and maintenance; failure to install Pella®products in accordance with Pella
installation instructions; or the use of Pella products in wall systems which do not allow for proper
management of moisture within the wall systems. The determination of the suitability of flashing and
sealing systems are the responsibility of the Buyer or User, the architect, contractor, installer, or other
construction professional and are not the responsibility of Pella.
Pella products should not be used in barrier wall systems which do not allow for proper management
of moisture within the wall systems, such as barrier Exterior Insulation and Finish Systems, (EIFS)
(also known as synthetic stucco) or other non-water managed systems. Except in the states of
California, New Mexico, Arizona, Nevada, Utah, and Colorado, Pella makes no warranty of any
kind on and assumes no responsibility for Pella windows and doors installed in barrier wall
systems. In the states listed above, the installation of Pella Products in barrier wall or similar
systems must be in accordance with Pella’s installation instructions.
Product modications that are not approved by Pella Corporation will void the Limited Warranty.
EXTERIOR FINISH
The exterior frame and sash are protected by aluminum cladding with our tough EnduraClad®or
EnduraClad Plus baked-on factory nish that needs no painting. Clean this surface with mild soap and
water. Stubborn stains and deposits may be removed with mineral spirits. DO NOT use abrasives. DO
NOT scrape or use tools that might damage the surface.
Use of inappropriate nishes, solvents, brickwash or cleaning chemicals will cause adverse reactions
with window and door materials and voids the Limited Warranty.
CARE AND MAINTENANCE
Care and maintenance information is available in the Pella Owner’s Manual. You can obtain an owner’s
manual by contacting your local Pella retailer. This information is also available on www.pella.com.

ACABADO INTERIOR
Si no puede realizar el acabado de los productos inmediatamente, cúbralos con plástico transparente para
protegerlos de la suciedad, de posibles daños y de la humedad. Elimine cualquier residuo producido
durante la construcción antes de realizar el acabado. Lije todas las supercies de madera con un papel
de lija de grano 180 o menor. NO use lana de acero. ASEGURESE DE NO RAYAR EL VIDRIO.
Elimine el polvo producido al lijar.
Los productos Pella deben recibir un acabado según las instrucciones que verá a continuación;
el incumplimiento de estas instrucciones invalidará la garantía limitada.
• En los marcos giratorios y toldos, es opcional pintar, entintar o acabar los bordes de las hojas
verticales y horizontales.
• En las ventanas de abertura simple y abertura doble, no pinte, entinte ni acabe los bordes de la hoja
vertical, ya que la hoja puede pegarse. Es opcional pintar, entintar o acabar los bordes de la hoja horizontal.
• En las puertas para patio, es opcional pintar, entintar o acabar los bordes de los paneles verticales
y horizontales.
Nota: Para mantener el correcto rendimiento del producto, no pinte, acabe ni elimine los burletes,
las almohadillas de mohair contra el polvo, los empaques ni las piezas de vinilo. Si elimina estas
piezas, se producirán fugas de aire y agua. Después de aplicar el acabado, deje que las puertas
y las ventanas de ventilación se sequen por completo antes de cerrarlas.
Pella Corporation no es responsable de las imperfecciones de la pintura interior y el acabado entintado
de ningún producto que no haya sido aplicado en la fábrica por Pella Corporation. El uso incorrecto
de acabados, solventes, productos químicos para lavar ladrillos y limpiadores causará reacciones adversas
en los materiales de puertas y ventanas, y anulará la garantía limitada.
Para obtener información adicional sobre el acabado, vea el manual del usuario de Pella o visite www.pella.com.
ACABADO EXTERIOR
El bastidor y el marco exteriores están protegidos por un revestimiento de aluminio con un acabado
EnduraClad® o EnduraClad Plus de Pella aplicado en fábrica que no necesita pintura. Limpie esta supercie
con un jabón suave y agua. Las manchas y los depósitos resistentes pueden quitarse con alcoholes minerales.
NO utilice agentes abrasivos. NO raye ni utilice herramientas que puedan dañar la supercie.
El uso de acabados, solventes, lavados de ladrillos o productos químicos de limpieza inadecuados provocará
reacciones adversas con los materiales de las ventanas y las puertas, y anulará la garantía limitada.
CUIDADO Y MANTENIMIENTO
La información sobre el cuidado y el mantenimiento se incluye en el Manual del propietario de Pella. Puede
obtener un manual del propietario contactando a su representante de ventas local de Pella. Esta información
también está disponible en www.pella.com.
NOTA IMPORTANTE
Debido a que en todas las construcciones se debe anticipar algún tipo de ltración de agua, es importante
que el sistema de paredes esté diseñado y construido para manejar adecuadamente la humedad. Pella
Corporation no será responsable por reclamos o daños causados por ltración de agua prevista o imprevista,
deciencias en el diseño de la edicación, construcción y mantenimiento, incumplimiento de las
instrucciones de instalación de los productos Pella; o el uso de los productos Pella en sistemas de
barreras de pared; los cuales no permiten el manejo apropiado de la humedad dentro del sistema de pared.
La determinación de la idoneidad de todos los componentes de la construcción, incluyendo el uso de
los productos Pella, así como del diseño y la instalación de impermeabilizante y sistemas selladores, son
responsabilidad del comprador o del usuario, del arquitecto, contratista, instalador u otro profesional
de la construcción y no son responsabilidad de Pella.
Los productos Pella no deben ser usados en sistemas de barrera de pared que no permitan el adecuado
manejo de la humedad dentro de los sistemas de pared, tales como barrera de aislamiento exterior
y sistemas de acabado (EIFS, por sus siglas en inglés) (también conocidos como estuco sintético)
u otros sistemas que no posean indicadores de agua. Excepto en los estados de California, Nuevo México,
Arizona, Nevada, Utah y Colorado, Pella no otorga garantía de ningún tipo ni asume responsabilidad
por las ventanas Pella ni las puertas instaladas en sistemas de barreras de pared. En los estados
mencionados arriba, la instalación de los productos Pella en sistemas de barrera de pared deberá
estar de acuerdo con las instrucciones de instalación de Pella.
Las modicaciones al producto que no hayan sido aprobadas por Pella Corporation invalidarán la garantía
limitada.
D. Instale bloques sujetadores entre el extremo superior de la ventana y el plafón de alero como
se muestra. Los bloques sujetadores deben quedar a ras del exterior del marco de la ventana.
E. Haga una muesca en la pata de retención de los extensores del marco superior y del inferior.
Sostenga el extensor del marco, a n de que quede centrado en la ventana del centro, y marque
el extensor del marco en el centro de la cuña que está entre las ventanas. Corte una muesca de
1/4 de pulgada de ancho de la pata de retención a n de permitir que el extensor del marco se
incline y sujete los paneles laterales de las ventanas.
F. Aplique un reborde de sellador sobre la pata del extensor del
marco del cabecero e instálelo golpeando con un martillo
sobre un bloque de madera.
G. Instale el extensor del marco inferior golpeando con
un martillo sobre un bloque de madera con bordes
redondeados.
H. Inserte la varilla de relleno en el espacio entre la cubierta de
la jamba y el material de revestimiento exterior tan
profundamente como pueda. Aplique un reborde de sellador
para exteriores de alta calidad en la punta de la varilla de
relleno. Moldee, trabaje y limpie el exceso de sellador. Cuando
termine, el sellador debe tener la forma de un reloj de arena.
Nota: La varilla de relleno confiere forma y profundidad a
la línea del sellador. Este método crea una línea de sellador
más flexible, capaz de expandirse y contraerse.
6F
6I
6D
6G
I. Aplique un reborde de sellador sobre la parte superior del extensor
del marco del cabecero. Moldee, trabaje y limpie el exceso
de sellador.
J. Instale las extensiones de las jambas interiores (incluidas).
K. Instale el material para techos según las instrucciones del
fabricante.
6I
6J
6H
Ranura adicional
Sellador
Varilla y sellador
traseros
Cubierta de la
jamba exterior Ventana de
mirador
de doble abertura
Extensor
del marco
Marque el extensor del
marco en el centrode la cuña
Centro del extensor del marco
6E
Corte una muesca de 1/4”

Precaución: Utilice exclusivamente espumas de poliuretano de baja expansión para instalación de
puertas y ventanas, y siga al pie de la letra las recomendaciones para la aplicación de la espuma
suministradas por el fabricante de la espuma. El uso de espumas altamente expansivas o la
aplicación incorrecta de la espuma pueden hacer que la puerta se deforme y pueden dificultar su
funcionamiento.
A. Aplique la espuma aislante. (Vea “Precaución”).
Desde el interior, inserte la boquilla del aplicador
aproximadamente 1 pulgada (25,4 mm) dentro del
espacio entre la ventana y la abertura sin terminar,
y aplique un reborde de 1 pulgada (25,4 mm) de
profundidad de espuma. Esto dejará suciente espacio
para que la espuma se expanda y reducirá la cantidad
que rebose. Antes de proceder al paso siguiente,
espere a que la espuma se seque completamente
(normalmente de 8 a 24 horas).
Nota: Puede que sea necesario apretar el extremo
del tubo con una pinza para insertar la espuma en
el espacio entre los marcos y la abertura, y entre las
tablas del cabecero y de asiento y la abertura sin
terminar.
Exterior
5A
Al aplicar revestimiento, revestimiento de ladrillos u otros materiales de acabado exterior, deje
un espacio adecuado entre la cubierta de la jamba y el material sellador de revestimiento exterior
Exterior
6B
6C
A. Instale las cubiertas exteriores de las jambas sobre
las dos ventanas exteriores. Aplique un reborde de
sellador sobre el borde de la pata que se insertará
dentro de la ranura adicional. Ajuste la pata corta en la
ranura adicional con un bloque de madera con bordes
redondeados y un martillo.
B. Clave las cubiertas de las jambas a la pared utilizando un
clavo en cada extremo y uno en el centro.
C. Corte dos trozos de cinta tapajuntas que sean 6 pulgadas
(15,24 cm) más largos que la altura del marco de la ventana.
Aplique la cinta tapajuntas de 3 pulgadas (7,60 cm) por
encima del extremo superior de la cubierta de la jamba,
superponiéndola con la barrera resistente a la intemperie.
5APLICACION DE LA ESPUMA AISLANTE
6SELLADO DE LA VENTANA DE MIRADOR
AL REVESTIMIENTO EXTERIOR DE LA PARED
6A
Double-hung bay window
Accessory groove
Exterior jamb cover
Sealant

B. Lleve el cable hasta la base de la abrazadera de
cables. Sostenga el cable tenso sobre la abrazadera
y ajuste por completo los dos tornillos centrales de
la abrazadera para jar el cable. Inserte completamente
los tornillos cuadrados No. 12 de 3 1/4 pulgadas.
Nota: Asegúrese de que los cuatro tornillos estén
ajustados hasta su máxima torsión. Puede ejercerse
presión adicional ajustando las tuercas en el extremo
opuesto del cable, en la base de la ventana.
C. Cuando esté instalando la ventana de mirador, pase el extremo roscado del cable a través de
la tuerca en forma “T”, llévelo hacia abajo hasta cubrir todo el largo de la ventana de mirador
y páselo por el agujero de la tabla de asiento. Coloque una arandela y dos tuercas hexagonales
en cada extremo del cable.
Nota: La cubierta interior de entrepaño puede quitarse fácilmente durante este proceso
y colocarse nuevamente una vez terminada la instalación.
MONTAJE DE ABRAZADERAS DE CABLE
Este método solo puede utilizarse si la proyección de la ventana de mirador mide 18 pulgadas (45,7 cm).
Utilice el refuerzo cruzado si la proyección de la ventana de mirador mide más de 18 pulgadas (45,7 cm).
Nota: Asegúrese de que las abrazaderas de cables
estén sujetadas en un marco estructural sólido
TABLA DEL CABECERO
TABLA
DE ASIENTO
PROYECCION MAXIMA
DE 18” (45.7 cm)
LA LINEA DE PUNTOS INDICA
LA POSIBLE INSTALACION EN
TECHOS DE DOS
AGUAS
MINIMO
DE 10-1/2”
A. Ajuste la tuerca hexagonal en ambos extremos del cable. Utilizando una llave de 3/16 de
pulgada (0,47cm) o un sujetador, sostenga el extremo del cable en posición mientras aprieta la
tuerca hexagonal superior con una llave de 1/2 pulgada (1,27cm) o un sujetador. Esto evitará que
el cable se tuerza ya que las tuercas hexagonales están ajustadas con una llave.
B. Asegure la tabla de asiento y la tabla del cabecero con clavos de acabado de 10d o con tornillos
largos de 2 1/2 pulgadas (6,35 cm) en centros de 16 pulgadas (40,6 cm); inserte un clavo o un
tornillo en la tabla del cabecero, en la tabla de asiento y en las calzas por el oricio de abertura.
C. Quite el refuerzo temporal. Asegúrese de que la ventana esté a nivel y a plomo, y controle
el reborde de la hoja y el funcionamiento de la ventana. Si es necesario, vuelva a ajustar.
Nota: Asegúrese de usar el refuerzo temporal cuando esté reajustando las tuercas.
D. Ajuste la tuerca de seguridad (parte inferior) en ambos extremos
del cable y quite el refuerzo temporal una vez encontrada la
posición correcta. NO corte el extremo roscado del cable, ya que
esto imposibilitará futuros ajustes, que pueden ser necesarios.
E. Se recomienda la instalación de barras de refuerzo angulares
para ayudar a sostener el peso de la unidad saliente. Cuando
realice el cálculo del peso, tenga en cuenta el peso de los artículos
que colocará en la tabla de asiento de la unidad saliente. Las barras
de refuerzo angulares son necesarias si los miembros del techo/marco
superior no pueden sostener 1300 libras o más.
4E
3COLOCACION DE LA ABRAZADERA DE CABLES
(continuación)
4SUJECION DE LA VENTANA
(cabecero, placas del umbral o montante de pared).
Si el marco estructural o las abrazaderas de cables
no están asegurados de manera correcta, pueden
aflojarse durante la instalación o después de ella
y provocar que la ventana de mirador se mueva.
A. Instale las abrazaderas de cables. Inserte parcialmente
los tornillos cuadrados No. 12 de 3 1/4 pulgadas en la
supercie de montaje usando la broca cuadrada No. 3.

Montaje de refuerzo
cruzado
Montaje
del
cabecero
Tuerca
en
forma
de “T”
Instale las abrazaderas de cables según el tipo de instalación
que se requiera. La instalación de refuerzo cruzado consiste
en unir refuerzos cruzados de 2 x 6 pulgadas (5,08 x 15,24 cm)
entre los extremos de las vigas del techo. La instalación
montada sobre un marco consiste en unir a un miembro
estructural: marco, placas del umbral o montante de pared.
3B
3C
MONTAJE DE REFUERZO CRUZADO
DE ABRAZADERAS DE CABLES
A. Instale refuerzos cruzados de 2 x 6 pulgadas (5,08 cm x 15,24 cm)
entre los extremos de las vigas del techo, directamente sobre los oricios
de los cables en la tabla del cabecero de la ventana de mirador.
B. Instale las abrazaderas de cables directamente sobre las tuercas
en forma de “T” donde exista un soporte adecuado. Sostenga la
abrazadera paralela al cable orientado hacia arriba y, con un taladro,
inserte parcialmente los tornillos cuadrados No. 12 de 3 1/4 pulgadas
en la supercie de montaje usando la broca cuadrada No. 3.
C. Lleve el cable hacia la base de la abrazadera de cable. Mantenga
el cable tenso sobre la abrazadera y atornille totalmente los dos tornillos
centrales de la abrazadera para jar el cable en su lugar. Inserte
completamente los tornillos cuadrados No. 12 de 3 1/4 pulgadas.
Nota: Asegúrese de que los cuatro tornillos estén ajustados hasta
su máxima torsión. Puede ejercerse presión adicional ajustando
las tuercas en el extremo opuesto del cable, en la base de la ventana.
TABLA
DEL CABECERO
TABLA
DE ASIENTO
1"
A
B
MONTAJE DE REFUERZO CRUZADO. SUJECION DE
CABLES NO ACCESIBLE
3INSTALACION DE ABRAZADERA
DE CABLES
Nota: Los cables de soporte se instalan en combinaciones
de salientes y arcos armados en fábrica.
Nota: Instale la abrazadera del cable y el cable antes de instalar la
ventana de mirador.
A. Instale refuerzos cruzados de 2 x 6 pulgadas (5,08 x 15,24 cm)
entre los extremos de las vigas del techo, directamente sobre de los
oricios de los cables en la tabla del cabecero de la ventana
de mirador.
B. Quite el cable de la ventana de mirador.
Mida la distancia desde la base de la abrazadera
del cable hasta la base del cabecero, y además,
el espacio del cabecero de 3/8 de pulgada
(tamaño A). Mida la altura de la unidad
desde la parte superior de la tabla del cabecero
hasta la base de la tabla de asiento (tamaño B).
Agregue “A” a “B” a n de obtener el largo
correcto del cable que cuelga desde la base de
la abrazadera del cable. Inserte el cable por el
agujero redondo de la abrazadera del cable.
Asegúrese de que el largo correcto del cable
cuelgue debajo de la base de la abrazadera del
cable. Ajuste los dos tornillos de la esquina
de la abrazadera del cable. Inserte un tornillo
en cada uno de los agujeros centrales, en la
abrazadera del cable, y ajuste hasta colocar la
abrazadera en su posición.

F. Aplique la cinta tapajuntas No. 2 del alféizar. Corte un trozo de
cinta tapajuntas que sea 12 pulgadas (30,5 cm) más largo que el
ancho de la abertura. Aplíquela en la base, superponiendo la cinta
No. 1, como mínimo, a 1 pulgada. No permita que la cinta supere
el interior del marco (1F).
Nota: La cinta tapajuntas no necesita
llegar hasta el interior del marco.
G. Instale y nivele los espaciadores del
alféizar. Coloque los espaciadores de
1 pulgada de ancho por 3/8 de pulgada
de espesor sobre la base de la abertura
a 1/2 pulgada de cada lado. Agregue las
calzas para asegurarse de que los espaciadores
estén a nivel. Una vez que estén a nivel, je
los espaciadores y las calzas en la abertura,
a n de evitar que se muevan.
1"
1F
PARA REALIZAR LOS SIGUIENTES PASOS, SERA NECESARIA LA PARTICIPACION
DE DOS O MAS PERSONAS.
Nota: En algunas instalaciones, las abrazaderas de cables
no serán accesibles para la sujeción y el ajuste de los cables
una vez que la ventana haya sido instalada. Para este tipo
de instalaciones, remítase a Montaje de refuerzo cruzado,
sujeción de cables no accesible. Deberá medir e instalar
el cable y la abrazadera antes de instalar la ventana.
A. Inserte la ventana desde el exterior del edificio. Coloque
el asiento de la ventana en la base de la abertura y luego deslice
el borde superior para colocarlo en su lugar. Centre la ventana entre
los lados de la abertura a n de que quede espacio para las calzas.
B. Coloque un refuerzo temporal debajo del asiento de la
ventana y levante la unidad hasta alcanzar el nivel que se
muestra (2B).
C. Nivele la ventana a plomo y a escuadra. Coloque
calzas
a 1 pulgada (2,54 cm) de la base y del extremo superior
de la ventana, entre la ventana y los lados de la abertura.
Ajuste las calzas según sea necesario para nivelar y escuadrar
la ventana dentro de la abertura. Coloque calzas en el punto
medio de los lados de la ventana.
D. Coloque un clavo de acabado 10d o inserte un tornillo
largo No. 8 de 2 1/2 pulgadas (12,7 mm) en cada extremo
de la tabla de asiento para ajustarla a la abertura.
E. Coloque calzas/espaciadores entre la tabla de asiento y la
abertura a no más de 16 pulgadas (40,64 cm) en el centro.
Asegúrese de que la tabla de asiento esté nivelada.
F. Coloque un clavo de acabado 10d o inserte un tornillo
largo No. 8 de 2 1/2 pulgadas (12,7 mm) en cada extremo,
a través de la tabla del cabecero, para ajustarla a la abertura.
G. Coloque calzas entre la tabla del cabecero y la abertura,
a no más de 16 pulgadas (40,64 cm) del centro. Asegúrese
de que la tabla del cabecero esté nivelada.
2B
Interior
2C
Interior
2F
2D
1G
2COLOCACION DE LA VENTANA

ARTICULOS QUE USTED NECESITARA COMPRAR: HERRAMIENTAS NECESARIAS:
• Calzas/espaciadores de madera de cedro o impermeables
(12 a 20 unidades)
• 10 clavos de acabado galvanizado o tornillos de cabeza plana
resistentes a la corrosión No. 8 de 2 1/2 pulgadas (entre 4 y 6)
• Relleno de sellador/varilla de relleno de espuma compacta
(20 a 35 pies)
• Cinta tapajuntas de butilo con relleno metalizado para
aislamiento para puertas y ventanas de Pella®, o equivalente
• Sellador de silicona o poliuretano para exteriores de alta
calidad (1 tubo por ventana)
• Espuma aislante para puertas y ventanas Great Stuff™ fabricada
por Dow Chemical Company o espuma equivalente de baja presión
para puertas y ventanas. NO utilice espumas de alta presión o de látex
• Extensiones para jambas y/o molduras interiores (25 a 40 pies)
• Refuerzos en ángulo (2)
• Cinta métrica
• Nivel
• Escuadra
• Martillo
• Grapadora
• Tijeras o cuchillo para
uso general
• Pistola para sellador
• Taladro con broca
Phillips No. 2 y una
broca cuadrada No. 3
• Llave de 3/16 de pulgada
(0,47cm) o sujetador
• Llave española de 1/2 pulgada
SEALANT
SEALANT
NO OLVIDE UTILIZAR UN EQUIPO DE PROTECCION PERSONAL ADECUADO.
A. Asegúrese de que la abertura esté aplomada y nivelada.
Nota: Es fundamental que el borde inferior esté nivelado.
B. Compruebe que la ventana encaje en la abertura. Mida los cuatro
lados de la abertura para asegurarse de que sean 3/4 de pulgada (19 mm)
más grandes que la ventana tanto en ancho como en largo. En aberturas
de mayor tamaño mida la anchura y la altura en varios lugares para
asegurarse de que el cabecero o los montantes no estén deformados.
Nota: Se requiere colocar bloques sujetadores de madera maciza
de 1 1/2 pulgadas (38 mm) o más alrededor del perímetro de la
abertura. Resuelva los problemas que haya con la abertura sin
terminar antes de proceder con la instalación
C. Corte la barrera resistente al agua. Doble las solapas laterales,
acóplelas a la abertura y engrápelas en la pared interior.
Interior
1A
1er corte
2do
corte
45o
típico
3er corte
Barrera resistente
a la intemperie 1C
D. Aplique la cinta tapajuntas del alféizar No. 1. Corte un trozo de cinta
tapajuntas que sea 12 pulgadas (30,5 cm) más largo que el ancho de la
abertura. Aplíquelo al borde inferior de la abertura tal como se muestra (1D),
de manera que sobresalga 1 pulgada (2,54 cm) hacia el exterior.
Nota: La cinta se corta 12 pulgadas (30,5 cm) más larga que el
ancho de la abertura para que se extienda 6 pulgadas (15,25 cm)
hacia arriba a cada lado de la abertura.
E. Recorte lengüetas en la cinta tapajuntas del alféizar y dóblelas.
Corte lengüetas de 1 pulgada (25,4 mm) de ancho en cada esquina
(1/2 pulgada [12,7 mm] a cada lado de la esquina) (1E). Doble la
cinta hacia afuera y presione rmemente para adherirla a la barrera
resistente al agua.
1E
1"
1/2"
1/2"
6"
1D
Interior
1B
1PREPARACION DE LA ABERTURA SIN TERMINAR

INSTRUCCIONES DE INSTALACION
PARA VENTANAS DE MIRADOR
CON TABLA DE ASIENTO
Nota: Estas instrucciones pueden utilizarse para todas las ventanas de mirador de Pella
con cabezal y tabla de asiento. Los cables de soporte se instalan en combinaciones de
salientes y arcos armados en fábrica.
Precaución: Los cables deben sujetarse a los miembros con capacidad de sostener 1300 libras.
Si los miembros no tienen la capacidad de sostener 1300 libras, debe utilizar barras de refuerzo
angulares además de los cables. Las unidades salientes no están diseñadas para sostener
ninguna estructura de techo. Consulte con un arquitecto, ingeniero o profesional de la
construcción si no conoce la capacidad de los miembros para sostener la unidad saliente.
Instrucciones de instalación para marcos de madera típicos.
Estas instrucciones han sido elaboradas y probadas con marcos de madera típicos en un sistema
de muro diseñado para controlar el agua. No las utilice con otros métodos de construcción
diferentes. Si necesita instrucciones de instalación adecuadas para otros métodos de construcción,
unidades múltiples o ventanas de mirador, puede obtenerlas de Pella Corporation o de un vendedor
local de productos Pella, o visitando http://www.pella.com. Los diseños, métodos y materiales
de construcción, así como las condiciones del emplazamiento exclusivas de su proyecto podrían
requerir un método de instalación diferente del descrito en estas instrucciones, además de detalles
adicionales. La determinación del método de instalación adecuado para su caso es responsabilidad
suya, de su arquitecto o de su constructor.
Abrazadera
de cables
Extensiones
de las jambas
Refuerzo cruzado
Extremo de la
viga de techo
Cubiertas
de la jamba
Cinta tapajuntas
Refuerzos en ángulo
Extensor del
marco inferior
Extensor del
marco del cabecero
Lea siempre la garantía limitada de Pella®antes de comprar o de instalar cualquier producto
Pella. Al instalar este producto, usted reconoce que esta garantía limitada es parte de las cláusulas de
la venta. El incumplimiento de alguna de las instrucciones de instalación y de mantenimiento puede
invalidar la garantía de su producto Pella. Para conocer todos los detalles de la garantía limitada de Pella,
visite http://warranty.pella.com.
Pieza No.: 80AT0102
C.
,
©2008 Pella Corporation
Table of contents
Other Pella Household Appliance manuals

Pella
Pella 812WO100 User manual

Pella
Pella 81CP0101 User manual

Pella
Pella 350 Series User manual

Pella
Pella 801U0102 User manual

Pella
Pella 80WW0101 Guide

Pella
Pella 81470102 User manual

Pella
Pella 802Q0102 User manual

Pella
Pella 812W0100 User manual

Pella
Pella 802X0104 User manual

Pella
Pella 801P0101 User manual