Note: Position shims to ensure they allow at least
1/2" from the exterior surface of the window to
allow for placement of backer rod and sealant.
4SETTING AND FASTENING THE WINDOW
AWNING/CASEMENT
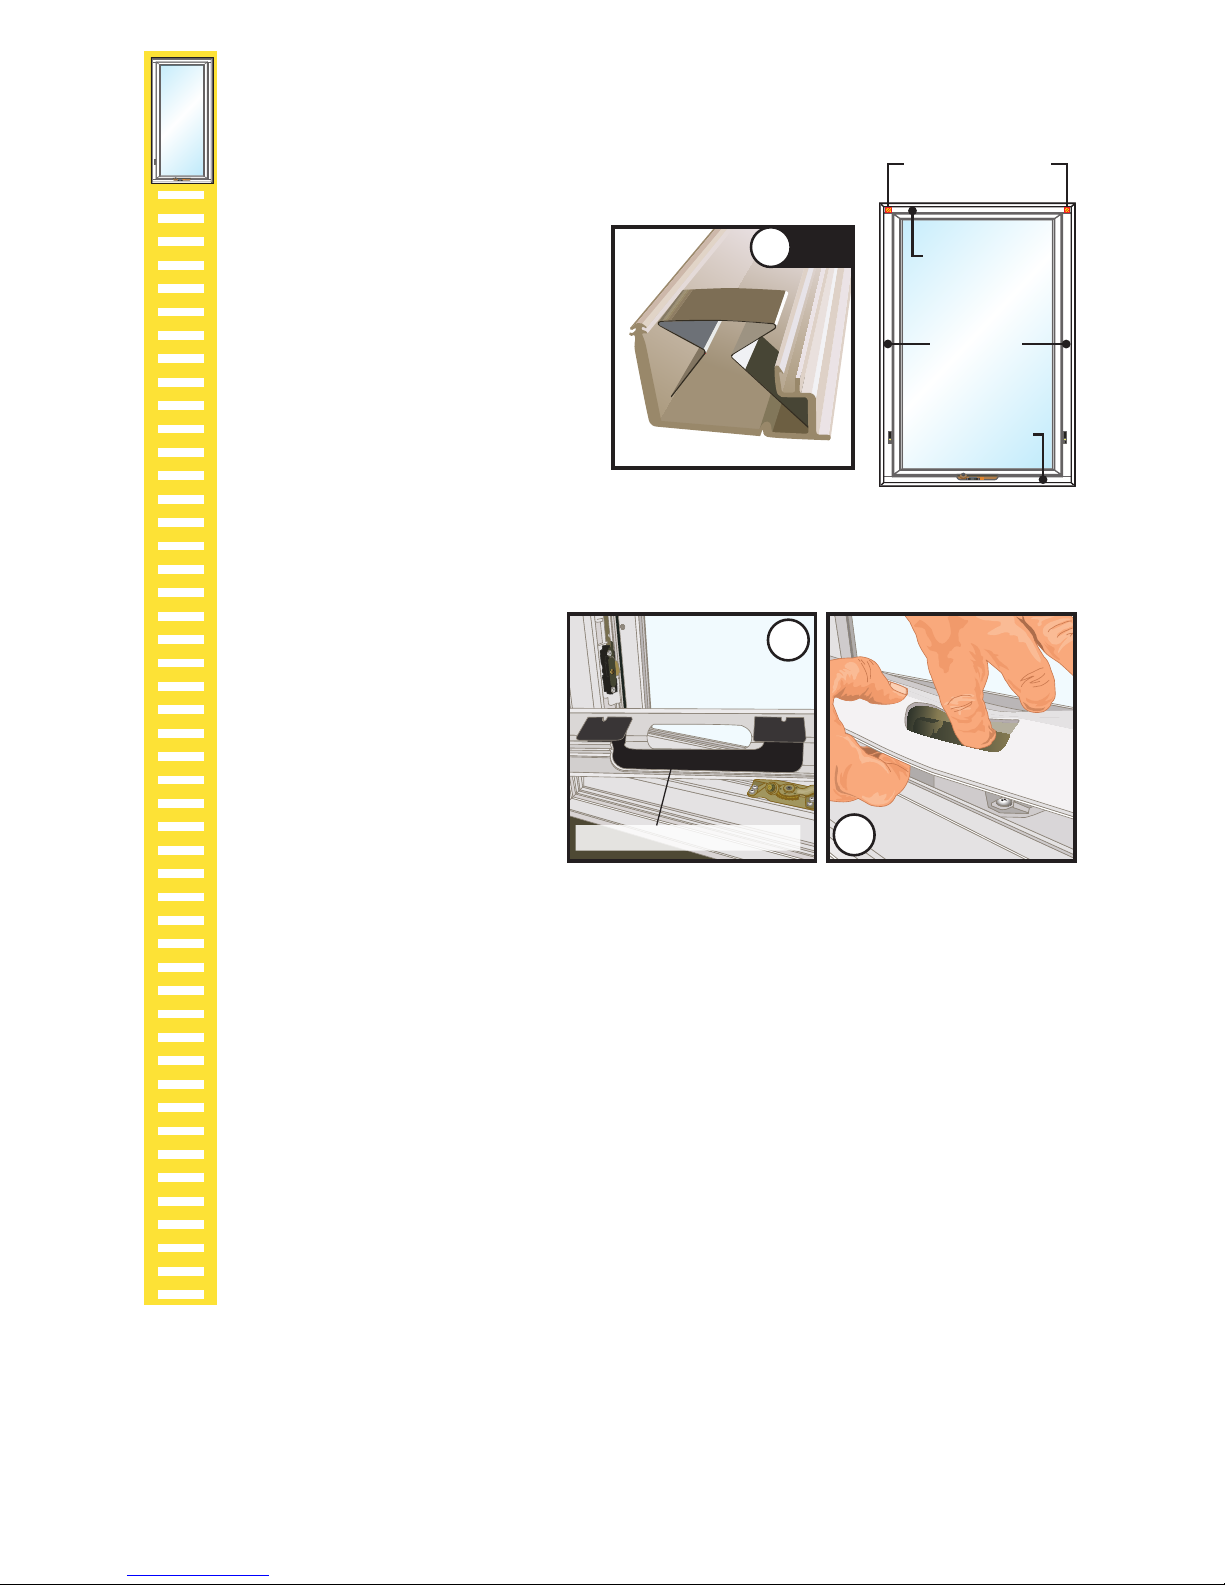
A. Insert the window and center it in the opening to allow
clearance for shimming.
Note: Use of a suction cup on the glass will assist in
handling the window.
Note: Each existing window frame and wall depth will vary
in different applications; therefore there is not a standard
measurement for the overhang of the window frame to
the exterior or for the distance from the interior face of
the window to interior trim. When performing Steps 4B
thru 4D, installing the frame screws, be sure to keep the
distance consistent all around the window.
Note: On the exterior, there must be
enough room for backer rod and 3/8"
sealant bead.
B. Insert shims between the window and
the opening at the top two anchor
hole locations in the window jambs.
Keepshimsback1/2"frominteriorfaceofwindow.
NOTE4A
AWNING/
CASEMENT
C. Fasten the window near the top of the opening by
driving2-1/2"longwoodscrewsthroughthetoptwo
holes at the jambs and into the opening sides.
D. Plumb and square the window.
Insert shims between the window
frame and the rough opening at the
anchor hole locations in the window
frame.Keepshimsback1/2"from
interior face of window.
Note: Install shims per Shim and
Fastener Guide. DO NOT over shim.
E. Check the interior reveal. Make sure
the measurement from the interior
face of the window to the interior face of
the window to the interior face of the wall is
equal at several points around the window.
F. If additional installation holes are needed;
drilla3/16"installationholethroughboth
the interior and exterior walls of the frame.
Interior
Shim
2-1/2" Screw
4B
4C
4D
1
2 0 3 0 4 0 5 0 6 0 7 0
2 3
INCHES
mm
4E
G. Fasten the window in the opening by driving
the 2-1/2" long screws through each pre-
drilled hole in the window frame, through the
shims and into the rough opening.
Note: Drive screws per the Awning/Casement Shim and Fastener Guide.
H. Insert the construction handle into the lock lever location and unlock the window.
Removethehandle.Placetheconstructioncrankhandleovertherotooperator
stud. Open and close each sash to verify the smooth operation and alignment
ofsashlockswithsashstrikes.Checkandadjustshimsasneeded.Removethe
construction handle.
3/16"
3/16"
4F
EXTERIOR