Pentair Pool Products Kreepy Krauly Kruiser User manual

IMPORTANT SAFETY INSTRUCTIONS
READ AND FOLLOW ALL INSTRUCTIONS
SAVE THESE INSTRUCTIONS
Installation
and
User's Guide
Inground Suction Pool Cleaner

© 2009 Pentair Water Pool and Spa, Inc. All rights reserved.
This document is subject to change without notice.
1620 Hawkins Ave., Sanford, NC 27330 • (919) 566-8000
10951 West Los Angeles Ave., Moorpark, CA 93021 • (805) 553-5000
293 Wright Street, Delavan, WI 53115 • (262) 728-5551
Trademarks and Disclaimers: Kreepy Krauly®, Kruiser™and Pentair Water Pool and Spa®are trademarks and/or registered trademarks of Pentair
Water Pool and Spa, Inc. and/or its affiliated companies in the United States and/or other counties.Teflon®is a registered trademark of E.I. Du Pont
De Nemours and Company Corporation. Unless noted, names and brands of others that may be used in this document are not used to indicate an
affiliation or endorsement between the proprietors of these names and brands and Pentair Water Pool and Spa, Inc.Those names and brands may
be the trademarks or registered trademarks of those parties or others.
P/N K60477 Rev. C 5/21/09
Customer Service
If you have questions about ordering Pentair replacement parts, and pool or spa products,
please use the following contact information:
Customer Service / Technical Support (8 A.M. to 4:30 P.M. — Eastern, Central and Pacific Times)
Phone: (800) 831-7133
Fax: (800) 284-4151
Web site
visit
www.pentairpool.com
or
www.staritepool.com
to find information about Pentair products
Protected by one or more of the following U.S. Patents and all corresponding foreign counterparts:
U.S. Patent Numbers 4,790,344, 5,077,853, 5,398,362, 5,706,540

i
Kreepy Krauly® Kruiser™Installation and User’s Guide
Contents
Important Safety Precautions ..............................................................................................ii
Disclaimer of Liability ........................................................................................................... iii
Pre-installation Check List................................................................................................... iii
Section 1: Introduction ..................................................................................................... 1
Kreepy Krauly®Kruiser™Overview ........................................................................ 1
Kreepy Krauly® Kruiser™Features ......................................................................... 2
Section 2: Pool Preparation .............................................................................................. 3
Section 3: Assembly ......................................................................................................... 4
Kreepy Krauly® Kruiser™Cleaner Components ....................................................... 4
Vacuum Seal Installation ......................................................................................... 5
Hose Assembly ....................................................................................................... 5
Attaching Hose Weights .......................................................................................... 5
Section 4: Installation ....................................................................................................... 6
Standard Installation ................................................................................................ 6
Pool with Two Skimmers .......................................................................................... 6
Optional Vacuum Line Installation ............................................................................7
Section 5: Adjustments..................................................................................................... 8
Adjusting the Flow Gauge ....................................................................................... 8
Return Line Adjustments .........................................................................................8
Section 6: Maintenance ..................................................................................................... 9
In-Line Leaf Canisters ............................................................................................. 10
Section 7: Troubleshooting .............................................................................................. 11
Section 8: Replacement Parts .......................................................................................... 12
Kreepy Krauly® Kruiser™Exploded View ................................................................ 12
Kreepy Krauly® Kruiser™Replacement Parts List .................................................. 12

ii
Kreepy Krauly® Kruiser™Installation and User’s Guide
IMPORTANT SAFETY PRECAUTIONS
Important Notice:
Attention Installer:
This guide contains important information about the installation, operation and safe use of
this product. This information should be given to the owner and/or operator of this equipment after installation of the
pool cleaner.
Attention User:
This manual contains important information that will help you in operating and maintaining this
pool cleaner. Please retain it for future reference. Consult Pentair Water Pool and Spa with any questions regarding
this equipment.
WARNING —
Before installing this product, read and follow all warning notices and instructions which are
included. Failure to follow safety warnings and instructions can result in severe injury, death,
or property damage. Call (800) 831-7133 for additional free copies of these instructions.
Consumer Information and Safety
The Kreepy Krauly®Kruiser™
pool cleaners are designed and manufactured to provide many years of safe and reliable
service when installed, operated and maintained according to the information in this manual. Throughout the manual,
safety warnings and cautions are identified by the “ “ symbol. Be sure to read and comply with all of the warnings
and cautions.
WARNING —Hazardous suction
can cause injury and/or drowning.
• Do not play with cleaner or hose or apply to body.
• To reduce the risk of injury, do not let children use or play with pool cleaner.
• Do not allow swimmers in the pool while pool cleaner is operating. Hose can trip or entangle
swimmers which could result in drowning.
• Always disconnect the power to the pump before servicing or attempting to clean the unit.
Failure to do so could result in injury and/or drowning.
WARNING —Suction Entrapment
can cause injury and/or drowning.
• If your pool has a dedicated suction port, (vacuum port), for vacuuming or for an automatic pool
cleaner, it must be covered when not in use. If your dedicated suction port does not have a
spring loaded cover, (vacuum lock), purchase one from your local pool store and install it before
attaching pool cleaner to dedicated suction port.
WARNING —
Stop pump before attempting to clean unit. Do not allow swimmers in pool while pool cleaner
is operating.
CAUTION —
The cleaner was not designed to do initial cleanup for a new pool installation.

iii
Kreepy Krauly® Kruiser™Installation and User’s Guide
DISCLAIMER OF LIABILITY
Important Notice About Your Pool and Kreepy Krauly® Kruiser™:
There are a multitude of factors that contribute to the life of your pool.The Kreepy Krauly®Kruiser™automatic
pool cleaner is a very passive product that will have no impact on pool life.
Please be aware that over time, deterioration, discoloration and brittleness of any pool finish can be caused
separately by, or in combination with, age, an imbalance in pool water chemistry, improper installation and
other factors. An automatic pool cleaner, such as Kreepy Krauly® Kruiser™, will not remove or cause wear on
“good” pool plaster. In fact, the opposite is true—pool plaster will eventually cause wear on the cleaner.
The same situation holds true for vinyl-lined inground swimming pools, because vinyl liners are also affected
by the environment and factors such as pool water chemistry, sunlight and the pool’s surroundings.
Therefore over time, vinyl can become brittle and weak. In addition, vinyl-lined pools are affected by the
workmanship, composition and installation of the liner and the workmanship and quality of construction of the
supporting walls and pool base.These are all factors which can contribute to liner failure.The existence of any
of these type of conditions in your pool is not caused by the use or operation of Kreepy Krauly® Kruiser™.
Pre-installation Check List
Before installing your cleaner, review and understand all warnings and safety information in this guide. Failure
to follow these instructions or improper installation of the cleaner can result in damage to the pool finish or the
vinyl liner, Pentair Water Pool and Spa, Inc. disclaims any liability for repairs or replacement to any of these
structures or components of the customer’s pool.
Before installing the cleaner in a vinyl liner pool:
Before installing the pool cleaner, examine the interior of your pool carefully. Check liner closely for signs of deterioration or damage
from age, chemicals, pool wall damage, etc. If any damage is found, have a qualified pool professional make all the necessary
repairs. Also, if your vinyl liner is brittle or has stones, wrinkles, roots or metal corrosion in contact with the underside of the liner,
or has damage to the base or supporting walls, do not install the pool cleaner before having a qualified professional perform the
necessary repairs.
Before installing the cleaner in a gunite pool or a pool that is partially or completely tiled:
Before installing the pool cleaner in a gunite pool or pool that is partially or completely tiled; check closely for loose tiles and loose
light fittings. Do not install the pool cleaner before having a qualified professional perform the necessary repairs.
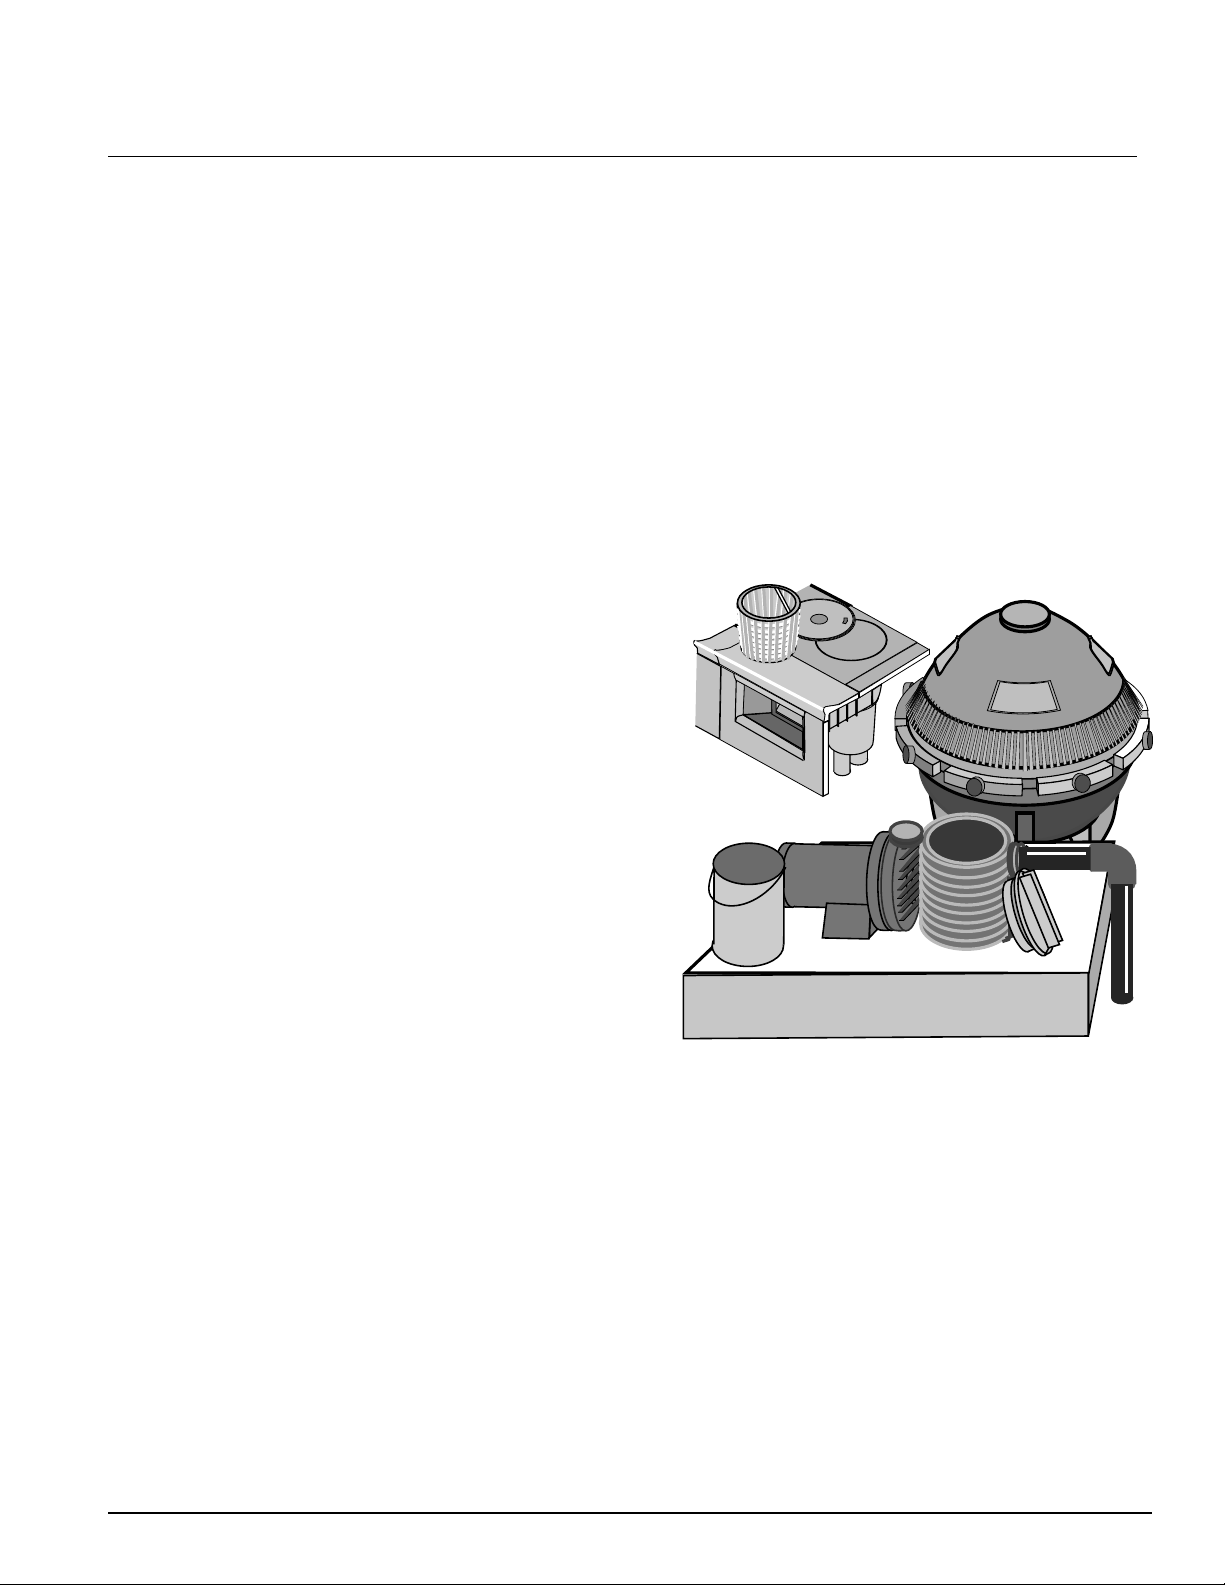
Before installing the cleaner, clean your filter system:
Make sure you have cleaned the filter, including backwashing, rinsing, and emptying all baskets. A clean system is necessary for
proper cleaner operation and coverage.
Before installing the cleaner, fill the hose with water:
Always make sure the cleaner head is submerged and the hose is full of water before connecting the hose to the filtration system
(whether through a skimmer or dedicated wall fitting). Air in the system can damage the pump through dry running and overheating.
Before installing the cleaner, understand cleaner coverage:
The cleaner is designed to rid your pool of debris in approximately 4-6 hours. Less time could be needed, depending on the pool
size. The cleaner was not designed to automatically clean steps or swimouts or to work under a solar cover. It was also not
designed to do initial cleanup for a new pool or when opening your pool for the season.
AFTER installing the cleaner, make sure the cleaner is operating correctly:
The cleaner may need some minor adjustments to make sure it is operating properly so there is no damage to the pool finish.
Certain vinyl liner patterns are particularly susceptible to surface wear, pattern removal, ink rubbing off of, or serious scratches to
the pattern caused by objects coming into contact with the vinyl surface, including automatic pool cleaners. Pentair Water Pool and
Spa, Inc. is not responsible for any pattern removal, abrasions or markings on vinyl liners.

iv
Kreepy Krauly® Kruiser™Installation and User’s Guide

1
Kreepy Krauly® Kruiser™Installation and User’s Guide
Kreepy Krauly® Kruiser™
Section 1
Introduction
The Kreepy Krauly® Kruiser™Overview
Put your pool cleaning on “Kruise” control
Kreepy Krauly® Kruiser™features many design elements shared by the most popular suction-side cleaner in
history, the Kreepy Krauly®.Then we added performance features to make Kreepy Krauly® Kruiser™relentless
in its pursuit of dirt and debris, while keeping it affordable and sensationally dependable.
Kreepy Krauly® Kruiser™features a new, patented silent flapper design. This sole operational moving part
creates the kinetic energy that powers Kreepy Krauly® Kruiser™around your pool. Elegantly simple and
highly reliable, this dependable design has been proven in more than 2 million pools worldwide.
Supremely simple and relentless in the pursuit of dirt and debris
Kreepy Krauly® Kruiser™is the ultimate in carefree operation. It comes fully assembled. Just add the seal
and connect the hoses. No tools required and you’re on Kruise control in minutes. It even comes with a free
flow gauge and adjustable speed control to ensure optimum performance.

2
Kreepy Krauly® Kruiser™Installation and User’s Guide
General Features
• Superior vacuum power and extra-wide mouth capture large and small debris with ease.
• Silent flapper design provides quiet cleaning performance.
• Patented seal design includes specially engineered scurved “fingers” to navigate over and around pool
obstacles for total coverage and uninterrupted performance.
• Built-in bumper assures free movement around steps and ladders for total cleaning coverage and
uninterrupted, hands-free operation.
• Connects to your skimmer or vacuum line fitting in minutes without tools.
Additional Features:
Also consider these other hands-free and reliability features:
• No bags or compartments to empty or replace…dirt and debris go right to your filtration
equipment…where they belong.
• No wheels or gears to jam or diaphragms to replace.
• No expensive booster pump to buy and operate…it uses your pool’s existing filtration system.
• Only one operational moving part…only 8 parts in total.
• All parts are UV stable and chemical resistant for years of dependable service.
• Sleek, compact design increases maneuverability for best cleaning performance.
Flapper—the only moving part in
Kreepy Krauly®Kruiser’s™
simple and dependable
propulsion system.

3
Kreepy Krauly® Kruiser™Installation and User’s Guide
Section 2
Pool Preparation
The following general information describes how to set-up your Kreepy Krauly® Kruiser™pool cleaner. Carefully
read the following so that you are fully aware of all the capabilities and features this cleaner has to offer.
NOTE: Before setting up this product, read and follow all warning notices and instructions starting
on page ii.
POOL PREPARATION
Before assembling and installing your Kreepy Krauly® Kruiser™pool cleaner, your pool should be clean and
algae-free so as not to inhibit the cleaner’s traction. If necessary, make the following preparations before
proceeding:
1. Hand vacuum your pool and ensure that all debris is removed.
2. Chemically balance and stabilize the pool water.
3. Clean your filter system.
4. Empty the Skimmer Basket.
5. Empty the Pump Strainer Basket.

4
Kreepy Krauly® Kruiser™Installation and User’s Guide
Section 3
Assembly
Remove Kreepy Krauly® Kruiser™and all of its parts from the box and check to make sure that all components
were included.
Your Kreepy Krauly® Kruiser™pool cleaner includes the following components:
1. Cleaner body – (1)
2. Vacuum Seal – (1)
3. Regulator Valve –
Adjustable
(1)
4. Regulator Cap – (1)
5. Flow Gauge – (1)
6. Threaded Compression Adapter – (1)
7. Hose Sections –
1m
(12)
8. Hose Weights – (2)
9. Eyeball Diverters – (2)
10. 45 Degree Elbow – (1)
11. Hose Protector Sleeve – (1)
12. Safety Vac-Lock Fitting – (1)
2. 3. 4. 5.
6. 7. 8. 9.
10. 11.
1.
12.

5
Kreepy Krauly® Kruiser™Installation and User’s Guide
VACUUM SEAL INSTALLATION
1. Pull the Vacuum Seal over the Cleaner’s
FootPadsothatitwillfitproperlyintothe
Foot Pad’s groove as shown in the
illustration.
2. Ensure that the curved tips face upwards.
3. Ensure with your hand that the Vacuum
Sealrotatesfreelyonceitisinit’sgroove.
Hose must equal longest stretch
—
—
plus one length
—
HOSE ASSEMBLY
The Kreepy Krauly® Kruiser™hosecomesin sections which
must be assembled. Connect together as many hose sections
as needed to reach from the vacuum source to the farthest
point of the pool, plus one section. Once assembled, attach
the female hose end onto the swivel of your Kreepy Krauly®
Kruiser™.
ATTACHING HOSE WEIGHTS
1. To improve cleaner’s pool coverage you may
needtoattachhoseweightstothehosetoneutralize
the hose’s buoyancy in the water. The number of
hoseweightsrequiredisdeterminedbythemaximum
depthofyourpool.Thedeeperyourpool,themore
weight is needed. The number of hose weights
appropriate for your pool is explained in Table 1.
2. Fine tuning: The water density in each pool may
vary due to mineral and salt content. To fine tune
the balance of your hose, try moving the 1st hose
weight closer towards the 2nd hose weight to
improve cleaner’s pool coverage.
No weights on
the hose cuffs
Hose Weights
NOTE: The hose length
illustrated is not representative
of actual size. You will need to
use more sections than shown.
Table 1.
htpeDlooPtnemecalPthgieW
,teef6nahteroM
teef9nahtsseltub
sehcni02ot21eno:thgiew1
.daehleviwsehtmorf
,teef9n
ahteroM
teef21nahtsseltub
,sehcni02ot21eno:sthgiew2
.daehleviwsehtmorfteef6eno
teef21nahteroM,sehcni02ot21
eno*:sthgiew3
teef01enodnateef6eno
.daehleviwsehtmorf
apSdnalooPretaWriatnePruoytcatnoC*
®
otdeenuoyfirelaed
.sthgiewesohlanoitiddaesahcrup

6
Kreepy Krauly® Kruiser™Installation and User’s Guide
No
Regulator
Cap
Skimmer
Regulator
Valve
To Pump
Threaded
Compression
Adapter
Section 4
Installation
STANDARD INSTALLATION
For pools with one skimmer, using the adjustable Regulator Valve.
The advantage of this installation is that the adjustable regulator valve balances the water flow between the
skimmer and Kreepy Krauly® Kruiser™. We strongly recommend the use of the adjustable regulator valve for
maximum safety and performance. The valve can be adjusted to changes in the amount of water flow to provide
Kreepy Krauly® Kruiser™with the power necessary to ensure proper cleaning performance.
1. Turn the pool pump off.
2. Closethemaindrain(bottomdrain)andall
suctionlines,exceptthelinefromtheskimmer
towhichtheKreepyKrauly® Kruiser™will
be connected, as shown below.
3. Remove skimmer basket.
4. Screw the threaded compression adapter
into the vacuum connection in the bottom
of the skimmer.
NOTE: Use two wraps of Teflon®tape
around threads to ensure easy removal.
(If the opening in the bottom of the skimmer is not threaded, use a
2” hose cone. It is not included with your Kreepy Krauly® Kruiser™,
but can be purchased from your Pentair Water Pool and Spa®
dealer.)
5. Press the adjustable regulator valve into the threaded compression
adapter.
6. Place the Kreepy Krauly® Kruiser™into the pool and allow it to sink to the floor. Continue to feed the hose
vertically down into the pool until it is completely filled with water and purged of air.
7. Slide the hose protector sleeve into position on the furthest hose from the cleaner that will be connected
to the regulator vlave in the skimmer to prevent the hose body from rubbing against the skimmer wall.
8. Insert the end of the hose through the skimmer opening and connect the hose directly into the adjustable
regulator valve.
NOTE: The Regulator Cap is not used in this installation.
POOL WITH TWO SKIMMERS CONNECTION
1. If your pool has two skimmers, select one skimmer for the cleaner and
close off the other skimmer with the pump valve.
2. Connect the end of submerged hose into the selected skimmer the same
way as shown above in the “Standard Installation” instructions.
Pump Valve

7
Kreepy Krauly® Kruiser™Installation and User’s Guide
Safety Vac-Lock
(provided) Regulator Cap
Safety Vac-Lock
Skimmer
Regulator
Valve
Cap
To Pump
Threaded
Compression
Adapter
OPTIONAL VACUUM LINE INSTALLATION
Vacuum Line Installation With Adjustable Regulator Valve in Skimmer.
We recommend the use of the adjustable regulator valve to balance water flow between Kreepy Krauly® Kruiser™
and the skimmer. When attaching Kreepy Krauly® Kruiser™to a dedicated vacuum line, the adjustable regulator
valve should be installed in the skimmer.
Important: Ensure that your Dedicated Suction Port
is fitted with a Safety Vac-Lock Fitting. If not, install
the one that is provided with your cleaner.
1. Turn the pool pump off.
2. Closethemaindrainandallsuctionlines,exceptthe
skimmer and the vacuum line to which the Kreepy
Krauly® Kruiser™will be connected.
3. Thread the vac-lock wall fitting into the end of the
dedicatedsuction line.
NOTE: Use two wraps of Teflon®tape around the
threads to ensure easy removal.
4. Place the Kreepy Krauly® Kruiser™(with the hose
and hose weights) into the pool and allow it to sink
to the floor. Continue to feed the hose vertically
down into the pool until it is completely filled with
water and purged of air.
5. Insert the hose end of the last hose section into the
vac-lockwallfitting.
6. Screw the threaded compression adapter into the
vacuum connection in the bottom of the skimmer.
NOTE: Use two wraps of Teflon®tape around the
threads to ensure easy removal.
(If the opening in the bottom of the skimmer is not
threaded, use a 2’’ hose cone, the 2” hose cone is
not provided but can be purchased from your Pentair
Water Pool and Spa®dealer.)
7. To prevent water from flowing through the top of
the adjustable regulator valve, fasten the regulator
cap onto the top of the adjustable regulator valve.
This activates the adjustable regulator valve and
assures that an accurate amount of water will flow
through the vacuum line and the Kreepy Krauly®
Kruiser™. Without the regulator valve cap, the
adjustable regulator valve and the cleaner will not
functionproperly.
8. Presstheadjustableregulatorvalveintothethreaded
compression adapter.
9. IfyourpooldoesnothaveaDedicatedSuctionPort;
goto“StandardInstallation”instructionsonpage6.

8
Kreepy Krauly® Kruiser™Installation and User’s Guide
BEFORE ADJUSTMENT
AFTER ADJUSTMENT
TOP VIEW SIDE VIEW
TOP VIEW SIDE VIEW
Flow Gauge
Adjustment
Knob
Section 5
Adjustments
After completing the installation, turn the pool pump on. Allow the pump to run for a couple of minutes to
ensure all air cycles out of the system. Kreepy Krauly® Kruiser™should be moving about the pool. Check
each of the following initial adjustments to the Kreepy Krauly® Kruiser™at this time.
ADJUSTING THE FLOW
1. Turn the pool pump off. Remove the Cleaner and connect the Flow Gauge
to the end of the hose, make sure you keep the hose submerged to prevent
any air to enter into it. Then turn the pump on.
2. With the pump running, turn the Adjustment Knob of the Regulator Valve
“Faster” or “Slower” until the disc indicator in the Flow Gauge settles
between “Maximum” and “Minimum” flow.
NOTE: If you have very strong pump and the flow is still over the
“Maximum” you may need to open the main drain only slightly.
3. Turn the pool pump off. Remove the Flow Gauge and connect the Cleaner
to the end of the hose, make sure you keep the hose submerged to prevent
anyairtoenterintoit. Allowthecleanertodroptothepoolfloor.Thenturn
the pump on.
NOTE: Optimizing the water flow does not mean maximizing the flow
through the Cleaner. In fact, to insure a random pattern of travel that
will enable the Cleaner to reach all areas of your pool, it is better to
use less suction, not more.
RETURN LINE ADJUSTMENTS
Important; the cleaner must move randomly throughout the pool. Water circulating at the surface
will influence the hose thus limiting the Cleaner’s coverage.
1. Adjust the Return Line Flow as
described in the diagrams.
2. To adjust the Eyeball Diverters;
loosen the lock ring and redirect
the Eyeball Diverters slightly
downwards and also try different
directions to see what works best
in your pool. Allow time for the
body of water to settle into the
new pattern.
3. If it is difficult to adjust your
existingEyeballDiverters,replace
the eyeball component with the
newEyeballDiverters(included).

9
Kreepy Krauly® Kruiser™Installation and User’s Guide
Section 6
Maintenance
Your Kreepy Krauly® Kruiser™cleaner requires very little maintenance.
Check the following from time to time.
1. ItisquickandeasytoopenuptheFlapper’schamber.Simply
turn off the pump, push the sliding lock up into the open
positionandremovethelid.Withyourfinger,liftandinspect
theFlapperandthe chambertoinsurethatit isnotobstructed
by debris, as shown.
2. AlsoinsurethattheFlapperismovingfreelyupanddownand
that it is securely clipped into place. Then place the lid back
and slide the lock down to close.
3. To remove a damaged or worn Flapper; (no tools are
required). Simply grab the Flapper, pull and wiggle outward
untilitun-clipsfromit’spin.ToinstallthenewFlapper,push
itinfirmly(TOPsideupasmarked)ontothepinuntilitsnaps
into place. If the Flapper is clipped in the wrong way (TOP
side down) you will not be able to close the lid.
4. Check the Vacuum Seal for wear. If it becomes thin and too
floppy, it will impair the correct random movement of the
Cleaner and should be replaced.
5. Inspect the Foot Pad for wear, when the traction pads on the
bottom have worn down, it is time to replace them.
6. Inspect the Regulator Valve and flush
away any debris build up.
7. Clean your filter system.
8. Empty the Skimmer Basket.
9. Empty the Pump Strainer Basket.
10. Use your Flow Gauge to insure correct water flow for your
Cleaner.
11. For best results and to maintain proper operation, use only
originalhoses.
Note: Remove the Cleaner from the pool before any chemical
shock treatment!!
12. When not in the pool, keep the Cleaner’s Vacuum Seal flat
to avoid warping.
13. YourCleanercanstayinthepoolatalltimes,however,when
usingthe pool, disconnectthe Cleanerand hose andpull itto
one side of the pool.
14. WhenstoringorwinterizingtheCleaner,donotcoilthehose.
Lay the hose flat in an area protected from direct sunlight. It
is also important to remove the Vacuum Seal from the
Cleaner and store it flat.
Flapper

10
Kreepy Krauly® Kruiser™Installation and User’s Guide
IN-LINE LEAF CANISTERS
If your pool is exposed to large quantities of leaves, we suggest purchasing and
installing an in-line leaf canister, (P/N R211084 or R211086). A leaf canister will
provide more debris-loading capacity and also provides a water by-pass when the
canister is full. It is very important that the pump will not starve for water!

11
Kreepy Krauly® Kruiser™Installation and User’s Guide
Section 7
Troubleshooting
Usethefollowing troubleshootinginformationtoresolvepossibleproblemswith yourKreepyKrauly® Kruiser™poolcleaner.
Problem Corrective Action
Cleaner is sluggish or has stopped operating. Check Cleaner for blockage inside the Flapper chamber.
Refer to Maintenance on page 9.
Clean your filter system, empty pump basket and empty skimmer
basket. Refer to page 4.
Inspect the Regulator Valve and flush away any debris buildup.
Check the hose for blockage.
Check the hose for leeks by lifting each section above water and
listen for the leak.
Using your Flow Gauge, verify proper water flow to your Cleaner.
Refer to page 8.
Cleaner gets stuck on the steps. Adjust the Eyeball Diverter of the return flow towards the problem
area to guide the Cleaner away from the steps.
Verify proper hose length and correct position of the Hose Weights.
Refer to page 6.
Purchase the optional 12” or 16” Deflector Wheel.
Using your Flow Gauge, Increase or decrease the flow to your
cleaner within the maximum/minimum range.
Cleaner travels in repetitive pattern. Adjust Eyeball Diverters as described on page 5.
Verify proper hose length and correct position of the Hose Weights.
Refer to page 6.
Place one Hose Weight 2” to 4” from the Cleaner head.
Check the Kreepy Kruiser’s hose to ensure it has not become bent
or kinked. It only takes one bent or kinked hose section to hinder the
cleaning coverage. One way to check for kinks in the hose is to lay
each section flat on your pool’s deck, (or other flat surface). The
hose should be perfectly straight and flat. Do Not coil the hose
when taking your cleaner out of the pool because it will retain
the coil shape, forming a bend or kink.
Cleaner does not transit onto the wall. Using your Flow Gauge, verify proper water flow to your Cleaner.
Refer to page 8.
Increase the water flow slightly.
Verify proper hose length and correct position of the Hose Weights.
Refer to page 6.
Cleaner stays in one side of the pool. Adjust Eyeball Diverters as described on page 5.
Verify proper hose length and correct position of the Hose Weights.
Refer to page 6.
Remove or add one hose section.

12
Kreepy Krauly® Kruiser™Installation and User’s Guide
1
2
3
3
5
4
6
7
8
15
14
13
12
11
10
9
16
Section 8
Replacement Parts
Kreepy Krauly® Kruiser™Model
SAVE THESE INSTRUCTIONS.
ITEM P/N’s DESCRIPTION
NO.
1 K12458 Kruiser Deflector Wheel
2 K12414 Kruiser Swivel Kit
3 K12417 Kruiser Bumper Kit (Horizontal & Vertical)
4 K12413 Kruiser 18" Vacuum Seal Kit
5 K12416 Kruiser Foot Pad Kit
6 K12411 Kruiser Main Housing Assembly Kit
7 K12415 Kruiser Silent Flapper Kit
8 K12412 Kruiser Lid & Lock Kit
ITEM P/N’s DESCRIPTION
NO.
9 41201-0236 Eyeball Diverter
10 41200-0212 Flow Gauge
11 K12454 Hose Weight
12 K60465 Hose Protector
13 K12079 Threaded Compression Adapter
14 41200-0200 Regulator Valve (Adjustable)
15 41200-0211 Regulator Cap
16 K12500 Safety Vac-Lock Fitting
NOT SHOWN
K01210 Hose Kit (12 M/F Sections)
Table of contents
Other Pentair Pool Products Swimming Pool Cleaner manuals