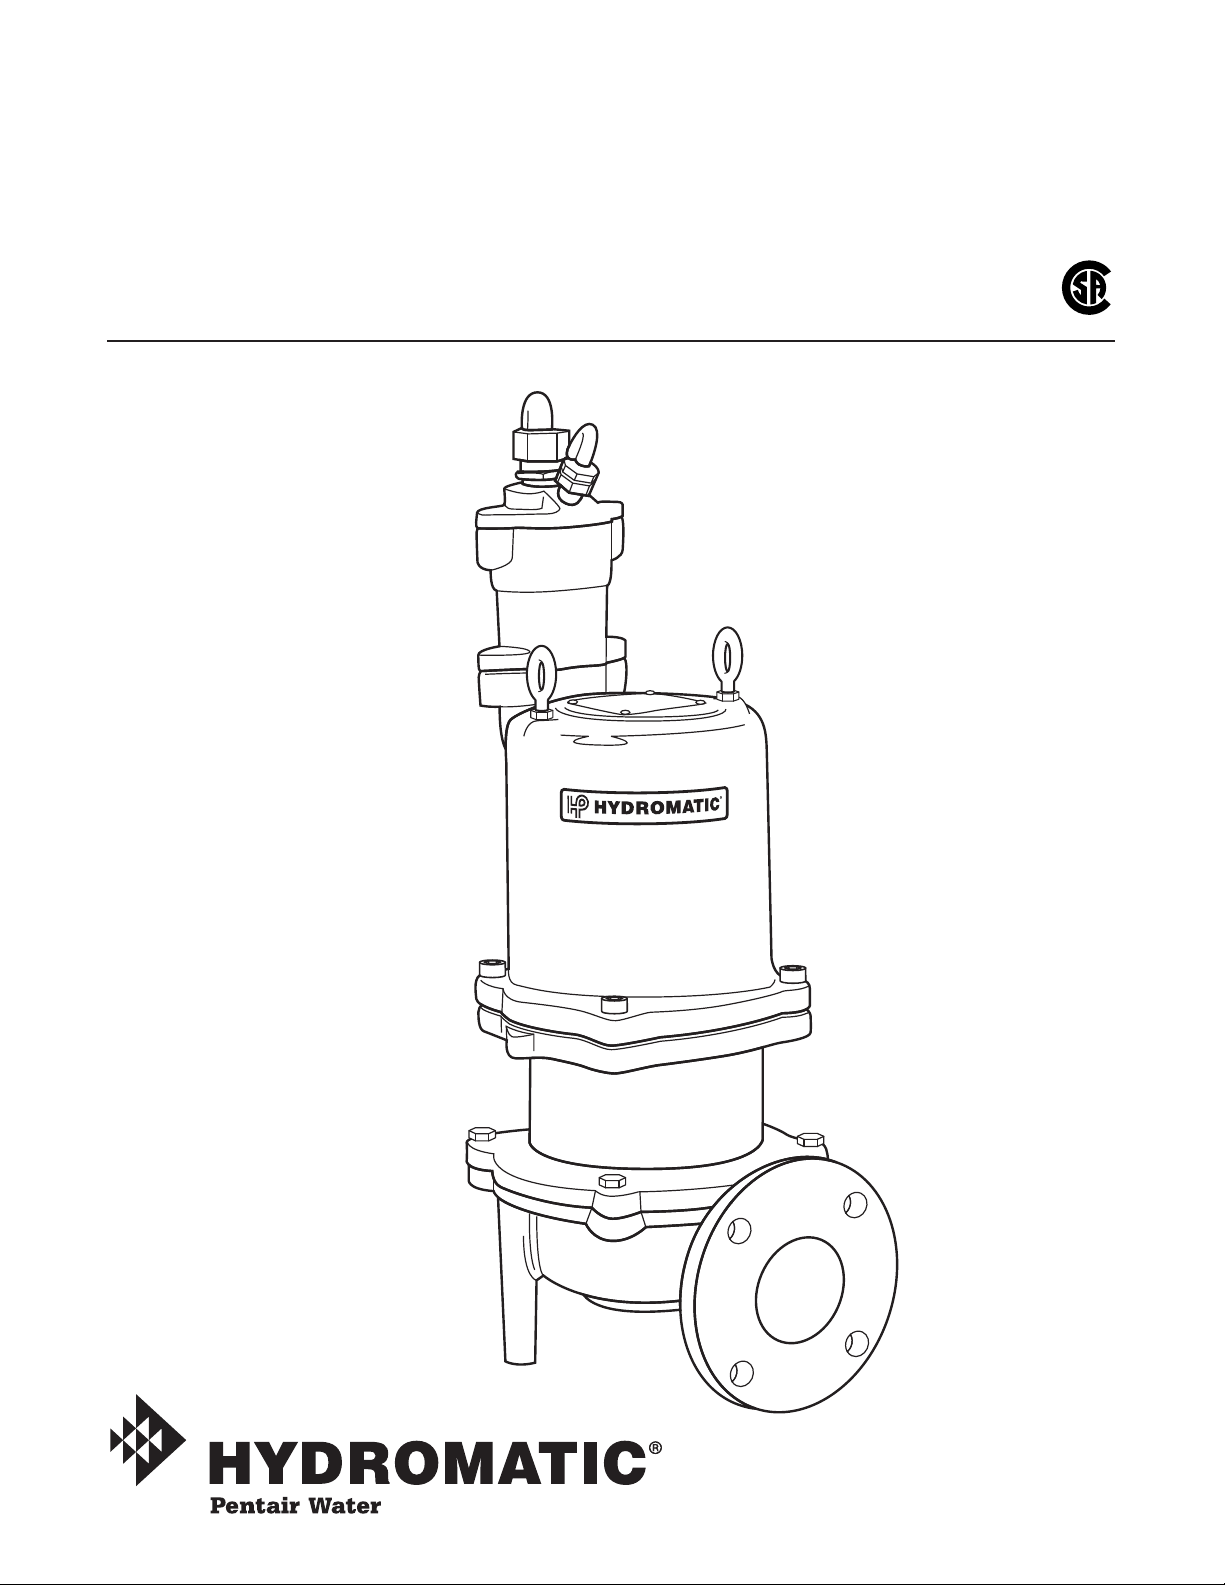
oil fill hole upright. Do not
completely fill; leave oil about
1" below plug hole. Use only
Hydromatic sub mers ible oil or
high grade trans form er oil in
this chamber. Re place plug;
use Permatex on threads.
Install air valve in plug
opening of motor housing and
charge housing with about 10
psi of air. Be sure air is dry. Do
not use air line where water
may be trapped in the line.
Submerge com plete unit under
water and check for leaks.
13.Refill motor chamber with
oil through con nec tion box
opening. Use high grade,
non-syn thet ic trans form er
oil or Hydromatic spe cial
sub mers ible oil. Fill hous ing
until oil covers the top of
wind ings. Leave air space in
top for expansion.
$& '/-. )0 , .)*
)!-..),
*&$(" &-( ,$("-
1. Drain all oil from motor
chamber and seal chamber
as described.
2. Remove motor housing as
de scribed in re plac ing stator.
3. Remove bolts that hold
bearing housing to volute. Lift
bearing housing and rotating
unit off and set assembly on its
side. Remove socket head
screw and washer at the
impeller end
of the shaft. Hold ing the
shaft stationary, un screw the
impeller from the shaft by
tapping the end of the
impeller blades.
4. To remove seal plate take out
sock et head screws and using
screws in back-off holes pry
plate loose. This will also
force seal off if not already
removed. 7
6. Check pump for proper
rotation before re turn ing to
normal service.
*&$("..),
If motor winding is burned or
shorted, it can be rewound or
replaced with new factory wound
sta tor. Refer to sectional drawing
of pump and motor, and use the
following steps to remove and
replace stator.
1. If only the stator is damaged,
it may not be necessary to
com plete ly dismantle pump as
stator and housing can be lifted
from pump without dis turb ing
seals or bear ings.
2. Drain all oil from upper
housing. Remove drain plug in
bottom of bearing housing, and
re move con nec tion box to
allow air to enter.
3. When connection box is
lifted off, con nec tion wires to
motor will be exposed. These
wires are tagged with a metal
marker giving wire num ber.
Disconnect wires and remove
connection box.
4. After chamber is drained,
remove hold-down bolts on
motor housing and lift off. Use
care in lifting as the seal
failure connecting wire must
be disconnected before hous ing
is completely re moved. See
sectional drawing.
5. The stator is held in the housing
with a bolted-in retaining ring
and pre vent ed from rotating by
a roll pin.
6. Remove the retaining ring and
socket head cap screw.
7. After ring is removed, turn
hous ing upright and bump on
hard wood block. This should
jar the stator loose and allow it
to drop out.
8. Thoroughly clean housing
before replacing new stator.
Replace sta tor and make all
wire con nec tions to con nec tion
box before re plac ing housing
on pump. See motor lead
connection drawing. This is
important as leads must be
tucked behind the windings
by using hands up through
rotor core.
- )(&3 /..
)(( .$)(-)(.# 1$, -
) (). .* & - - )$& 1$&&
. ,$),. .# .* ( /-
'" .)-..),( ,$("-
9. Check top bearing. If the
bearing is clean and does
not turn rough, bearings can
be reused. If bear ings are
damaged with dirt or heat,
they must be replaced. See
ad di tion al instructions on
re plac ing seals and bearings.
10.Replace stator housing onto
seal chamber and bolt in place.
Be sure seal failure wires
are con nect ed before housing
is as sem bled.
Be sure O-ring seal has been
re placed. If O-ring is nicked or
cut, replace with new ring.
This ap plies to all O-rings used
in as sem bly.
11.After all leads are reconnected
in the con nec tion box, make a
high voltage ground test on
each wire. The only wire that
should show ground is the
green power lead and the
ground head in the aux il ia ry
control cable.
12.For safety, complete pump
should be air checked under
water for leaks.
If seals were okay, refill seal
cham ber with oil. Lay pump
on side for this oil filling with