manuals.online logo
Brands
  1. Home
  2. •
  3. Brands
  4. •
  5. Pentair
  6. •
  7. Controllers
  8. •
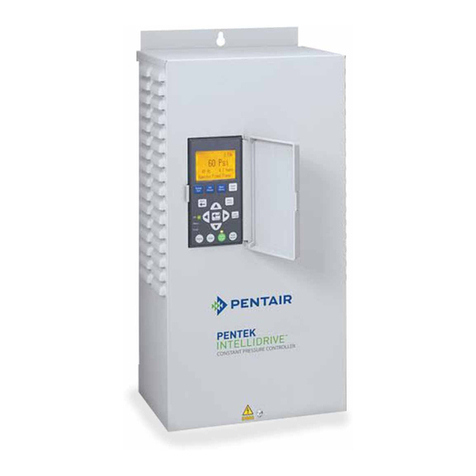
  9. Pentair Pentek Intellidrive User manual

Pentair Pentek Intellidrive User manual

Other manuals for Pentek Intellidrive

7

Other Pentair Controllers manuals

Pentair RAYCHEM RAYSTAT-ECO-10 User manual

Pentair

Pentair RAYCHEM RAYSTAT-ECO-10 User manual

Pentair AVID XA+ Manual

Pentair

Pentair AVID XA+ Manual

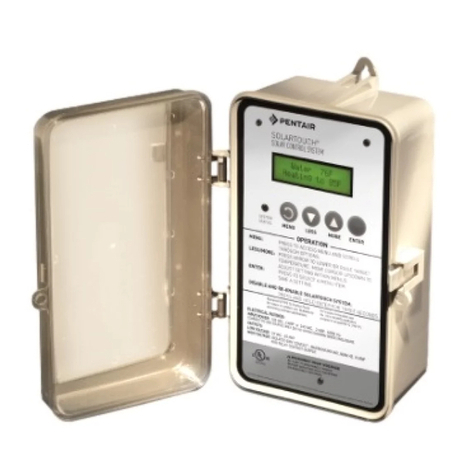
Pentair SOLARTOUCH 521592 User manual

Pentair

Pentair SOLARTOUCH 521592 User manual

Pentair INTELLICHEM Series User manual

Pentair

Pentair INTELLICHEM Series User manual

Pentair ACU-TROL AK600 User manual

Pentair

Pentair ACU-TROL AK600 User manual

Pentair intellichem User manual

Pentair

Pentair intellichem User manual

Pentair AUTOTROL LOGIX 740 User manual

Pentair

Pentair AUTOTROL LOGIX 740 User manual

Pentair FLECK 5800 XTR2 User manual

Pentair

Pentair FLECK 5800 XTR2 User manual

Pentair MYERS 19280C User manual

Pentair

Pentair MYERS 19280C User manual

Pentair SPEEDEO CONNECT User manual

Pentair

Pentair SPEEDEO CONNECT User manual

Pentair AUTOTROL Performa 263 User manual

Pentair

Pentair AUTOTROL Performa 263 User manual

Pentair Raychem ECW-GF User manual

Pentair

Pentair Raychem ECW-GF User manual

Pentair Pentek Solar Drive PSD30 User manual

Pentair

Pentair Pentek Solar Drive PSD30 User manual

Pentair GOYEN IS Series User manual

Pentair

Pentair GOYEN IS Series User manual

Pentair Fleck 5800 LXT User manual

Pentair

Pentair Fleck 5800 LXT User manual

Pentair COLOR SYNC User manual

Pentair

Pentair COLOR SYNC User manual

Pentair TRI-LARM Link2O User manual

Pentair

Pentair TRI-LARM Link2O User manual

Pentair FLECK 3200 NXT User manual

Pentair

Pentair FLECK 3200 NXT User manual

Pentair Biffi F02 User manual

Pentair

Pentair Biffi F02 User manual

Pentair AUTOTROL LOGIX 740 User manual

Pentair

Pentair AUTOTROL LOGIX 740 User manual

Pentair Intellichem 521498 User manual

Pentair

Pentair Intellichem 521498 User manual

Pentair 962 Series User manual

Pentair

Pentair 962 Series User manual

Pentair AQUATIC ECO-SYSTEMS SAFEGUARD UV SYSTEMS... User manual

Pentair

Pentair AQUATIC ECO-SYSTEMS SAFEGUARD UV SYSTEMS... User manual

Pentair COLOR SYNC User manual

Pentair

Pentair COLOR SYNC User manual

Popular Controllers manuals by other brands

Sunricher SR-ZV9003T3-RGBW-US Installation

Sunricher

Sunricher SR-ZV9003T3-RGBW-US Installation

Ksenia intro Installation and configuration manual

Ksenia

Ksenia intro Installation and configuration manual

Inovance CAN200 Series manual

Inovance

Inovance CAN200 Series manual

Gauzy LC6 FLEX Controller Installation and operation guide

Gauzy

Gauzy LC6 FLEX Controller Installation and operation guide

Viking SLP-1 Technical practice

Viking

Viking SLP-1 Technical practice

CKD KBX-30E-U Series instruction manual

CKD

CKD KBX-30E-U Series instruction manual

Sharp Energy Sun Flux User manual & installation guide

Sharp Energy

Sharp Energy Sun Flux User manual & installation guide

Yamaha RCX40 user manual

Yamaha

Yamaha RCX40 user manual

AB Quality PowerFlex 400 Frames D-H Service bulletin

AB Quality

AB Quality PowerFlex 400 Frames D-H Service bulletin

Yamaha MJC8 owner's manual

Yamaha

Yamaha MJC8 owner's manual

AL-KO ATC operating instructions

AL-KO

AL-KO ATC operating instructions

Savant SmartControl 2 Deployment guide

Savant

Savant SmartControl 2 Deployment guide

GameSir T3S user manual

GameSir

GameSir T3S user manual

Kostal inveor operating manual

Kostal

Kostal inveor operating manual

Emerson Yarway 20-55 Operating and safety instructions

Emerson

Emerson Yarway 20-55 Operating and safety instructions

CoCo ACM-LV24 Quick installation guide

CoCo

CoCo ACM-LV24 Quick installation guide

Brooks SLA5810/20 Installation and operation manual

Brooks

Brooks SLA5810/20 Installation and operation manual

SIGMA TEK SR 011 Technical manual

SIGMA TEK

SIGMA TEK SR 011 Technical manual

manuals.online logo
manuals.online logoBrands
  • About & Mission
  • Contact us
  • Privacy Policy
  • Terms and Conditions

Copyright 2025 Manuals.Online. All Rights Reserved.

OWNER’S MANUAL
Should you the installer or owner be unfamiliar with the correct installation or operation
of this type of equipment you should contact the distributor/manufacturer for the correct
advice before proceeding with the installation or operation of this product.
Installation / Operation / Parts
PID_OM_2014.indd 1 24/02/2014 1:49:52 PM
Safety 2
Important Safety Instructions
Read the Owner’s Manual and related documentation
carefully before attempting to install or operate the
PENTEK INTELLIDRIVETM
. Make sure that you have a full
knowledge of the equipment, safety information, and
instructions before using this product.
Carefully read and follow all safety instructions in this
manual and on the VFD.
This is the safety-alert. When you see this symbol
on your VFD or in this manual, look for one of the
following signal words and be alert to the potential for
personal injury:
warns about hazards that will cause
serious personal injury, death or major property damage if
ignored.
warns about hazards that cancause
serious personal injury, death or major property damage if
ignored.
warns about hazards that will or can
cause minor personal injury or property damage if ignored.
The word NOTE indicates special instructions which are
important but not related to hazards.
To avoid serious or fatal personal injury and possible
property damage, carefully read and follow the safety
instructions.
Risk of high-voltage electrical shock
from the EMI/RFI Filter if the front cover of the VFD is
open or removed while power is connected to the VFD or
the VFD is running. The front cover of the VFD must be
closed during operation.
• After allowing at least 5 minutes for the EMI/RFI Filter
to discharge and before starting any wiring or
inspection procedures, check for residual voltage with
a voltage tester.
Risk of electrical shock if VFD is
connected to the power wiring before hanging the box.
Always hang the VFD box before connecting the wires to it.
Risk of electrical shock if the VFD is
handled or serviced with wet or damp hands. Always
make sure your hands are dry before working on the VFD.
Perform all operations on the HMI with dry hands.
Risk of electrical shock and hand
injury. Do not reach into or change the cooling fan while
power is on to the VFD.
Risk of electrical shock. Do not touch
the printed circuit board when power is on to the VFD.
Fire hazard if installed with incorrect or
inadequate circuit breaker protection. To make sure of
protection in the event of an internal fault in the VFD,
install the VFD on an independent branch circuit protected
by a circuit breaker (see Table 2, Page 6 for circuit breaker
sizing), with no other appliances on the circuit.
Risk of burns.The drive can become
hot during normal operation. Allow it to cool for 10
minutes after shut-down before handling it to avoid burns.
Risk of electric shock.A means for
disconnection from the supply mains, having a contact
separation in all poles, must be incorporated in the fixed
wiring in accordance with the wiring rules.
Complex equipment. This device is not
intended for use by persons (including children) having
reduced physical, sensory or mental capabilities, or lack of
experience and knowledge.
NOTE: This VFD is classified as Class A EMC/EMI
equipment. It is intended for use in an industrial
environment. There may be potential difficulties ensuring
electromagnetic compatibility in other environments due
to conducted as well as radiated disturbances.
NOTE: The device must be supplied through a Type A
Residual Current Device (RCD) having a rated residual
operating current not exceeding 30 mA.
NOTE: To avoid damage to the drive or problems with the drive:
• Connect the output cables to 3-wire submersible
motors as described in Output Connections, page 7.
Any other order will reverse the motor rotation and
may damage the motor.
• Do not modify the equipment.
• Do not use power factor correction capacitors with this
VFD; they will damage both the motor and the VFD.
• Do not remove any parts unless instructed to do so in
the owner’s manual.
• Do not use a magnetic contactor on the VFD for
frequent starting/stopping of the VFD.
• Do not install or operate the VFD if it is damaged or
parts are missing.
• Before starting a VFD that has been stored for a long
time, always inspect it and test operation.
• Do not carry out a megger (insulation resistance) test
on the control circuit of the VFD.
Risk of high-voltage electrical shock
from EMI/RFI Filter inside Drive.
Make all wiring connections, then
close and fasten the cover before
turning on power to Drive.
DO NOT open the box when power is
connected to the Drive.
Before doing any service
or maintenance inside
the Drive:
1. DISCONNECT power.
2. WAIT 5 minutes for
retained voltage to
discharge.
3. Open box.
Before connecting or
disconnecting any wires
inside the Drive:
1. DISCONNECT power.
2. WAIT 5 minutes for
retained voltage to
discharge.
3. Open box.
PID_OM_2014.indd 2 24/02/2014 1:49:52 PM
Table of Contents 3
Owner’s Information
PENTEK INTELLIDRIVE Model No. _________________________
PENTEK INTELLIDRIVE Serial No. _________________________
Pump Model No. _________________________
Pump Serial No. _________________________
Motor Model No. _________________________
Motor Service Factor Amps _________________________
Pressure Tank Model No. _________________________
Pressure Tank Serial No. _________________________
Dealer/Installer: __________________________________________
________________________________________________________
Installer Phone No. _________________________
Date of Installation _________________________
Wire Lengths in (Meters):
Circuit Breaker to Drive _________________________
PENTEK INTELLIDRIVE to Motor _________________________
Supply Voltage _________________________
Note to Installer: Record the data listed above for future reference. Give manual
to end user or attach to
PENTEK INTELLIDRIVE
when installation is
complete.
Fan
EMI/RFI Filter
6020 0609
Risk of electric shock.
Can shock, burn or kill.
• Drive’s internal
components retain
high voltage for up to
5minutes after input
power is disconnected.
• EMI/RFI Filter carries
high voltage when pump
is running.
• Disconnect power and
wait 5 minutes before
opening
PENTEK
INTELLIDRIVE
 cover.
Safety ................................................................ 2
Owner’s Information .................................................. 3
Description. . . . . . . . . . . . . . . . . . . . . . . . . . . . . . . . . . . . . . . . . . . . . . . . . . . . . . . . . 4-5
Installation ......................................................... 6-9
Initial Startup ....................................................10-11
Programming ....................................................12-15
I/O Connections ..................................................16-17
Additional Information ...............................................18
Troubleshooting ..................................................19-21
EMC Installation ..................................................22-23
PID_OM_2014.indd 3 24/02/2014 1:49:52 PM
Description 4
Specifications/Ratings
Input Voltage .............1-Phase 230VAC Nominal (190–265VAC)
Input Frequency ........................................................... 50/60Hz
Ambient Temperate Range ................................. -20° to 50 °C
Output Connections ......................... 3-Phase, 3-wire, 220V,
.....................................................................3-Wire/1-Phase
..................................................................... 1-Phase/2-wire
Max Motor Cable Length...................................................305m
Enclosure .............................................................................. 3R
Table 1 - Specifications
Model Max
kW
Input
Phase
Motor
Operation
Max
Amps
PID20 1.5 12-wire, 3-wire &
3-phase 13.5
The PENTEK INTELLIDRIVE is specifically
designed to operate 4” submersible pumps and
3-phase, 220V above ground pumps in water well
and residential booster applications. Each Drive is
rated for maximum output amp rating. Any use of
Drive outside of intended design parameters will
void warranty. If Drive is used with above ground
motors not rated for a Variable Frequency Drive,
maximize motor life by limiting lead length to 8m.
Refer to pump Owners Manual and AS/NZS 3000
for proper wire size.
Each carton contains:
• PENTEK INTELLIDRIVE Variable Frequency Drive
• Pressure Transducer
• 3m Pressure Transducer Cable
• Quick Start Guide
• Owner’s Manual
Figure 1 - A typical residential installation layout
PID2000 - 1 1 2 3
Product Family
PID - PENTEK INTELLIDRIVE
Voltage Rating:
1 = 190-265 Volt 1 phase input
Output voltage:
1 = 230v 1 phase output
HP Rating: Motor
Type:
2 = 2.0 HP 3 = 3-wire
PID_OM_2014.indd 4 24/02/2014 1:49:53 PM
Description 5
Transducer
The PENTEK INTELLIDRIVE uses a 4-20mA, 0-668
kPa pressure transducer to control motor speed
(max is 2068 kPa transducer).
The transducer (see Figure 1) senses pressure
in the pipe and converts it to an electrical signal.
The Drive senses and processes the signal in the
PID (Proportional, Integration, Derivative) control.
When operating in AUTOSTART mode, the Drive
increases and decreases the speed of the pump
motor as needed to maintain constant pressure in
the piping system.
Keypad
The keypad programs the Drive, monitors the
status of the pump, and displays faults if they
occur. Each button has a unique function, as
described in Figure 2. The LCD display shows a
text display of the status of the Drive’s operation.
Other LEDs light up to indicate when certain
buttons are pressed or certain events occur.
Fan
The Drive uses a thermostatically controlled
internal fan which operates automatically when
necessary to cool the Drive components.
Figure 2 - PENTEK INTELLIDRIVE keypad functions
6007 0412
Stops the
motor.
Power is ON to Drive.
A fault has
occurred.
Selects menu items and confirms
numeric value changes.
Displays Drive’s current operating
condition and changes display
parameters.
Changes display to previous screen.
Drive is in Warning Mode (TPM); refer to
Troubleshooting section.
Changes internal pressure setpoint
from 103 kPa to transducer max
-20 kPa . ie 2047kPa
Runs the Drive at 45Hz (with no
pressure control) to allow installer to
pump out well.*
Up and down arrows scroll through
menus and change numeric values.
Toggles between English, Spanish, and
French (default is English).
Resets fault that stopped Drive/pump.
With code, locks and unlocks password
protected keys.
Left and right arrows move cursor.
Shows last 15 faults.
Checks for line fill, then starts pump
in constant pressure mode.
Views and changes
parameters.
PID_OM_2014.indd 5 24/02/2014 1:49:53 PM
Installation 6
Table 2 - Circuit breaker and wire sizes
Motor Drive
Model Volts Motor HP Wire Size* Circuit
Breaker**
Generator
(kVA)***
Input Output
2-wire PID20
230
1-1/2 2.5mm² 2.5mm² 25 (with RCD,
Ref page2
)5.3
3-wire PID20 1-1/2 2.5mm² 2.5mm² 25 (with RCD,
Ref page2
)
5.3
2 5.8
* Wiring size will change depending on the length of wire. See Table 3
** With properly-sized circuit breakers, the Drive is protected from short circuit on the input and the
output. There is no risk of fire or electrical shock due to a short circuit. The Drive has NEC Class 10
overload protection.
*** Minimum 240V generator size.
NOTICE Information in Table 3 applies ONLY to PENTEK® motors. For other motors, refer to motor
manufacturer specifications for wire sizing.
Table 3 - Wire Sizing, Drive to Pentek 3-Wire, 1-Phase Motor, 40°C Ambient, and 5 percent Voltage
Drop, 60C and 75C Insulation (copper only).
Motor P/N Motor Rating Maximum Cable Length in M
Volts HP SFA 1.5 mm² 2.5 mm² 4.0 mm² 6 mm² 10 mm² 16 mm²
G43A0010B2
230
1 6.4 64 117 188 280 305 -
G43A0015B2 1 1/2 9.4 43 80 128 190 305 -
G43A0020B2 2 12.4 33 60 95 140 240 305
PID_OM_2014.indd 6 24/02/2014 1:49:53 PM
Installation 7
Mounting the Drive
To mount the Drive as shown in Figure 6, follow
this procedure:
1. First, remove the cover by backing out screw
at bottom of front cover.
2. Push on backplate with thumbs while pulling
the cover toward you with index fingers,
creating a gap. See Figures 3 and 4.
3. Pull bottom of cover towards you; lift up on
cover and remove. See Figure 5.
4. With the cover removed, permanently
mount the Drive using the top slotted hole,
plus either the three bottom holes (for flat
surface mounting) or the center bottom hole
(for attaching to a post or stud). See Figure
6.
Gap
Figure 3 - Separate cover and backplate
Figure 4 - Gap between cover and backplate
Figure 5 - Pull out bottom of cover
5. Ensure the Drive’s ventilation holes are
not blocked and there is enough space
around it to allow free air flow (minimum
75mm clearance on top, bottom, and sides).
See Figure 6. Once the Drive is mounted,
electrical wiring can be connected.
6. To reattach the Drive cover, hook the top of it
on backplate (be sure to leave a gap). Lower
bottom of cover into place. Push cover evenly
against backplate, eliminating the gap. See
Figure 7.
7. Replace screw at bottom of front cover.
5997 0412
Figure 6 - Attaching Drive to wall
Typical
230VAC
Circuit
Breaker
(Double
Width)
Figure 7 - Re-attaching Drive cover
PID_OM_2014.indd 7 24/02/2014 1:49:56 PM
Installation 8
Terminal
Removable
(pull down)
01+ 01+ I1+ I1- I2+ I2- V+ V- AI+ AI- P N SD CARD
Transducer Cable
Connections
Submersible Motor: 3-Ph./ 3-W. 1-Ph., follow colors as above.
Submersible Motor: 1-Ph./ 2-W., connect toY and B, any order.
Above-Ground Motors: L1 to R, L2 to Y, L3 to B; verify rotation.
Output
Ground Screw
Input Power
Connections
Input
Ground Screws
Red
Yellow
Black
Green/Yellow (Ground)
Green/Yellow
(Ground)
6539 0412
Motor Connections
Red to AI+
Black to AI–
Green Cable Shield/Screw
Terminal
Removable
(pull down)
Figure 9 - Basic Wiring Connections for Startup
Wiring
To allow for ease of wiring, the enclosure
wiring area is free of electronics other than
the terminals. Conduit holes and knockouts
are located so that the wire can be fed straight
through to the connectors, with minimal bending.
The terminals accept 1.5mm²-16mm² wire.
For wire sizing refer to table 3, page 6.
NOTICE For convenience in wiring, the input and
motor terminals unplug from the box. Pull them
down to remove them for ease of access, as
shown in Figure 8.
Verify that the terminal connectors are completely
seated when you replace them. It is best practice
to connect all output wires (larger wire gauge)
first, then all input wires.
Pump Connections
If the PENTEK INTELLIDRIVE is used with above
ground motors not rated for Variable Frequency
Drive use, maximize motor life by limiting lead
length to 8.0m.
The output of the Drive is single phase (2-wire or
3-wire) or 3-phase, depending on motor selection
during startup.
The output power terminals (motor wire
connections) are located on the lower right side of
the Drive and are labeled R (Red), Y (Yellow), and
B (Black). See Tables 3.
Feed the motor cable through the 20mm conduit
hole on the bottom right side and into the
appropriate terminals. If the wire is large enough
to require a larger conduit hole, remove the
3.2cm knockout and use the appropriate conduit
connections. Attach the motor ground wire to the
grounding screw, located to the upper right of the
terminal block. Attach the motor power wires to
the terminals as shown in Figure 9.
NOTICE Drive does not sense motor temperature
and will not protect motor from over heating.
5999 0509
Figure 8 - Pull input and motor terminals down
to remove, making wiring easier.
PID_OM_2014.indd 8 24/02/2014 1:49:56 PM
Installation 9
Pressure Tank Recommendations
Minimum tank size is 8 litres. Use a pre-charged
pressure tank with Drive, as shown in Table6. The
tank size must equal at least 20 percent of the
pump’s rated flow in litres per minute (LPM), but
cannot be less than 8 litre capacity. For example,
a pump rated at 30LPM would require a tank of
8 litres capacity or larger. A pump rated at 200
LPM would require a 40 litre tank or larger. Tanks
larger than 40 litre can be used, but may require
adjustment of
Wake Delay
parameter.
Table 7 - Control Pressure Set Point and Tank
Pre-Charge Pressure Values (PSI).
Pressure
Point
Setting
(kPa)
Precharge
Pressure
(kPa)
Pressure
Point
Setting
(kPa)
Precharge
Pressure
(kPa)
170 120 440 310
205 145 480 340
240 170 510 360
270 190 545 380
310 220 580 410
350 245 610 430
375 265 650 455
414
(Default) 290 –
NOTICE Set pressure tank’s pre-charge to 70
percent of the system operating pressure. When
using an external set point as well as an internal
set point, pre-charge tank to 70 percent of the
lower setpoint of the two. Some applications may
require a different percentage when determining
the setpoint.
Transducer Connections
A 0-668 kPa 4-20 mA transducer is provided
with Drive. Install the transducer downstream
of tank, as shown in Figure 1. Install transducer
in a tee in a straight section of pipe with at least
30cm of straight pipe on each side of the tee
(i.e., all fittings must be at least 30cm away from
transducer).
Feed transducer cable through the open 13mm
conduit hole on bottom of the Drive enclosure.
As shown in Figure 9, connect the red wire of the
transducer cable to AI+, connect black wire to AI–,
and connect the green cable shield to the metal
cable shield screw.
To connect the transducer wires:
1. Strip wire 13mm
2. Push spring terminal up with finger or slotted
screwdriver
3. Insert wires from bottom
4. Release spring terminal
Input Power Connections
The input power terminals are located on the
lower left side and are marked L1 and L2 (see
Figure 9). There is a ground screw for the input
ground wire to the right of the connector (torque
to 1.5 Nm). Feed wire through the 20mm conduit
hole on the bottom left side and into appropriate
terminals. If wire is large enough to require a
larger conduit hole, remove the 3.2cm knockout
and use appropriate conduitconnections.
To determine the correct wire sizes for
installation, see Table 3.
NOTICE The PENTEK INTELLIDRIVE only accepts
230V single phase input power. If incoming power
does not match this, have a qualified electrician
alter supply voltage to 230V/1Ph before connecting
it to the Drive.
PID_OM_2014.indd 9 24/02/2014 1:49:56 PM
Initial Startup 10
Initial Startup and
Programming Procedures
Ensure that the cover is installed before operating
the
PENTEK INTELLIDRIVE.
Most installations will only require the initial
startup settings. However, the installer may need
to set additional parameters. Information about
accessing all parameters, explanations of their
functions, and procedures for changing parameter
values, will be found later in this section.
1. Program the Drive: Apply power to the
PENTEK INTELLIDRIVE.
Setup Guide
will appear
in the display. Follow keypress sequence shown
in Figure 10.
NOTICE If
Setup Guide
does not appear, refer to
Drive Reset Procedure,
Figure 20.
Service Factor Amps
To maximize pump performance, be sure to
enter the correct Service Factor Amps (SF
Amps) in the
PENTEK INTELLIDRIVE
.
• Entering SF Amps higher than the motor
rating lets the Drive supply more amps to the
motor than the motor is designed for and may
allow the motor to overheat (see Table 8).
• Entering SF Amps lower than the motor
rating limits the output amps to less than
the motor is designed for and will reduce the
performance of the pump.
• For any 1-Phase 3-Wire motor, the correct
Service Factor Amp rating for the Drive is Cap
Start/Cap Run amps (see Table 8). This may
not match the motor nameplate, which (for a
Single Phase, 3-Wire motor) will generally be
Cap Start/ Induction Run Amps.
• For any 3-Phase, 220V or 1 Phase, 2-Wire
motor, use the motor nameplate Service
Factor Amprating.
NOTICE
PENTEK®
submersible motors may
differ from motors of the same horsepower
from other manufacturers. For 1-Phase,
3-Wire motors from all other submersible
motor manufacturers, enter the motor
manufacturer’s CS/CR service factor amps
for your motor. For 3-Phase, 220V or 2-Wire
1-Phase motors, use the motor nameplate amp
value. Also see
Retro Fit Applications.
Figure 10 - Drive Setup Guide.
PID_OM_2014.indd 10 24/02/2014 1:49:56 PM