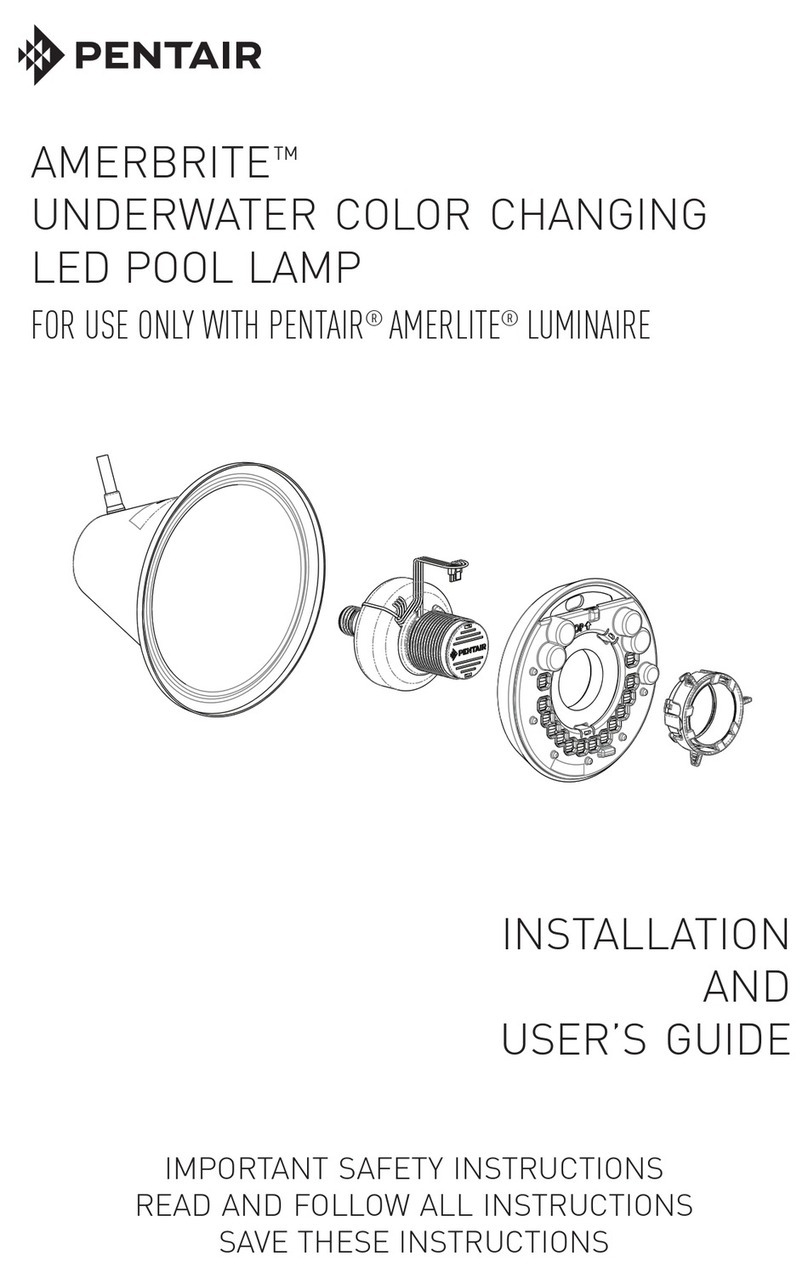
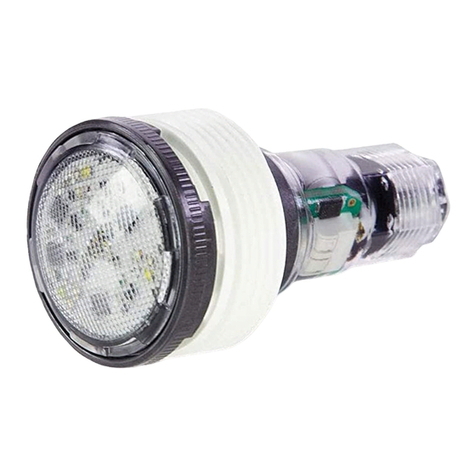
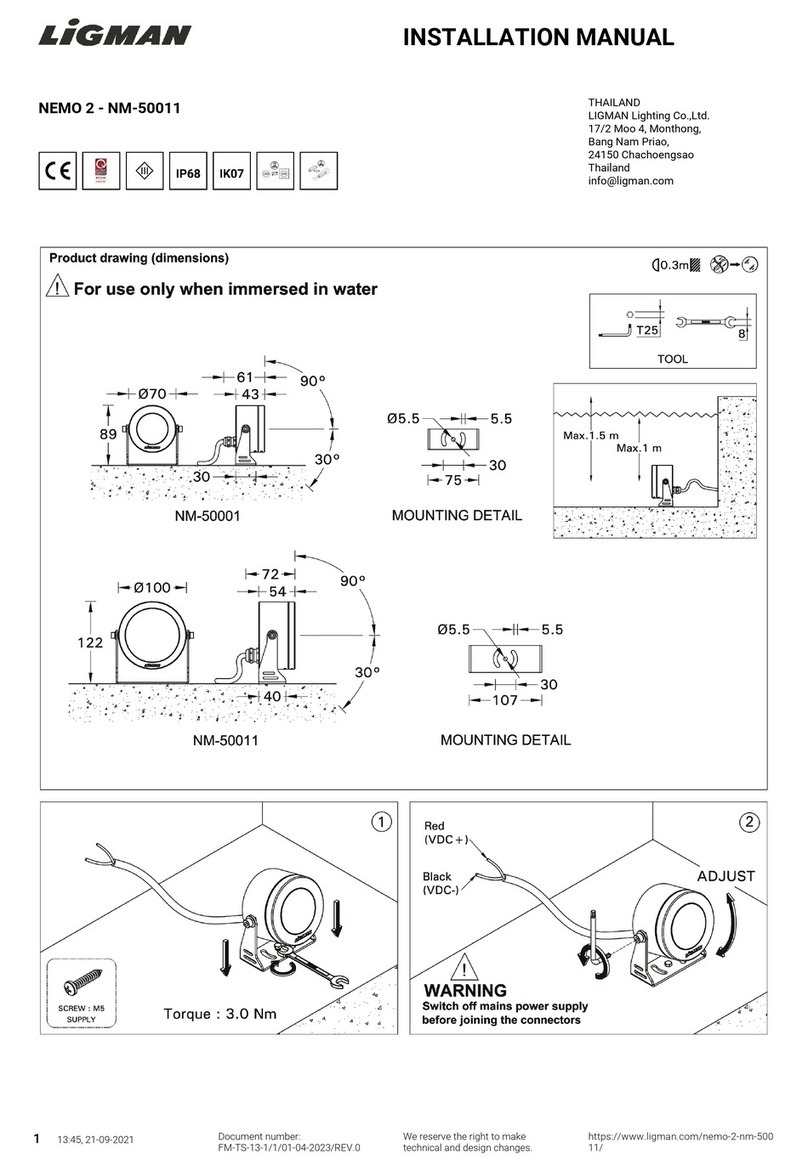
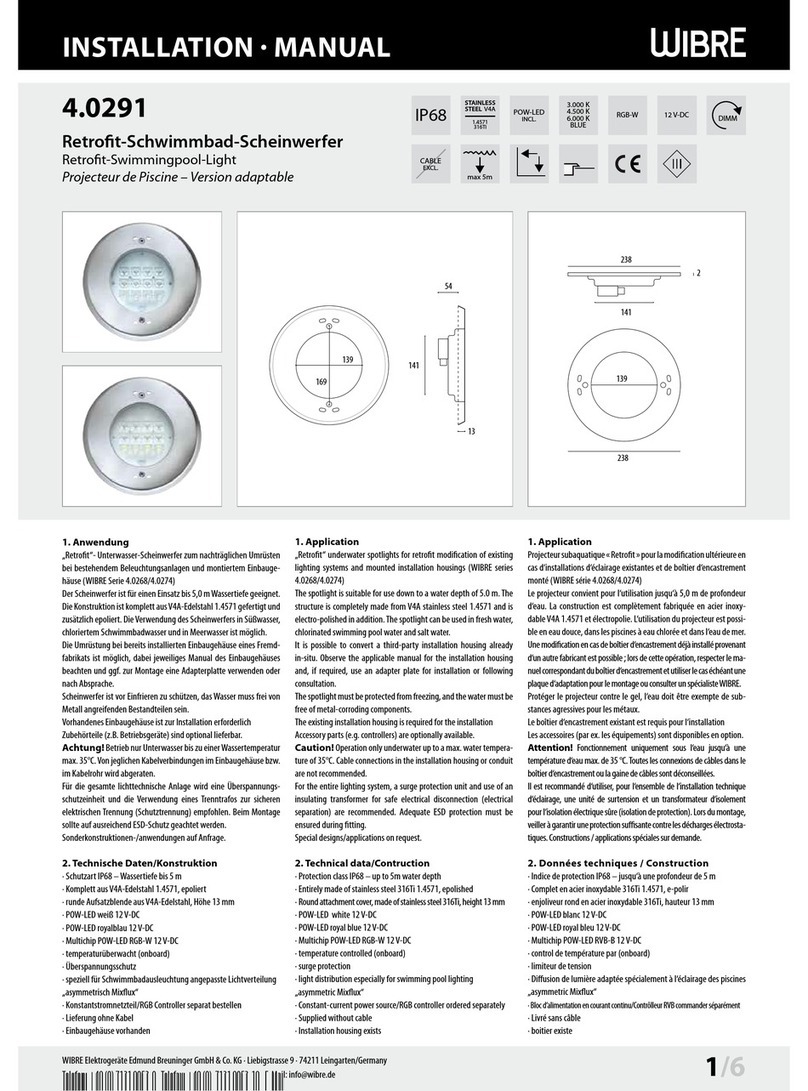
Pentair ARCHITECTURAL Series User manual

IMPORTANT SAFETY INSTRUCTIONS
READ AND FOLLOW ALL INSTRUCTIONS
SAVE THESE INSTRUCTIONS
INTELLIBRITE®
ARCHITECTURAL SERIES POOL/SPA LIGHT
INSTALLATION AND
USER’S GUIDE
ENGLISH FRANÇAIS
ESPAÑOL

INTELLIBRITE®Architectural Series Pool/Spa Light Installation and User’s Guide
i
TABLE OF CONTENTS
IMPORTANT SAFETY INSTRUCTIONS .......................................
INSTALLATION ............................................................................
Overview ...................................................................................
Operating Lights Using a Standard Wall Switch ........................
Using an External Transformer for Multiple
Lights (12V Lights Only) .........................................................
Electrical Installation Requirements (USA) ................................
Electrical Installation Requirements (Canada) ...........................
Junction Box Installation Requirements for Canadian Installs ...
Light Assembly Installation ........................................................
OPERATION .................................................................................
Manually Selecting a Light Show or Color .................................
MAINTENANCE ............................................................................
Replacing the Light Assembly ...................................................
Removing and Disassembling the Pool Light ............................
Replacing the Fuse Assembly (12V Pool Lights Only) ...............
Replacing the Pool Light LED Boards (Pool Lights Only) ..........
Reassembling the Pool Light .....................................................
Removing and Disassembling the Spa Light .............................
Reassembling the Spa Light ......................................................
REPLACEMENT PARTS ..............................................................
12V Pool Light Replacement Parts ............................................
120V Pool Light Replacement Parts ..........................................
12V Spa Light Replacement Parts ............................................
120V Spa Light Replacement Parts ...........................................
ii-iii
1
1
1
1
2
3
4
5-6
7
7
8
8-9
10-11
12
13
14
15-16
17
18
18
19
20
21
CUSTOMER SERVICE AND TECHNICAL SUPPORT
Hours: 8:00AM to 7:30PM EST (5:00AM - 4:30PM PST)
Call: (800) 831-7133
Fax: (800) 284-4151
Visit: www.pentair.com

INTELLIBRITE®Architectural Series Pool/Spa Light Installation and User’s Guide
ii
Before Installing luminaires read the following:
Always install a new Wire Clamp assembly and Lens Gasket
when reassembling the light assembly. Failure to do so may permit
water to leak into the assembly which could cause; (a) an electrical hazard resulting
in death or serious injury to pool/spa users, installer, or others due to electrical shock,
or (b) breakage of the lamp or lens, which likewise could result in serious injury to
pool/spa user, installers, or bystanders, or in damage to property.
THIS LIGHT CANNOT BE USED ON A DIMMER CIRCUIT. USING
A DIMMER SWITCH WILL RESULT IN PERMANENT DAMAGE TO
THE LIGHT.
Before installing this product, read and follow all warning notices
and instructions in this Guide. Failure to follow warnings and
instructions can result in severe injury, death, or property damage.
Call (800) 831-7133 for additional free copies of these instructions. Please refer to
www.pentair.com for more information related to this products.
IMPORTANT NOTICE - Attention Installer: This Installation and User’s
Guide (“Guide”) contains important information about the installation,
operation and safe use of this light. This Guide should be given to the owner
and/or operator of this equipment.
IMPORTANT SAFETY INSTRUCTIONS
RISK OF ELECTRICAL SHOCK OR ELECTROCUTION:
THIS LIGHT REQUIRES HIGH VOLTAGE WHICH CAN SHOCK,
BURN, OR CAUSE DEATH.
BEFORE SERVICING THE LIGHT ALWAYS DISCONNECT
POWER TO THE LIGHT AT THE CIRCUIT BREAKER. Failure
to do so could result in death or serious injury to service
person, pool/spa users or others due to electric shock.
This light must be installed by a licensed or certied electrician or a qualied pool
professional in accordance with the current National Electrical Code (NEC) or the
Canadian Electrical Code (CEC). All applicable local installation codes and ordinances
must also be adhered to. Improper installation will create an electrical hazard which
could result in death or serious injury to pool/spa users, installers or others due to
electrical shock, and may also cause damage to property. Always disconnect the power
to the light at the circuit breaker before servicing the light. Failure to do so could result
in death or serious injury to serviceman, pool/spa users or others due to electrical shock.
Most states and local codes regulate the construction, installation, and
operation of public pools and spas, and the construction of residential
pools and spas. It is important to comply with these codes, many of which directly
regulate the installation and use of this product. Consult your local building and health
codes for more information.
SERIOUS BODILY INJURY OR DEATH CAN RESULT IF THIS
LIGHT IS NOT INSTALLED AND USED CORRECTLY.
INSTALLERS, POOL/SPA OPERATORS AND POOL/
SPA OWNERS MUST READ THESE WARNINGS AND ALL
INSTRUCTIONS BEFORE USING THE LIGHT.
INTELLIBRITE®Architectural Series Pool/Spa Light Installation and User’s Guide
iii
IMPORTANT SAFETY INSTRUCTIONS
RISK OF ELECTRIC SHOCK AND INJURY. ONLY USE
INSTALLATION METHODS SPECIFIED IN THIS GUIDE.
The light xture must only be used with Pentair xture housings
(niches). If the light xture is installed into other niches, the
installation will not carry UL approval and will void all warranties.
Salt is an inherently corrosive material. While the levels of salt
required for proper operation of a salt chlorine generator are relatively
low when compared to sea water and other salt solutions, placing any amount of salt
in your pool increases the likelihood of corrosion or deterioration of pool equipment
and surfaces used in and around your pool. Metal parts and certain natural and man-
made surfaces are particularly susceptible when used in and around salt water pools.
Pentair does not represent or otherwise guarantee that the proper use of a salt chlorine
generator will prevent corrosion or deterioration of pool equipment and surfaces used
in and around your pool. Consult a pool professional, who should be able to advise
you on the proper material selection, installation techniques for those materials, and
the proper use, care and maintenance of those materials for your specic pool type
and location in order to minimize the corrosion and deterioration that is inherent in and
around salt water pools.
Follow these guidelines when installing, replacing or repairing Pentair
luminaires:
REPLACE ANY CRACKED PROTECTIVE SHIELD (CRACKED LENS) WITH NEW
LENS AND GASKET.
FOR LIGHT OPERATION, ONLY USE A SAFETY ISOLATION TRANSFORMER.
Luminaires not suitable for direct mounting on normally
ammable surfaces. Suitable ONLY for mounting on non-
combustible surfaces.
READ AND FOLLOW ALL INSTRUCTIONS
All Niche and Light installations must conform with all codes. If local
codes mandate a cord seal, use Pentair plastic niches (P/N 79206600
and P/N 79206700) and Cord Seal Kit (P/N 670044).
NEVER replace lights by splicing wire underwater or behind niche.
The external exible cable or cord of this luminaire cannot be
replaced. If the cord is damaged, the luminaire shall be destroyed.

INTELLIBRITE®Architectural Series Pool/Spa Light Installation and User’s Guide
1
Overview
This manual describes how to install, operate and maintain IntelliBrite®Architectural
Series Pool/Spa Lights.
White Light: White light for your pool/spa.
Color Light: Multiple colors and eects for your pool/spa. Choose from seven pre-
programmed color light shows or ve xed colors to create dramatic lighting eects.
Operating Lights Using a Standard Wall Switch
Lights can be manually controlled using a standard wall-mount light switch. Multiple
lights can be connected, through a junction box, to a single switch allowing all lights to
be switched on and o together.
IntelliBrite lights can also be automatically controlled via Pentair automation systems
and light controllers. Refer to the automation system or light controller manual for wiring
instructions.
Using an External Transformer for Multiple
Lights (12V Only)
When using multiple 12 VAC lights on a 300 Watt transformer, no more than three lights
should be used.
When operating multiple lights: Distance between the transformer and the lights
should not exceed 100 feet (30.5 m).
When operating a single light: Distance between the transformer and light should not
exceed 200 feet (61 m).
Note:For longer cable lengths, set the transformer to 14 VAC.
INSTALLATION
12 Gauge
(Minimum)
200 ft. (61 m) max.
300 Watt
Transformer Junction
Box
12 Gauge
(Minimum)
100 ft. (30.5 m)
300 Watt
Transformer Junction
Box

INTELLIBRITE®Architectural Series Pool/Spa Light Installation and User’s Guide
2
Ensure that the pool/spa electrical system meets the requirements of the current
National Electrical Code (NEC) and all applicable local codes and ordinances. A
licensed or certied electrician must install the electrical system to meet or exceed those requirements
before the light is installed. Some of the requirements of the National Electrical Code that must be met
are listed below.
Electrical Installation Requirements (US)
Connect three wires to the corresponding circuit wires in the Junction Box.
• Black to Power
• White to Common
• Green to Ground
FOR LIGHT OPERATION, ONLY USE A SAFETY ISOLATION TRANSFORMER.
USE ONLY PENTAIR NICHES TO INSURE PROPER BONDING AND
GROUNDING CONNECTIONS.
• 120V lights MUST BE connected to a Ground Fault Circuit Interrupter (GFCI),
with an appropriately rated circuit breaker. Refer to FIGURE 1 (US Installs) below.
• The low-voltage transformer, and/or junction box, shall be located at least 8-inches
(20.3 cm) above the maximum water level and at least four 4-inches (10.2 cm)
above the ground level or pool/spa deck, whichever provides the greater elevation.
Refer to FIGURE 4 (US Installs) on page 5.
• The junction box shall be no less than 4 feet (1.2 m) from the inside wall of the pool/
spa; unless separated from the pool/spa by a solid fence, wall or other permanent
barrier. Refer to FIGURE 4 (US Installs) on page 5.
• Bond the light xture to all other metallic items within 5 feet (1.5 m) of the pool/
spa, using a #8 AWG bond wire. The bonding lug is located at the rear of the niche.
Refer to FIGURE 4 (US Installs) on page 5.
• If non-metallic conduit is used, a #8 AWG bonding/grounding wire must be installed
through the conduit from the Junction Box to the bonding/grounding lug inside the
niche. Seal the bonding/grounding connection with a proper sealant to protect the
connection from potential corrosion. Refer to FIGURE 4 (US Installs) on page 5.
• The niche must be installed so that the top edge of the light lens, when installed, is
at least 18-inches (45.7 cm) below the maximum water level. Refer to FIGURE 4
(US Installs) on page 5.
FIGURE 1 (US Installs)
12V INTELLIBRITE LIGHTS
(NO GFCI REQUIRED)
120V INTELLIBRITE LIGHTS
(GFCI REQUIRED)
120V
LIGHT
SAFETY ISOLATING
TRANSFORMER
120 V to 12 V
STEP DOWN
TRANSFORMER
(100 W or 300 W)
12V
LIGHT

INTELLIBRITE®Architectural Series Pool/Spa Light Installation and User’s Guide
3
Electrical Installation Requirements (CANADA)
REFER TO THE NEXT PAGE FOR JUNCTION BOX REQUIREMENTS FOR
CANADIAN INSTALLS
• Lights MUST BE connected to a Ground Fault Circuit Interrupter (GFCI), with an
appropriately rated circuit breaker. Refer to FIGURE 2 (Canadian Installs) below.
• The GFCI breaker or transformer must be located at least 3 meters (10 feet) from
the edge of the pool/spa. Refer to FIGURE 5 (Canadian Installs) on page 5.
• Bond the light xture to all other metallic items within 3 meters (9.8 feet) of the pool/
spa, using a #6 AWG bond wire. The bonding lug is located at the rear of the niche.
Refer to FIGURE 5 (Canadian Installs) on page 5.
• If non-metallic conduit is used, a #6 AWG bonding/grounding wire must be installed
through the conduit from the Junction Box to the bonding/grounding lug inside the
niche. Seal the bonding/grounding connection with a proper sealant to protect the
connection from possible pool/spa water corrosion. Refer to FIGURE 5 (Canadian
Installs) on page 5.
• The niche must be installed so that the top edge of the light lens, when installed,
is at least 60 centimeters (23.6 inches) below the maximum water level. Refer to
FIGURE 5 (Canadian Installs) on page 5.
Ensure that the pool/spa electrical system meets the requirements of the
current Canadian Electrical Code (CEC) and all applicable local codes and
ordinances. A licensed or certied electrician must install the electrical system to meet or exceed those
requirements before the light is installed. Some of the requirements of the Canadian Electrical Code
that must be met are listed below.
Connect three wires to the corresponding circuit wires in the Junction Box.
• Black to Power
• White to Common
• Green to Ground
FOR LIGHT OPERATION, ONLY USE A SAFETY ISOLATION TRANSFORMER.
USE ONLY PENTAIR NICHES TO INSURE PROPER BONDING AND
GROUNDING CONNECTIONS.
FIGURE 2 (Canadian Installs)
12V
LIGHT
12V INTELLIBRITE LIGHTS
(GFCI REQUIRED)
SAFETY ISOLATING
TRANSFORMER
120 V to 12 V
STEP DOWN
TRANSFORMER
(100 W or 300 W)
120V INTELLIBRITE LIGHTS
(GFCI REQUIRED)
120V
LIGHT

INTELLIBRITE®Architectural Series Pool/Spa Light Installation and User’s Guide
4
Junction Box Installation Requirements for
Canadian Installs
Junction/Deck boxes must be installed:
(a) above the maximum water level of the pool/spa
(b) so that the top of the box is located at or above the level of the pool/spa deck
(c) in a manner and/or location where the box will not be an obstacle
(d) in such a manner that any water on the deck will drain away from the box
(e) sealed to the conduit to prevent water entering the box
Deck water drains
away from Junction/Deck Box
Approved Junction/Deck Box
Water level
below Junction/Deck Box
Approved Junction/Deck Box
elevated and protected
Diving Board or
other equipment
to protect
Junction/Deck Box
Top of Junction Box ush
with Deck
Junction Box elevated above
Deck and protected
FIGURE 3 (Canadian Installs)

INTELLIBRITE®Architectural Series Pool/Spa Light Installation and User’s Guide
5
Light Assembly Installation
1. Switch o main electrical switch or circuit breaker, and the switch which
operates the light.
2. Route light cable through conduit to Junction Box, leaving at least 4 feet (1.2 m)
of cord coiled inside of the niche. This allows the light to be serviced on the deck
while the pool/spa is lled with water.
3. Cut the cable at the Junction Box, leaving at least 6-inches (15.3 cm) of cord to
make connections.
4 in (10.2 cm) minimum
16 in
(40.6 cm)
Wrap 4 ft (1.2 m) of light
cable around fixture
#8 AWG Bonding Connector
(located on outside of niche)
11.5 in (29.2 cm) minimum
Concrete must be cut around
niche to allow for compacted
plaster seal.
18 in (42.7 cm)
minimum to top of lens
4 ft (1.2 m) minimum
GFCI Circuit
Breaker and
Power Source
Rigid
Conduit
8 in (20.3 cm)
Junction Box or Low Voltage
Transformer, to the max water level.
DETAIL
Tie offs to
rebar
Pilot Screw
at 12 o’clock
FIGURE 4 (US Installs)
40.6 cm
(16 in)
Wrap 1.2 m (4 ft) of light
cable around fixture
#6 AWG Bonding Connector
(located on outside of niche)
60 cm (23.6 in)
minimum to top of lens
3 m (9.8 ft) minimum
GFCI Circuit
Breaker and
Power Source
Rigid
Conduit
29.2 cm (11.5 in) minimum
Concrete must be cut around
niche to allow for compacted
plaster seal.
Junction Box must have a water tight bushing
Pilot Screw
at 12 o’clock
DETAIL
Tie offs to
rebar
FIGURE 5 (Canadian Installs)

INTELLIBRITE®Architectural Series Pool/Spa Light Installation and User’s Guide
6
Light Assembly Installation (cont.)
4. Carefully strip 6-inches (15.3 cm) of the outer cord jacket to expose the three
insulated conductors. Be careful not to damage the insulation on the three inner
conductors).
5. Carefully strip a 1/2-inch (1.3 cm) of insulation o the three conductors. Be careful
not to damage the copper conductor.
6. Connect all three conductors to the corresponding
circuit wires in the Junction Box
• Black to Power
• White to Common
• Green to Ground
7. Secure the Junction Box cover in place.
8. Insert the Face Ring Tab into the slot in the bottom of
the niche.
9. Tighten the pilot screw.
Only use the provided pilot screw.
This screw mounts and electrically
grounds the housing to the face ring and niche. Failure to
use the provided screw could create an electrical hazard
which could result in death or serious injury to pool/spa
users, installers or others due to electrical shock.
10. Fill the pool/spa until the light is completely
submerged in water before operating the light.
11. Check for proper light operation: To check for
proper operation, switch on the main switch or circuit
breaker, and the switch that operates the light itself.
The light should illuminate when power is applied.
Face Ring Tab
(hidden)
Pilot screw
Face Ring Tab
(hidden)
Pilot screw

INTELLIBRITE®Architectural Series Pool/Spa Light Installation and User’s Guide
7
Manually Selecting a Light Show or Color
Color light can be manually controlled via a standard light switch. When the color light
is switched on it will momentarily illuminate white and then transition to the previously
selected color.
To manually select a color show (1-7) or xed color (8-12), turn the switch o and on a
specic number of times.
Each number (1-12) shown below corresponds to the number of times the switch must be
turned o/on to activate a specic light show or xed color.
Example: To select California Sunset Mode; turn the light o/on six times. During this
process the light will not illuminate.
Saving a Color Show or Fixed Color
When power is switched o to color lights, the last color show or xed color will be
saved. The next time the light is powered on the saved color show or xed color will be
occur.
Example: While in “Party Mode” switch the light o. Wait more than 10 seconds
and switch the light back on to resume “Party Mode.”
During the off/on switching process, before the selected color is displayed, no
illumination will occur for a brief time. This is normal during the switching process.
During this period precautions should be taken to avoid unforeseen accidents. Failure to observe this warning
may result in serious injury or death.
Note: Pentair color lights can be controlled by Pentair Automation Systems and
Light Controllers. Contact your pool dealer for more information.
1 SAm Mode: Cycles through
white, magenta, blue and green.
2 Party Mode: Rapid color
changes, building energy and
excitement.
3 Romance Mode: Slow color
transitions creating a calming
eect.
4 Caribbean Mode: Cycles
between a variety of blues and
greens.
5American Mode: Cycles
through red, white and blue.
6California Sunset Mode:
Cycles through orange, red and
magenta.
7Royal Mode: Richer,
deeper color tones.
8Blue: Fixed color.
9 Green: Fixed color.
10 Red: Fixed color.
11 White: Fixed color.
12 Magenta: Fixed color.
13 Hold: Save the current light
show or xed color.
14 Recall: Activate the last
saved light show or xed
color.
Number of times to cycle power (1-5)
Number of times to cycle power (6-14)
OPERATION

INTELLIBRITE®Architectural Series Pool/Spa Light Installation and User’s Guide
8
MAINTENANCE
1. Remove the brass or stainless steel pilot screw from top of face ring.
2. Remove the light assembly from the niche and place it on the deck.
3. Cut the cord about 12-inches (30.5 cm) from the back of the light assembly.
4. Remove Junction Box cover, disconnect the light xture wires, and pull the cord
through the conduit.
Note: Before pulling the cord, tape the new cord to the existing cord. This
might make it easier to feed the new cord through the conduit.
5. Feed the new cord through the conduit from the niche to the Junction Box.
Note: Depending on the length of the conduit, special tools may be required to
pull the cord through the conduit.
6. Leave at least 4 feet (1.2 m) of cord coiled inside of the niche. This allows the light
to be serviced on the deck while the pool/spa is lled with water.
7. Cut the cord at the Junction Box, leaving at least 6-inches (1.3 cm) of cord to make
the necessary connections.
8. Carefully strip 6-inches (15.2 cm) of the outer jacket from the cord to expose the
three insulated conductors. Be careful not to damage the insulation on the three
inner conductors.
9. Carefully strip a 1/2-inch (1.3 cm) of insulation o the three conductors. Be careful
not to damage the copper conductor.
10. Connect the three light wires to the corresponding circuit wires in the Junction Box.
• Black to Power
• White to Common
• Green to Ground
Failure to bring the pool/spa electrical system up to code requirements before
installing the light will create an electrical hazard which could result in death
or serious injury to pool/spa users, installers, or others due to electrical shock, and may also cause
damage to property.
RISK OF ELECTRICAL SHOCK OR ELECTROCUTION!
This light must be installed by a licensed or certied electrician or a qualied
pool professional in accordance with the National Electrical Code (NEC) and
all applicable local codes and ordinances. Improper installation will create an
electrical hazard which could result in death or serious injury to pool/spa users,
installers or others due to electrical shock, and may also cause damage to
property.
Always disconnect power to the light at the circuit breaker before servicing. Failure to do so could
result in death or serious injury to service person, pool/spa users or others due to electrical shock.
Replacing the Light Assembly

INTELLIBRITE®Architectural Series Pool/Spa Light Installation and User’s Guide
9
Replacing the Light Assembly (cont.)
11. Remove the brass or stainless steel pilot screw from
the top of face ring.
Only use the provided pilot screw.
This screw mounts electrically ground
the housing to the face ring and niche. Failure to use
the provided screw could create an electrical hazard
which could result in death or serious injury to pool users,
installers or others due to electrical shock.
12. Remove the light assembly from the niche and place
it on the deck.
13. Cut the cord about 12-inches (30.5 cm) from the back
of the light assembly.
14. Remove Junction Box cover, disconnect the light
xture wires, and pull the cord through the conduit.
Face ring TAB
(hidden)
Pilot screw

INTELLIBRITE®Architectural Series Pool/Spa Light Installation and User’s Guide
10
Removing and Disassembling the Pool Light
The following removal and disassembly instructions only apply to IntelliBrite®
Architectural Series Pool Lights.
For instructions on removing and disassembling a spa light, refer to Removing
and Disassembling the Spa Light, page 15.
1. Disconnect all power to the light at the circuit
breaker and turn OFF the switch that operates the
light itself.
Note: DO NOT service the light while in the
pool.
2. Before disassembling the light ensure that you have a
new Gasket and Wire Clamp ready for reassembly.
3. Using a #2 Phillips screwdriver, loosen the Pilot
Screw found at the top of the Face Ring.
Note: DO NOT remove the Pilot Screw from the
Face Ring.
4. Remove the light assembly from the niche and place
the assembly on the pool deck.
Note: It is not necessary to drain the pool when removing the light.
5. Place a clean cloth on the ground.
6. Turn the light over and rest the Lens on the clean cloth.
- Continue to next page -
RISK OF ELECTRICAL SHOCK OR ELECTROCUTION
Always disconnect power to the light at the circuit breaker before servicing.
Failure to do so could result in death or serious injury to installer, service person,
pool/spa users, or others due to electrical shock.
Always install a new Gasket and Wire Clamp when reassembling the light.
Failure to replace these components may allow water to leak into the light
which could cause:
(a) an electrical hazard resulting in death or serious injury to pool/spa users, installers, or others
due to electrical shock, or
(b) damage to the lens, which likewise could result in serious injury to pool/spa users, installers,
or bystanders, or in damage to property.
Pilot screw

INTELLIBRITE®Architectural Series Pool/Spa Light Installation and User’s Guide
11
Removing and Disassembling the Pool Light (cont.)
7. Using a 7/16" open-end or adjustable wrench and a #2 Phillips screwdriver, loosen
the bolt tensioning the Wire Clamp.
Note: Carefully remove the Clamp
Hardware. The wire clamp will
release a small amount of tension
when the nut reaches the end of
bolt.
8. Discard the Wire Clamp and Wire Clamp
Hardware.
9. Lift the Light Housing away from the Lens
and Face Ring. Place the Light Housing
aside.
10. Lift the Lens away from the Face Ring
and set it aside.
11. Remove the orange Gasket from the
Lens.
12. Discard the Gasket.
Note: A NEW LENS GASKET AND
WIRE CLAMP MUST BE USED EACH
TIME THE LIGHT IS REASSEMBLED.
Refer to REPLACEMENT PARTS on
page 18 for part numbers.
13. If replacing the pool light Fuse Assembly,
continue to Replacing the Fuse Assembly
(12V Pool Lights Only), page 12.
If replacing the pool light LED Boards,
continue to Replacing the LED Boards
(Pool Lights Only), page 13.
If reassembling the light, continue to
Reassembling the Pool Light, page 14.
Wire Clamp
Hardware
Face
Ring
Lens
Gasket
Wire
Clamp
Pilot
Screw
Light
Housing

INTELLIBRITE®Architectural Series Pool/Spa Light Installation and User’s Guide
12
Replacing the Fuse Assembly (12V Pool Lights Only)
Only 12V pool lights contain a replaceable fuse assembly. Spa lights and 120V
pool lights do not contain a fuse assembly.
Refer to Pool Light Replacement Parts, page 18 for a list of replacement parts.
REPLACING THE FUSE
ASSEMBLY:
1. Carefully disconnect both
Fuse-Board Flag Connectors
from the light LED board.
2. Press down the release lever
on the Fuse-Harness Connector
and gently separate the fuse
assembly from the fuse harness.
3. Plug the new Fuse-Harness
Connector into the light's fuse
harness until they lock together.
4. Carefully connect both Fuse-
Board ag Connectors onto the
LED board terminals.
Note: DO NOT press down too hard on the ag connectors. This may damage
the board and/or board terminals.
5. Reassemble the light according to the instructions given in Reassembling the Pool
Light, page 14.
FUSEHARNESS
CONNECTOR
FUSE-BOARD
CONNECTORS (x2)
Fuse
Assembly

INTELLIBRITE®Architectural Series Pool/Spa Light Installation and User’s Guide
13
Replacing the LED Boards (Pool Lights Only)
Only pool lights contain replaceable LED boards. Spa light LED boards can NOT
be replaced.
Refer to Pool Light Replacement Parts, page 18 for a list of replacement parts.
When replacing the LED boards, always use the same type and wattage.
Operating the light with an incorrect LED board will damage the light and may
cause an electrical hazard resulting in death or serious injury to pool/spa users, installers, or others
due to electrical shock, and may also cause damage to property.
REMOVING OLD LED BOARDS:
1. Locate the two wires running from
the Light Housing to the middle
LED Board.
2. Carefully disconnect both ag
connectors from the middle LED
board.
3. Using a 5/16-inch socket or nut
driver, carefully remove the eight
Retaining Nuts securing the LED
Boards to the Light Housing.
4. Remove the plastic LED Refractor
from the middle LED Board.
5. Remove all three LED Boards from
the Light Housing.
6. Remove the Thermal Pad from the
Light Housing.
INSTALLING NEW LED BOARDS:
7. Place the new Thermal Pad over
the Board Mounts.
8. Ensure an LED Refractor is
installed on both new right and left
side LED Boards.
9. Place the larger middle LED Board
over the middle appropriate ve Board Mounts.
Note: Ensure the wires running from the Light Housing are not pinched under
the middle LED Board.
10. Place the middle LED Refractor onto the new middle LED Board.
11. Place both the right and left side LED Boards over the appropriate Board Mounts.
12. Using a 5/16-inch nut driver, reinstall the eight Retaining Nuts.
Note: Overtightening the Retaining Nuts may damage the LED refractors
and/or boards.
13. If necessary, carefully reconnect both
fuse assembly wires to the middle LED
Board.
14. To reassemble the light, refer to Reassembling the Pool Light on the next page.
Retaining
Nuts (x8)
Light
Housing
Thermal
Pad
LED
Boards (x3)
Board
Mounts
(x8)
LED
Refractors (x3)
Control Board
(Fuse Assembly - 12V
Pool Lights Only)

INTELLIBRITE®Architectural Series Pool/Spa Light Installation and User’s Guide
14
Reassembling the Pool Light
The following removal and disassembly instructions only apply to IntelliBrite®
Architectural Series Pool Lights. For instructions on removing and
disassembling a spa light, refer to Reassembling the Spa Light, page 17.
Always install a new Gasket and Wire Clamp when reassembling the light.
Failure to replace these components may allow water to leak into the light
which could cause:
(a) an electrical hazard resulting in death or serious injury to pool/spa users, installers, or others
due to electrical shock, or
(b) damage to the lens, which likewise could result in serious injury to pool/spa users, installers,
or bystanders, or in damage to property.
1. Ensure the black Lens O-ring is seated inside of the
orange Lens Gasket.
2. Stretch the Gasket around the outer edge of
the Lens, ensuring the side marked "TOP" is
positioned at the intended top side of the light.
Note: Ensure the Lens Gasket is installed
evenly around the Lens.
3. With the Light Housing resting on its base, place
the Lens/Gasket onto the light housing.
4. Place the Face Ring on top of the Lens/Gasket/
Housing.
5. Rotate the Face Ring until the Pilot Screw is
aligned with the notch in the inner edge of the
Light Housing. Refer to the image below.
6. With the hooked ends of the Wire Clamp facing
away from the Lens/Housing, place the clamp into
all six Face Ring Hooks on the back of the Face
Ring.
Note: Ensure the clamp is held by all six hooks.
This ensures a proper seal between the Gasket
and Face Ring.
7. Ensure both ends of the Wire Clamp are
positioned at a 45-degree angle to the pilot screw.
8. Place the Clamp Bolt through
both ends of the Wire Clamp.
9. Thread the washer and nut
onto the bolt.
10. Using a 7/16" open-end or
adjustable wrench and a #3
Phillips screwdriver, tighten
the clamp bolt and nut until the
ends of the clamp are within
3/16-inch (5 mm) of each other.
11. Refer to Light Assembly
Installation, page 5 for
instructions on reinstalling the light.
Wire Clamp
Hardware
Face
Ring
Lens
Gasket
Wire
Clamp
Pilot
Screw
Light
Housing
Face Ring
Hook (x6) Wire
Clamp
3/16" (5 mm)
or less gap
Pilot Screw
aligned with
notch in Light
Housing
45°

INTELLIBRITE®Architectural Series Pool/Spa Light Installation and User’s Guide
15
Removing and Disassembling the Spa Light
The following removal and disassembly instructions only apply to IntelliBrite®
Architectural Series Spa Lights.
For instructions on removing and disassembling a pool light, refer to Removing
and Disassembling the Pool Light, page 10.
1. Disconnect all power to the light at the circuit
breaker and turn OFF the switch that operates the
light itself.
Note: DO NOT service the light while in the
spa.
2. Before disassembling the light ensure that you have a
new Gasket and Wire Clamp ready for reassembly.
3. Using a #2 Phillips screwdriver, loosen the Pilot
Screw found at the top of the Face Ring.
Note: DO NOT remove the Pilot Screw from the
Face Ring.
4. Remove the light assembly from the niche and place
the assembly on the spa deck.
Note: It is not necessary to drain the spa when removing the light.
5. Place a clean cloth on the ground.
6. Turn the light over and rest the Lens on the clean cloth.
- Continue to next page -
RISK OF ELECTRICAL SHOCK OR ELECTROCUTION
Always disconnect power to the light at the circuit breaker before servicing.
Failure to do so could result in death or serious injury to installer, service person,
pool/spa users, or others due to electrical shock.
Always install a new Gasket and Wire Clamp when reassembling the light.
Failure to replace these components may allow water to leak into the light
which could cause:
(a) an electrical hazard resulting in death or serious injury to pool/spa users, installers, or others
due to electrical shock, or
(b) damage to the lens, which likewise could result in serious injury to pool/spa users, installers,
or bystanders, or in damage to property.
Pilot screw

INTELLIBRITE®Architectural Series Pool/Spa Light Installation and User’s Guide
16
Removing and Disassembling the Spa Light (cont.)
7. Using a 7/16" open-end or adjustable
wrench and a #3 Phillips screwdriver,
loosen the bolt tensioning the Wire
Clamp.
Note: Carefully remove the Clamp
Hardware. The wire clamp will
release a small amount of tension
when the nut reaches the end of bolt.
8. Discard the Wire Clamp and Wire Clamp
Hardware.
9. Lift the Light Housing away from the
Lens and Face Ring. Place the Light
Housing aside.
10. Lift the Lens away from the Face Ring
and set it aside.
11. Remove the Gasket from the Lens.
12. Discard the Gasket.
Note: A NEW LENS GASKET
AND WIRE CLAMP MUST BE
USED EACH TIME THE LIGHT IS
REASSEMBLED.
Refer to 12V Spa Light Replacement
Parts on page 20 or 120V Spa Light
Replacement Parts on page 21 for
part numbers.
13. To reassemble the light, continue to
Reassembling the Spa Light on the next
page.
Face
Ring
Lens
Lens
Gasket/
O-ring
Wire
Clamp
Pilot
Screw
Light
Housing
This manual suits for next models
17
Table of contents
Languages:
Other Pentair Underwater Lighting manuals
Popular Underwater Lighting manuals by other brands

Ikelite
Ikelite DS230 manual

ML Accessories
ML Accessories WGULED Installation & maintenance manual

METALSUB
METALSUB KL 1255 quick start guide

HEISSNER
HEISSNER U 130-T Instructions for use

Hurley Marine
Hurley Marine RGB Sea-Vue series quick start guide

ASTEL MARINE
ASTEL MARINE PLAQUE MFM18240 operating instructions