Perfect Fit FE-AM3-16P3-WB User manual

AC EV Charging Station Manual
Before operating this product, please read the operating instruction carefully

CONTENTS
1.Safe Use Guide------------------------------------------------------------------------1
2.Product Picture------------------------------------------------------------------------2
3.Product Features/Basic Information---------------------------------------3
4.Installation Steps---------------------------------------------------------------------4
5.Charging Steps------------------------------------------------------------------------5
6.Key Operation Steps---------------------------------------------------------------8
7.Charging Status and LED Definition---------------------------------------9
8.Trouble Shooting-------------------------------------------------------------------10
9.Adding Device------------------------------------------------------------------------------12
10.App Function------------------------------------------------------------------------14

1
Safe Use Guide
When using the charging station, please read all instructions carefully before:
1) Do not bring flammable, explosive or combustible materials, chemicals,
combustible vapors and other dangerous items near the charging station。
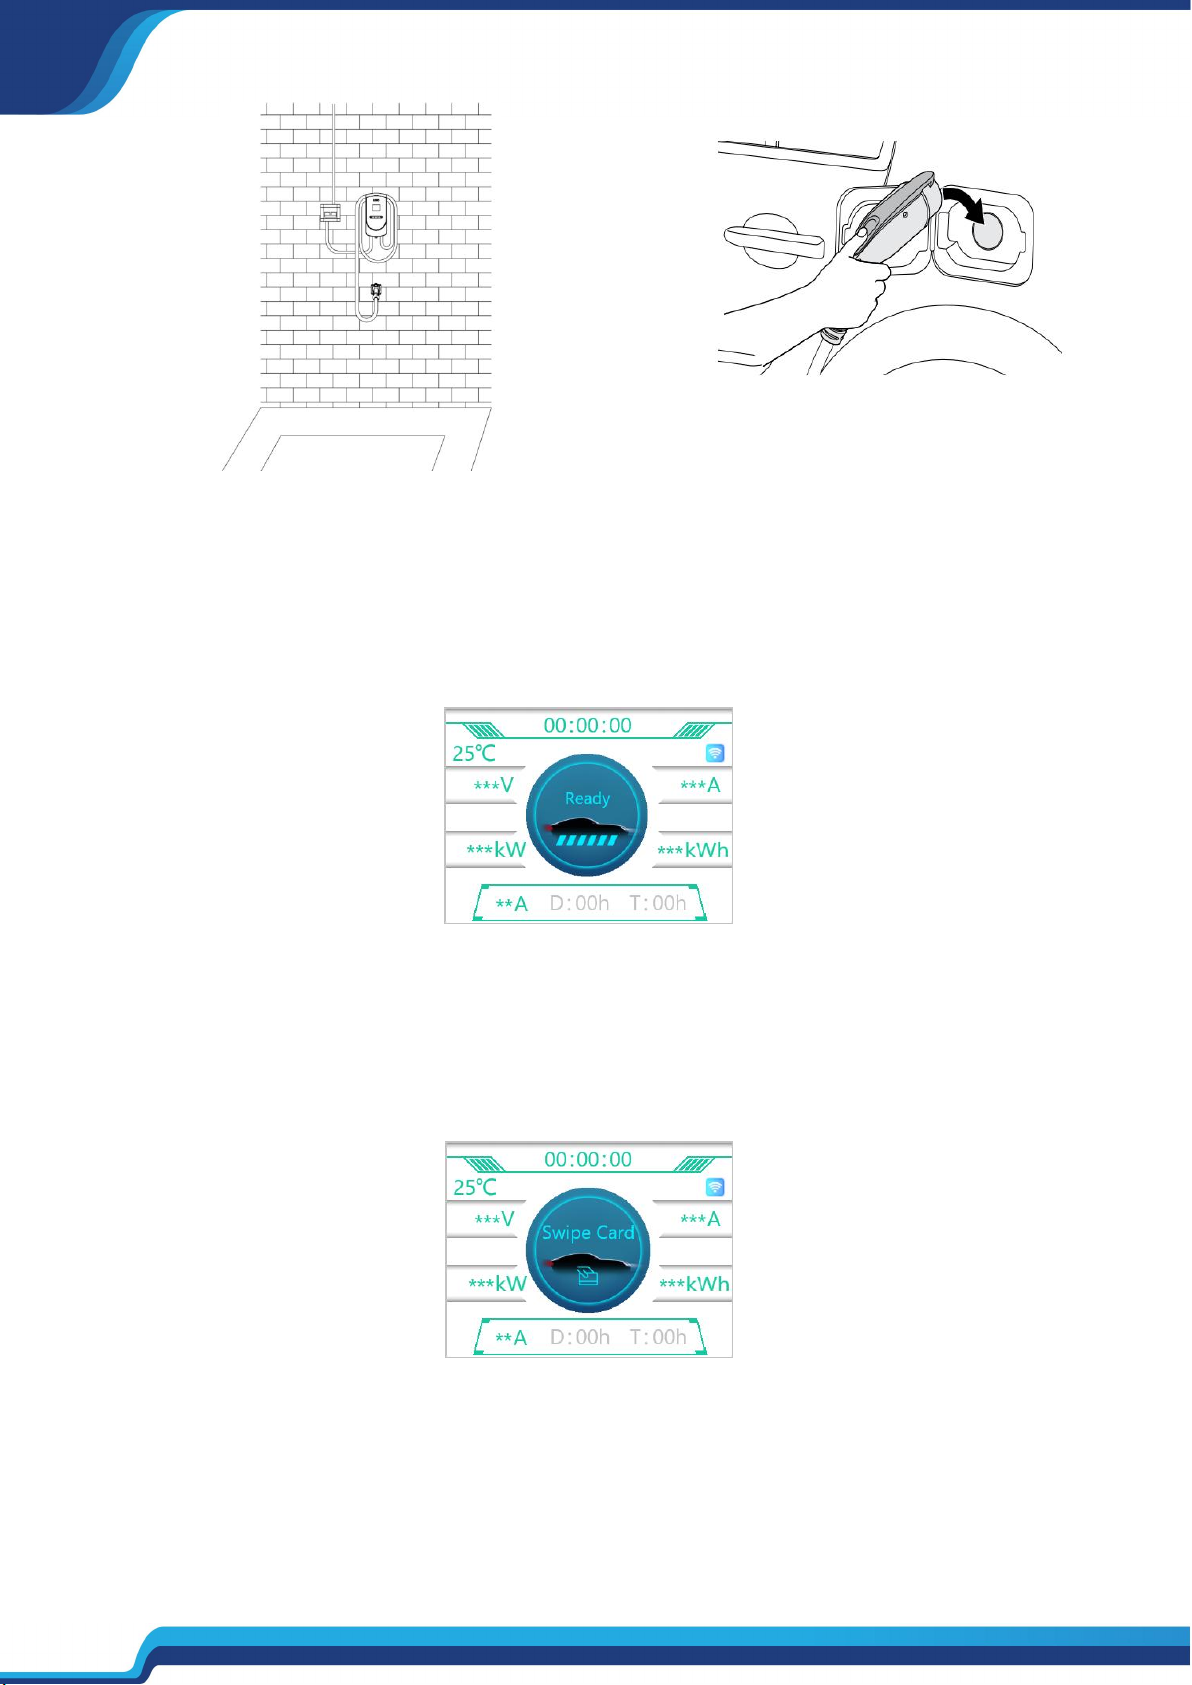
2) Keep the charging gun head clean and dry, wipe it with a clean dry cloth if it is dirty,
and it is strictly forbidden to touch the charging gun core by hand when it is charged。
3) It is strictly forbidden to use the charging station when the charging gun or
charging cable is defective, cracked, worn, broken, or the charging cable is exposed,
etc. If found, please contact the staff in time。
4) Please do not attempt to disassemble, repair or modify the charging station, if you
have a need for repair or modification, please contact the staff, improper operation
may cause damage to the equipment, water leakage, electricity leakage, etc。
5) If there is any abnormal situation during use, press the emergency stop button
immediately to cut off all input and output power。
6) In case of rain and thunder, please charge with caution。
7) Children please do not approach or use the charging station during charging to
avoid injury。
8) During the charging process, the vehicle is forbidden to drive and can only be
charged when it is stationary. Please turn off the hybrid electric vehicle before
charging。
9) If the charging station is damaged, in order to prevent injury accidents, it must be
repaired only by the manufacturer or its agent, or an equally qualified person。

2
Product Overview
LED light
RFID
LCD display
Touch Button
Cable
Type2 plug

3
Product Features
1. With RFID function to start or stop charging.
2. Connect to APP via Bluetooth or WIFI.
3. With the function of appointing charging time and appointing charging duration.
4. Equipped with display screen to show charging information in real time.
5. With overload protection, over-voltage protection, under-voltage protection,
over-temperature protection, leakage protection, emergency stop and other functions.

4
Installation Steps
Step 2 :Installation of charging station.
inlet.
Step 3: After installing the steel plate (the small one)
on the end of the control box using short screws, hang
the equipment on the steel plate (the large one) and
fix the steel plate (the small one) on the wall using long
screws.
Step 4: Install the hook.
Step 1 :According to the size of the steel plate’s
hole, using an electric drill to drill a hole in the
wall at a suitable height, then put in the expansion
tube. and use long screws to fix the steel plate(the
large one) in the wall.

5
Charging Steps
Step 5: Turn on the power to confirm that the LED
light and the display start normally.
Step 6: Try to start charging by inserting
the gun and swiping the card.
Standby status :
(1) In the standby state of the charging station, the interface shows that the device has entered
the ready charging state, as shown in the following picture.
The LED light on the station (applicable to WIFI function only) is green and always on.
Waiting for card swipe status :
(2) Take off the charging gun from the hook and insert it into the connector of the electric vehicle,
please make sure that it is inserted in place and the connection is safe and reliable. When the
charging gun monitors that it is inserted correctly, it will enter the status of identity verification,
as shown in the following picture.
The LED light on the station green flashing (for WIFI function only).

6
Start-up device :
(3)Use RFID cards to authorize the use of charging station.
Start charging :
(4) The device starts charging and the interface displays the charging status and
information parameters as shown in the flowing picture.
The LED light on the station (for WIFI function only) is green breathing.
Stop charging :
(5.1) When the vehicle is fully charged, the charging station will automatically
stop charging; in case of emergency, the power can be cut off by manually
pressing the emergency stop button.
(5.2) During the charging process, users can also use RFID card to authorize to
stop charging.

7
(5.3)When charging is finished, the end interface has two displays,as shown
in the following pictures.
Non-active card swipe to end charging
Active swipe to stop charging
The LED light on the station (for WIFI function only) is green flashing or green always on.

8
Key Operation Instructions
Enable or disable the card swipe function:Before the charging gun is inserted, long press
the first button for 5 seconds to set the opening or closing of the card swiping function.
Setting the current adjustment function: Touch the second button to adjust the current,
the current can be set 8A 10A 13A 16A.
Setting the appointment charging function: Touch the third button to set an
appointment for charging and then start charging with an RFID card , the device will
start charging after a delay of ( X ) hours according to the set appointment time, which
can be set from 0 to 15 hours (each touch increases the time by 1 hour).
For example, if it is set to 1 hour, then the charger will start charging after 1 hour.
Setting the charging time: Touch the fourth button on the station to set the charging
duration. and then start charging with an RFID card, the device will continue charging
for ( X ) hours according to the time you set before which can be set from 0 to 15
hours (each touch increases the time by 1 hour).
For example, if it set to 1 hour, then the charger will continue charging for 1 hour and
then stop charging automatically.
Clear the accumulated power function: When the charging gun is not inserted,
press and hold the fourth button for 5 seconds to clear the accumulated charge
history.

9
Charging Status and LED Definition

10
Trouble Shooting
The fault name
Symptom Possible causes
AC over voltage
AC input voltage too high
Rule out advice
1.If the voltage exceeds 457Vac for a short time,wait for the power grid to restore itself to
the normal voltage range.
2.Check the background monitoring data and analyze, if this area is over-voltage for a
long time, the input over voltage protection point can be increased through the
configuration software, up to 457Vac.
The fault name
Symptom Possible causes
AC under voltage
AC input voltage too low
Rule out advice
Check the background monitoring data and analyze, if the voltage in this area is chronically
under voltage 147Vac, please contact the power supply department.
The fault name
Symptom Possible causes
AC over current
Excessive AC input current
Rule out advice
1.Immediately turn off the leakage/over current protection circuit breaker of the power
distribution box.
2.Check whether there is low impedance or short circuit between the output line of AC
station.
3.After the fault is rectified, power on the device again. If the fault persists,contact us.
The fault name
Symptom Possible causes
Over temperature
The temperature in the AC pile is too high
Rule out advice
Check the ac station installation environment. Check whether there are other heating devices
nearby. Ensure that the ambient temperature is below 60 ° C.(140°F)

11
The fault name
Symptom Possible causes
Leakage current exceeds
standard
High leakage current to the ground
Rule out advice
1. Immediately turn off the leakage/over current protection switches in the power
distribution box.
2.Check whether the output line of AC station is damaged or has low impedance to the
ground.
3.After the fault is rectified, power on the device again. If the fault persists,contact us.
The fault name
Symptom Possible causes
Ground fault
The input/output is improperly grounded
or the input L/N is inversely connected
Rule out advice
1.Immediately turn off the leakage/over current protection switches in the power
distribution box
2.Check whether the input and output cables of ac stations are grounded properly and
whether the input L/N cables are connected in normal sequence.
3.After the fault is rectified, power on the device again. If the fault persists,contact us.
The fault name
Symptom Possible causes
Abnormal
communication(Internet mode)
Poor background communication of AC pile
Rule out advice
1.Check whether the network cable is properly connected.
2.Check whether charging stations are correctly configured in the background.
The fault name
Symptom Possible causes
Abnormal connection of
charging gun
Charging gun CC/CP Connection exception
Rule out advice
1.Check whether the charging gun is connected correctly and reliably.
2.If the fault persists, contact us.

12
Adding Device
1) Application download
Download Tuya Smart App from the App Store
2) Configure the charging device network
Ensure that the charging device and the mobile phone are in the same Wifi network
(5G band Wifi is not currently supported) and that the phone located near the
charging device. When the device is powered on, open the Tuya APP, and the
networking status of the charging device will be displayed as follows:
If there is a timeout or network distribution failure during network distribution,
please check whether the Wifi network has been connected to the network and the
router is working in the 2.4G band or the phone is too far away from the charging
device, resulting in Bluetooth connection failure. If these situations, repeat the above
operations to successfully configure the network.
Wait for the network
Connected
Unconnected

13
Demonstration of distribution network operation process:
Step 1:
Add Device
Step 2:
Turn on WIFI&Bluetooth
Step 3:
Add Enter
Step 4:
Waitting
Step 6:
Done
Step 5:
Next

14
App Function
Connect
Charging
Charging
Finish
Set Current
Set Delaytime
Set Chargetime
Table of contents