manuals.online logo
Brands
  1. Home
  2. •
  3. Brands
  4. •
  5. Petsafe
  6. •
  7. Pet Care Product
  8. •
  9. Petsafe SmartDoor Connected Pet Door Setup guide

Petsafe SmartDoor Connected Pet Door Setup guide

Scan for more
Scannez pour ensavoirplus
Verder zoeken
Escanee para más información
Esegui la scansione
persapernedi più
Scannen für mehr
Informationen
Start Training!
Commencez le dressage !
Begin met trainen!
¡Empiece el adiestramiento!
Inizia l’addestramento!
Trainieren Sie!
2
SmartDoor™Connected Pet Door Training Guide
Manuel de dressage pour porte connectée pour
animaux SmartDoor™
SmartDoor™Slim luik - Trainingshandleiding
Guía de adiestramiento de la puerta para
mascotas conectada SmartDoor™
Manuale di addestramento per l’uso della porta
per animali connessa SmartDoor™
SmartDoor™Vernetzte Haustiertür
Trainingsanleitung
3
ENNow that you have finished installing your pet door,
it is time to train your pet to use it. This is a crucial
step — even if your pet is accustomed to using a pet door, the
SmartDoor™Connected Pet Door will look, sound and behave
differently than his previous door. Training consists of the
following steps:
• Step 1: Learning to move through the opening without
the flap
• Step 2: Gradually getting used to the weight of the flap
• Step 3: Pushing the flap open
• Step 4: Getting used to the sound of the door locking and
unlocking
• Step 5: Giving your pet freedom
FRMaintenant que vous avez fini d’installer votre nouvelle
porte pour animaux, il ne vous reste plus qu’à entraîner
votre animal à l’utiliser. Il s’agit d’une étape cruciale. Même
si votre animal a l’habitude d’utiliser une chatière, la porte
connectée pour animaux SmartDoor™présente une apparence,
des sons et un fonctionnement différents de sa porte
précédente. Le dressage comprend les étapes suivantes :
• Étape 1 : Apprendre à passer à travers la porte sans le battant
• Étape 2 : S’habituer progressivement au poids du battant
• Étape 3 : Pousser pour ouvrir le battant
• Étape 4 : S’habituer au son de la porte qui se verrouille et
se déverrouille
• Étape 5 : Donner plus de liberté à votre animal
NLNadat je het huisdierluik hebt geplaatst, kun je je
huisdier trainen om het te gebruiken. Dat is zeer
belangrijk. Zelfs als je huisdier gewend is om een huisdierluik te
gebruiken, zal het SmartDoor™Slim luik er anders uitzien, klinkt
het anders en werkt het anders dan het vorige luik. De training
bestaat uit de volgende stappen:
• Stap 1: Door de opening gaan zonder de flap te
hoeven openen
• Stap 2: Langzaam laten wennen aan het gewicht van de flap
• Stap 3: De flap openduwen
• Stap 4: Gewend raken aan het geluid van het vergrendelen
en ontgrendelen van de klep
• Stap 5: Je huisdier de vrijheid geven
ESAhora que ha terminado de instalar la puerta para
mascotas, es hora de entrenar a su mascota para
que la use. Se trata de un paso crucial ya que, aunque su
mascota esté acostumbrada a usar una puerta, la puerta
para mascotas conectada SmartDoor™tendrá un aspecto, un
sonido y un comportamiento distinto de la puerta anterior. El
adiestramiento consta de los siguientes pasos:
• Paso 1: Aprender a moverse a través de la abertura sin
el batiente
• Paso 2: Acostumbrarse poco a poco al peso del batiente
• Paso 3: Empujar el batiente para abrirlo
• Paso 4: Acostumbrarse al sonido de la puerta al abrirse
y cerrarse
• Paso 5: Dar libertad a la mascota
ITOra che hai completato l’installazione della porta per
animali domestici, è tempo di addestrare il tuo animale
domestico a usarla. Questo è un passaggio cruciale: anche se
il tuo animale domestico è abituato a utilizzare una porta per
animali domestici, la porta per animali connessa SmartDoor™
avrà un aspetto, un suono e un funzionamento diverso rispetto
alla porticina precedente. L’addestramento consiste nelle
seguenti fasi:
• Fase 1: Imparare a passare attraverso l’apertura senza l’anta
• Fase 2: Abituarsi gradualmente al peso dell’anta
• Fase 3: Spingere l’anta aperta
• Fase 4: Abituarsi al suono di chiusura e sblocco
della porticina
• Fase 5: Dare al tuo animale domestico la libertà di entrare e uscire
DENachdem Ihre Haustiertür nun eingebaut ist, ist es an
der Zeit, Ihrem Haustier beizubringen, sie zu nutzen.
Dies ist ein entscheidender Schritt – selbst wenn Ihr Haustier
daran gewöhnt ist, eine Haustiertür zu benutzen, wird die
SmartDoor™Vernetzte Haustiertür anders aussehen, klingen
und sich anders verhalten als seine bisherige Tür. Das Training
besteht aus den folgenden Schritten:
• Schritt 1: Lernen, ohne Klappe durch die Öffnung zu gehen
• Schritt 2: Allmähliche Gewöhnung an das Gewicht
der Klappe
• Schritt 3: Aufschieben der Klappe
• Schritt 4: Gewöhnung an das Ver- und
Entriegelungsgeräusch der Haustiertür
• Schritt 5: Geben Sie Ihrem Haustier Freiheit
4
What to expect
Ce à quoi il faut s’attendre
Wat kun je verwachten
ENMost pets need time and training to move comfortably
through the new door. Plan to spend several 10-to-
15-minute training sessions with your pet. The training steps
provided in this guide have helped other pet door users and
their pets have success with their new door.
It is not uncommon to need to repeat a training step several
times before moving on to the next, especially if you have a
timid pet. Remember to give your pet breaks between training
sessions. Sometimes a new door can be scary to your pet, so
watch for changes in your pet’s mood and take time to calm
your pet as needed.
It is also common for your pet to become accustomed to
moving through the door in one direction before gaining
confidence in the other direction. If you observe this, continue
training with your pet to encourage confidence. Each pet’s
journey with a new pet door is unique; if you have questions,
please contact our Customer Care team.
And remember — your pet can read your body language and
mirror it. If you find yourself getting frustrated, it might be best
to take a break and try again later.
FRLa plupart des animaux ont besoin de temps et
d’entraînement pour passer confortablement à travers
la nouvelle porte. Prévoyez de passer plusieurs séances
d’entraînement de 10 à 15 minutes avec votre animal de
compagnie. Les étapes de dressage fournies dans ce guide ont
aidé d’autres utilisateurs de porte pour animaux ainsi que leurs
animaux de compagnie à adopter leur nouvelle porte.
Il n’est pas rare de devoir répéter plusieurs fois une étape de
dressage avant de passer à la suivante, surtout si votre animal
est de nature craintive. N’oubliez pas d’accorder des pauses à
votre animal de compagnie entre les séances d’entraînement.
Parfois, il peut arriver que votre animal de compagnie soit
effrayé par sa nouvelle porte, alors surveillez ses changements
d’humeur et prenez le temps de le calmer au besoin.
Il se peut également que votre animal de compagnie s’habitue
à franchir la porte dans un sens uniquement, avant de
gagner en confiance et passer dans le sens inverse. Le cas
échéant, continuez à entraîner votre animal de compagnie
pour l’encourager à poursuivre ses progrès. Chaque animal
réagira différemment à l’utilisation de sa nouvelle porte pour
Qué esperar
Cosa aspettarsi
Was Sie erwarten können
animaux ; si vous avez des questions, veuillez contacter notre
équipe de service à la clientèle.
N’oubliez pas que votre langage corporel peut influencer le
comportement de votre animal de compagnie. Si vous vous
sentez frustré, il serait peut-être préférable de faire une pause
et de réessayer plus tard.
NLDe meeste huisdieren hebben tijd en training nodig om
zonder probleem door het nieuwe luik te kunnen gaan.
Plan meerdere sessies van 10 tot 15 minuten om je huisdier te
laten oefenen en te laten wennen. De trainingsstappen in deze
gids hebben andere bezitters van huisdierluiken geholpen om
hun huisdier(en) eraan te laten wennen.
Het is niet ongebruikelijk om een trainingsstap meerdere keren
te moeten herhalen voordat je met de volgende stap begint,
vooral als je huisdier schuw is. Vergeet niet om je huisdier met
rust te laten tussen de trainingssessies. Soms kan je huisdier
angst hebben voor het nieuwe huisdierluik. Let dus vooral op
veranderingen in de stemming van je huisdier en neem de tijd
om je huisdier te kalmeren als dat nodig is.
Het komt ook vaak voor dat je huisdier eraan gewend raakt
om in de ene richting door het luik klep te gaan voordat het
eraan gewend is geraakt om vanuit de andere richting door
het luik te gaan. Als je dat ziet, neem dan de tijd om je huisdier
eraan te laten wennen. Elk huisdier reageert anders op een
nieuw huisdierluik. Neem bij vragen contact op met ons
klantenserviceteam.
En denk eraan dat je huisdier je lichaamstaal kan lezen en zich
ernaar gaat gedragen. Als je merkt dat het je gaat ergeren,
neem dan rustig de tijd en probeer het later nog eens.
5
ESLa mayoría de las mascotas necesitan tiempo y
adiestramiento para moverse cómodamente a
través de la nueva puerta. Planifique pasar varias sesiones de
adiestramiento de 10 a 15 minutos con su mascota. Los pasos
de adiestramiento proporcionados en esta guía han ayudado
a otros usuarios de puertas para mascotas y a sus mascotas a
utilizarlas con éxito.
No es raro que tenga que repetir un paso de adiestramiento
varias veces antes de pasar al siguiente, especialmente si su
mascota es tímida. Recuerde que debe dejar que su mascota
descanse entre las sesiones de adiestramiento. A veces, una
puerta nueva puede asustar a su mascota, así que observe
los cambios en su estado de ánimo y dedique tiempo para
calmarla si es necesario.
También es habitual que su mascota se acostumbre a pasar por
la puerta en una dirección antes de ganar confianza para pasar
en la otra dirección. Si observa esto, siga el adiestramiento con
su mascota para fomentar la confianza. El recorrido de cada
mascota con una nueva puerta es único; si tiene preguntas,
póngase en contacto con nuestro Equipo de atención
al cliente.
Y recuerde: su mascota puede leer su lenguaje corporal e
imitarlo. Si se siente frustrado, es mejor tomarse un descanso y
volver a intentarlo más tarde.
ITLa maggior parte degli animali domestici necessità di
tempo e addestramento per passare in modo naturale
attraverso la nuova porticina. Pianifica di trascorrere varie
sessioni di addestramento da 10 a 15 minuti con il tuo animale
domestico. Le fasi relative all’addestramento illustrate in questo
manuale hanno già aiutato tanti altri acquirenti della porta per
animali domestici e i loro animali a usare con successo la loro
nuova porticina.
Non è raro dover ripetere più volte una fase di addestramento
prima di passare alla fase successiva, soprattutto se il tuo
animale domestico è un po’ timido. Ricorda di concedere
al tuo animale domestico delle pause tra le varie sessioni di
addestramento. Considera che all’inizio la nuova porticina
potrebbe spaventare il tuo animale domestico, quindi fai
attenzione ai cambiamenti nell’umore del tuo animale
domestico e prenditi del tempo per calmarlo.
Potrebbe anche accadere che il tuo animale domestico si
abitui a passare attraverso la porta in una certa direzione
prima di acquisire sicurezza nell’altra direzione. Se osservi
questo comportamento, continua ad addestrare il tuo animale
domestico per incoraggiarlo. Ogni animale domestico ha una
sua specifica esperienza con una nuova porticina. In caso di
domande, contatta il nostro team assistenza clienti.
E ricorda che il tuo animale domestico può leggere il tuo
linguaggio del corpo e rispecchiarlo. Se stai provando un senso
di frustrazione, fai una pausa e riprova più tardi.
DEDie meisten Haustiere brauchen Zeit und Training,
um ohne Probleme durch die neue Tür zu gehen.
Planen Sie mehrere 10- bis 15-minütige Trainingseinheiten
mit Ihrem Haustier ein. Die in diesem Leitfaden beschriebenen
Trainingsschritte haben anderen Besitzern von Haustiertüren
und deren Haustieren dabei geholfen, ihre neue Tür erfolgreich
zu nutzen.
Es ist nicht ungewöhnlich, dass Sie einen Trainingsschritt
mehrmals wiederholen müssen, bevor Sie zum nächsten
übergehen, vor allem, wenn Sie ein ängstliches Tier
haben. Denken Sie daran, Ihrem Haustier zwischen den
Trainingseinheiten Pausen zu gönnen. Manchmal kann eine
neue Tür für Ihr Haustier beängstigend sein. Achten Sie daher
auf Stimmungsänderungen Ihres Haustieres und nehmen Sie
sich die Zeit, es bei Bedarf zu beruhigen.
Außerdem kann es vorkommen, dass sich Ihr Haustier daran
gewöhnt, erst in einer Richtung durch die Tür zu gehen, bevor
es Vertrauen gewinnt, auch andersherum durchzugehen.
Wenn Sie dies beobachten, trainieren Sie weiter mit Ihrem
Haustier, um sein Vertrauen zu stärken. Die Herangehensweise
eines Haustieres an eine neuen Haustür ist sehr individuell.
Wenn Sie Fragen haben, wenden Sie sich bitte an unsere
Kundenbetreuung.
Denken Sie daran: Ihr Haustier kann Ihre Körpersprache lesen
und sie widerspiegeln. Wenn Sie frustriert sind, sollten Sie eine
Pause einlegen und es später noch einmal versuchen.
6
1
Learning to move through
the opening without the flap
Apprendre à passer à travers
la porte sans le battant
Door de opening gaan
zonder de flap te hoeven
openen
Aprender a moverse a través
de la abertura sin el batiente
Imparare a passare attraverso
l’apertura senza l’anta
Lernen, ohne Klappe durch
die Öffnung zu gehen
ENFirst, we will help your pet get used to going through
the pet door opening without the flap. This step is
easiest with two people.
a. Place the pet door in Standard Mode and unlock the flap.
You can do this in the My PetSafe®app or by pressing the
lock/unlock button ( ) inside the battery compartment.
b. Temporarily secure the flap in an open position by taping
one end of a piece of string to the flap and the other end to
the door or wall.
c. Offer your pet’s preferred toys or treats to encourage your
pet to go through the opening.
d. Celebrate with your pet each time he goes through
the opening.
e. After your pet has gone through the opening several times
with your encouragement, leave the flap taped open and
allow him to explore it on his own.
f. When your pet is comfortable going through the fully open
flap on his own, proceed to step 2.
FRTout d’abord, nous aiderons votre animal à s’habituer
à passer par l’ouverture de la porte pour animaux sans
le battant. Cette étape est plus facile avec l’intervention de
deux personnes.
a. Réglez la porte pour animaux en mode standard et
déverrouillez le battant. Pour ce faire, utilisez l’application
My PetSafe®ou appuyez sur le bouton de verrouillage/
déverrouillage ( ) à l’intérieur du compartiment à piles.
b. Maintenez temporairement le battant en position ouverte
en fixant l’extrémité d’un morceau de ficelle au battant
et l’autre extrémité à la porte ou au mur à l’aide de
ruban adhésif.
7
c. Utilisez une friandise ou le jouet préféré de votre animal de
compagnie pour l’encourager à passer par l’ouverture.
d. Félicitez votre animal et récompensez-le chaque fois qu’il
franchit l’ouverture.
e. Une fois que votre animal est passé par l’ouverture plusieurs
fois avec vos encouragements, laissez le battant ouvert et
laissez-le explorer par lui-même.
f. Lorsque votre animal de compagnie est suffisamment à
l’aise pour franchir l’ouverture tout seul avec le battant
complètement ouvert, passez à l’étape 2.
NLTen eerste helpen we je huisdier eraan te wennen om
zonder flap door het huisdierluik te gaan. Dit oefen je
het gemakkelijkst met twee personen.
a. Zet het huisdierluik in de standaardmodus en ontgrendel
de flap. Je kunt dit doen in de My PetSafe®-app of door op
de vergrendel-/ontgrendelknop te drukken ( ) in het
batterijcompartiment.
b. Zet de klep tijdelijk geopend vast door het ene uiteinde van
een touwtje aan de klep te plakken en het andere uiteinde
aan de klep of de muur.
c. Leg het favoriete speeltje of wat lekkers voor je huisdier aan de
ene kant van het luik om je huisdier door het luik te laten gaan.
d. Beloon je huisdier als het door het luik is gegaan.
e. Nadat je huisdier na te zijn aangemoedigd meerdere malen
door het luik is gegaan, laat je de flap openstaan en laat je je
huisdier op eigen gelegenheid door het luik gaan.
f. Wanneer je huisdier eraan gewend is om door het volledig
geopende luik te gaan, ga je verder met stap 2.
ESEn primer lugar, ayudaremos a que su mascota se
acostumbre a pasar por la puerta para mascotas sin el
batiente. Este paso es más fácil si se realiza con dos personas.
a. Coloque la puerta para mascotas en modo estándar y
desbloquee el batiente. Puede hacerlo con la app My
PetSafe®o pulsando el botón de bloqueo/desbloqueo
( ) dentro del compartimiento de las pilas.
b. Asegure temporalmente el batiente en una posición abierta
pegando con cinta adhesiva un extremo de un trozo de
cuerda al batiente y el otro extremo a la puerta o pared.
c. Ofrezca a su mascota sus juguetes o golosinas preferidos
para animarla a que pase por la abertura.
d. Felicite a su mascota cada vez que pase por la abertura.
e. Después de que su mascota haya pasado por la abertura
varias veces con su ayuda, deje el batiente abierto con cinta
adhesiva y deje que la explore por su cuenta.
f. Cuando su mascota se sienta cómoda pasando por la
puerta completamente abierta por su cuenta, continúe
con el paso 2.
ITPer prima cosa, aiuteremo il tuo animale domestico ad
abituarsi a passare attraverso l’apertura della porticina
senza l’anta. Questa fase è più semplice con due persone.
a. Metti la porta per animali domestici in modalità standard
e sblocca l’anta. Puoi farlo nell’app My PetSafe®oppure
premendo il pulsante di blocco/sblocco ( ) presente
all’interno del vano batterie.
b. Blocca temporaneamente l’anta in posizione aperta
fissando un’estremità di un pezzo di spago all’anta e l’altra
estremità alla porta oppure al muro.
c. Offri al tuo animale domestico dei giocattoli oppure i
suoi cibi preferiti per incoraggiarlo a passare attraverso
l’apertura.
d. Festeggia con il tuo animale domestico ogni volta che
passa attraverso l’apertura.
e. Dopo che il tuo animale domestico è passato attraverso
l’apertura diverse volte con il tuo incoraggiamento, lascia
l’anta attaccata con del nastro adesivo e consentigli di
riprovare da solo.
f. Quando il tuo animale domestico si sente a suo agio a
passare da solo attraverso l’anta completamente aperta,
procedi alla fase 2.
DEZunächst helfen wir Ihrem Haustier dabei, sich
daran zu gewöhnen, ohne Klappe durch die
Haustüröffnung zu gehen. Dieser Schritt geht mit zwei
Personen am einfachsten.
a. Stellen Sie die Haustiertür in den Standardmodus und
entriegeln Sie die Klappe. Sie können dies in der App
My PetSafe®oder durch Drücken der Verriegelungs-/
Entriegelungstaste ( ) im Batteriefach tun.
b. Sichern Sie die Klappe vorübergehend in geöffneter
Stellung, indem Sie ein Ende einer Schnur an der Klappe
und das andere an der Tür oder Wand befestigen.
c. Bieten Sie Ihrem Haustier sein Lieblingsspielzeug oder Leckerlis
an, um es zu ermutigen, durch die Öffnung zu gehen.
d. Loben Sie Ihr Haustier jedes Mal, wenn es durch die
Öffnung geht.
e. Nachdem Ihr Haustier mit Ihrer Ermutigung einige Male
durch die Öffnung gegangen ist, halten Sie die Klappe
mit Klebeband offen. Erlauben Sie ihm nun, sie selbst
zu erkunden.
f. Sobald Ihr Haustier von sich aus durch die vollständig
geöffnete Klappe gehen kann, fahren Sie mit Schritt 2 fort.
8
Gradually getting used to
the weight of the flap
S’habituer progressivement
au poids du battant
Langzaam laten wennen aan
het gewicht van de flap
Acostumbrarse poco a poco
al peso del batiente
Abituarsi gradualmente al
peso dell’anta
Allmähliche Gewöhnung an
das Gewicht der Klappe
EN
a. Place the pet door in Standard Mode and unlock the flap as
in the previous step.
b. Use tape and a piece of string to secure the flap as in step 1,
but this time lower it slightly.
c. Offer your pet’s preferred toys or treats to encourage your
pet to go through the opening.
As your pet moves though the opening, he will feel the flap
resting lightly on his back. This helps remove your pet’s fear
of discomfort from the flap as he pushes through the door.
d. Celebrate with your pet each time he goes through
the opening.
e. After your pet has gone through the opening several times
with your encouragement, leave the flap taped open and
allow him to explore it on his own.
f. When your pet is comfortable going through the flap at the
new height on his own, lower the flap again and repeat the
steps above.
Let your pet’s temperament be your guide; if your pet
struggles with the flap at the new lower height, return to the
previous height and continue the process.
g. Once your pet is comfortable pushing through the flap
taped open at lower and lower heights, he is ready to
proceed to step 3.
Please note: Your pet may need to practice with the flap
raised in both directions to gain confidence moving through
the pet door in both directions.
2
9
FR
a. Placez la porte pour animaux en mode standard et
déverrouillez le battant comme à l’étape précédente.
b. Utilisez du ruban adhésif et un morceau de ficelle pour fixer
le battant comme dans l’ étape 1, mais cette fois baissez-le
légèrement.
c. Utilisez une friandise ou le jouet préféré de votre animal de
compagnie pour l’encourager à passer par l’ouverture.
Lorsque votre animal franchira l’ouverture, il sentira
légèrement le battant sur son dos. Cette étape aide à
éliminer la peur ou l’inconfort de votre animal causé par le
battant lorsqu’il franchit la porte.
d. Félicitez votre animal et récompensez-le chaque fois qu’il
franchit l’ouverture.
e. Une fois que votre animal est passé par l’ouverture plusieurs
fois avec vos encouragements, laissez le battant ouvert et
laissez-le explorer par lui-même.
f. Lorsque votre animal est suffisamment à l’aise pour franchir
la porte tout seul avec le battant dans cette position,
abaissez-le encore une fois et répétez les étapes ci-dessus.
Laissez le tempérament de votre animal vous guider ;
si votre animal n’arrive pas à franchir l’ouverture avec
la nouvelle hauteur du battant, revenez à la hauteur
précédente et continuez l’entraînement.
g. Une fois que votre animal de compagnie est suffisamment à
l’aise pour passer à travers la porte avec le battant ouvert à
des hauteurs de plus en plus basses, passez à l’étape 3.
Remarque : Votre animal de compagnie peut avoir besoin
de s’entraîner avec le battant relevé dans les deux sens pour
gagner en confiance et franchir la porte pour animaux dans
les deux sens.
NL
a. Zet het huisdierluik in de standaardmodus en ontgrendel
de flap zoals in de vorige stap.
b. Gebruik tape en een touwtje om de flap vast te zetten
zoals in stap 1, maar deze keer iets lager.
c. Leg het favoriete speeltje of wat lekkers voor je huisdier
aan de ene kant van het luik om je huisdier door het luik te
laten gaan.
Als je huisdier nu door het luik gaat, voelt die de flap langs
zijn rug strijken. Op die manier went je huisdier aan de flap
wanneer je huidsier door het luik gaat.
d. Beloon je huisdier als het door het luik is gegaan.
e. Nadat je huisdier na te zijn aangemoedigd meerdere
malen door het luik is gegaan, laat je de flap openstaan en
laat je je huisdier op eigen gelegenheid door het luik gaan.
f. Wanneer je huisdier eraan is gewend door het luik te
gaan terwijl de flap langs zijn rug strijkt, laat je de flap iets
zakken en laat je je huisdier weer door het luik gaan.
Laat de stemming van je huisdier je leidraad zijn. Als je
huisdier terugschrikt van de lager hangende flap, hang die
dan op de vorige hoogte en oefen verder.
g. Zodra je huisdier gewend is aan de lager hangende flap
en zonder probleem door het luik gaat, kun je verder gaan
met stap 3.
Onthoud: je huisdier moet wellicht wennen aan de flap
als het door het luik naar buiten en binnen gaat, dus oefen
net zolang totdat je merkt dat het niet meer reageert op
die flap.
10
ES
a. Coloque la puerta para mascotas en modo estándar y
desbloquee el batiente como en el paso anterior.
b. Use cinta adhesiva y un trozo de cuerda para asegurar el
batiente como en el paso 1, pero esta vez bájelo un poco.
c. Ofrezca a su mascota sus juguetes o golosinas preferidos
para animarla a que pase por la abertura.
A medida que su mascota se mueva a través de la abertura,
sentirá que el batiente se apoya suavemente sobre su
espalda. Esto ayuda a quitar el miedo de su mascota a la
incomodidad del batiente cuando empuje la puerta.
d. Felicite a su mascota cada vez que pase por la abertura.
e. Después de que su mascota haya pasado por la abertura
varias veces con su ayuda, deje el batiente abierto con cinta
adhesiva y deje que la explore por su cuenta.
f. Cuando su mascota se sienta cómoda pasando por sí sola
por el batiente a la nueva altura, baje el batiente de nuevo y
repita los pasos anteriores.
Deje que el temperamento de su mascota sea su guía; si
su mascota tiene problemas con el batiente con la nueva
altura más baja, vuelva a la altura anterior y continúe con
el proceso.
g. Una vez que su mascota se sienta cómoda empujando el
batiente para abrirlo a alturas cada vez más bajas, estará lista
para continuar con el paso 3.
Obsérvese lo siguiente: Es posible que su mascota necesite
practicar con el batiente levantado en ambas direcciones
para ganar confianza para moverse a través de la puerta
para mascotas en ambas direcciones.
IT
a. Posiziona la porticina in modalità standard e sblocca l’anta
come indicato nella fase precedente.
b. Usa del nastro adesivo e un pezzo di spago per fissare l’anta
come indicato nella fase 1, ma questa volta abbassa l’anta
leggermente.
c. Offri al tuo animale domestico dei giocattoli oppure i suoi
cibi preferiti per incoraggiarlo a passare attraverso l’apertura.
Quando il tuo animale domestico si muove attraverso
l’apertura, sentirà l’anta appoggiarsi in modo leggero sulla
sua schiena. Questo aiuta il tuo animale domestico ad
abituarsi alla sensazione legata al contatto con l’anta mentre
attraverso la porta.
d. Festeggia con il tuo animale domestico ogni volta che passa
attraverso l’apertura.
e. Dopo che il tuo animale domestico è passato attraverso
l’apertura diverse volte con il tuo incoraggiamento, lascia
l’anta attaccata con del nastro adesivo e consentigli di
riprovare da solo.
f. Quando il tuo animale domestico si sente a suo agio ad
attraversare da solo l’anta alla nuova altezza, abbassa di
nuovo l’anta e ripeti le fasi precedenti.
Lasciati guidare dal temperamento del tuo animale. Se il tuo
animale non riesce a passare attraverso l’anta alla nuova
altezza inferiore, torna all’altezza precedente e continua
il processo.
g. Quando il tuo animale domestico è a suo agio a passare
attraverso l’anta fissata con nastro adesivo ad altezze
sempre più basse, è pronto per passare alla fase 3.
Nota: il tuo animale domestico potrebbe avere bisogno di
esercitarsi con l’anta sollevata in entrambe le direzioni per
acquisire sicurezza nel passare attraverso la porticina in
entrambe le direzioni.
11
DE
a. Stellen Sie die Haustiertür in den Standardmodus und
entriegeln Sie die Klappe wie im vorherigen Schritt.
b. Sichern Sie die Klappe mit Klebeband und einem Stück
Schnur wie in Schritt 1, lassen Sie sie diesmal aber
etwas herunter.
c. Bieten Sie Ihrem Haustier sein Lieblingsspielzeug oder
Leckerlis an, um es zu ermutigen, durch die Öffnung
zu gehen.
Wenn Ihr Tier durch die Öffnung geht, spürt es, dass die
Klappe leicht auf seinem Rücken aufliegt. Dadurch wird
Ihrem Haustier die Angst vor der Klappe genommen, wenn
es sich durch die Tür schiebt.
d. Loben Sie Ihr Haustier jedes Mal, wenn es durch die
Öffnung geht.
e. Nachdem Ihr Haustier mit Ihrer Ermutigung einige Male
durch die Öffnung gegangen ist, halten Sie die Klappe
mit Klebeband offen. Erlauben Sie ihm nun, sie selbst
zu erkunden.
f. Wenn Ihr Haustier von sich aus durch die Öffnung mit
gesenkter Klappe gehen kann, lassen Sie die Klappe
noch etwas weiter herunter und wiederholen Sie die
obigen Schritte.
Lassen Sie sich vom Temperament Ihres Tieres leiten. Wenn
Ihr Tier mit der Klappe in der neuen, niedrigeren Höhe nicht
zurechtkommt, kehren Sie zur vorherigen Höhe zurück und
üben Sie weiter mit ihm.
g. Sobald sich Ihr Haustier daran gewöhnt hat, durch die mit
Klebeband befestigte Klappe in immer niedrigerer Höhe
hindurchzugehen, ist es bereit für Schritt 3.
Hinweis: Es kann sein, dass Ihr Haustier üben muss, bei
angehobener Klappe in beide Richtungen durch die
Haustiertür zu gehen, bis es sich sicher fühlt.
12
3
Pushing the flap open
Pousser pour ouvrir le battant
De flap openduwen
Empujar el batiente para
abrirlo
Spingere l’anta aperta
Aufschieben der Klappe
EN
a. Place the pet door in Standard Mode and unlock the flap as
in the previous step.
b. With you on one side of the door and your pet on the other,
encourage your pet to nudge the door with his nose or
paw. You may need to lift the flap a little and hold a treat
where he can reach it by pushing his nose or paw through
the small opening.
c. Repeat this a few times, letting the flap fall back into place
between each treat. Eventually, your pet will start to push
on the flap to get the treat without help.
As your pet becomes more confident pushing the flap,
encourage your pet to move all the way through the
opening to earn the reward.
FR
a. Placez la porte pour animaux en mode standard et
déverrouillez le battant comme aux étapes précédentes.
b. Placez-vous du côté opposé de la porte par rapport à votre
animal de compagnie, puis encouragez-le à pousser la
porte avec son museau ou sa patte. Vous devrez peut-être
soulever légèrement le battant et appâter votre animal avec
une friandise pour l’inciter à passer son museau ou sa patte
à travers l’ouverture.
c. Répétez cette opération plusieurs fois en laissant le
battant retomber chaque fois que votre animal obtient une
friandise. Votre animal devrait commencer à pousser lui-
même sur le battant pour obtenir la friandise.
Au fur et à mesure qu’il devient plus confiant en poussant le
battant, encouragez-le à franchir entièrement la porte pour
recevoir la récompense.
13
NL
a. Zet het huisdierluik in de standaardmodus en ontgrendel de
flap zoals in de vorige stappen.
b. Zet je huisdier aan de ene kant van het luik en ga zelf aan
de andere kant zitten. Moedig vervolgens je huisdier aan
om met zijn poot of neus tegen de klep te duwen. Mogelijk
moet je de flap een beetje optillen en een dierensnoepje
vasthouden om je huisdier aan te moedigen door zijn neus
of poot door de kleine opening te duwen.
c. Herhaal dit een paar keer en laat de flap tussen elk
dierensnoepje dichtvallen. Uiteindelijk zal je huisdier tegen
de flap duwen om zijn beloning te kunnen krijgen.
Naarmate je huisdier meer zelfvertrouwen krijgt door tegen
de flap te duwen, moedig je je huisdier net zolang aan
totdat je huisdier zijn beloning komt halen.
ES
a. Coloque la puerta para mascotas en modo estándar y
desbloquee el batiente como en los pasos anteriores.
b. Con usted en un lado de la puerta y su mascota en el otro,
anime a su mascota a empujar la puerta con la nariz o la
pata. Es posible que deba levantar un poco el batiente y
sostener una golosina donde pueda alcanzarla empujando
la nariz o la pata a través de la pequeña abertura.
c. Repita esto varias veces, dejando que el batiente vuelva a su
lugar cada vez que le dé una golosina. Al final, su mascota
comenzará a empujar el batiente para conseguir la golosina
sin ayuda.
A medida que su mascota se sienta más segura al empujar
el batiente, anímela a moverse completamente a través de
la abertura para ganarse la recompensa.
IT
a. Posiziona la porticina in modalità standard e sblocca l’anta
come indicato nelle fasi precedenti.
b. Con te su un lato della porta e il tuo animale domestico
dall’altro, incoraggialo a spingere la porta con il naso oppure
con la zampa. Potresti dover sollevare leggermente l’anta
e tenere uno snack dove il tuo animale può raggiungerlo
spingendo il naso o la zampa attraverso la piccola apertura.
c. Ripeti quest’operazione varie volte, lasciando che l’anta
ricada in posizione dopo aver dato lo snack al tuo animale
domestico. Alla fine, il tuo animale domestico inizierà a
spingere sull’anta per ottenere lo snack senza alcun aiuto.
Via via che il tuo animale domestico acquista sicurezza
nello spingere l’anta, incoraggialo a muoversi fino in fondo
attraverso l’apertura per guadagnare la ricompensa.
DE
a. Stellen Sie die Haustiertür in den Standardmodus und
entriegeln Sie die Klappe wie in den vorherigen Schritten.
b. Sie stehen auf der einen Seite der Tür und Ihr Haustier auf
der anderen. Ermutigen Sie es dazu, die Tür mit seiner Nase
oder seiner Pfote anzustupsen. Möglicherweise müssen
Sie die Klappe ein wenig anheben und ein Leckerli dorthin
halten, wo es hinkommen kann, wenn es seine Nase oder
Pfote durch die kleine Öffnung schiebt.
c. Wiederholen Sie dies ein paar Mal und lassen Sie die Klappe
zwischen den einzelnen Leckereien wieder in ihre Position
zurückfallen. Mit der Zeit wird Ihr Haustier anfangen,
die Klappe anzustupsen, um das Leckerli ohne Hilfe
zu bekommen.
Wenn Ihr Haustier mit dem Anstupsen der Klappe immer
sicherer wird, ermutigen Sie es dazu, ganz durch die
Öffnung zu gehen, um die Belohnung zu erhalten.
14
4
Getting used to the sound
of the door locking and
unlocking
S’habituer au son de la
porte qui se verrouille et se
déverrouille
Gewend raken aan het geluid
van het vergrendelen en
ontgrendelen van de klep
Acostumbrarse al sonido de la
puerta al abrirse y cerrarse
Abituarsi al suono di chiusura
e sblocco della porticina
Gewöhnung an das Ver- und
Entriegelungsgeräusch der
Haustiertür
ENThe sound of the pet door’s motor, lock and unlock
actions, and the flap movement may all be unfamiliar
sounds for your pet. To help him get accustomed to these
sounds:
a. With your pet within earshot of the door, use the app or
buttons in the battery compartment to lock and unlock
the door.
b. Repeat this several times and watch your pet’s reaction.
Once your pet is comfortable with the sound of the
door locking and unlocking at a distance, proceed to the
next step.
c. Place the door in Smart Mode and select All Access for
your pet.
d. Make sure your pet’s Pet Door Key or microchip is paired
with the door.
e. If your pet is using the Pet Door Key, make sure it is secured
to his collar.
f. Place your pet’s preferred treat or toy next to the door and
encourage him to approach the door.
g. As your pet comes within range of the door, the door
motor will run and the door will unlock. As these noises
are occurring, reward your pet. The goal is for your pet to
associate the noise with a positive experience.
h. Repeat the above step a few times until your pet seems
comfortable with the sounds made by the door.
15
i. Finally, repeat this action, but while your pet is getting his
treat, lift the flap and let it close.
j. Repeat the above step until your pet is comfortable with
the sound of the motor and the sound of the flap opening
and closing.
FRLe bruit du moteur de la porte pour animaux, l’action
de verrouillage et de déverrouillage ainsi que le
mouvement du battant sont probablement des sons inconnus
pour votre animal. Pour l’aider à s’y habituer :
a. Lorsque votre animal est près de la porte, utilisez
l’application ou les boutons du compartiment à piles pour
verrouiller et déverrouiller la porte.
b. Répétez cette opération plusieurs fois et observez la
réaction de votre animal. Une fois que votre animal est
à l’aise avec le son de la porte qui se verrouille et se
déverrouille à distance, passez à l’étape suivante.
c. Réglez la porte en Mode intelligent et sélectionnez All
Access (Accès total) pour votre animal de compagnie.
d. Assurez-vous que la Médaille pour animaux pour porte ou la
micropuce de votre animal est associée à la porte.
e. Si votre animal utilise la Médaille pour animaux pour porte,
vérifiez qu’elle est correctement attachée à son collier.
f. Placez une friandise ou le jouet préféré de votre animal à
côté de la porte et encouragez-le à s’approcher de la porte.
g. Lorsque votre animal s’approche de la porte, le moteur
se met en marche et la porte se déverrouille. Lorsque
ces bruits se produisent, récompensez votre animal.
L’objectif est que votre animal associe le bruit à une
expérience positive.
h. Répétez l’étape ci-dessus plusieurs fois jusqu’à ce que votre
animal s’habitue aux sons émis par la porte.
i. Enfin, répétez cette action, mais cette fois-ci, lorsque votre
animal reçoit sa friandise, soulevez le battant et laissez-le
se refermer.
j. Répétez l’étape ci-dessus jusqu’à ce que votre animal
s’habitue au son du moteur et au son d’ouverture et de
fermeture du battant.
NLHet geluid van de motor van het huisdierluik, het
vergrendelen en ontgrendelen en de beweging van de
flap zijn allemaal vreemde geluiden voor je huisdier. Je laat je
huisdier als volgt wennen aan die geluiden:
a. Als je huisdier in de buurt van het huisdierluik is, vergrendel
en ontgrendel je het huisdierluik met de app of de knoppen
in het batterijvak.
b. Herhaal dit enkele keren en let op de reactie van je huisdier.
Zodra je huisdier niet mee reageert op die geluiden van het
vergrendelen en ontgrendelen van de klep, ga je verder met
de volgende stap.
c. Zet de klep in de Slimme modus en selecteer Volledige
toegang voor je huisdier.
d. Zorg ervoor dat de luiksleutel of de microchip van je
huisdier aan de klep is gekoppeld.
e. Als je een luiksleutel gebruikt, zorg dan dat deze goed is
vastgemaakt aan zijn halsband.
f. Leg de favoriete traktatie of het favoriete speeltje van je
huisdier bij het huisdierluik en moedig je huisdier aan om er
naartoe te gaan.
g. Als je huisdier binnen het bereik van de klep komt, gaat de
luikmotor draaien en wordt de klep ontgrendeld. Beloon je
huisdier wanneer het die geluiden hoort. Zo leert je huisdier
dat die geluiden iets lekkers voor hem betekenen.
h. Herhaal dit een paar keer totdat je huisdier zich niet meer
stoort aan het geluid van het ontgrendel;en van de klep.
i. Herhaal dit tot slot en terwijl je huisdier geniet van zijn
traktatie, til je de flap op en laat je die zakken.
j. Herhaal dit weer totdat je huisdier is gewend aan het geluid
van de motor en het geluid van het openen en sluiten van
de flap.
16
ESEl sonido del motor de la puerta para mascotas, las
acciones de bloqueo y desbloqueo y el movimiento del
batiente pueden ser sonidos desconocidos para su mascota.
Para ayudarla a acostumbrarse a estos sonidos:
a. Con su mascota junto a la puerta para que pueda
oír los sonidos, use la aplicación o los botones en el
compartimiento de las pilas para bloquear y desbloquear
la puerta.
b. Repita este proceso varias veces y observe la reacción de su
mascota. Una vez que su mascota se sienta cómoda con el
sonido del bloqueo y desbloqueo de la puerta a distancia,
continúe con el siguiente paso.
c. Coloque la puerta en modo inteligente y seleccione All
Access (Acceso total) para su mascota.
d. Asegúrese de que la llave de la puerta para mascotas o el
microchip de su mascota estén sincronizados con la puerta.
e. Si su mascota está usando la llave para puerta de mascotas,
asegúrese de que esté fijada a su collar.
f. Coloque la golosina o el juguete preferido de su mascota
junto a la puerta y anímela a que se acerque a la puerta.
g. Cuando su mascota se acerque a la puerta, el motor de la
puerta se activará y la puerta se desbloqueará. A medida
que se produzcan estos ruidos, premie a su mascota.
El objetivo es que su mascota asocie el ruido con una
experiencia positiva.
h. Repita el paso anterior varias veces hasta que su mascota se
sienta cómoda con los sonidos que hace la puerta.
i. Por último, repita esta acción pero al mismo tiempo que le
da la golosina, levante el batiente y deje que se cierre.
j. Repita el paso anterior hasta que su mascota se sienta
cómoda con el sonido del motor y el sonido del batiente
abriéndose y cerrándose.
ITIl suono del motore della porta per animali domestici,
delle azioni di blocco e sblocco e del movimento
dell’anta potrebbero essere tutti suoni sconosciuti per il tuo
animale domestico. Per aiutarlo ad abituarsi a questi suoni:
a. Con il tuo animale domestico vicino alla porticina, usa l’app
oppure i pulsanti presenti nel vano batterie per bloccare e
sbloccare la porta.
b. Ripeti questa operazione più volte e osserva la reazione del
tuo animale domestico. Quando il tuo animale domestico si
sente a suo agio con il suono della porta che si chiude e si
sblocca a distanza, passa alla fase successiva.
c. Posiziona la porta in modalità intelligente e seleziona
l’accesso illimitato per il tuo animale domestico.
d. Verifica che la chiave per animali oppure il microchip sia
accoppiato alla porta.
e. Se il tuo animale domestico sta usando la chiave per
animali, assicurati che questa sia fissata al suo collare.
f. Metti lo snack o il giocattolo preferito del tuo animale
domestico vicino alla porta e incoraggialo ad avvicinarsi
alla porta.
g. Quando il tuo animale domestico si avvicina alla porta, il
motore della porta si avvia e la porta si sblocca. Mentre si
verificano questi rumori, premia il tuo animale domestico.
L’obiettivo è far sì che il tuo animale domestico associ
questo rumore a un’esperienza positiva.
h. Ripeti varie volte la fase precedente finché il tuo animale
domestico non sembra a suo agio con i suoni emessi
dalla porta.
i. Infine, ripeti questa azione, ma mentre il tuo animale
domestico sta ricevendo il suo snack preferito, solleva l’anta
e falla chiudere.
j. Ripeti la fase precedente finché il tuo animale domestico
non si sente a suo agio con il suono del motore e con il
suono di apertura e chiusura dell’anta.
17
DEDas Geräusch des Motors der Haustiertür, das Ver- und
Entriegeln und die Bewegung der Klappe sind für Ihr
Haustier möglicherweise ungewohnt. So können Sie ihm dabei
helfen, sich an diese Geräusche zu gewöhnen:
a. Ver- und entriegeln Sie die Haustiertür über die App oder
die Tasten im Batteriefach, wenn sich Ihr Haustier in
Hörweite der Haustiertür befindet.
b. Wiederholen Sie diesen Vorgang mehrmals und beobachten
Sie die Reaktion Ihres Tieres. Sobald sich Ihr Haustier aus
einiger Entfernung an das Ver- und Entriegelungsgeräusch
der Haustiertür gewöhnt hat, fahren Sie mit dem nächsten
Schritt fort.
c. Versetzen Sie die Tür in den Smart-Modus und wählen Sie
“Unbeschränkter Zugang” für Ihr Haustier.
d. Vergewissern Sie sich, dass der Haustiertür-Schlüssel oder
Mikrochip Ihres Haustiers mit der Tür gekoppelt ist.
e. Wenn Sie für Ihr Haustier den Hausiertürschlüssel
verwenden, stellen Sie sicher, dass er an seinem Halsband
befestigt ist.
f. Legen Sie das Lieblingsleckerli oder -spielzeug Ihres
Haustieres neben die Haustiertür und ermuntern Sie es, sich
der Tür zu nähern.
g. Sobald Ihr Haustier in die Reichweite der Tür kommt, wird
der Türmotor aktiviert und die Tür wird entriegelt. Belohnen
Sie Ihr Haustier, wenn diese Geräusche zu hören sind. Das
Ziel ist, dass Ihr Haustier das Geräusch mit einer positiven
Erfahrung verbindet.
h. Wiederholen Sie den obigen Schritt einige Male, bis Ihr
Haustier mit den Geräuschen der Haustiertür vertraut ist.
i. Zum Schluss wiederholen Sie diesen Vorgang, aber während
Ihr Haustier sein Leckerli bekommt, heben Sie die Klappe an
und schließen Sie sie wieder.
j. Wiederholen Sie den obigen Schritt, bis Ihr Haustier mit
dem Geräusch des Motors und dem Ent- und Verriegeln der
Klappe vertraut ist.
18
5
Giving your pet freedom
Donner plus de liberté à votre
animal
Je huisdier de vrijheid geven
Dar libertad a la mascota
Dare al tuo animale
domestico la libertà di
entrare e uscire
Geben Sie Ihrem Haustier
Freiheit
ENYour pet should now be able to use the door on
his own.
a. Place the door in Smart Mode and select All Access for
your pet.
b. Encourage your pet to use the door with his Pet Door Key
or microchip activating the door.
c. Celebrate with your pet as he uses the door on his own.
Now your pet will be able to come and go on his own
schedule! Over time, your pet will learn that when he
hears the motor and the unlock action, he can go through
the door.
FRVotre animal devrait désormais pouvoir utiliser la porte
tout seul.
a. Réglez la porte en Mode intelligent et sélectionnez All
Access (Accès total) pour votre animal de compagnie.
b. Encouragez votre animal à utiliser la porte, qui se
déverrouille en détectant sa Médaille pour animaux pour
porte ou sa micropuce.
c. Félicitez-le lorsqu’il utilise la porte tout seul.
Votre animal peut désormais aller et venir à sa guise. Votre
animal comprendra progressivement que lorsqu’il entend le
bruit du moteur et de déverrouillage, cela signifie qu’il peut
passer à travers la porte.
19
NLJe huisdier zou nu zonder probleem door het
huisdierluik moeten gaan.
a. Zet de klep in de Slimme modus en selecteer Volledige
toegang voor je huisdier.
b. Moedig je huisdier aan om de klep te openen met de
luiksleutel of de microchip.
c. Beloon je huisdier als het zelf door het luik gaat.
Nu kan je huisdier naar buiten en binnen wanneer je huisdier
dat wil. Na verloop van tijd zal je huisdier weten wanneer die
naar buiten kan doordat je huisdier het geluid kent van de
motor waarmee het huisdierluik wordt ontgrendeld.
ESSu mascota ahora debería poder usar la puerta por
su cuenta.
a. Coloque la puerta en modo inteligente y seleccione All
Access (Acceso total) para su mascota.
b. Anime a su mascota a usar la puerta, activándola con su
llave para puerta de mascotas o su microchip.
c. Felicite a su mascota cuando use la puerta por su cuenta.
¡Ahora su mascota podrá entrar y salir cuando quiera! Con
el tiempo, su mascota aprenderá que cuando escuche el
motor y la acción de desbloqueo, puede atravesar la puerta.
ITOra il tuo animale domestico dovrebbe essere in grado
di usare la porta in modo autonomo.
a. Posiziona la porta in modalità intelligente e seleziona
l’accesso illimitato per il tuo animale domestico.
b. Incoraggia il tuo animale domestico a usare la porticina
con la chiave per animali oppure con il microchip che attiva
la porta.
c. Festeggia con il tuo animale domestico mentre usa la porta
in modo autonomo.
Ora il tuo animale domestico potrà andare e venire secondo
i suoi orari! Con il tempo, il tuo animale domestico imparerà
che quando sente il motore e l’azione di sblocco, può
passare attraverso la porta.
DEIhr Haustier sollte nun in der Lage sein, die Haustiertür
selbständig zu benutzen.
a. Versetzen Sie die Tür in den Smart-Modus und wählen Sie
“Unbeschränkter Zugang” für Ihr Haustier.
b. Ermutigen Sie Ihr Haustier dazu, die Haustiertür mit seinem
Haustierschlüssel oder Mikrochip zu nutzen, um die Tür
zu aktivieren.
c. Loben Sie Ihr Haustier, wenn es die Tür selbständig nutzt.
Jetzt kann Ihr Haustier nach Lust und Laune kommen und
gehen! Mit der Zeit wird Ihr Haustier lernen, dass es durch
die Haustiertür gehen kann, wenn es den Motor und den
Entriegelungsvorgang hört.
Radio Systems Corporation
10427 PetSafe Way
Knoxville, TN 37932 USA
+1 (865) 777-5404
Radio Systems PetSafe Europe Ltd.
2nd Floor, Elgee Building, Market Square
Dundalk, Co. Louth, A91 YR9X Ireland
+353 (0) 76 892 0427
Radio Systems Australia Pty Ltd.
Suite 11001 Australia Fair Office Towers
36 Marine Parade, Southport, QLD 4215
+61 (0) 7 5556 3800
United Kingdom
0800 046 1414
Ireland
1 800 81 43 02
France
00 800 18 18 20 20
Nederland
00 800 18 18 20 20
España
00 800 18 18 20 20
Deutschland
00 800 18 18 20 20
Italia
00 800 18 18 20 20
Belgique/België
00 800 18 18 20 20
Österreich
00 800 18 18 20 20
Suisse/Svizzera/Schweiz
00 800 18 18 20 20
United States
800-732-2677
Canada
800-457-3911
Australia
1800 786 608
New Zealand
0800 543 054
We’re here to help!
United States: 1-Year Warranty
All other regions: 3-Year Warranty
For important safety information,
pleaseseethecustomer care guide.
Nous sommes là
pourvousaider!
Garantie de 3ans
Pour obtenir les informations de
sécurité importantes, consultez le guide
du service clientèle à l’intérieur.
Wij staan klaar om tehelpen!
3 jaar garantie
Lees de klantenservicehandleiding
voorbelangrijkeveiligheidsinformatie.
Estamos aquí
para ayudarle.
3 años de garantía
Para obtener información de seguridad
importante, consulte la guía de
atención al cliente.
Siamo qui per aiutare.
3 anni di garanzia
Per importanti informazioni sulla
sicurezza, consulta la guida di
assistenza clienti.
Wir sind für Sie da!
3Jahre Garantie
Wichtige Informationen zur Sicherheit
findenSieim Kundenleitfaden.
PPA19-17256, ZPA19-17252, PPA19-17257, ZPA19-17253
©2022 Radio Systems Corporation | petsafe.com | L400-2566-19

Other manuals for SmartDoor Connected Pet Door

1

Other Petsafe Pet Care Product manuals

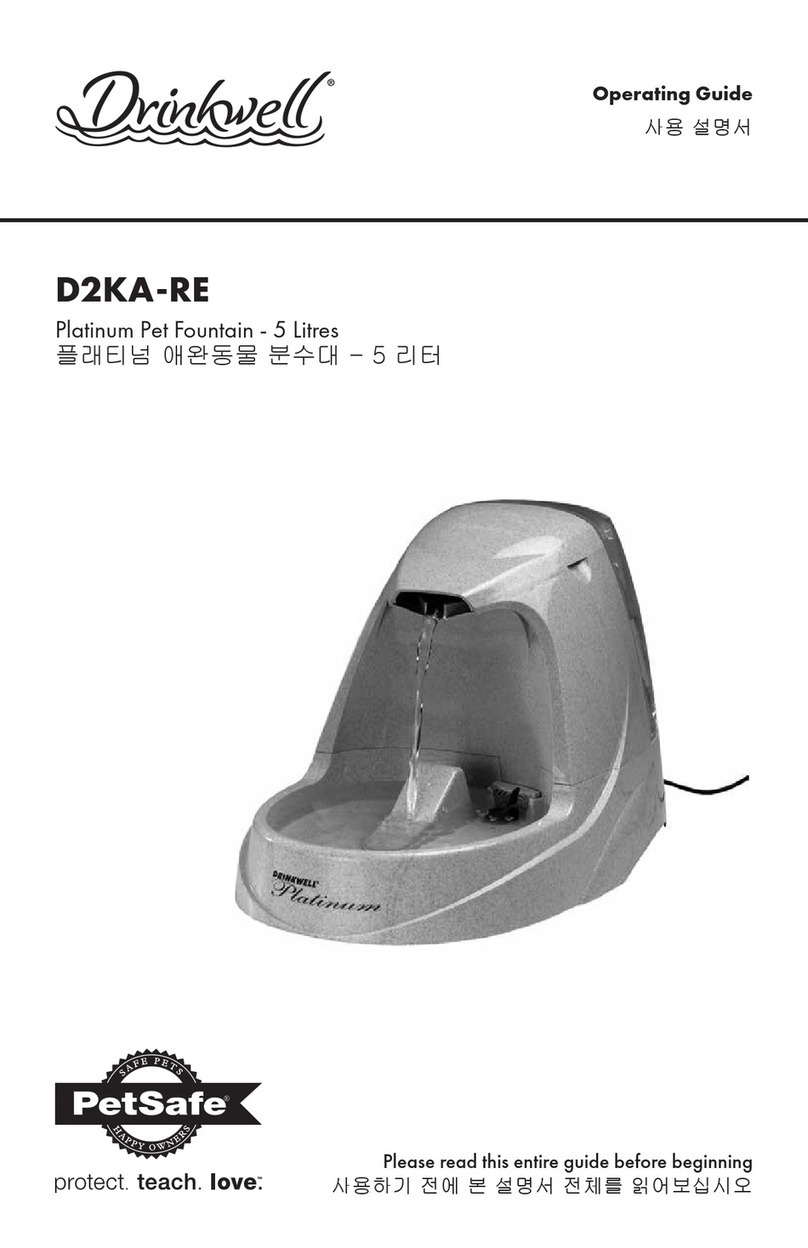
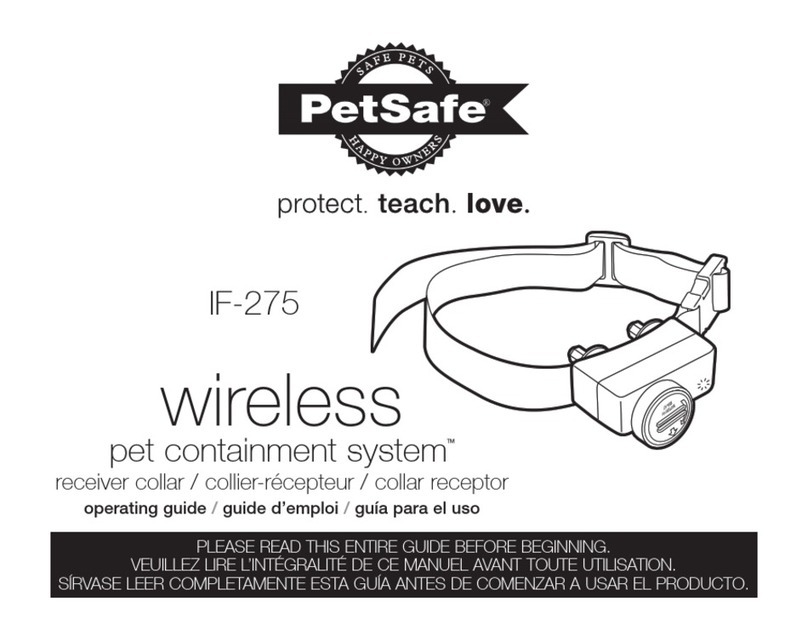
Petsafe Bark Control Collar User manual

Petsafe

Petsafe Bark Control Collar User manual

Petsafe PFD00-15956 User manual

Petsafe

Petsafe PFD00-15956 User manual

Petsafe Deluxe PDBC-300 User manual

Petsafe

Petsafe Deluxe PDBC-300 User manual

Petsafe Easy Walk Assembly instructions

Petsafe

Petsafe Easy Walk Assembly instructions

Petsafe RPA00-12510 Assembly instructions

Petsafe

Petsafe RPA00-12510 Assembly instructions

Petsafe PBC19-11794 User manual

Petsafe

Petsafe PBC19-11794 User manual

Petsafe Innotek Ultrasmart IUT-300 User manual

Petsafe

Petsafe Innotek Ultrasmart IUT-300 User manual

Petsafe PWM00-16580 User manual

Petsafe

Petsafe PWM00-16580 User manual

Petsafe 2-Way Interior Cat Door User manual

Petsafe

Petsafe 2-Way Interior Cat Door User manual

Petsafe PRF-3004XW-20 User manual

Petsafe

Petsafe PRF-3004XW-20 User manual

Petsafe Deluxe In-Ground Radio Fence Setup guide

Petsafe

Petsafe Deluxe In-Ground Radio Fence Setup guide

Petsafe Easy Walk Assembly instructions

Petsafe

Petsafe Easy Walk Assembly instructions

Petsafe Drinkwell Big-Dog Pet Fountain User manual

Petsafe

Petsafe Drinkwell Big-Dog Pet Fountain User manual

Petsafe Petporte smart flap User manual

Petsafe

Petsafe Petporte smart flap User manual

Petsafe Healthy Pet Simply Feed PFD44-15749 User manual

Petsafe

Petsafe Healthy Pet Simply Feed PFD44-15749 User manual

Petsafe PBC17-14135 User manual

Petsafe

Petsafe PBC17-14135 User manual

Petsafe HPA11-10987 User manual

Petsafe

Petsafe HPA11-10987 User manual

Petsafe PIF17-13478 Setup guide

Petsafe

Petsafe PIF17-13478 Setup guide

Petsafe Heated Wellness Pad PHP17-11813 User manual

Petsafe

Petsafe Heated Wellness Pad PHP17-11813 User manual

Petsafe PDT00-13410 Setup guide

Petsafe

Petsafe PDT00-13410 Setup guide

Petsafe PFD00-15956 User manual

Petsafe

Petsafe PFD00-15956 User manual

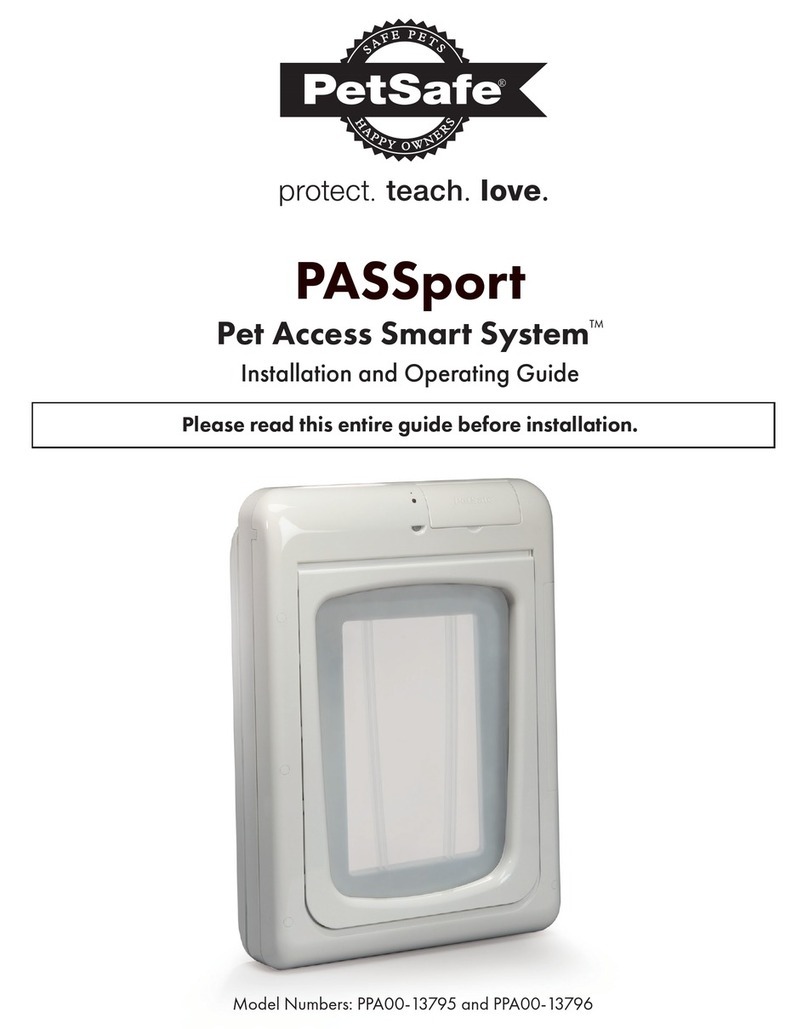
Petsafe PPA00-10958 User manual

Petsafe

Petsafe PPA00-10958 User manual

Petsafe SmartDoor MPA11-12019 User manual

Petsafe

Petsafe SmartDoor MPA11-12019 User manual

Petsafe Ricochet User manual

Petsafe

Petsafe Ricochet User manual

Popular Pet Care Product manuals by other brands

Refined Feline Lotus Branch Cat Shelf Assembly instructions

Refined Feline

Refined Feline Lotus Branch Cat Shelf Assembly instructions

Dogtra ARC owner's manual

Dogtra

Dogtra ARC owner's manual

Hoselink 1003-WG user manual

Hoselink

Hoselink 1003-WG user manual

Petrainer PET910 Operation manual

Petrainer

Petrainer PET910 Operation manual

Leuchtie Premium manual

Leuchtie

Leuchtie Premium manual

VEVOR JW-XB21212255(218) instructions

VEVOR

VEVOR JW-XB21212255(218) instructions

HALE PET DOOR installation instructions

HALE

HALE PET DOOR installation instructions

Garmin Delta XC Series user manual

Garmin

Garmin Delta XC Series user manual

Zoofari ZTWB 300 A1 operating instructions

Zoofari

Zoofari ZTWB 300 A1 operating instructions

Kaycee AVIJECTOR Instruction and maintenance manual

Kaycee

Kaycee AVIJECTOR Instruction and maintenance manual

Trixie 40040 instructions

Trixie

Trixie 40040 instructions

SportDOG NoBark SBC-8 operating guide

SportDOG

SportDOG NoBark SBC-8 operating guide

Behlen Country Patience Pole technical information

Behlen Country

Behlen Country Patience Pole technical information

Mellerware Petto! Drink manual

Mellerware

Mellerware Petto! Drink manual

Contech WaterDog quick start guide

Contech

Contech WaterDog quick start guide

Sutcliffe Play WUF015 installation instructions

Sutcliffe Play

Sutcliffe Play WUF015 installation instructions

Martin System Micro B user guide

Martin System

Martin System Micro B user guide

TRU-BLU K9000 2.0 Operator's manual

TRU-BLU

TRU-BLU K9000 2.0 Operator's manual

manuals.online logo
manuals.online logoBrands
  • About & Mission
  • Contact us
  • Privacy Policy
  • Terms and Conditions

Copyright 2025 Manuals.Online. All Rights Reserved.